Google Drive Channel ထည့်သွင်းခြင်း
စမလုပ်ခင် လိုအပ်တာတွေ
| လိုအပ်ချက် | ဘာကြောင့်လိုလဲ |
|---|---|
| Google account | Google Cloud ကို access လုပ်ရန်နှင့် Google Drive ကို authorize လုပ်ရန် |
| Google Cloud project | Drive API enable လုပ်ရန်နှင့် OAuth credentials ဖန်တီးရန် |
| OAuth 2.0 client | ImgBed က Client ID, Client Secret, Refresh Token ရယူရန် |
| သင့် ImgBed domain | OAuth redirect URI အတွက်။ သင်တကယ်သုံးတဲ့ domain နဲ့ match ဖြစ်ရပါမယ်။ |
Setup Steps
Step 1: Google Drive API Enable လုပ်ပါ
- Google Cloud Console ကိုဖွင့်ပါ။
- project အသစ်ဖန်တီးပါ သို့မဟုတ် existing project ကိုရွေးပါ။
APIs & Servicesကိုသွားပါ။Enable APIs and Servicesကိုနှိပ်ပါ။Google Drive APIကိုရှာပါ။- ဖွင့်ပြီး enable ကိုနှိပ်ပါ။
Step 2: OAuth Consent Screen Configure လုပ်ပါ
- Google Cloud မှာ
Google Auth Platformကိုဖွင့်ပါ။ - app name, support email, developer contact email စတဲ့ basic
Brandinginformation ကိုဖြည့်ပါ။ Audienceကိုဖွင့်ပါ။- self-hosted personal deployments အများစုအတွက်
Externalကိုရွေးပါ။ Externalရွေးလျှင် authorize လုပ်မယ့် Google account ကိုTest usersထဲထည့်ပါ။Data Accessကိုဖွင့်ပါ။- လိုအပ်တဲ့ Google Drive permissions တွေထည့်ပါ။
Step 3: OAuth 2.0 Client ဖန်တီးပါ
Google Auth PlatformထဲကClientsကိုဖွင့်ပါ။- client အသစ်ဖန်တီးပါ။
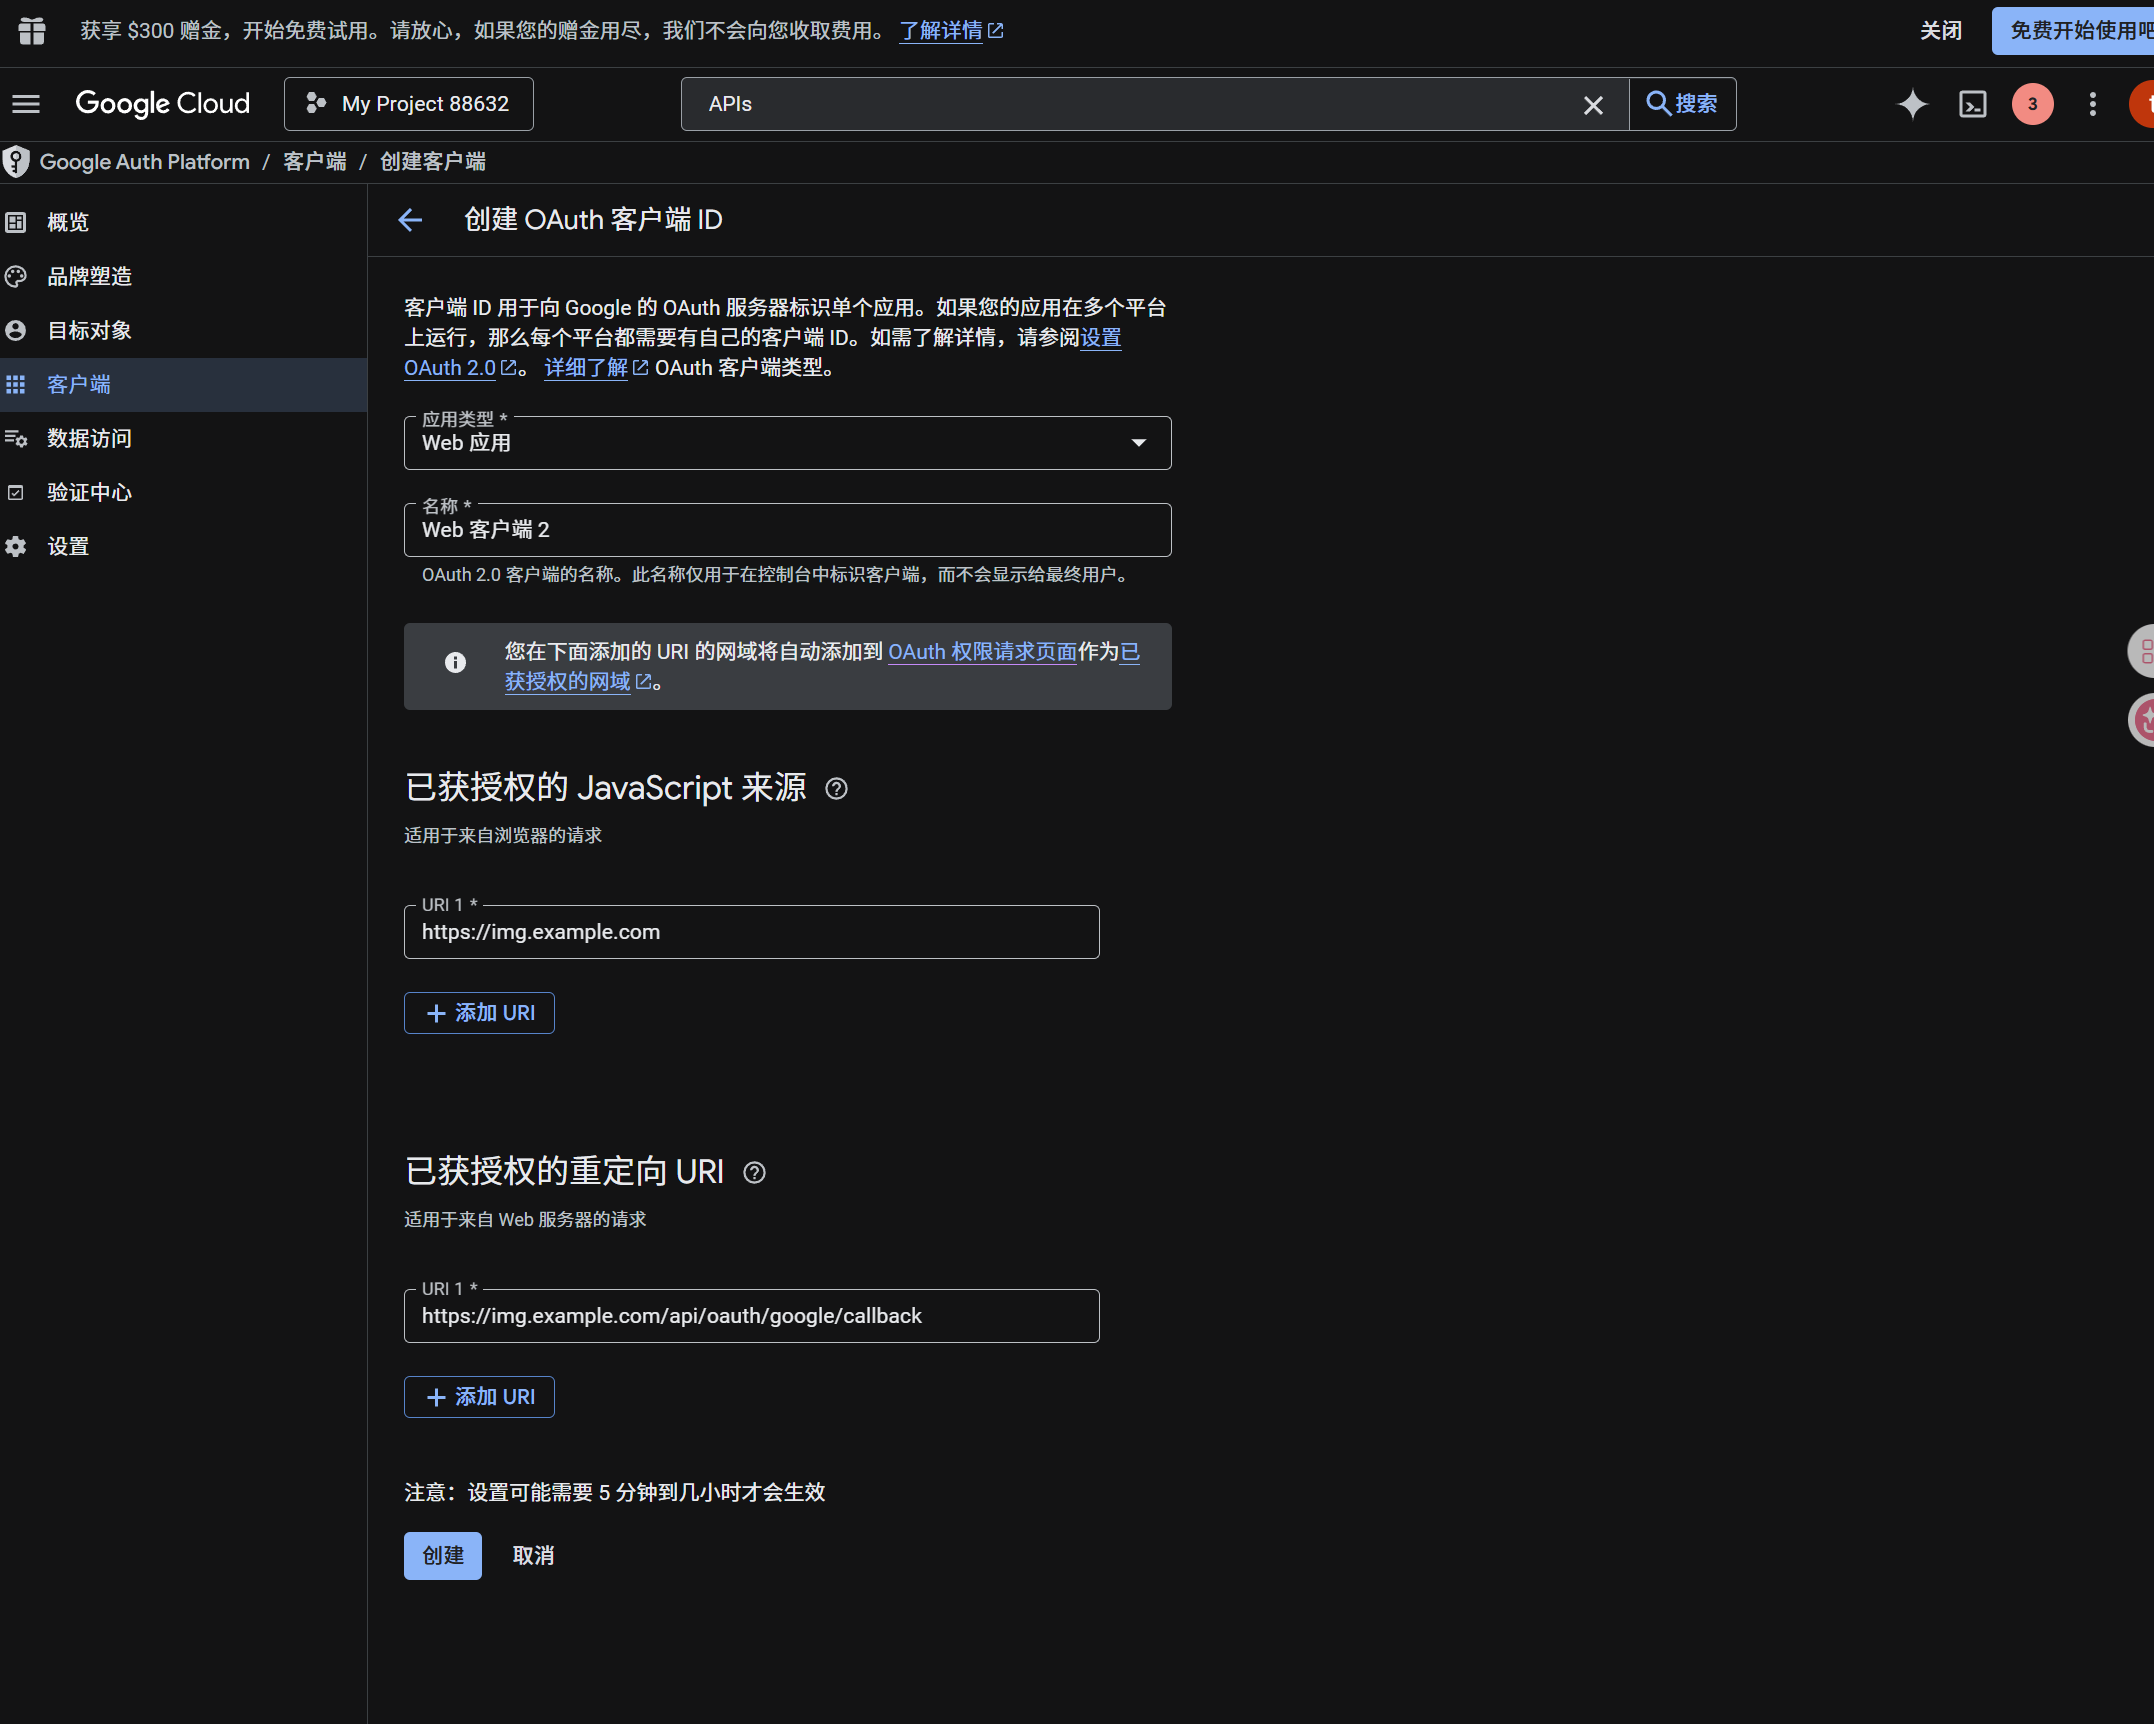
- application type ကို
Web applicationထားပါ။ - မှတ်မိလွယ်တဲ့ client name ထည့်ပါ။
- authorized JavaScript origins မှာ သင့် ImgBed URL ထည့်ပါ၊ ဥပမာ:
text
https://img.example.com- authorized redirect URIs မှာ ထည့်ပါ:
text
https://img.example.com/api/oauth/google/callback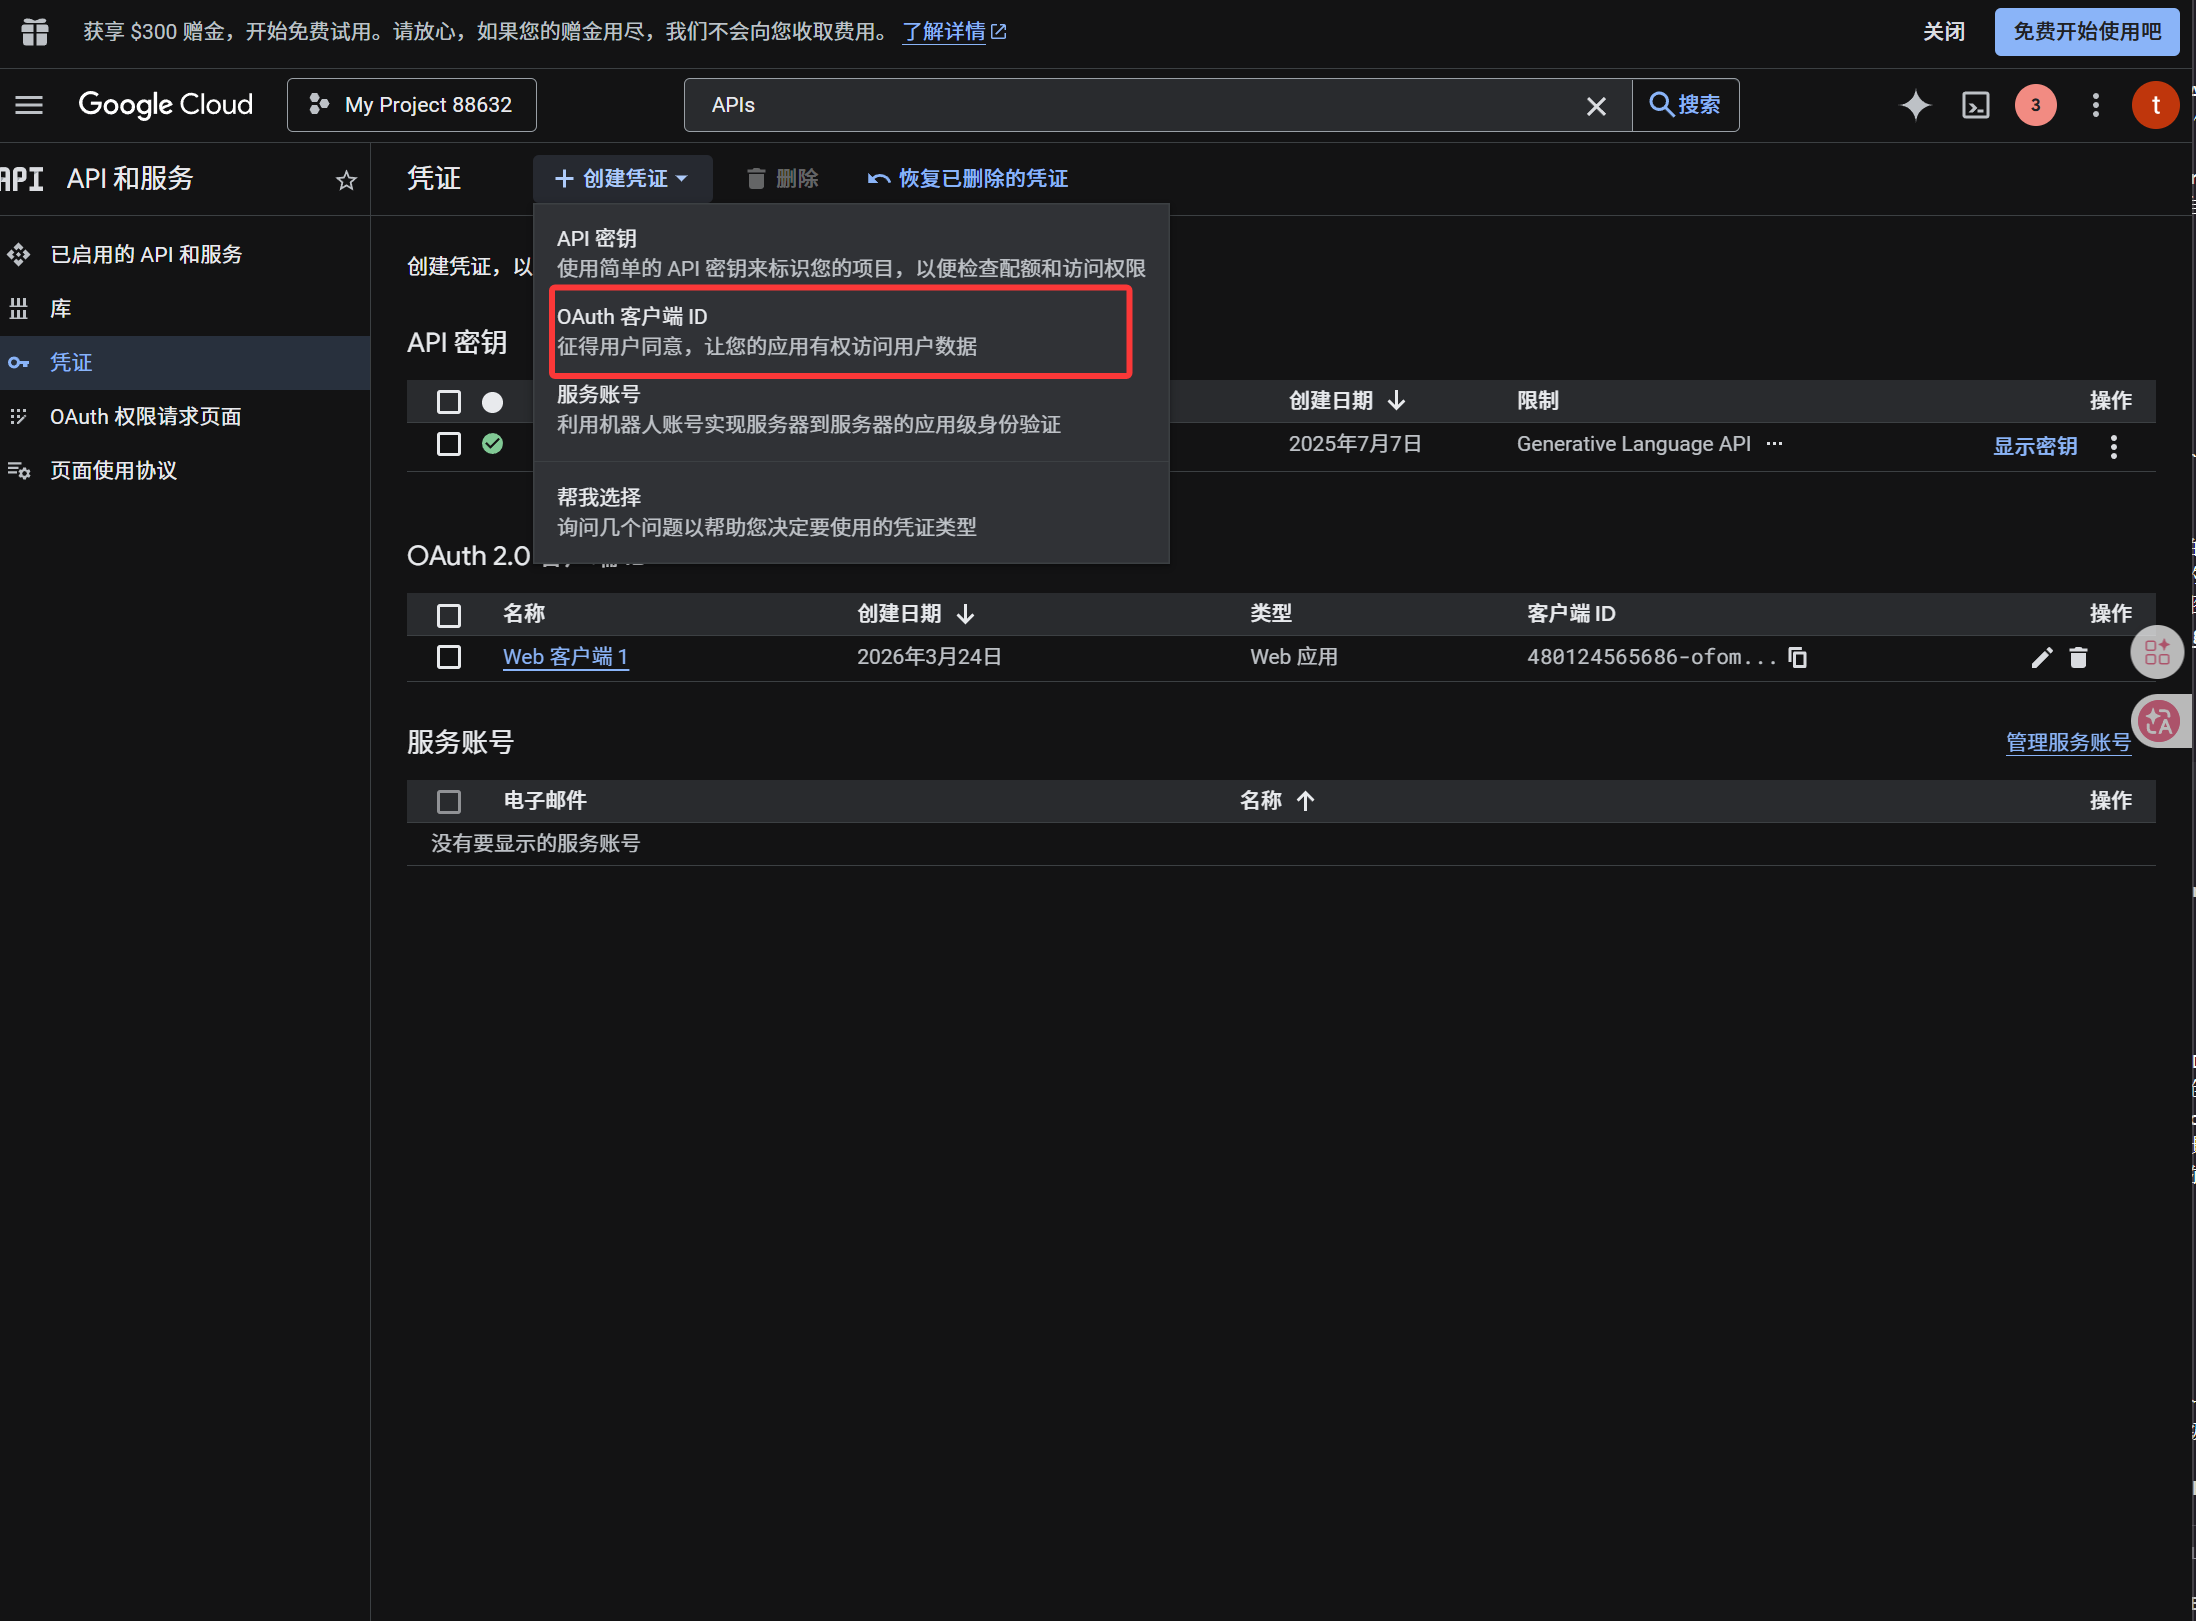
client ဖန်တီးပြီးနောက် ဒီ values တွေ copy လုပ်ပါ:
| Generated Value | ImgBed Field |
|---|---|
| Client ID | Client ID |
| Client Secret | Client Secret |
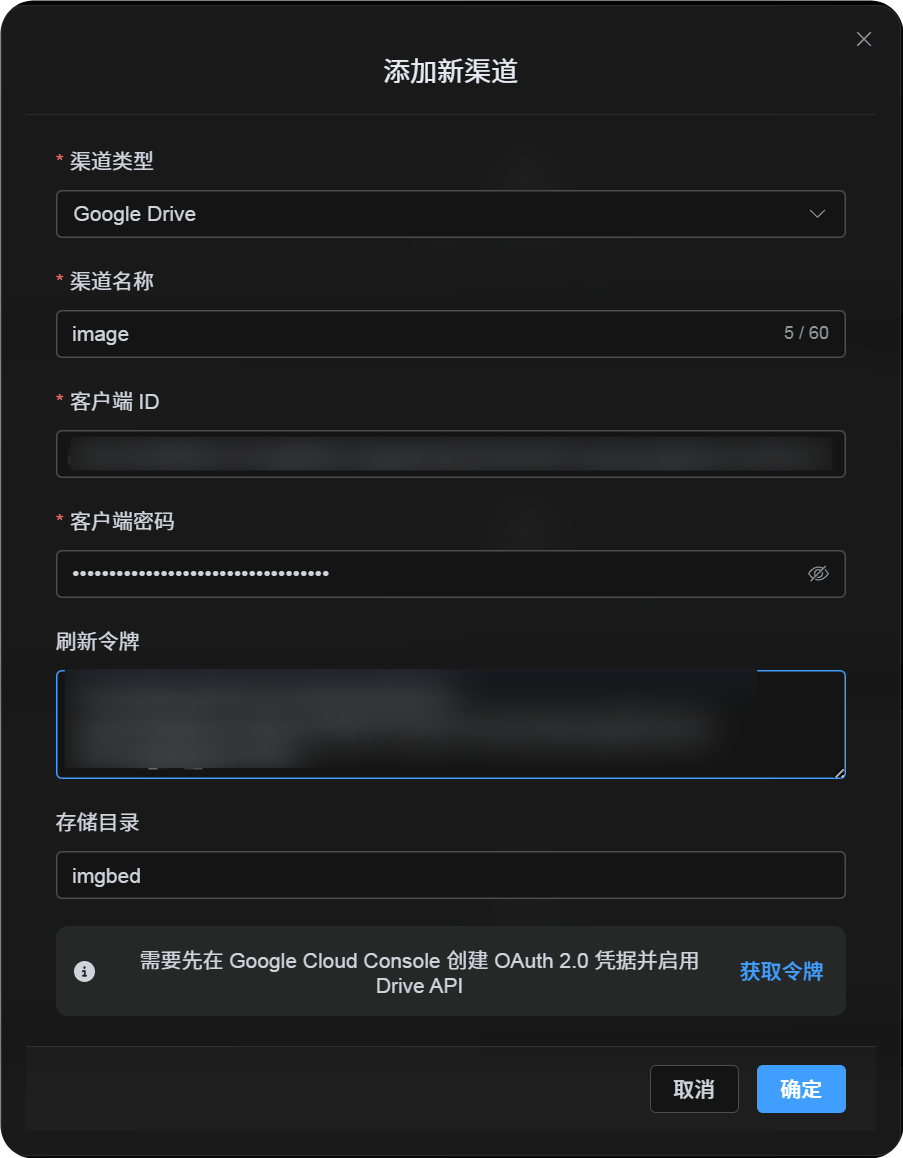
Step 4: ImgBed မှာ Google Drive Channel ဖြည့်ပါ
Upload Settings မှာ Google Drive ရွေးပြီး:
| ImgBed Field | What To Enter |
|---|---|
| Channel name | မှတ်မိလွယ်တဲ့အမည်၊ ဥပမာ Main Google Drive |
| Client ID | Google Cloud မှ Client ID |
| Client Secret | Google Cloud မှ Client Secret |
| Refresh Token | အခုခဏဗလာထားပါ။ နောက် step မှာရယူပါ။ |
| Root directory | Optional။ default က imgbed။ |
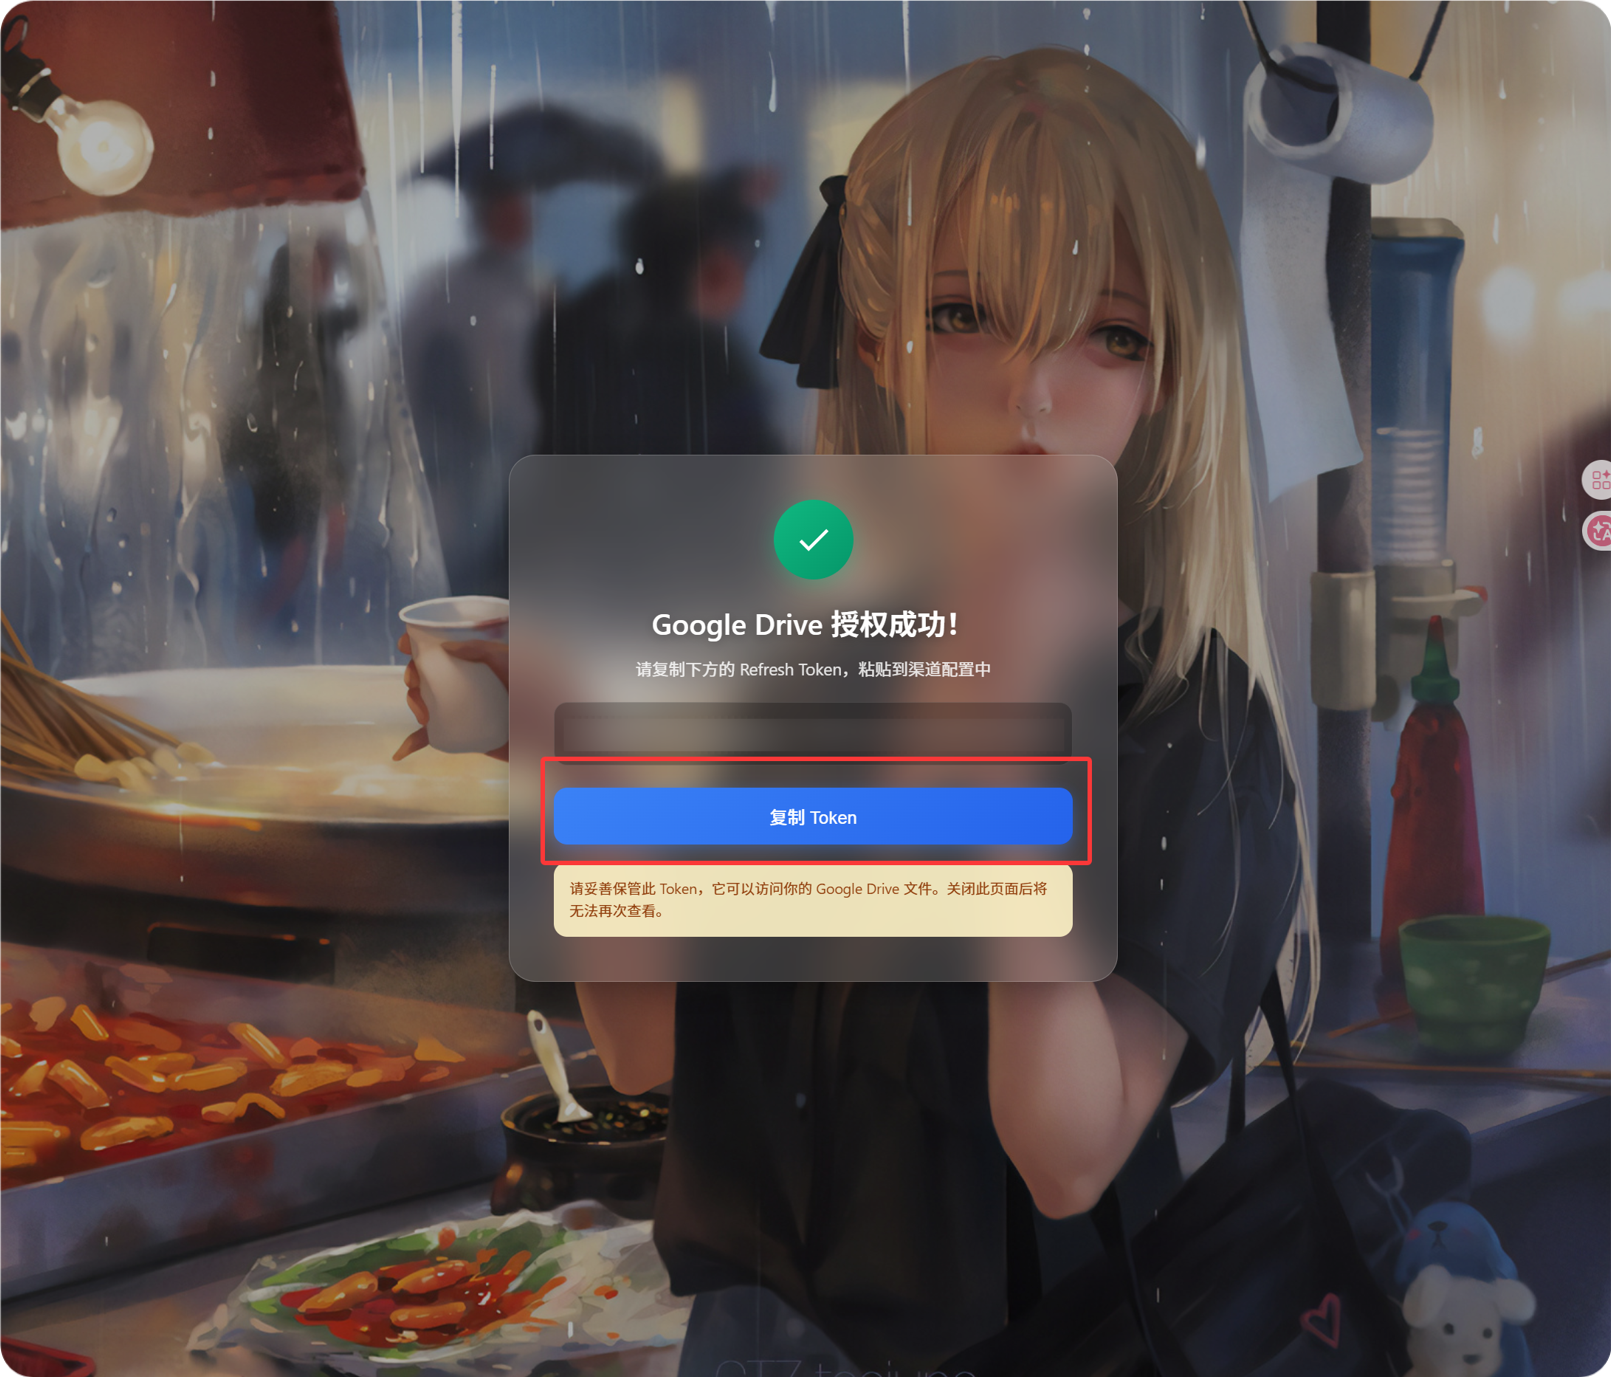
Step 5: Refresh Token ရယူပါ
Get Tokenကိုနှိပ်ပါ။- connect လုပ်ချင်တဲ့ Google account ကိုရွေးပါ။
- authorization prompts တွေကိုပြီးအောင်လုပ်ပါ။
- callback page မှာ
Refresh Tokenပြပါမယ်။ - အဲဒါကို copy လုပ်ပါ။
- ImgBed ကိုပြန်သွားပြီး
Refresh Tokenfield ထဲ paste လုပ်ပါ။
နောက်ပိုင်း Google account ပြောင်းလျှင်၊ OAuth client ပြောင်းလျှင်၊ သို့မဟုတ် authorization ဟောင်း expire ဖြစ်လျှင် channel ကို delete လုပ်စရာမလိုပါ။ edit page ကိုဖွင့်ပြီး Reauthorize ကိုနှိပ်ပါ။
Step 6: Channel Save လုပ်ပါ
fields အားလုံးဖြည့်ပြီးနောက် channel ကို save လုပ်ပါ။
Quick Flow
text
Google Cloud ဖွင့်ပါ
-> project ဖန်တီး သို့မဟုတ် ရွေးပါ
-> Google Drive API enable လုပ်ပါ
-> Google Auth Platform configure လုပ်ပါ
-> Audience က External ဖြစ်လျှင် သင့် Google account ကို Test users ထဲထည့်ပါ
-> Web application OAuth client ဖန်တီးပါ
-> redirect URI အဖြစ် https://your-domain.com/api/oauth/google/callback သုံးပါ
-> Client ID နဲ့ Client Secret ကို ImgBed ထဲထည့်ပါ
-> Get Token ကိုနှိပ်ပါ
-> Google နဲ့ sign in ဝင်ပြီး authorize လုပ်ပါ
-> callback page မှ Refresh Token copy လုပ်ပါ
-> ImgBed မှာ paste လုပ်ပြီး save လုပ်ပါ
-> test image upload လုပ်ပါ
References
- Google OAuth Web Server Applications: https://developers.google.com/identity/protocols/oauth2/web-server
- Google Workspace OAuth Consent Configuration: https://developers.google.com/workspace/guides/configure-oauth-consent
- Google Drive API Auth Scopes: https://developers.google.com/workspace/drive/api/guides/api-specific-auth