Discord Channel ထည့်သွင်းခြင်း
စမလုပ်ခင် လိုအပ်တာတွေ
| လိုအပ်ချက် | အသုံးပြုပုံ |
|---|---|
| Discord account | server, channel, developer application ဖန်တီးရန်။ |
| Discord server | bot က channel ကို access မလုပ်ခင် server ထဲဝင်ထားရမည်။ |
| Text channel | images နဲ့ files တွေကို ဒီ channel ဆီပို့ပါမယ်။ |
| Discord Developer Portal | application ဖန်တီးရန်၊ bot ဖန်တီးရန်၊ Bot Token ရယူရန်။ |
ဘယ်နေရာမှာ ထည့်မလဲ
- System Settings ကိုဖွင့်ပါ။
- Upload Settings ကိုသွားပါ။
- ညာဘက်အပေါ်ထောင့်က Add Channel ကိုနှိပ်ပါ။
Discordကိုရွေးပါ။
Field Reference
| Field | အသုံးပြုပုံ | Required |
|---|---|---|
| Channel name | ဒီ channel အတွက် မှတ်မိလွယ်တဲ့အမည်၊ ဥပမာ Discord Primary။ | Required |
| Bot Token | Discord bot token။ | Required |
| Channel ID | target text channel ရဲ့ ID။ | Required |
| Proxy URL (optional) | Discord CDN access မတည်ငြိမ်လျှင်သာသုံးပါ။ https:// ပါတဲ့ full URL ထည့်ပါ။ | Optional |
Setup Steps
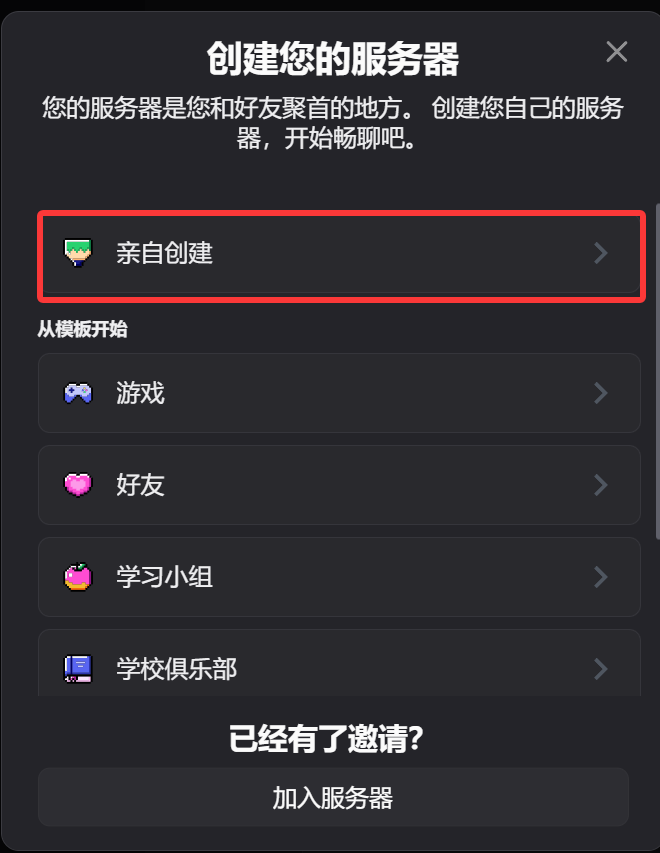
1. Discord Server နဲ့ Text Channel ဖန်တီးပါ
- Discord ကိုဖွင့်ပါ။
- server အသစ်ဖန်တီးပါ၊ သို့မဟုတ် သင်ပိုင်တဲ့ existing server ကိုသုံးပါ။
- အဲဒီ server ထဲမှာ text channel တစ်ခုဖန်တီးပါ။
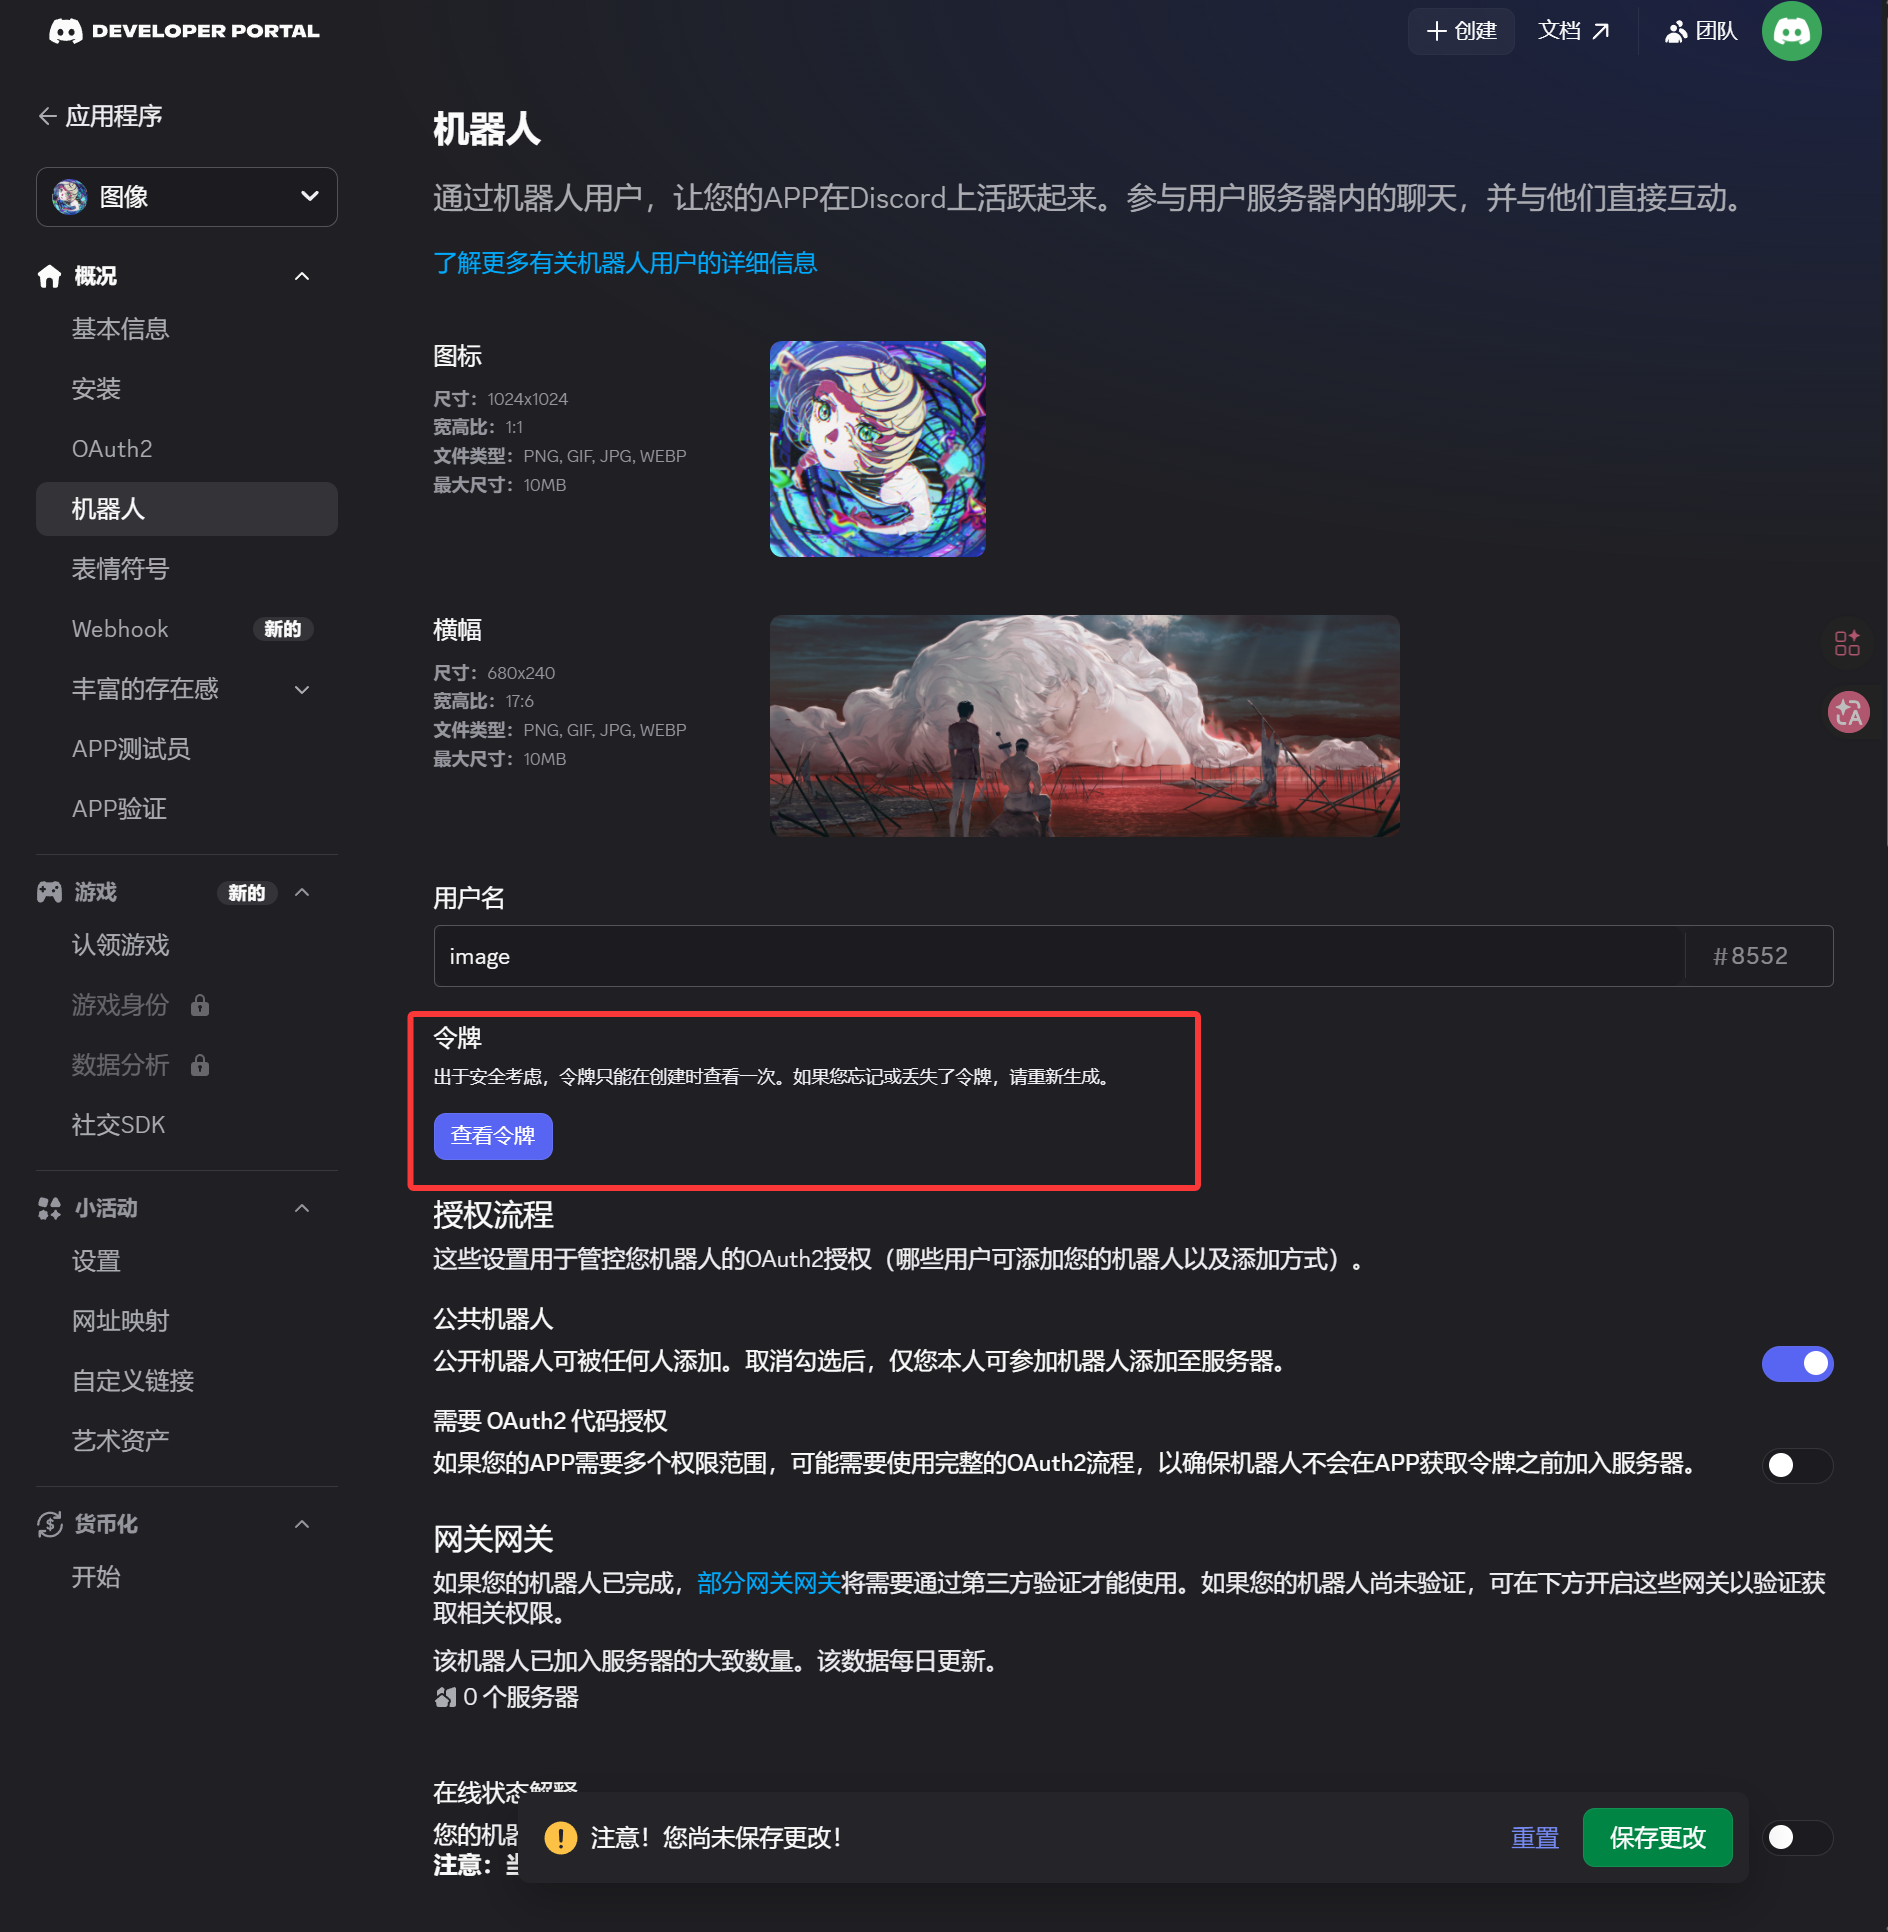
2. Discord Developer Portal မှာ Bot ဖန်တီးပါ
- Discord Developer Portal ကိုဖွင့်ပါ:
https://discord.com/developers/applications New Applicationကိုနှိပ်ပါ။- application name ထည့်ပြီး create လုပ်ပါ။
- left sidebar မှ
Botpage ကိုဖွင့်ပါ။ Botpage မှာ token ကို generate သို့မဟုတ် reset လုပ်ပါ။- token ကိုသိမ်းပါ။
ဒီ token က ImgBed မှာထည့်ရမယ့် Bot Token ဖြစ်ပါတယ်။
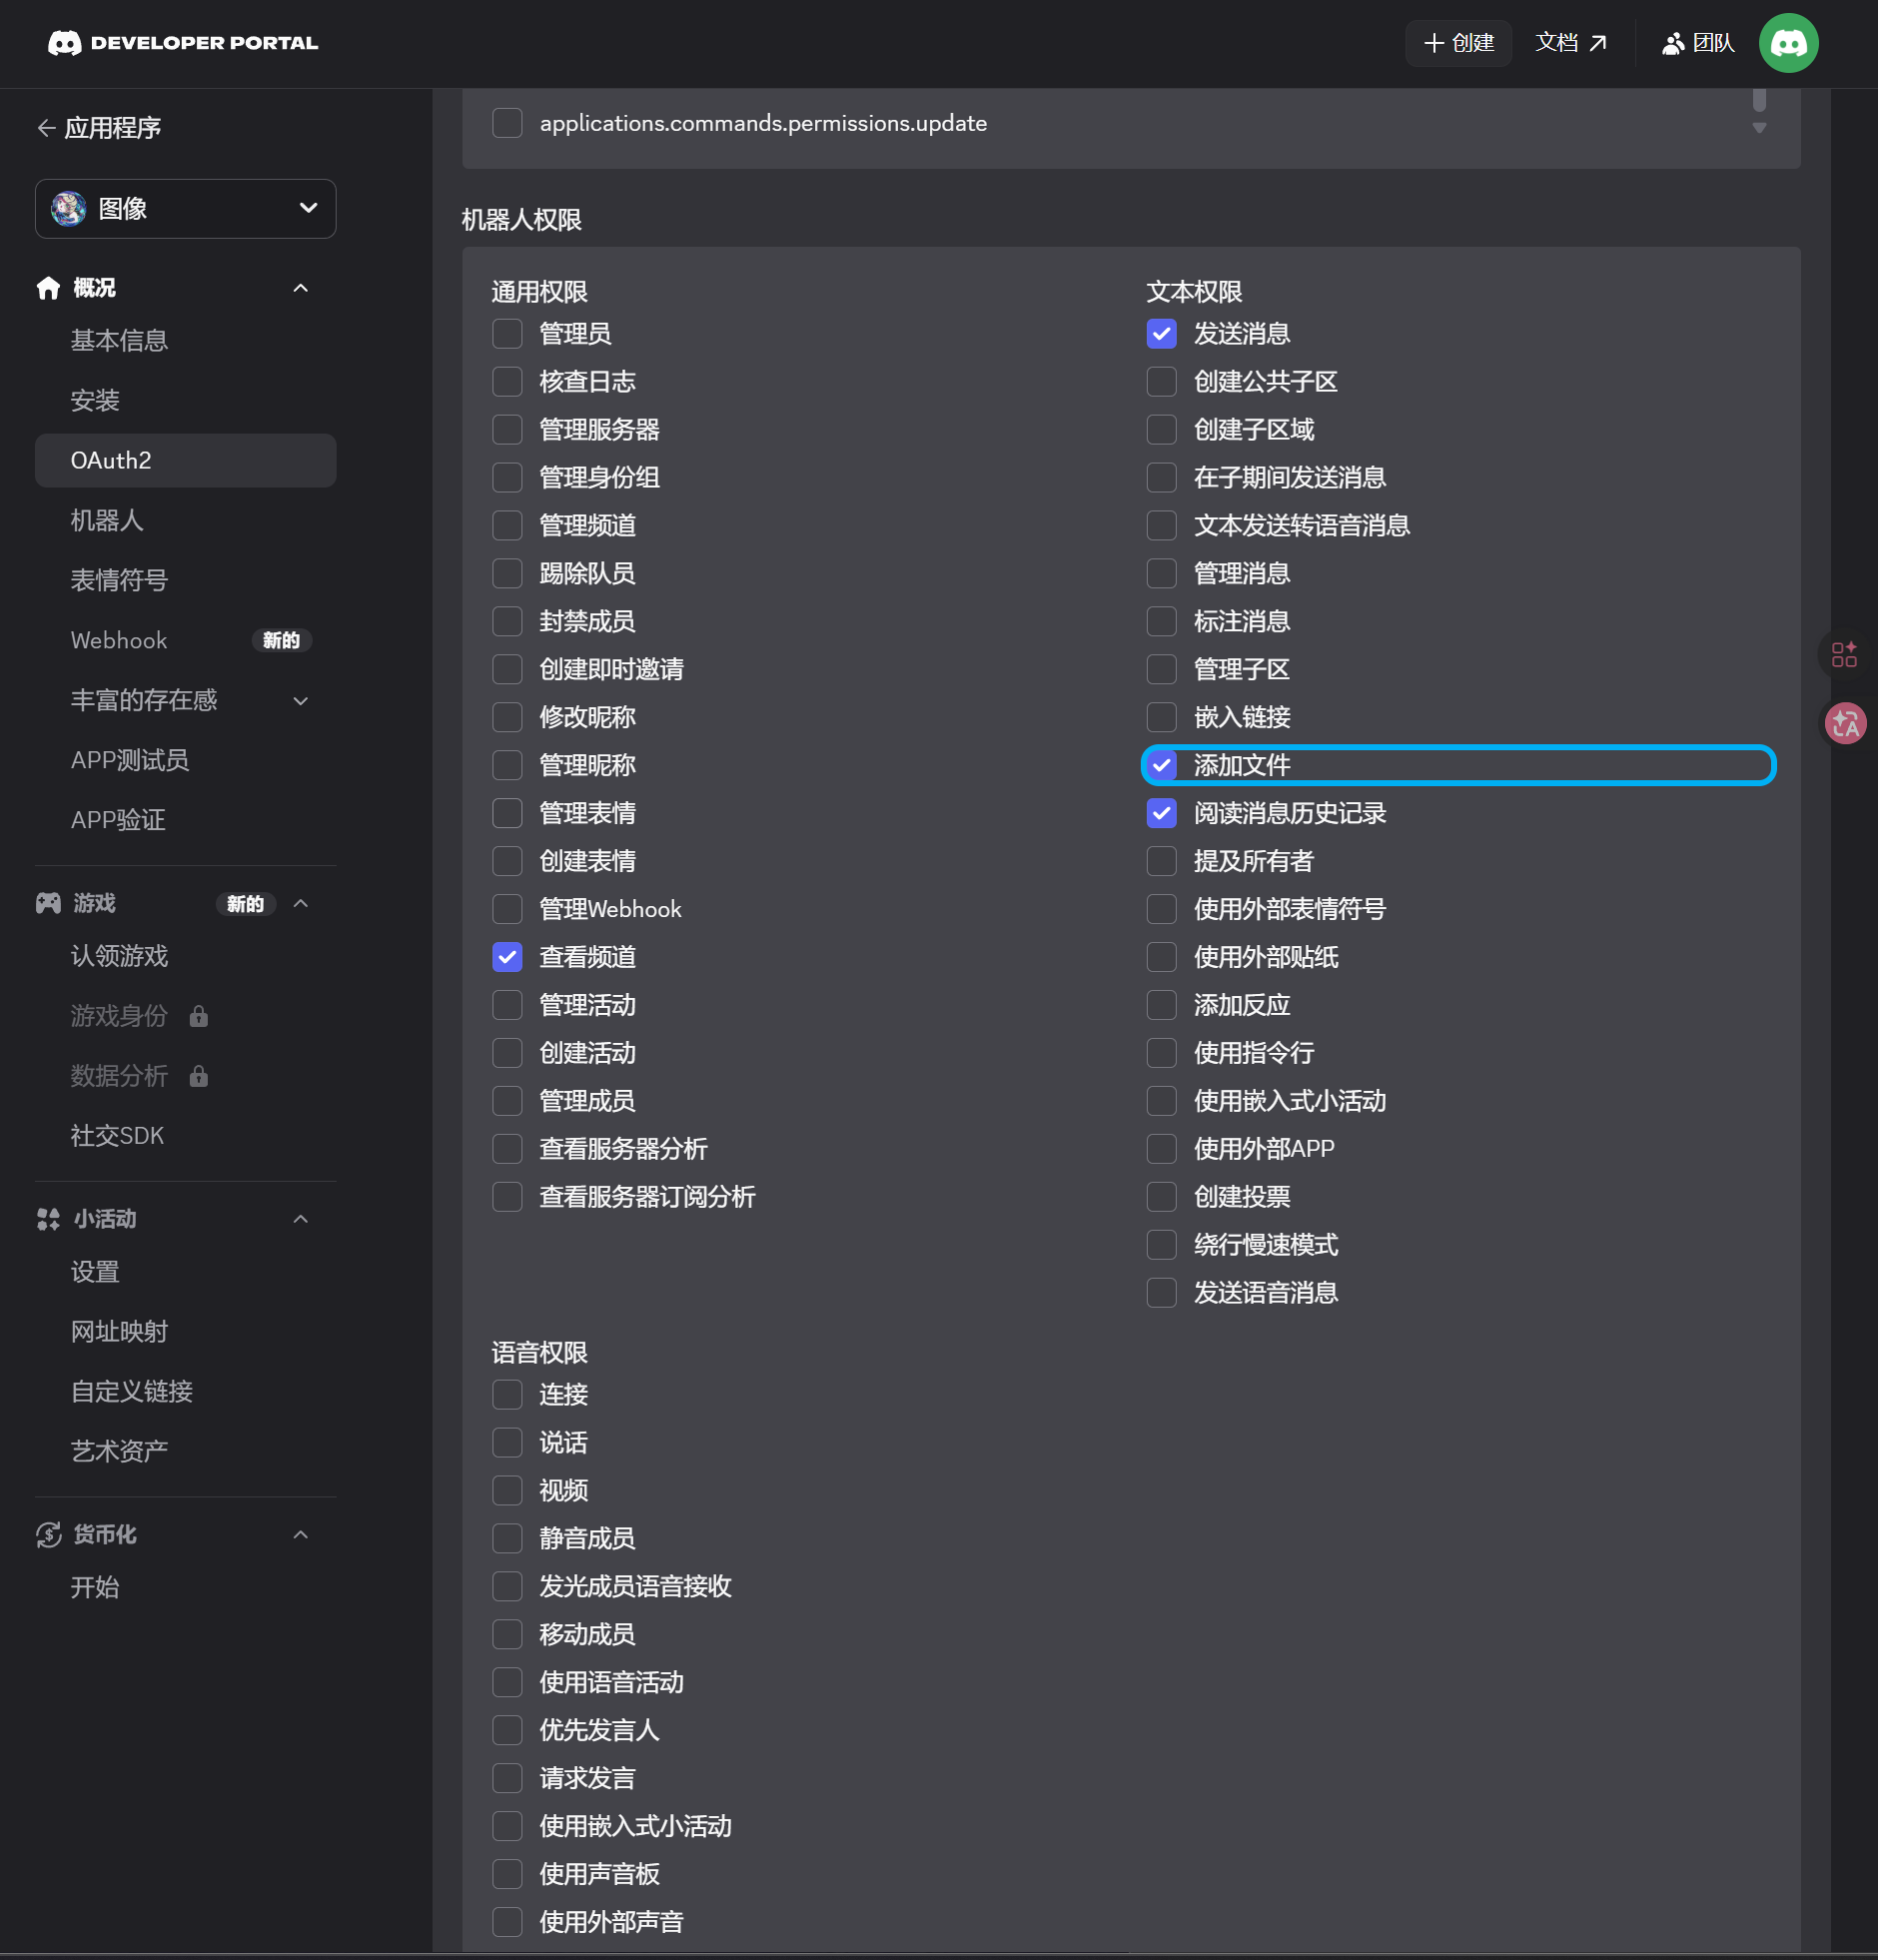
3. OAuth2 Invite Link ဖန်တီးပြီး Bot Install လုပ်ပါ
- left sidebar မှ
OAuth2page ကိုဖွင့်ပါ။ - scopes အောက်မှာ
botကိုရွေးပါ။ - permission area မှာ ဒီ permissions တွေကို enable လုပ်ပါ:
| Permission | Required |
|---|---|
| View Channels | Yes |
| Send Messages | Yes |
| Attach Files | Yes |
| Read Message History | Yes |
- page အောက်မှာ integration type က
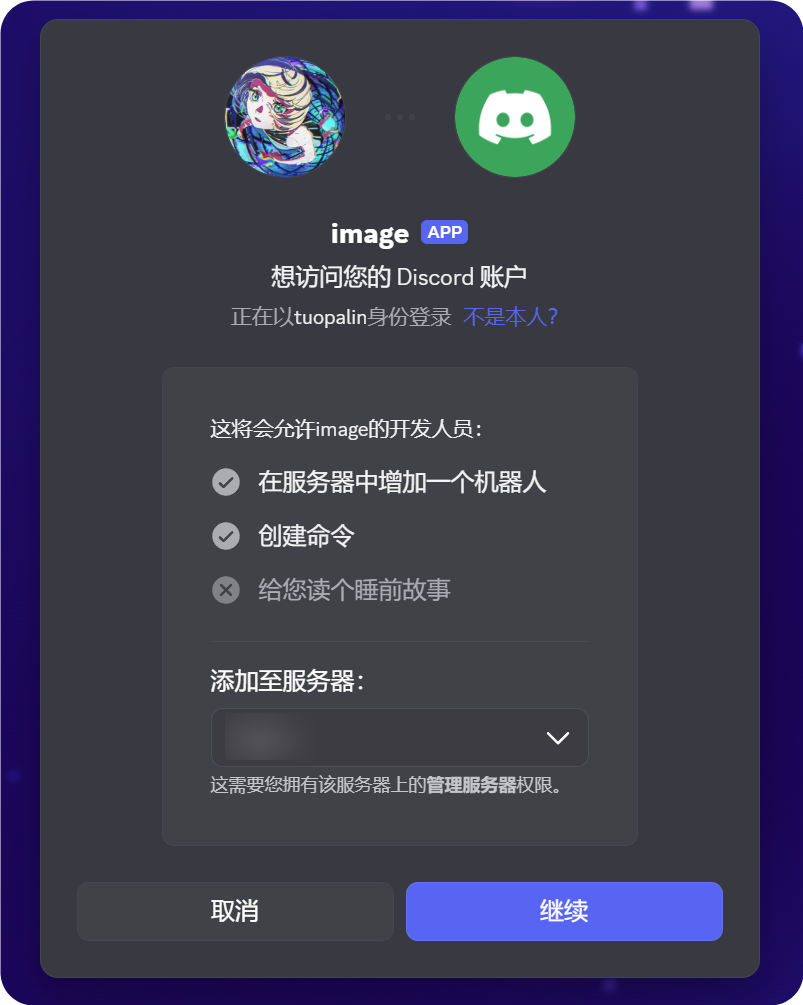
Guild Installဖြစ်ကြောင်း confirm လုပ်ပါ။ - generated URL ကို copy လုပ်ပါ။
- အဲဒီ URL ကို browser မှာဖွင့်ပါ။
- target server ကိုရွေးပါ။
- authorization flow ကိုပြီးအောင်လုပ်ပါ။
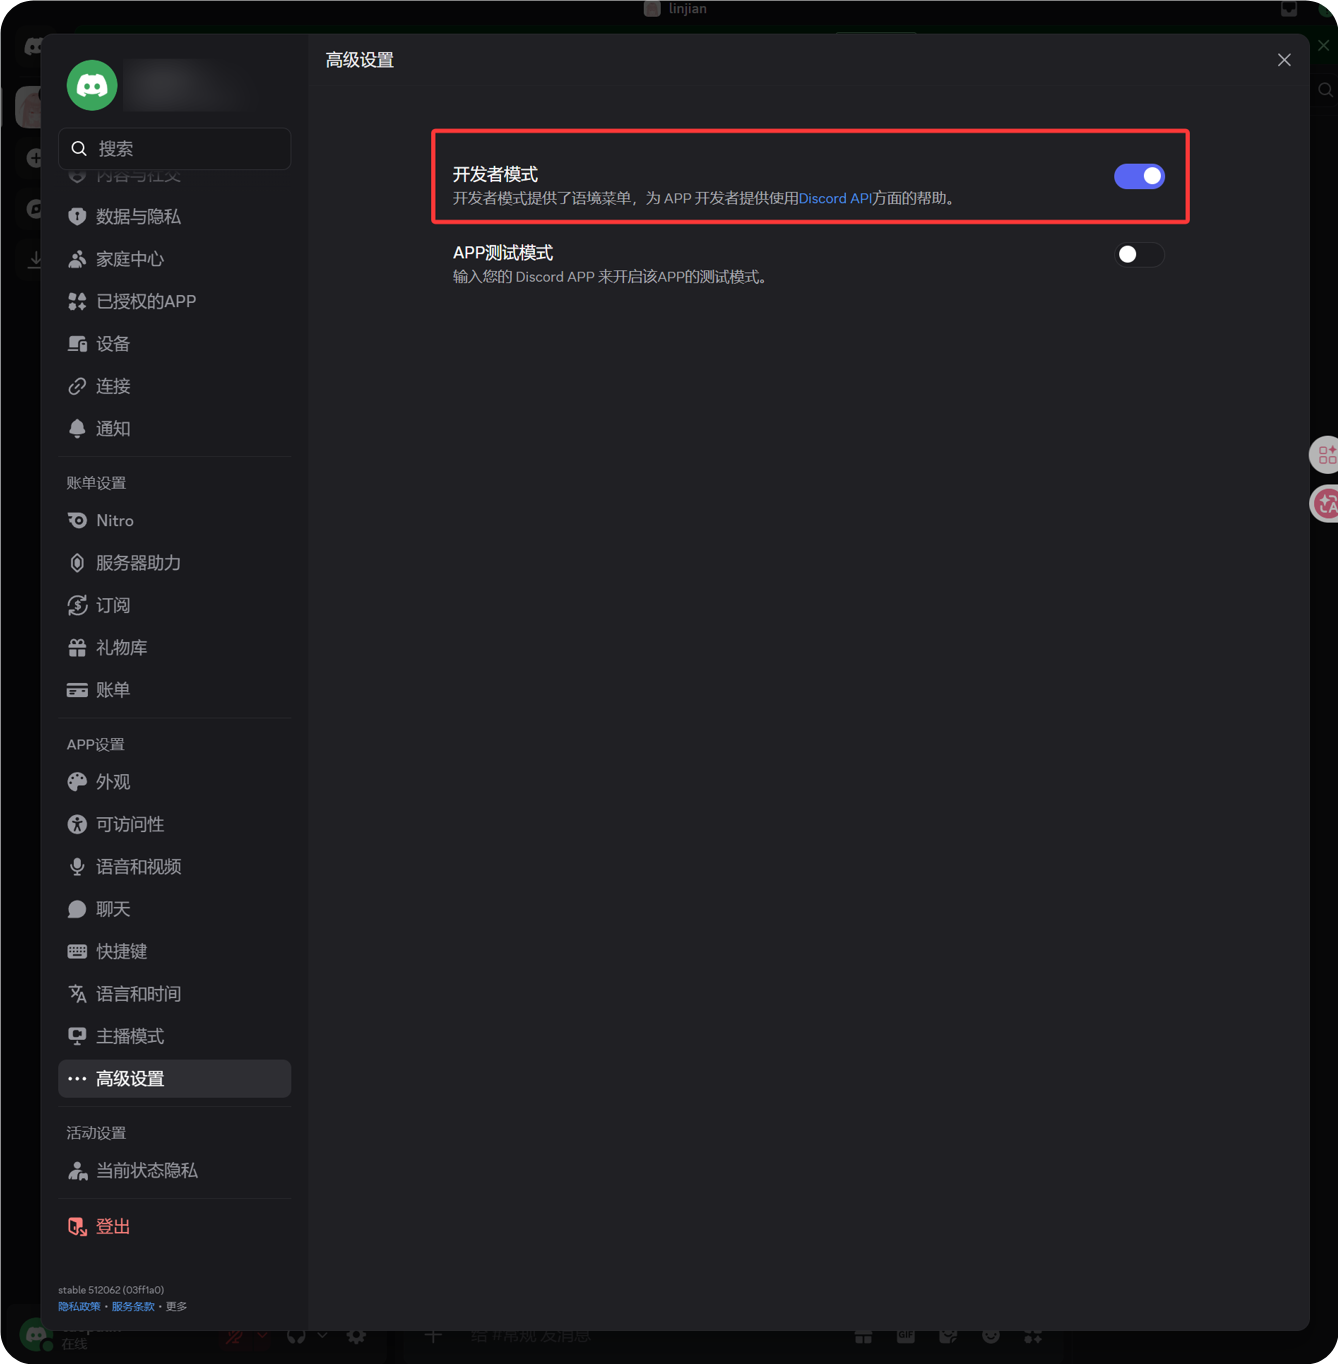
4. Developer Mode Enable လုပ်ပြီး Channel ID Copy လုပ်ပါ
- Discord ရဲ့ ဘယ်ဘက်အောက်ထောင့် avatar အနားက gear icon ကိုနှိပ်ပါ။
- left sidebar မှ Advanced ကိုဖွင့်ပါ။
- Developer Mode ကို enable လုပ်ပါ။
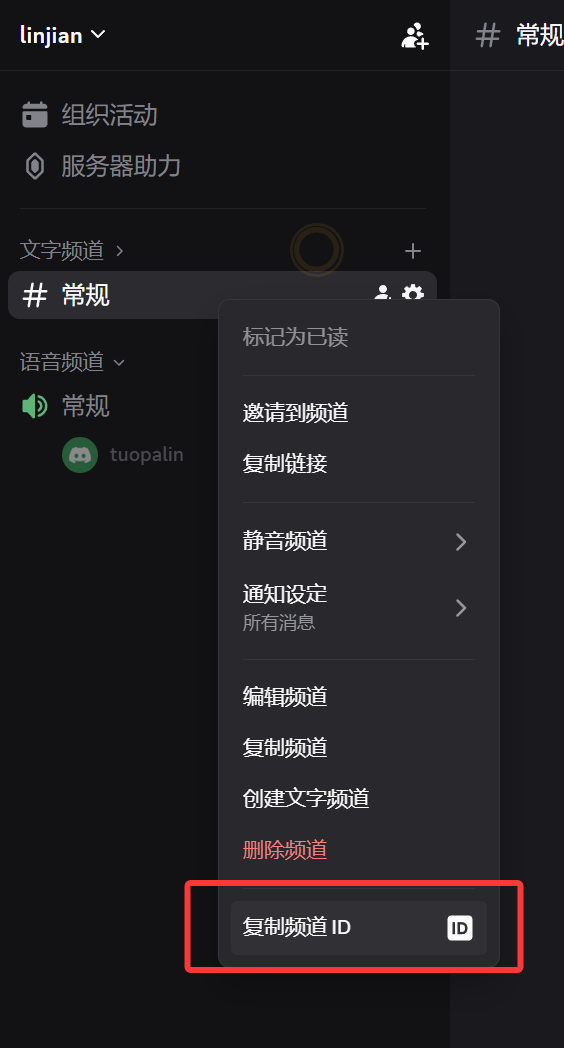
- target text channel ကိုပြန်သွားပါ။
- channel name ပေါ် right-click လုပ်ပါ။
- Copy Channel ID ကိုနှိပ်ပါ။
copy လုပ်ထားတဲ့ number က ImgBed မှာလိုအပ်တဲ့ Channel ID ဖြစ်ပါတယ်။
5. ImgBed မှာ Discord Channel ဖြည့်ပါ
channel configuration dialog ကိုပြန်သွားပြီး:
| UI Field | Value |
|---|---|
| Channel name | custom channel name၊ ဥပမာ DiscordPrimary။ |
| Bot Token | Discord Developer Portal ရဲ့ Bot page မှသိမ်းထားတဲ့ token။ |
| Channel ID | Discord မှ copy လုပ်ထားတဲ့ channel ID။ |
| Proxy URL (optional) | လိုအပ်မှသာ၊ ဥပမာ https://your-proxy.example.com။ |
ပြီးရင် Save ကိုနှိပ်ပါ။

စစ်ဆေးနည်း
| Check | စစ်ဆေးပုံ |
|---|---|
| Channel card appears | Save ပြီးနောက် Upload Settings page မှာ Discord channel card ပေါ်လာရပါမယ်။ |
| Channel can be enabled | Active switch က on ဖြစ်ရပါမယ်။ |
| Configuration is saved | detail view မှာ Bot Token နဲ့ Channel ID သိမ်းထားတာမြင်ရပါမယ်။ |
| Upload works | test image upload လုပ်ပြီး target Discord text channel ထဲပေါ်လာလားစစ်ပါ။ |
Quick Checklist
text
Discord server ဖန်တီးပါ
-> text channel ဖန်တီးပါ
-> Discord Developer Portal မှာ bot ဖန်တီးပါ
-> Bot page မှ Bot Token သိမ်းပါ
-> OAuth2 မှာ bot, View Channels, Send Messages, Attach Files, Read Message History ရွေးပါ
-> generated URL ကို copy လုပ်ပြီး target server အတွက် bot ကို authorize လုပ်ပါ
-> target text channel မှာ permissions တူညီလားစစ်ပါ
-> Developer Mode enable လုပ်ပါ
-> target text channel ပေါ် right-click လုပ်ပြီး Channel ID copy လုပ်ပါ
-> ImgBed မှာ Bot Token နဲ့ Channel ID ထည့်ပါ
-> Save လုပ်ပြီး test image upload လုပ်ပါ
References
- Discord Developers Getting Started: https://docs.discord.com/developers/quick-start/getting-started
- Discord Help - Where can I find my User/Server/Message ID: https://support.discord.com/hc/en-us/articles/206346498-Where-can-I-find-my-User-Server-Message-ID