GitHub Releases Channel ထည့်သွင်းခြင်း
စမလုပ်ခင် လိုအပ်တာတွေ
အချက်သုံးခုပဲလိုပါတယ်:
| လိုအပ်ချက် | အသုံးပြုပုံ |
|---|---|
| GitHub account | access token ဖန်တီးရန်နှင့် repository ပိုင်ရန်။ |
| GitHub Access Token | ImgBed က GitHub API ကို access လုပ်ရန်၊ releases ဖန်တီးရန်၊ files upload လုပ်ရန်။ |
| Repository name | repository name ပဲထည့်နိုင်ပါတယ်၊ ဥပမာ image။ |
Setup Steps
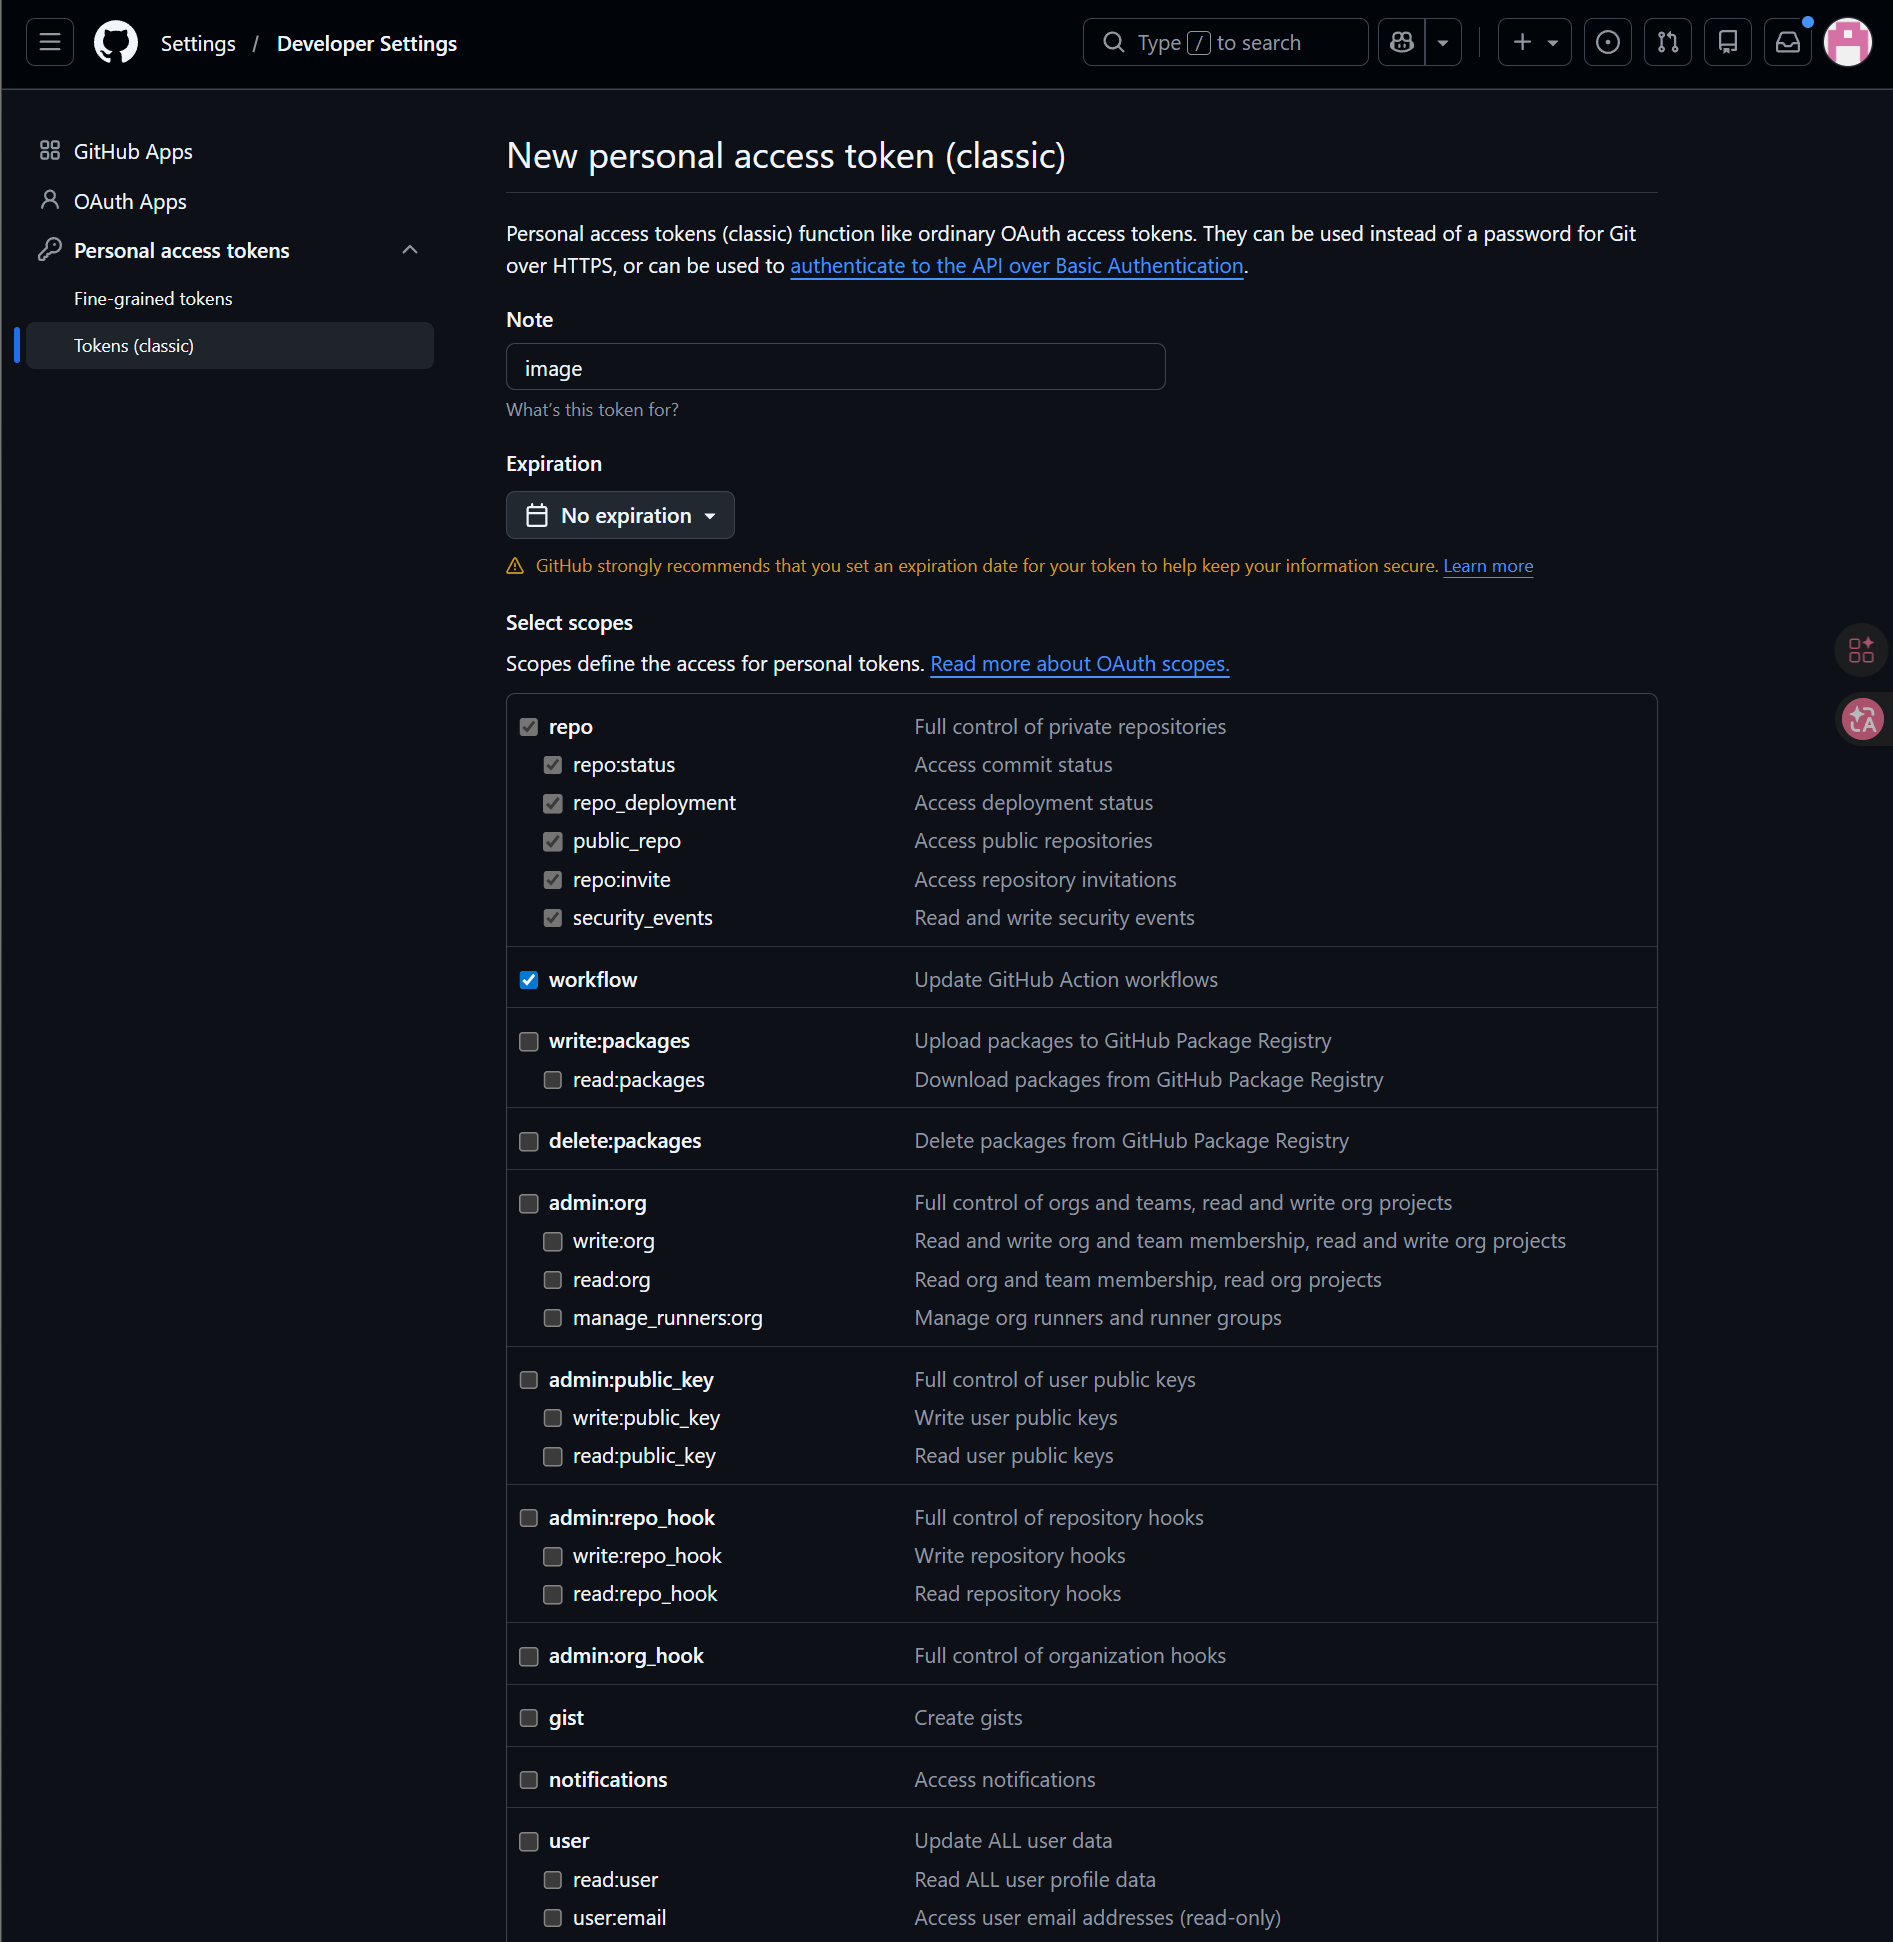
Step 1: GitHub ထဲ Sign in ဝင်ပြီး Access Token ဖန်တီးပါ
- GitHub ထဲ sign in ဝင်ပါ။
- ညာဘက်အပေါ်ထောင့်က avatar ကိုနှိပ်ပြီး
Settingsကိုဖွင့်ပါ။ - left sidebar မှ
Developer settingsကိုဖွင့်ပါ။ Personal access tokensကိုဖွင့်ပါ။Tokens (classic)ကိုဖွင့်ပါ။Generate new token (classic)ကိုနှိပ်ပါ။- token ကိုမှတ်မိလွယ်တဲ့အမည်ပေးပါ။
- ကိုယ်တိုင် maintenance လုပ်မယ့်အစီအစဉ်အလိုက် expiration date ရွေးပါ။
repoနဲ့workflowscopes ကိုရွေးပါ။- token ဖန်တီးပြီးတာနဲ့ ချက်ချင်း copy လုပ်ပြီးသိမ်းပါ။
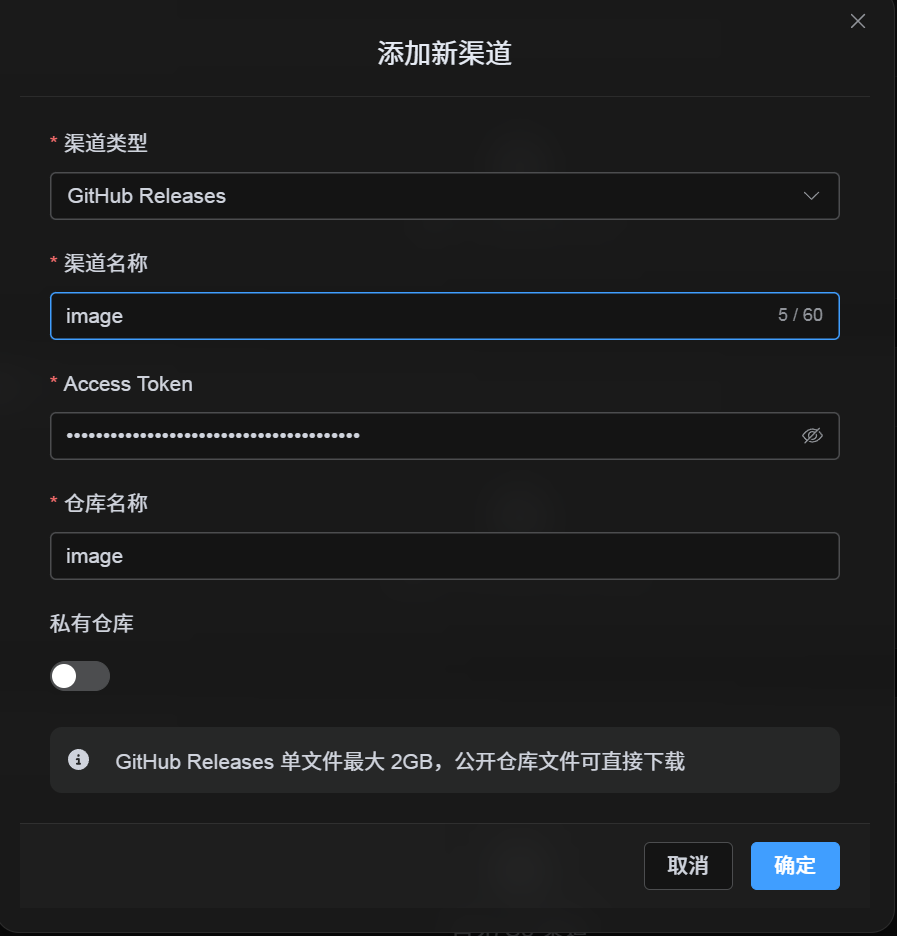
Step 2: ImgBed မှာ GitHub Releases Channel ဖြည့်ပါ
Upload Settings မှာ GitHub Releases ရွေးပြီးနောက်:
| UI Field | What to Enter |
|---|---|
| Channel name | ကိုယ်ရွေးတဲ့အမည်၊ ဥပမာ GitHubPrimary။ |
| Access Token | မကြာသေးခင်ဖန်တီးထားတဲ့ GitHub Personal Access Token။ |
| Repository name | short repo name image သို့မဟုတ် full path username/image။ |
| Private repository | လိုအပ်ချက်အရ on/off လုပ်ပါ။ |
| Remark | optional၊ ဥပမာ Primary upload channel။ |
Step 3: Channel Save လုပ်ပါ
fields ဖြည့်ပြီးနောက် Save ကိုနှိပ်ပါ။
system က ဒီအချက်တွေကို handle လုပ်ပါမယ်:
| System Behavior | Description |
|---|---|
| Short repository name | ImgBed က current GitHub account ကိုသိပြီး value ကို full repository path အဖြစ် expand လုပ်သည်။ |
| Full repository path | username/repository path ကို ထည့်ထားတဲ့အတိုင်းသုံးသည်။ |
| Repository check | current personal account path ဖြစ်လျှင် repository မရှိသောအခါ ImgBed ကအလိုအလျောက် create လုပ်သည်။ full path ကို manual ထည့်ထားလျှင် အဲဒီ path ကိုပဲသုံးသည်။ |
| Public/private state | repository visibility ကို current switch အတိုင်း synchronized လုပ်သည်။ |
Quick Checklist
GitHub Releases flow:
text
GitHub ထဲ sign in ဝင်ပါ
-> Access Token ဖန်တီးပါ
-> ImgBed ကိုပြန်သွားပြီး token နဲ့ repository name ထည့်ပါ
-> Save
-> repo name ပဲထည့်ထားရင် ImgBed က current username ကိုအလိုအလျောက်ထည့်ပါမယ်
-> username/repo ထည့်ထားရင် အဲဒီအတိုင်းသုံးပါမယ်
-> test image upload လုပ်ပါ