GitHub Releases चैनल जोड़ना
शुरू करने से पहले क्या चाहिए
सिर्फ तीन चीज़ें चाहिए:
| ज़रूरत | उपयोग |
|---|---|
| GitHub account | access token generate करने और repository own करने के लिए। |
| GitHub Access Token | ImgBed को GitHub API access, releases create और files upload करने के लिए। |
| Repository name | केवल repository name डाल सकते हैं, जैसे image। |
Setup Steps
Step 1: GitHub में sign in करें और Access Token बनाएँ
- GitHub में sign in करें।
- ऊपर दाएँ avatar पर क्लिक करके
Settingsखोलें। - left sidebar से
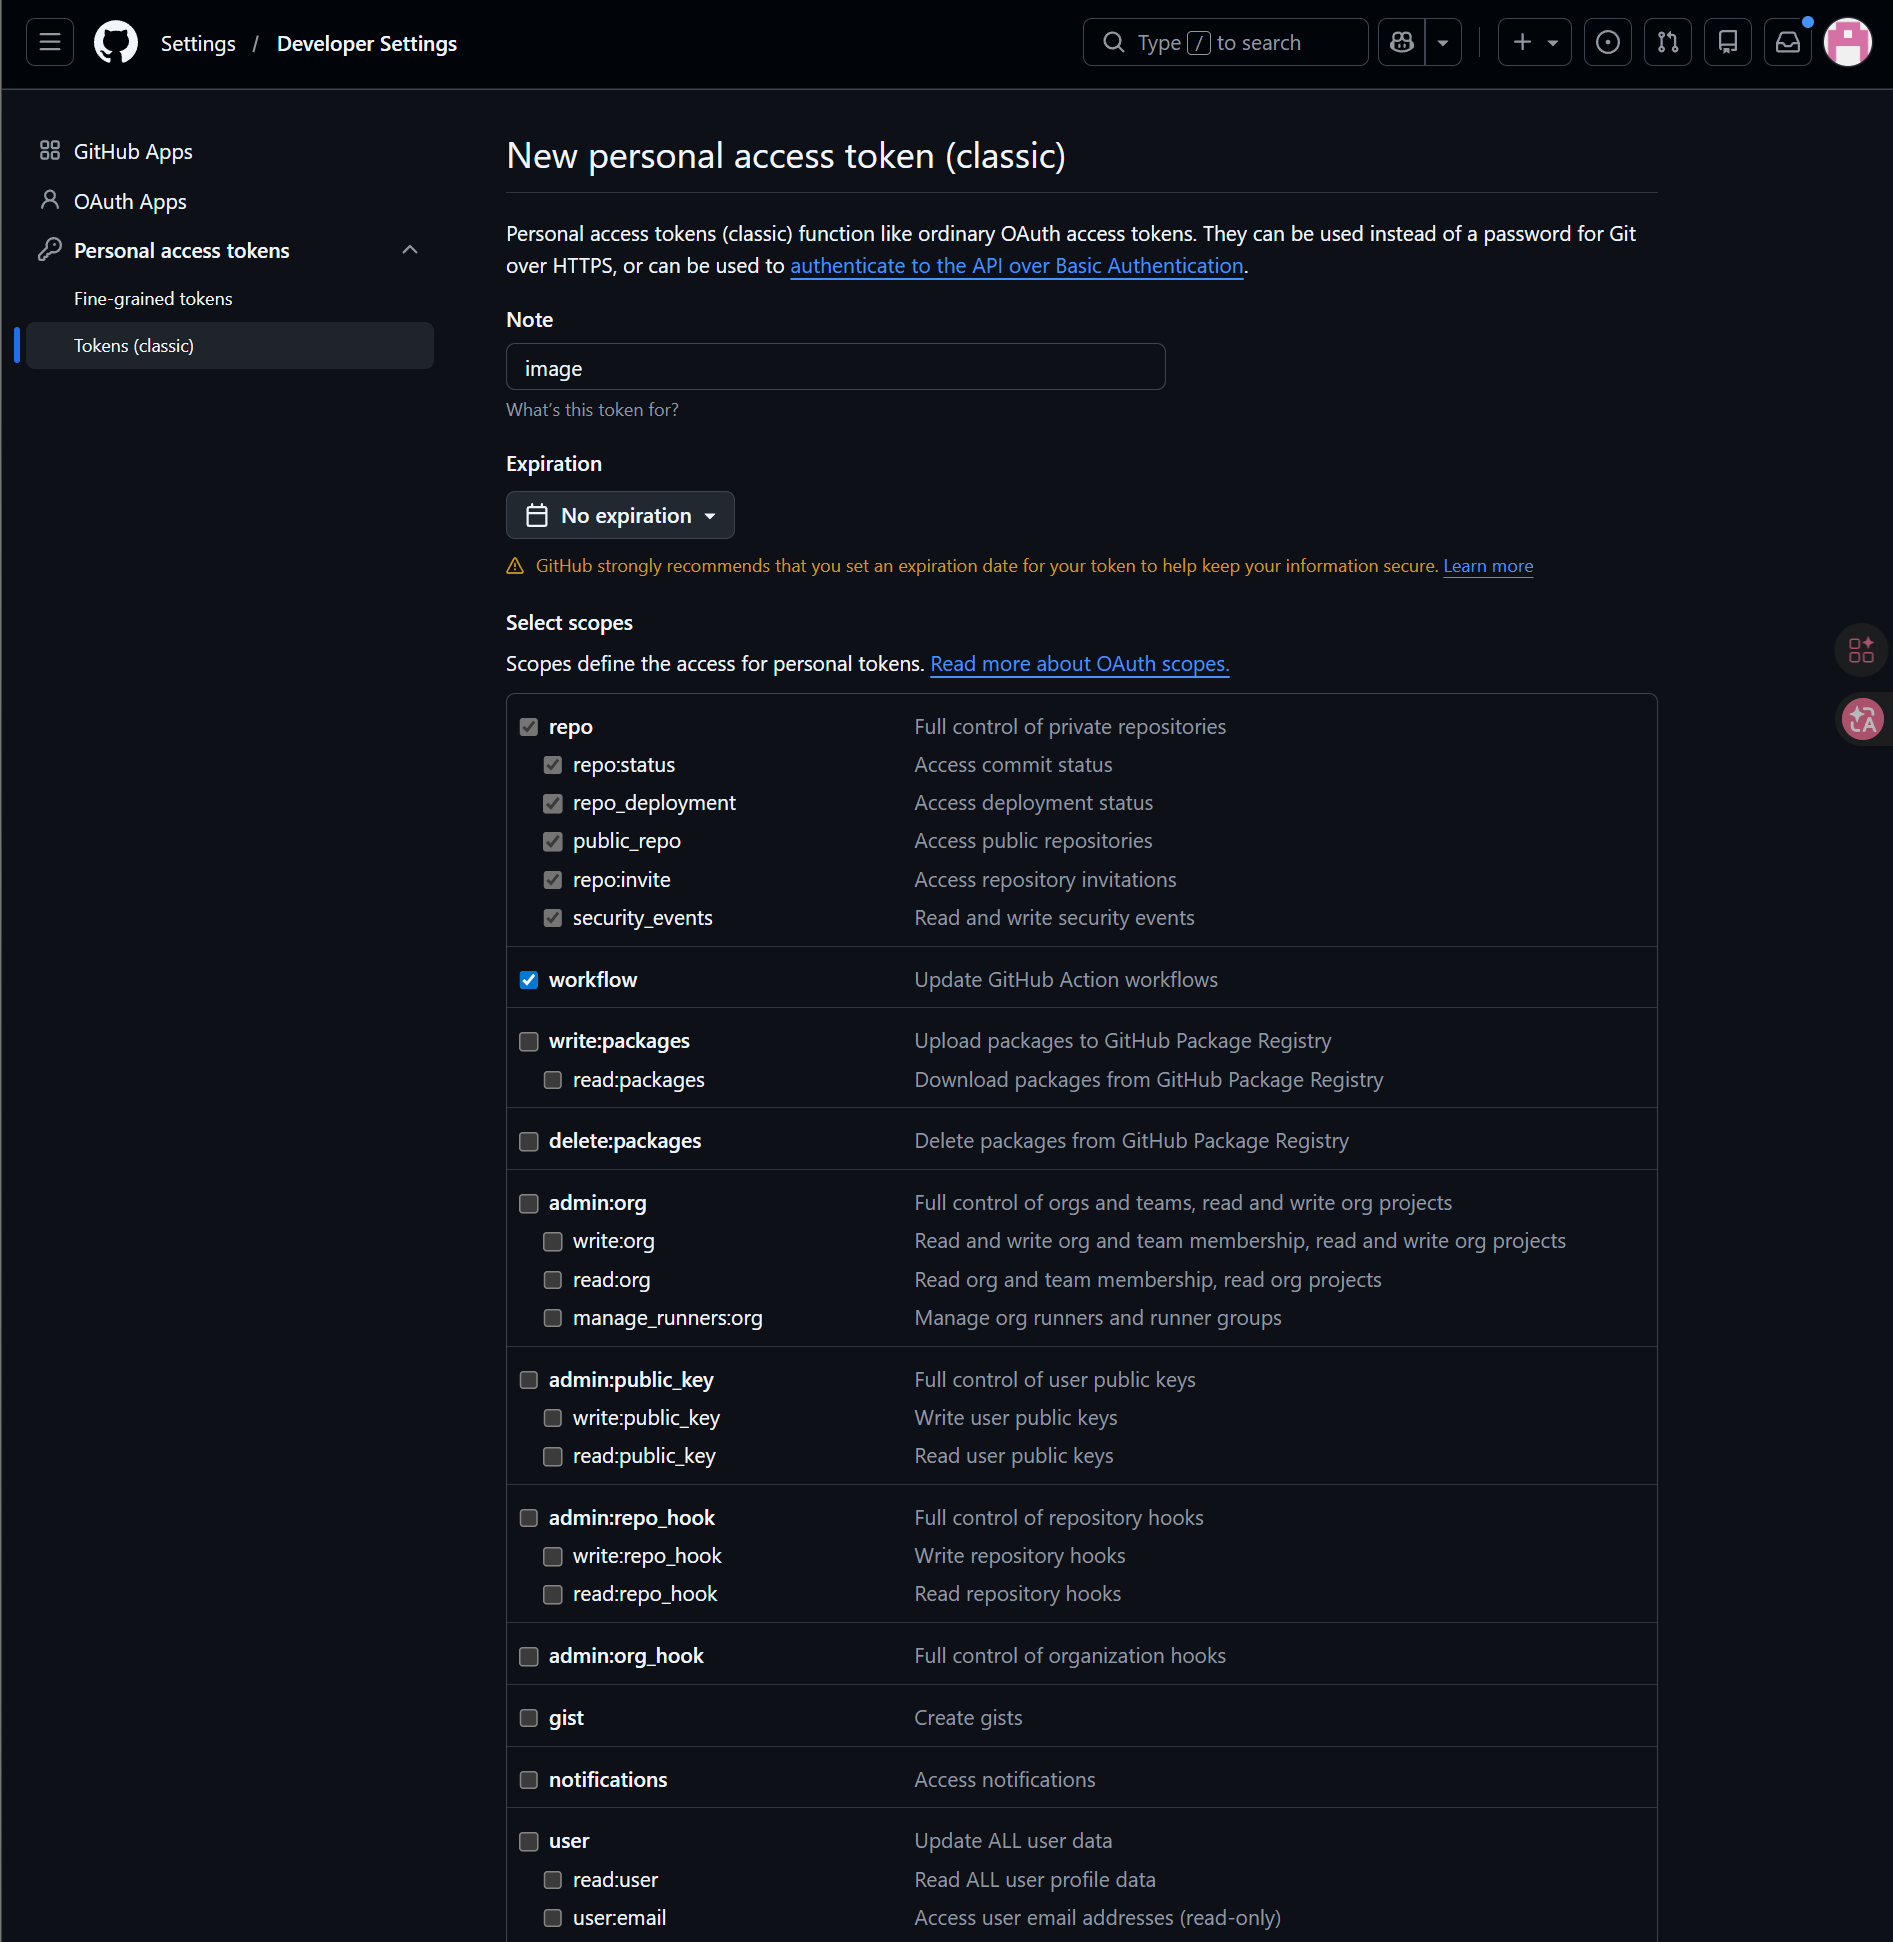
Developer settingsखोलें। Personal access tokensखोलें।Tokens (classic)खोलें।Generate new token (classic)पर क्लिक करें।- token को पहचानने लायक नाम दें।
- अपनी maintenance preference के हिसाब से expiration date चुनें।
repoऔरworkflowscopes चुनें।- token बनते ही उसे copy और save करें।
Step 2: ImgBed में GitHub Releases channel भरें
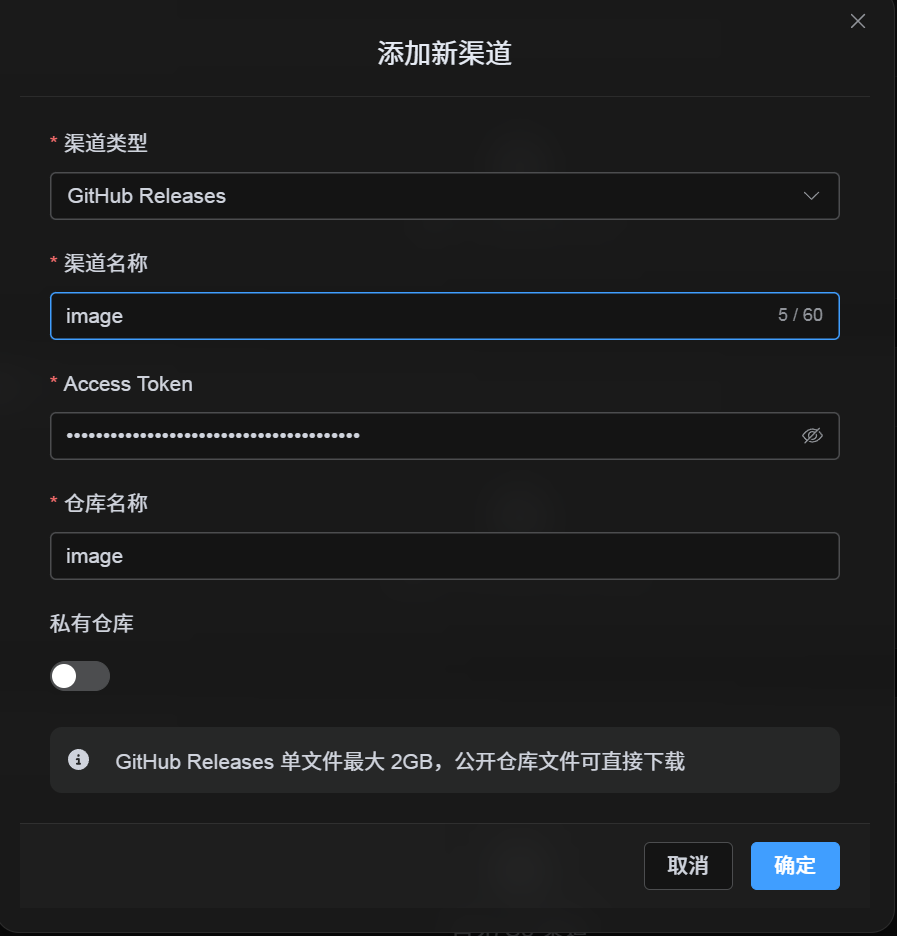
Upload Settings में GitHub Releases चुनने के बाद fields ऐसे भरें:
| UI Field | क्या डालें |
|---|---|
| Channel name | आपका चुना हुआ नाम, जैसे GitHubPrimary। |
| Access Token | अभी बनाया गया GitHub Personal Access Token। |
| Repository name | short repo name जैसे image, या full path जैसे username/image। |
| Private repository | अपनी ज़रूरत के हिसाब से on या off करें। |
| Remark | optional, जैसे Primary upload channel। |
Step 3: Channel save करें
fields भरने के बाद Save पर क्लिक करें।
system ये details संभालेगा:
| System Behavior | Description |
|---|---|
| Short repository name | ImgBed current GitHub account पहचानता है और value को full repository path में बदलता है। |
| Full repository path | ImgBed username/repository path को जैसा डाला गया है वैसा ही use करता है। |
| Repository check | current personal account path use होने पर ImgBed repository न हो तो automatically create करता है। full path manually डालने पर वही path directly use करता है। |
| Public/private state | repository visibility current switch के अनुसार sync होती है। |
Quick Checklist
GitHub Releases ऐसे काम करता है:
text
GitHub में sign in करें
-> Access Token बनाएँ
-> ImgBed में लौटकर token और repository name डालें
-> Save
-> केवल repo name डालने पर ImgBed current username automatically जोड़ता है
-> username/repo डालने पर ImgBed उसे जैसा है वैसा use करता है
-> test image upload करें