S3 चैनल जोड़ना
कब सबसे सही है
S3 channel का उपयोग तब करें जब:
- आप Cloudflare R2, Backblaze B2, MinIO, AWS S3 या किसी अन्य compatible provider जैसी S3-compatible object storage service जोड़ना चाहते हैं।
- आप standard S3 configuration model पसंद करते हैं:
Endpoint, Access Key और Secret Key। - आप native Cloudflare R2 binding channel इस्तेमाल नहीं करना चाहते, या आपका storage provider Cloudflare R2 नहीं है।
शुरू करने से पहले क्या चाहिए
| ज़रूरत | उपयोग |
|---|---|
| S3 Endpoint | object storage service का S3 API endpoint। |
| Bucket name | वह bucket जहाँ files रखी जाएँगी। |
| Region | storage region। Cloudflare R2 के लिए आम तौर पर auto। |
| Access Key ID | S3 access key ID। |
| Secret Access Key | S3 secret access key। |
| CDN domain | file access के लिए optional custom domain। |
Cloudflare R2 को S3 API से इस्तेमाल करने का उदाहरण:
text
Endpoint: https://your-account-id.r2.cloudflarestorage.com
Bucket: your-r2-bucket-name
Region: auto
Access Key ID: copied from the Cloudflare R2 API token
Secret Access Key: copied from the Cloudflare R2 API token
कहाँ जोड़ें
- System Settings खोलें।
- Upload Settings पर जाएँ।
- ऊपर दाएँ कोने में Add Channel पर क्लिक करें।
S3चुनें।
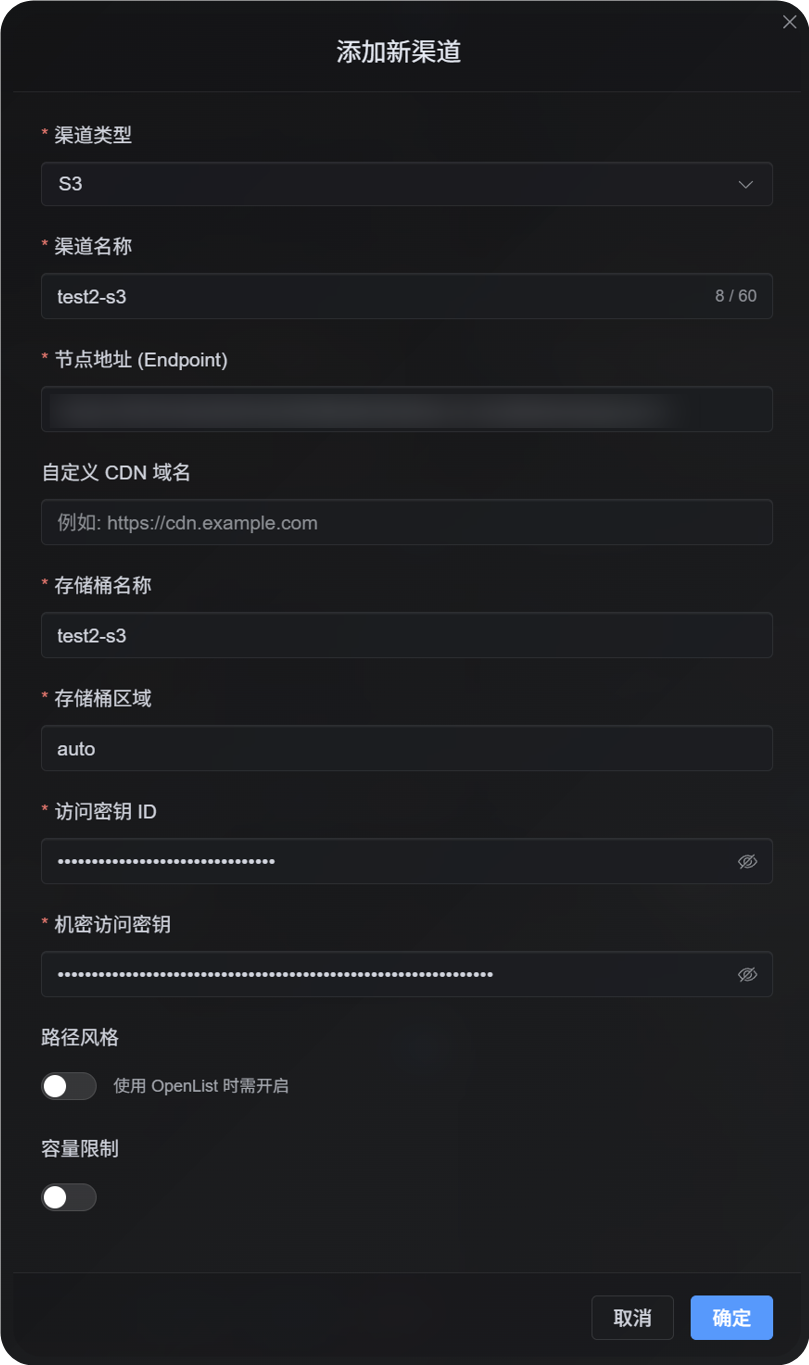
फ़ील्ड संदर्भ
| Field | क्या करता है | आवश्यक |
|---|---|---|
| Channel name | S3 channel का आसान नाम, जैसे s3test या R2-S3। | हाँ |
| Enable channel | यह channel upload selection में शामिल होगा या नहीं। | सुझाया गया |
| Endpoint | https:// सहित पूरा S3 service endpoint। | हाँ |
| Custom CDN domain | optional। set होने पर generated file links इस domain को prefer करते हैं। | नहीं |
| Bucket name | bucket name, जैसे s3test या img-r2। | हाँ |
| Bucket region | region। Cloudflare R2 के लिए आम तौर पर auto। | हाँ |
| Access Key ID | S3 access key ID। | हाँ |
| Secret Access Key | S3 secret access key। | हाँ |
| Path-style access | compatibility switch। default off। कुछ MinIO, OpenList या self-hosted S3 services को इसकी ज़रूरत हो सकती है। | नहीं |
| Quota limit | capacity के आधार पर यह S3 channel upload selection में शामिल होगा या नहीं। | नहीं |
| Capacity limit | quota limit enable होने के बाद ज़रूरी, जैसे 10 GB। | quota limit चालू हो तो आवश्यक |
| Threshold | usage इस percentage तक पहुँचने पर writing रोकता है, जैसे 90%। | quota limit चालू हो तो आवश्यक |
| Remark | आपकी maintenance notes। | नहीं |
Cloudflare R2 S3 API keys बनाएँ
- Cloudflare Dashboard खोलें।
R2 Object Storageपर जाएँ।Manage R2 API Tokensया API token management entry ढूँढें।

- target bucket access कर सकने वाला R2 API token बनाएँ।
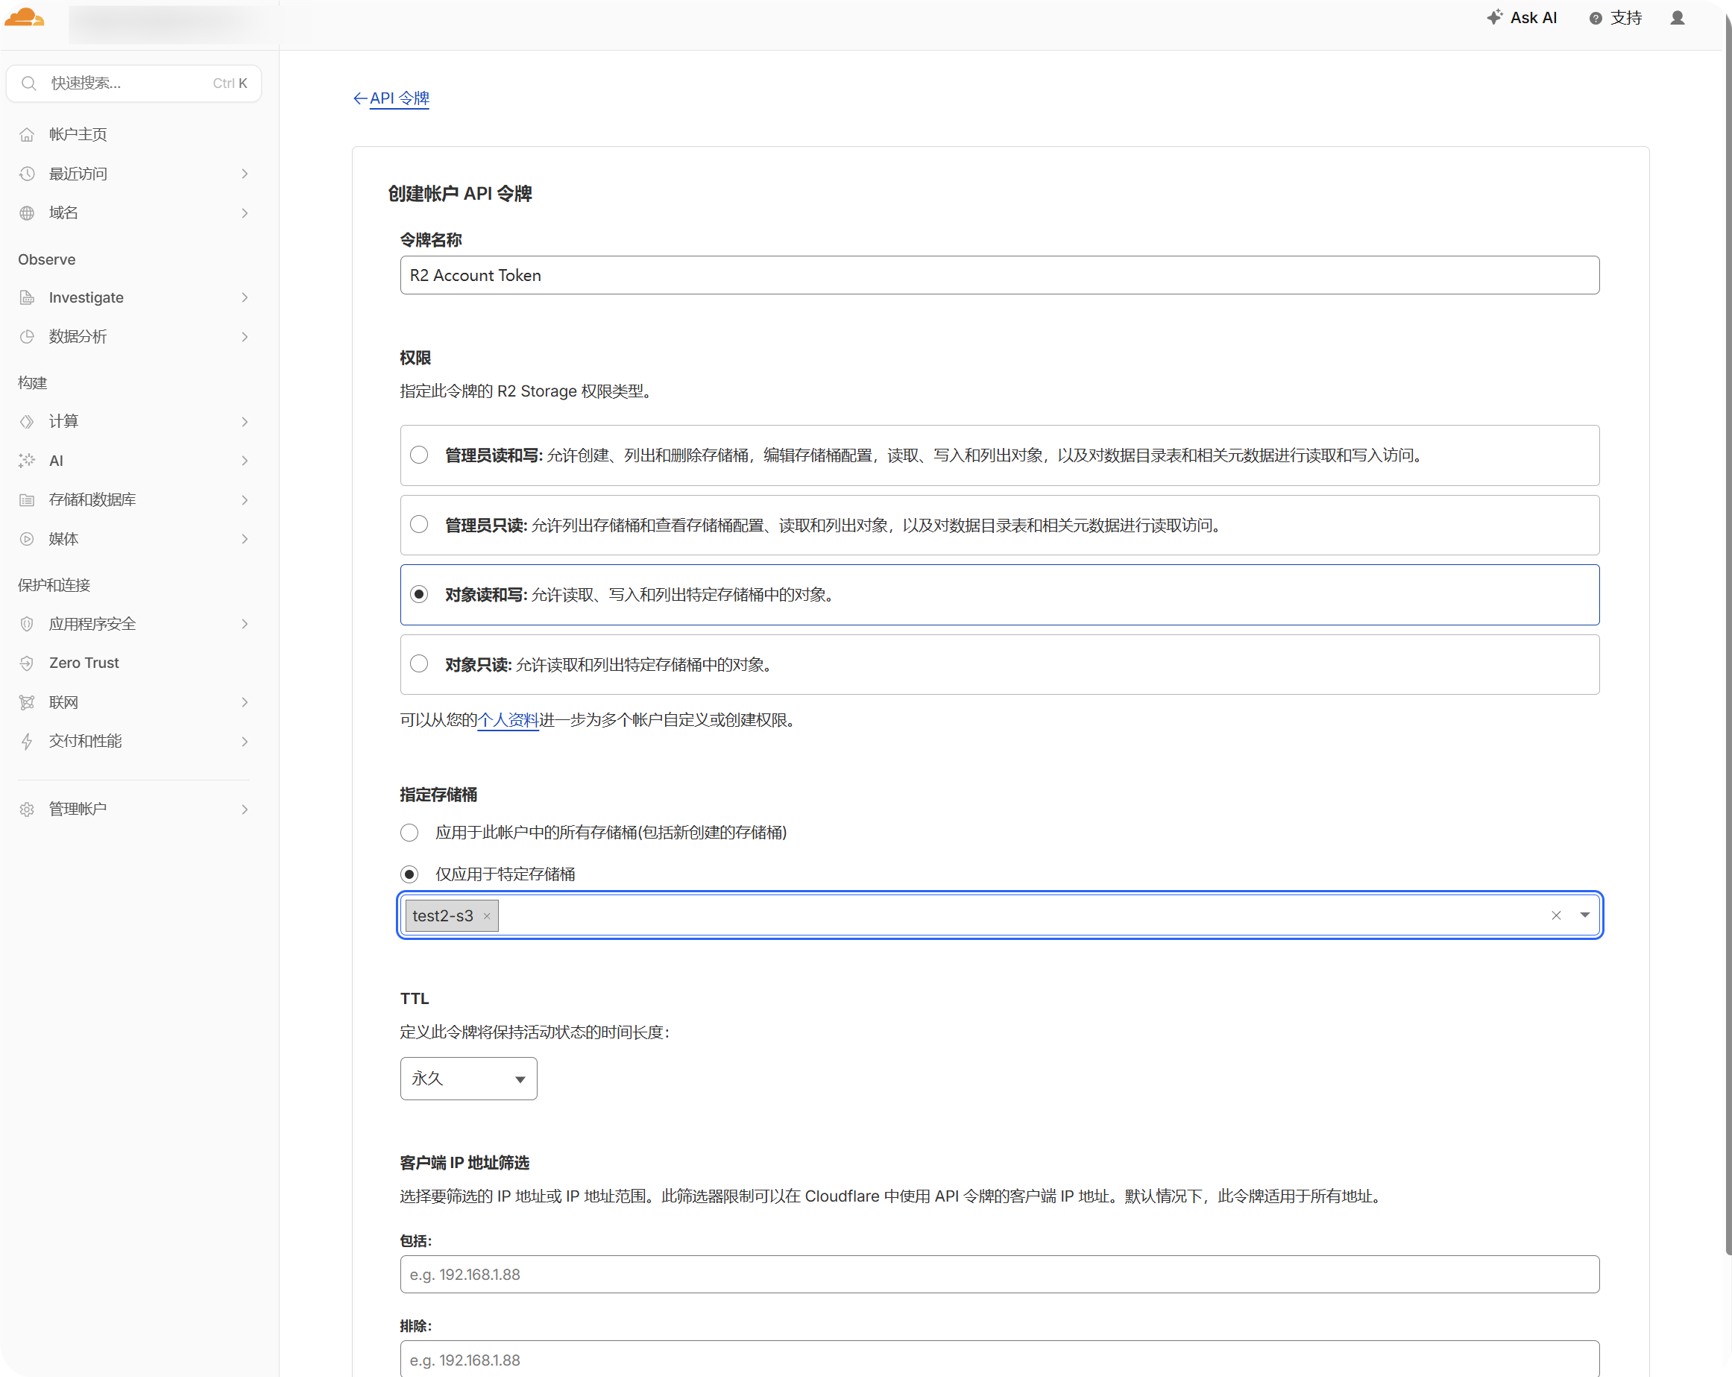
- generated
Access Key IDऔरSecret Access Keycopy करें।
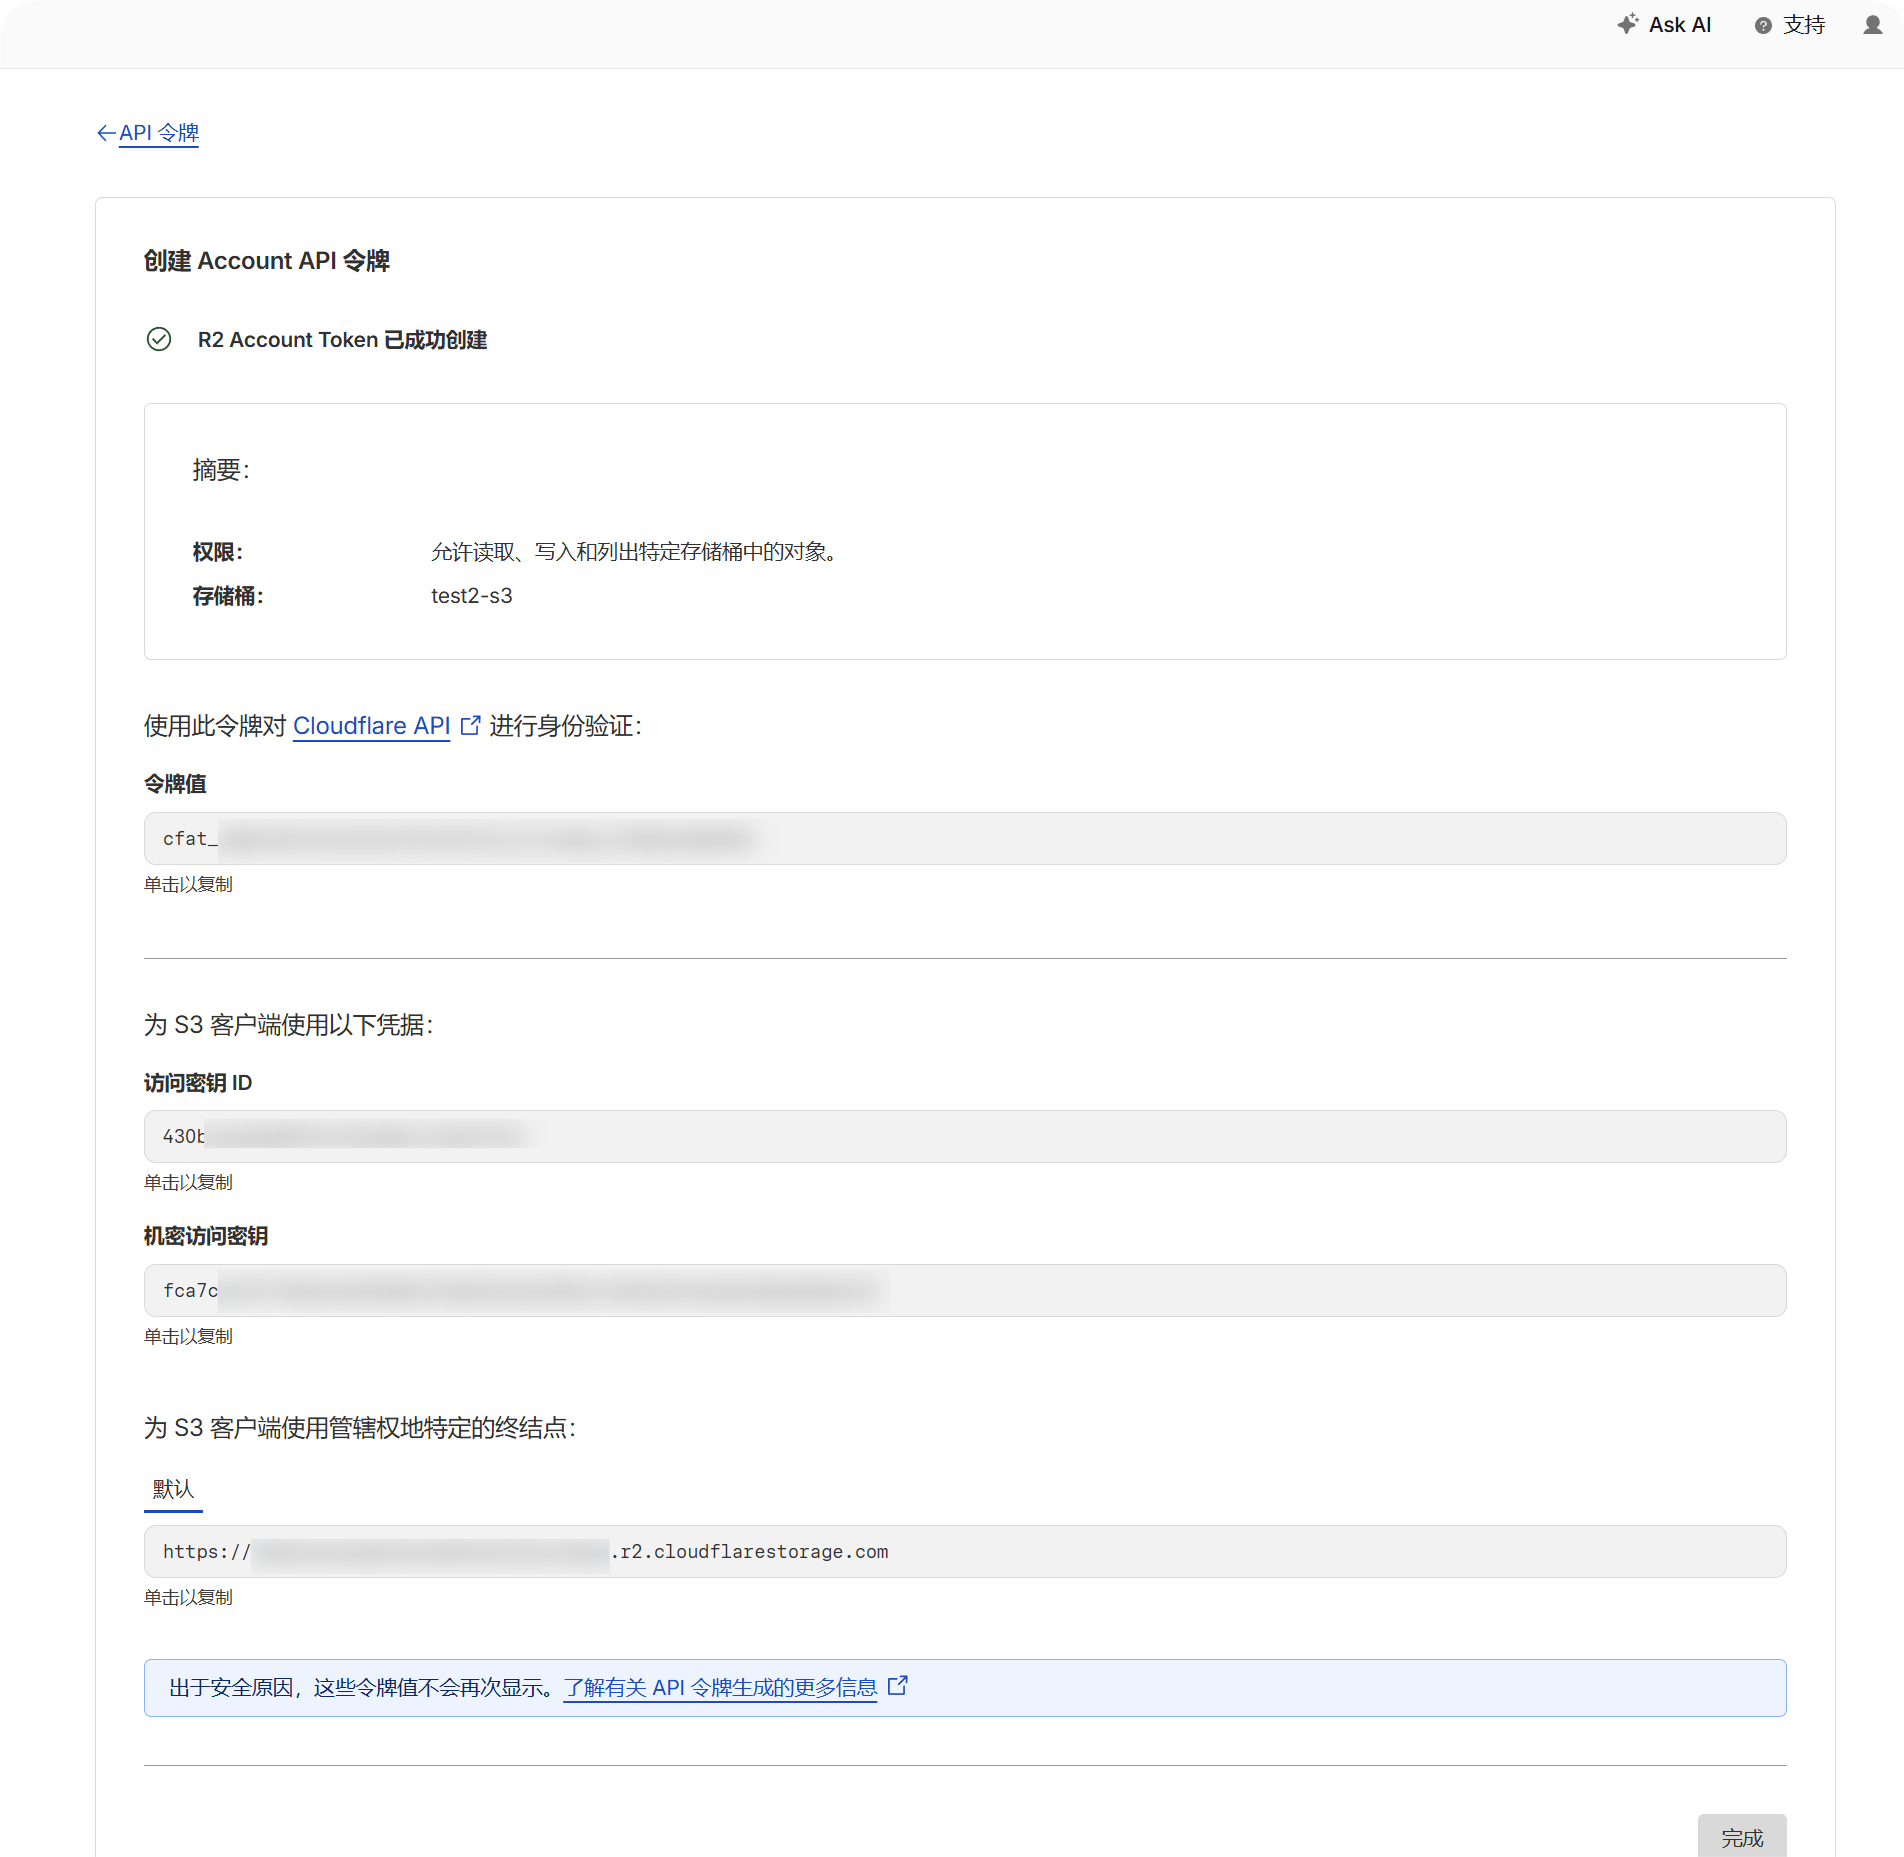
- R2 bucket page पर लौटें और bucket name confirm करें।
- account का S3 API endpoint note करें। आम तौर पर यह ऐसा दिखता है:
text
https://your-account-id.r2.cloudflarestorage.comSetup Steps
- Upload Settings खोलें।
- Add Channel पर क्लिक करें।
S3चुनें।- पहचानने लायक channel name डालें, जैसे
s3test। Endpointमें S3 API endpoint डालें।- custom CDN उपयोग करते हैं तो
Custom CDN domainमें डालें; नहीं तो खाली छोड़ें। - bucket name डालें।
- region डालें। Cloudflare R2 example के लिए
autoउपयोग करें। - Access Key ID और Secret Access Key डालें।
- जब तक provider स्पष्ट रूप से न कहे, path-style access off रखें।
- capacity control चाहिए तो quota limit enable करके capacity limit और threshold डालें।
- Save पर क्लिक करें।
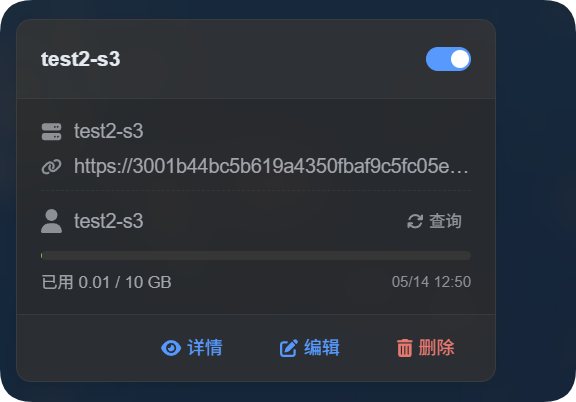
कैसे जाँचें
| जाँच | कैसे verify करें |
|---|---|
| Channel card दिखता है | save करने के बाद Upload Settings page में S3 channel card दिखना चाहिए। |
| Channel enabled है | card के ऊपर दाएँ switch को on रहना चाहिए। |
| मुख्य fields save हैं | detail view में Endpoint, Bucket, Region, path-style access और related fields दिखने चाहिए। |
| Upload काम करता है | test image upload करें और object target bucket में दिखाई दे। |
| Link खुलता है | upload के बाद लौटाया गया image link normally खुलना चाहिए। |
| Capacity display काम करता है | quota limit enabled हो तो card used capacity और configured limit दिखाए। |
S3 capacity statistics ImgBed के local file records से calculate होती हैं, provider bucket को real time query करके नहीं। S3 configuration save होने के बाद system current D1 records से quota ledger recalculate करता है।
FAQ
क्या path-style access enable करना चाहिए?
आम तौर पर नहीं।
इसे केवल तब enable करें जब आपका S3-compatible provider virtual-hosted-style URLs support नहीं करता, या provider documentation स्पष्ट रूप से path-style access मांगता है। कुछ MinIO, self-hosted S3 और OpenList-compatible endpoints में इसकी ज़रूरत हो सकती है।
CDN domain किसलिए है?
अगर bucket के आगे CDN या custom access domain है, तो यहाँ डालें।
configure होने के बाद generated file links इस domain को prefer करेंगे। CDN उपयोग नहीं करते तो खाली छोड़ें।
Upload क्यों fail होता है?
पहले ये बातें जाँचें:
- Endpoint पूरा
https://URL है। - bucket name सही है।
- Region provider requirement से match करता है।
- Access Key ID और Secret Access Key पूरी तरह copy किए गए हैं।
- key के पास target bucket में write permission है।
- provider path-style access नहीं मांगता, या अगर मांगता है तो path-style access enable है।
Quick Checklist
text
S3 Endpoint, Bucket, Region, Access Key और Secret Key तैयार करें
-> Upload Settings खोलें
-> Add Channel
-> S3 चुनें
-> Endpoint / Bucket / Region / Access Key / Secret Key डालें
-> ज़रूरत हो तो CDN domain डालें
-> default रूप से path-style access off रखें
-> ज़रूरत हो तो quota limit enable करें
-> Save
-> test image upload करके result देखें