Discord चैनल जोड़ना
शुरू करने से पहले क्या चाहिए
| ज़रूरत | उपयोग |
|---|---|
| Discord account | server, channel और developer application बनाने के लिए। |
| Discord server | bot को channel access करने से पहले server में join करना होता है। |
| Text channel | images और files इसी channel में भेजी जाएँगी। |
| Discord Developer Portal | application, bot और Bot Token बनाने के लिए। |
कहाँ जोड़ें
- System Settings खोलें।
- Upload Settings पर जाएँ।
- ऊपर दाएँ कोने में Add Channel पर क्लिक करें।
Discordचुनें।
फ़ील्ड संदर्भ
| Field | क्या करता है | आवश्यक |
|---|---|---|
| Channel name | इस channel का आसान नाम, जैसे "Discord Primary"। | हाँ |
| Bot Token | Discord bot token। | हाँ |
| Channel ID | target text channel का ID। | हाँ |
| Proxy URL (optional) | केवल तब use करें जब Discord CDN access अस्थिर हो। https:// सहित पूरा URL डालें। | नहीं |
Setup Steps
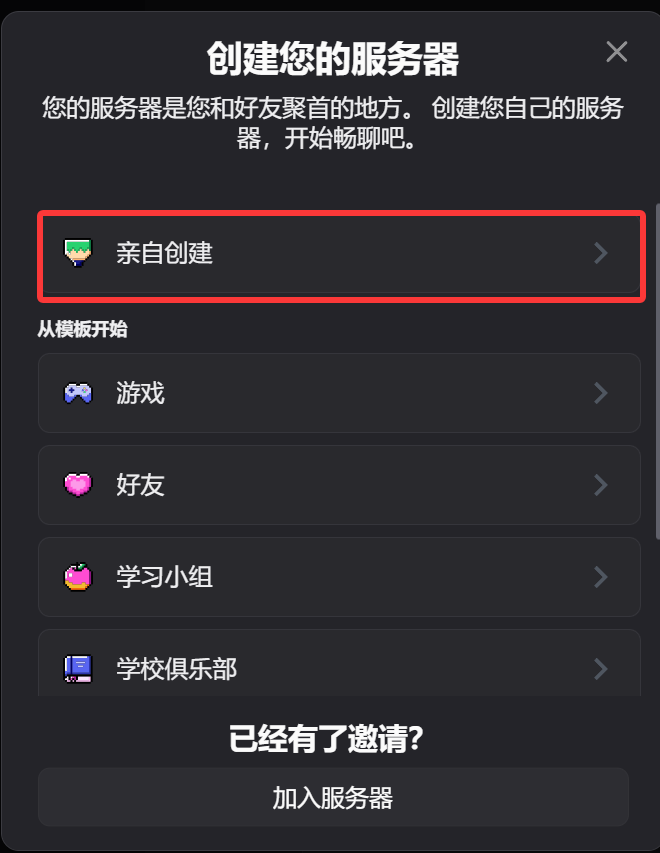
1. Discord server और text channel बनाएँ
- Discord खोलें।
- नया server बनाएँ या अपने existing server का उपयोग करें।
- उस server में text channel बनाएँ।
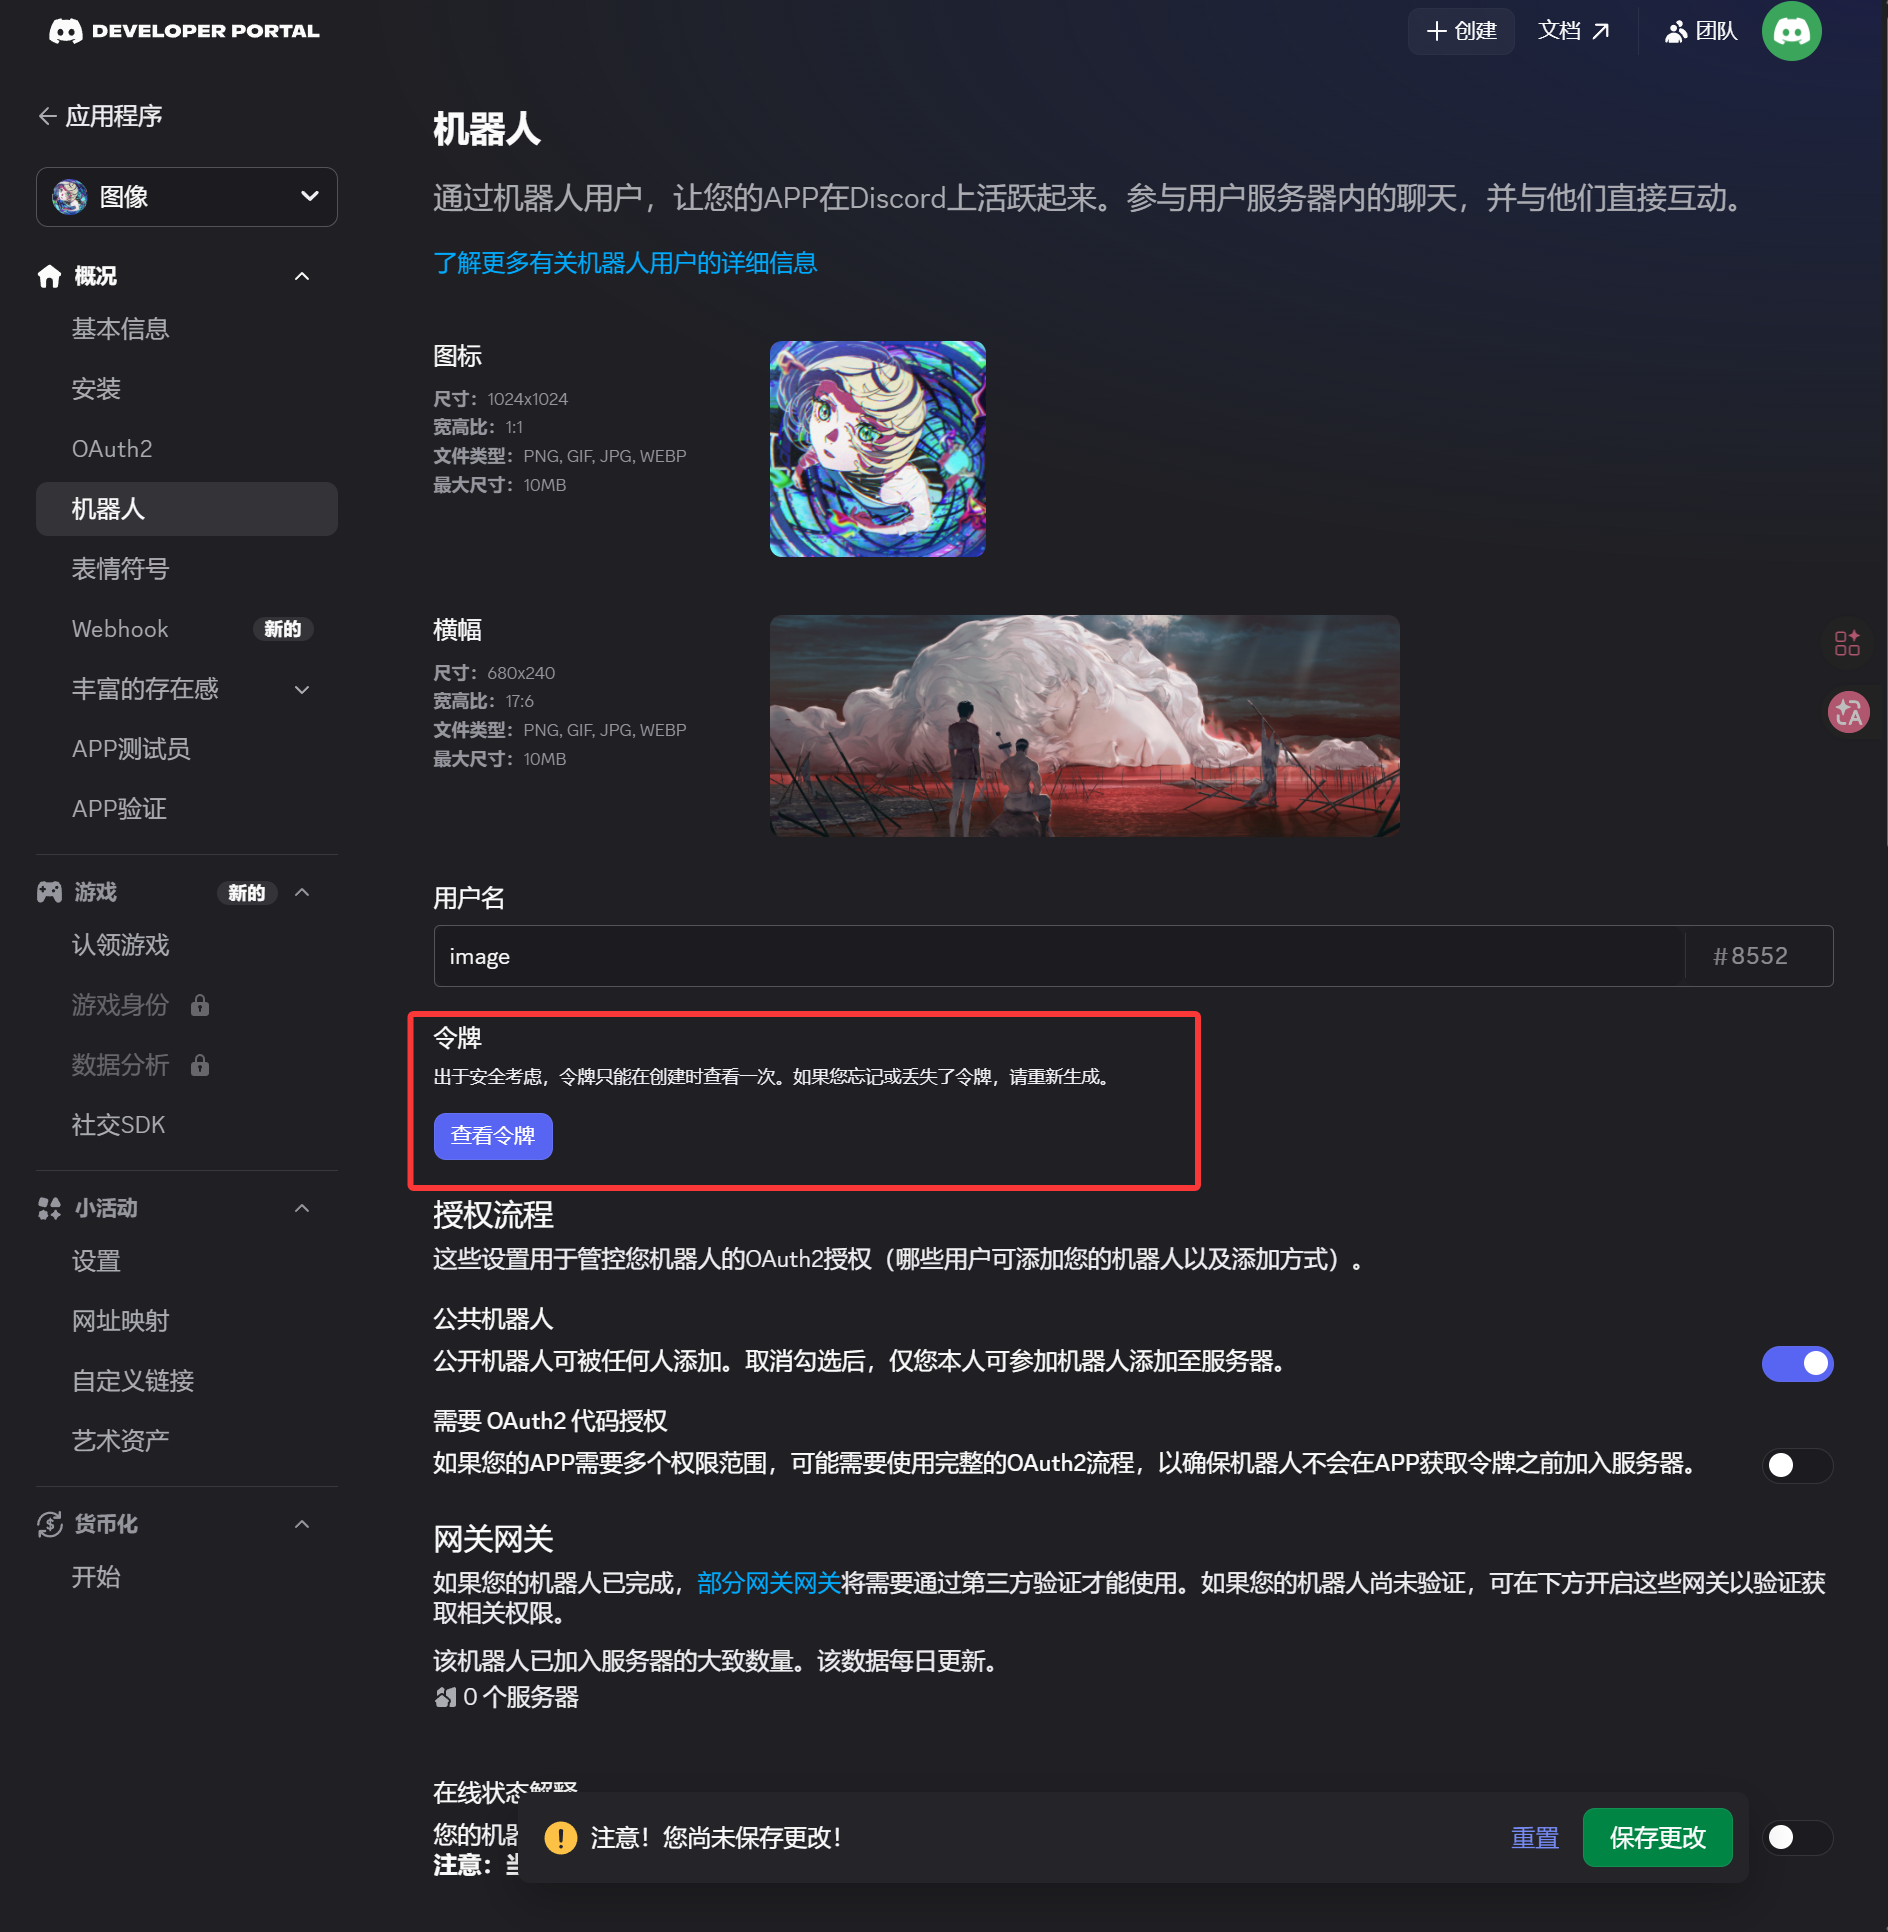
2. Discord Developer Portal में bot बनाएँ
- Discord Developer Portal खोलें:
https://discord.com/developers/applications New Applicationपर क्लिक करें।- application name डालकर create करें।
- left sidebar से
Botpage खोलें। Botpage पर token generate या reset करें।- token save करें।
यही token ImgBed में Bot Token field में डालना है।
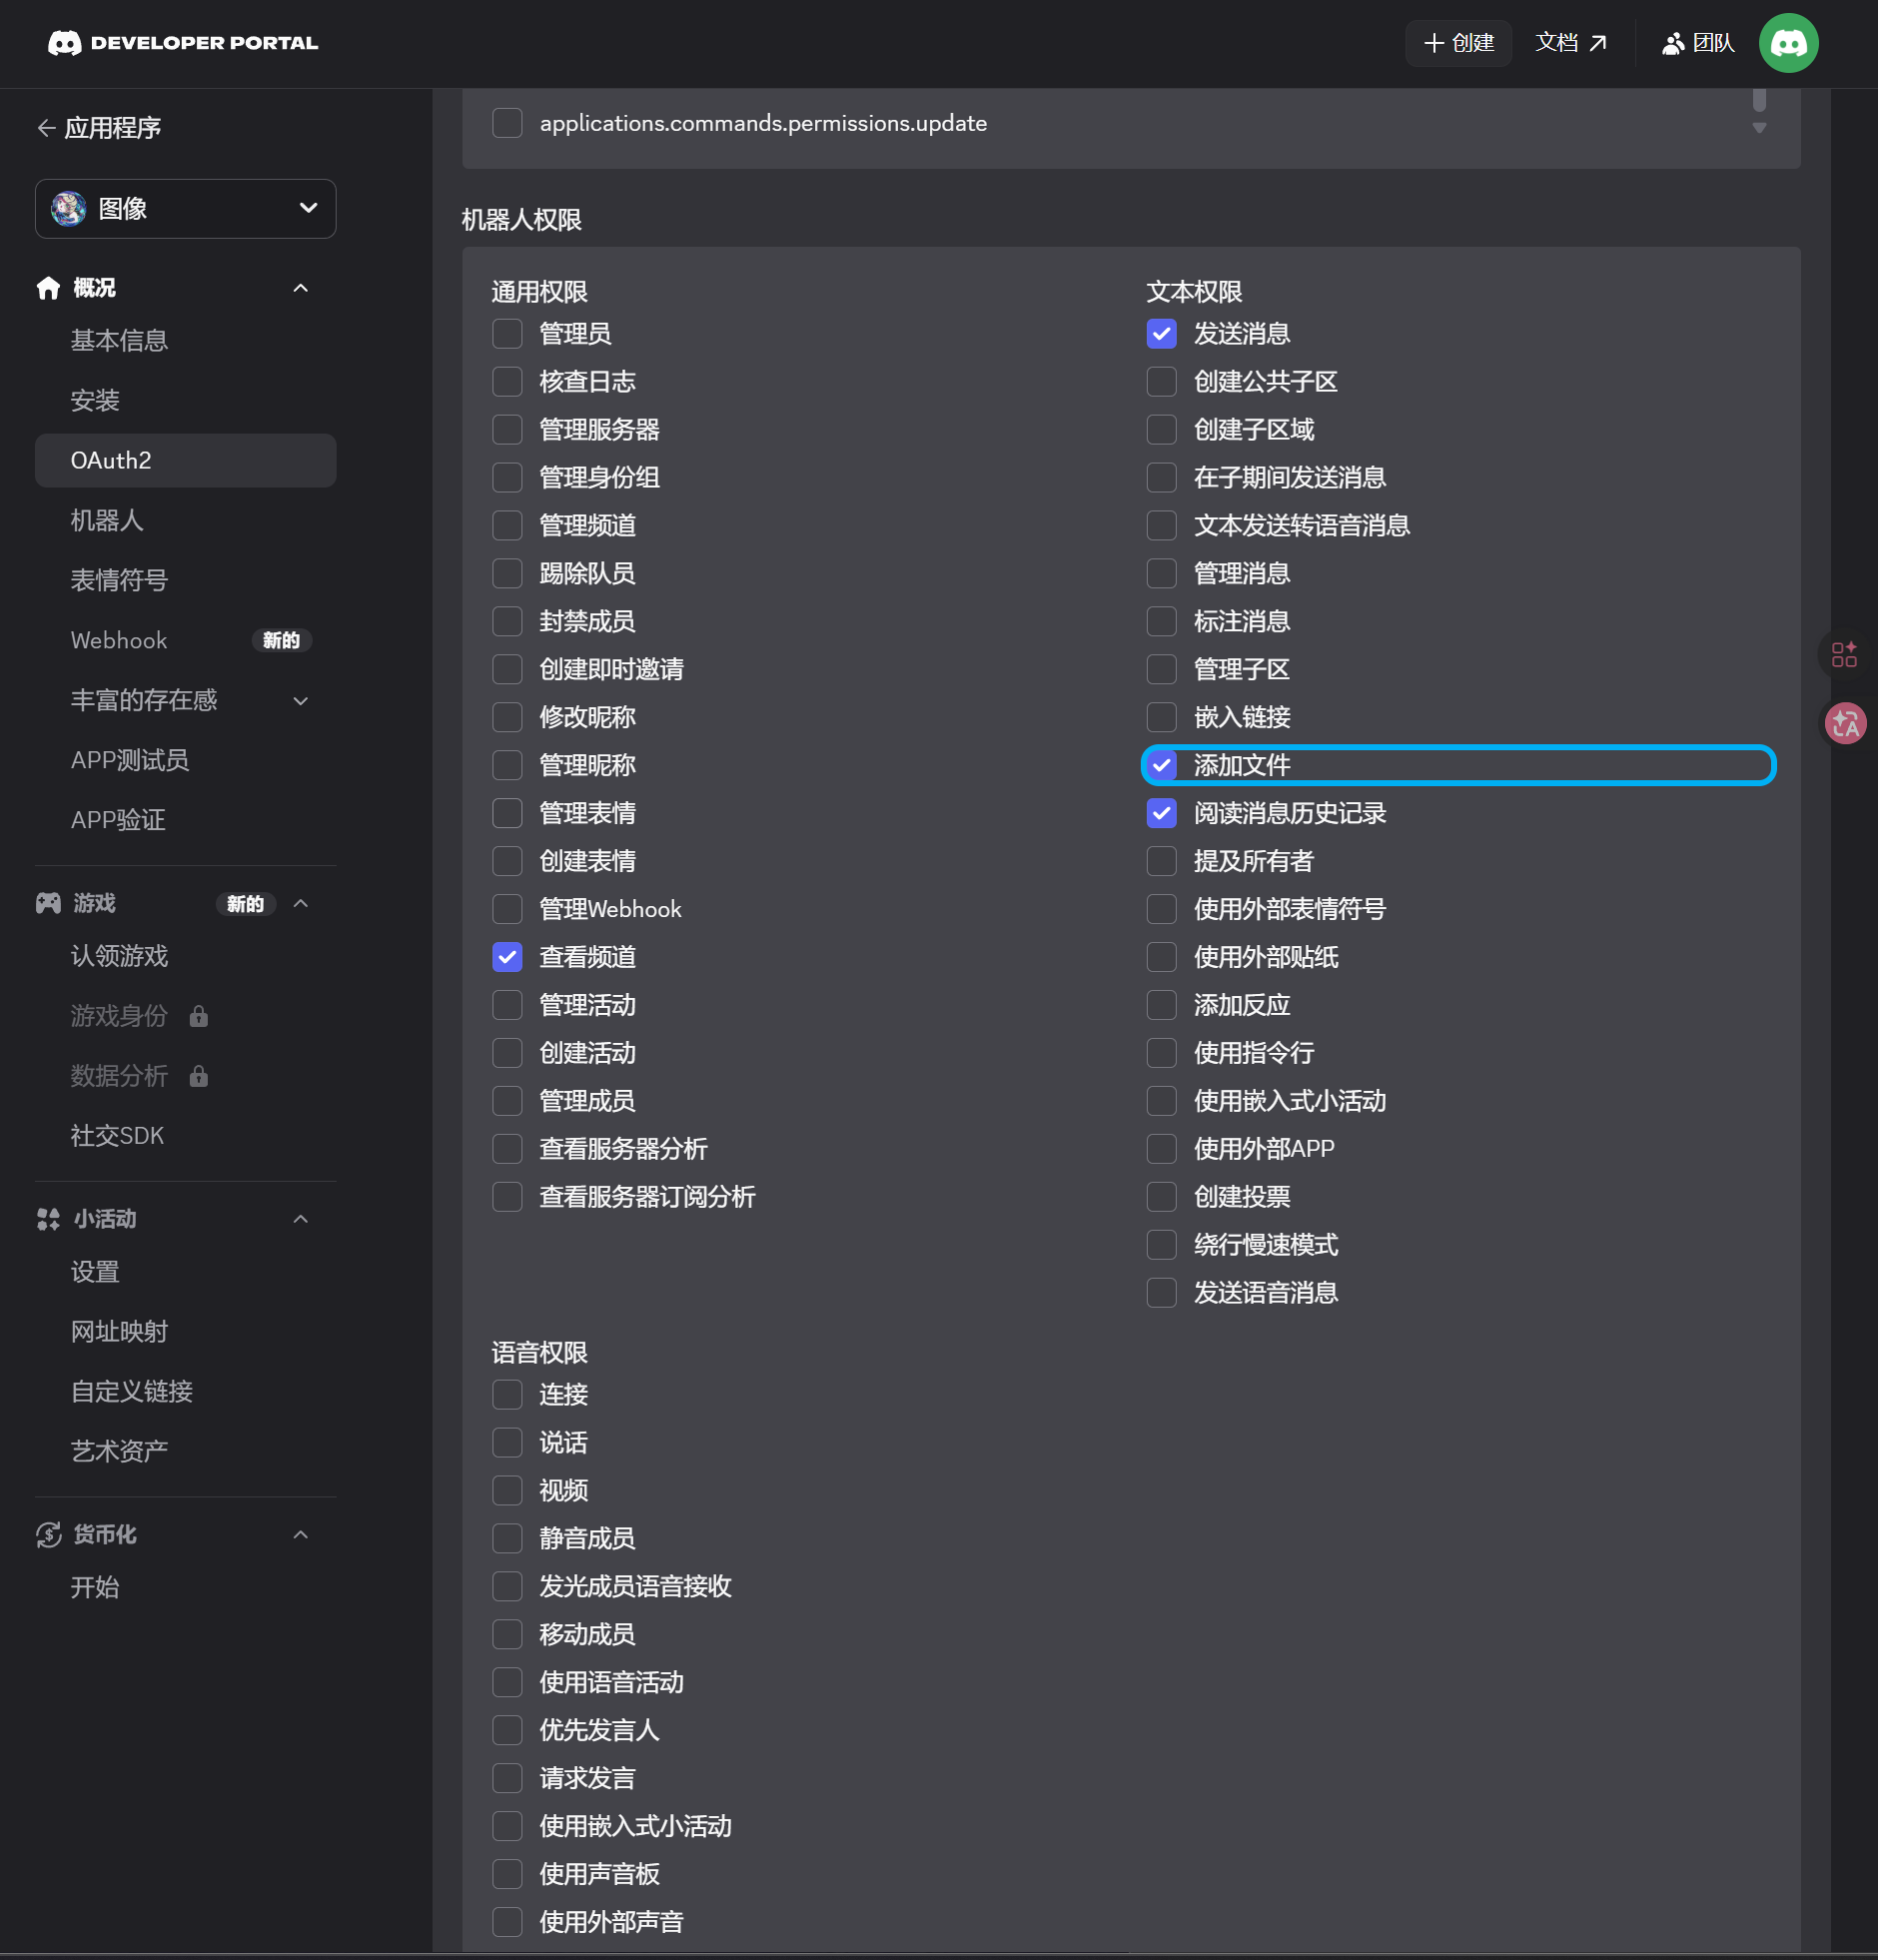
3. OAuth2 invite link बनाएँ और bot install करें
- left sidebar से
OAuth2page खोलें। - scopes में
botचुनें। - permission area में ये permissions enable करें:
| Permission | Required |
|---|---|
| View Channels | हाँ |
| Send Messages | हाँ |
| Attach Files | हाँ |
| Read Message History | हाँ |
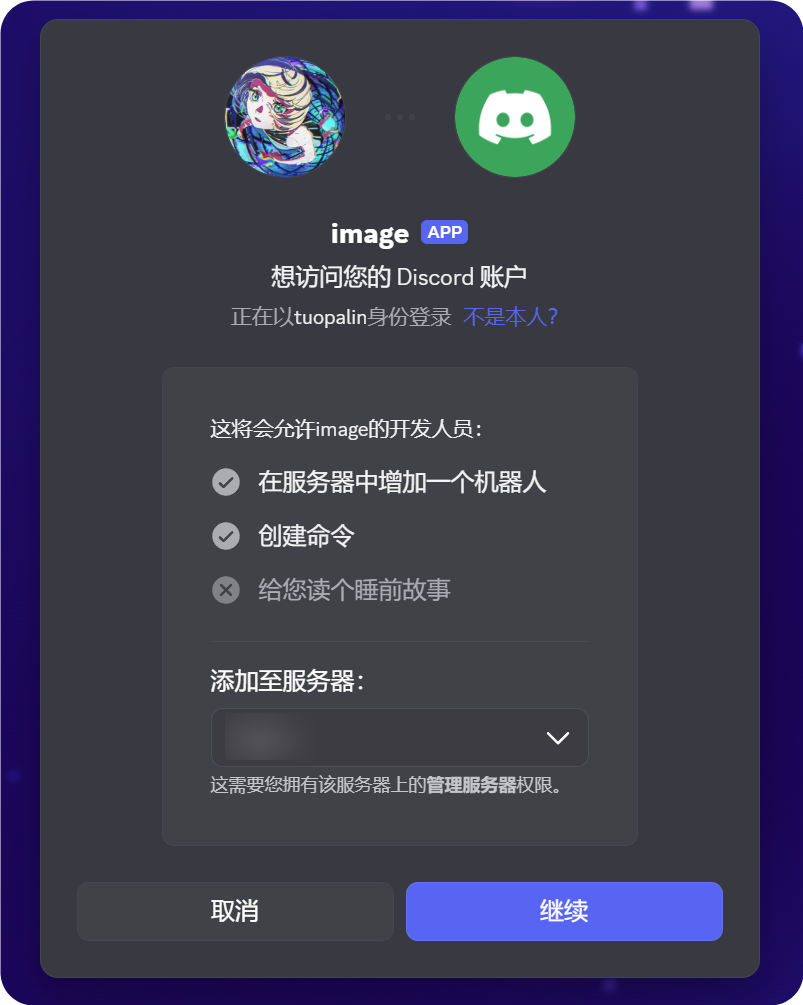
- page के नीचे confirm करें कि integration type
Guild Installहै। - generated URL copy करें।
- उस URL को browser में खोलें।
- target server चुनें।
- authorization flow पूरा करें।
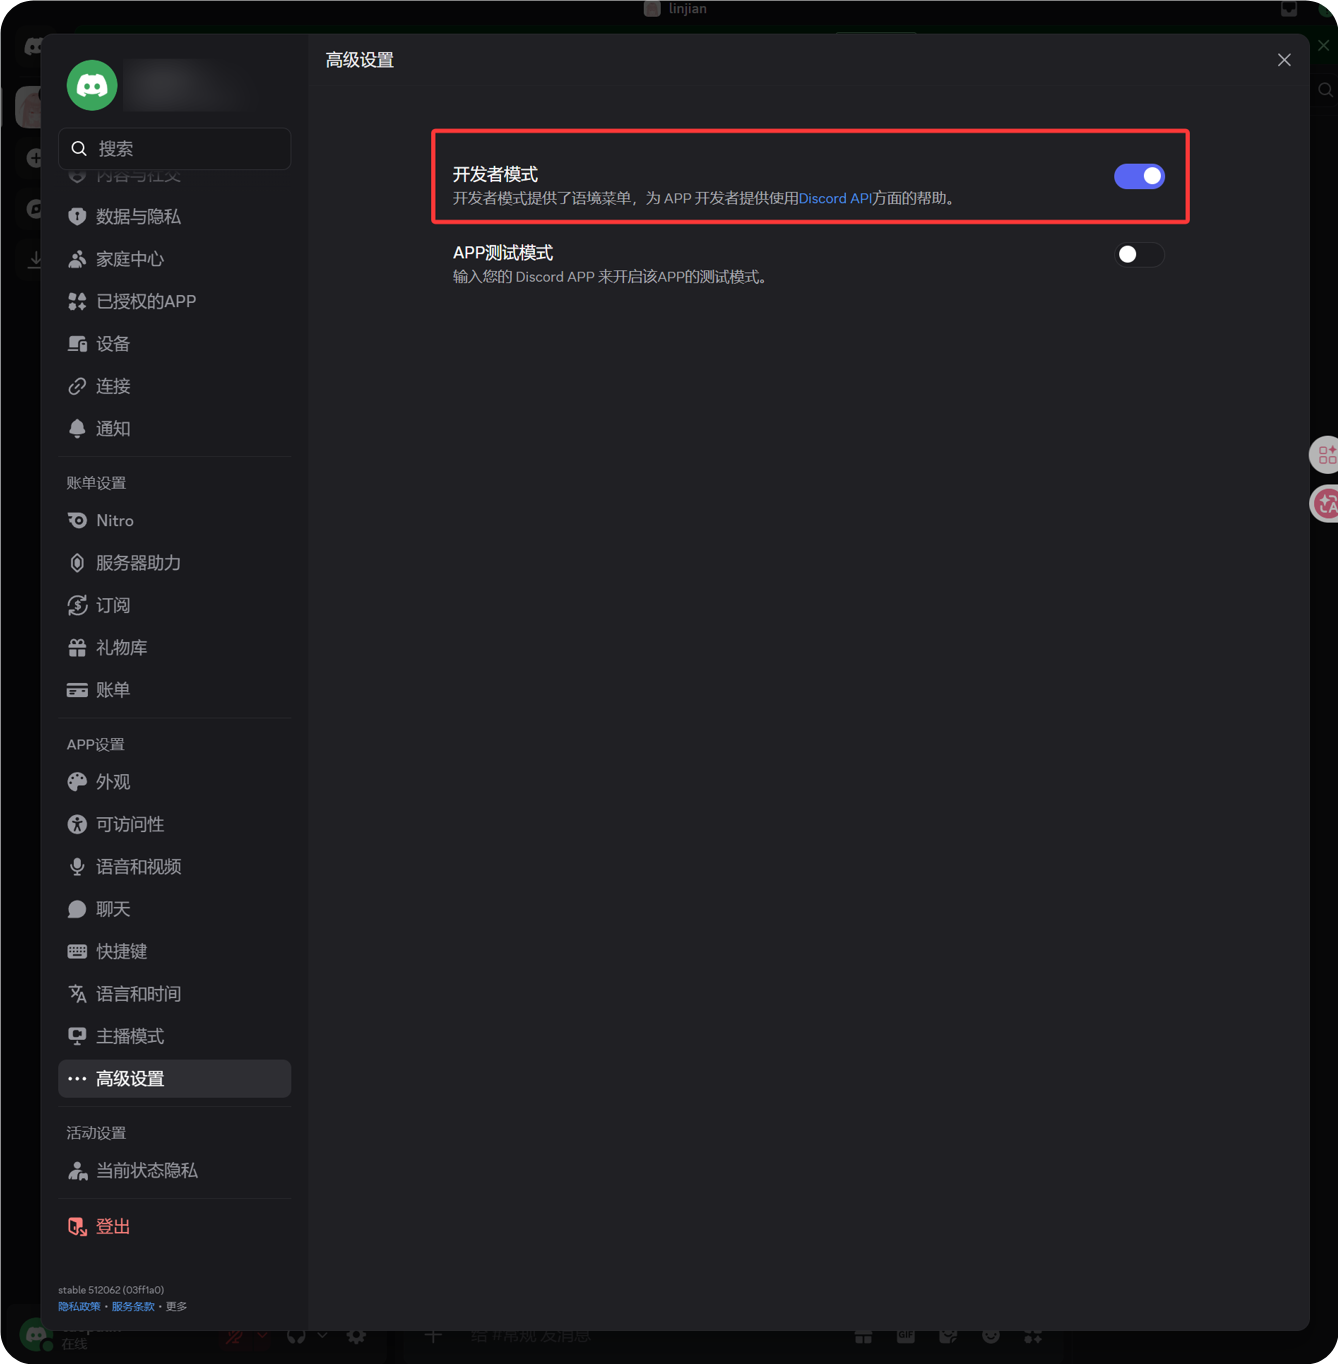
4. Developer Mode enable करें और Channel ID copy करें
- Discord के नीचे बाएँ अपने avatar के पास gear icon पर क्लिक करें।
- left sidebar से Advanced खोलें।
- Developer Mode enable करें।
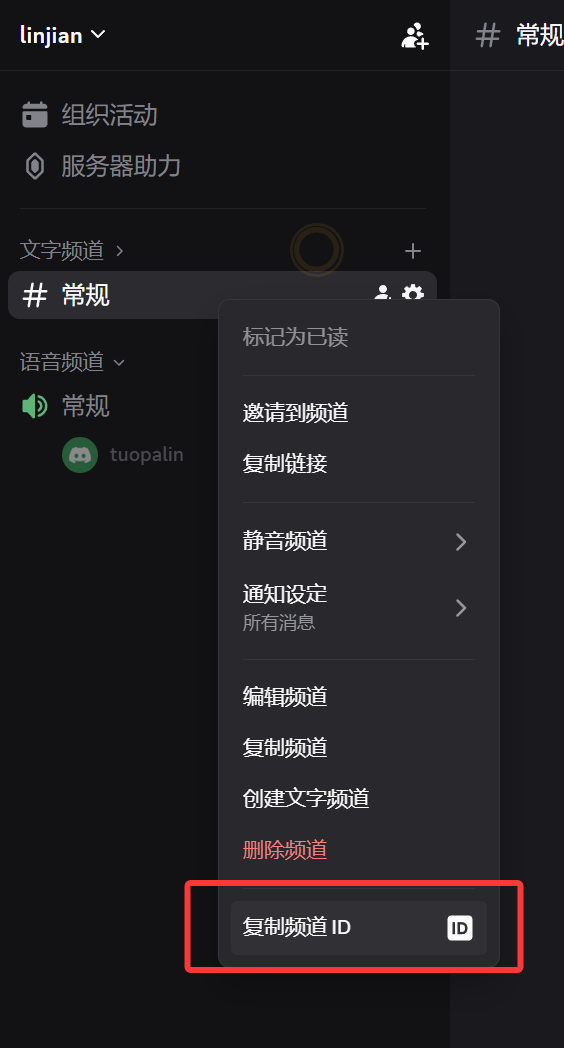
- target text channel पर लौटें।
- channel name पर right-click करें।
- Copy Channel ID पर क्लिक करें।
copy किया गया number ImgBed के लिए required Channel ID है।
5. ImgBed में Discord channel भरें
channel configuration dialog पर लौटें और fields ऐसे भरें:
| UI Field | Value |
|---|---|
| Channel name | custom channel name, जैसे DiscordPrimary। |
| Bot Token | Discord Developer Portal के Bot page से save किया token। |
| Channel ID | Discord से copy किया गया channel ID। |
| Proxy URL (optional) | ज़रूरत होने पर ही, जैसे https://your-proxy.example.com। |
सब भरने के बाद Save पर क्लिक करें।

कैसे जाँचें
| जाँच | कैसे verify करें |
|---|---|
| Channel card दिखता है | save करने के बाद Upload Settings page में Discord channel card दिखना चाहिए। |
| Channel enable रह सकता है | Active switch on रहना चाहिए। |
| Configuration save हुई | detail view में Bot Token और Channel ID saved दिखने चाहिए। |
| Upload काम करता है | test image upload करें और target Discord text channel में उसके आने की पुष्टि करें। |
Quick Checklist
text
Discord server बनाएँ
-> text channel बनाएँ
-> Discord Developer Portal में bot बनाएँ
-> Bot page से Bot Token save करें
-> OAuth2 में bot, View Channels, Send Messages, Attach Files और Read Message History चुनें
-> generated URL copy करें और target server के लिए bot authorize करें
-> target text channel में वही permissions confirm करें
-> Developer Mode enable करें
-> target text channel पर right-click करके Channel ID copy करें
-> ImgBed में Bot Token और Channel ID डालें
-> save करें और test image upload करें
References
- Discord Developers Getting Started: https://docs.discord.com/developers/quick-start/getting-started
- Discord Help - Where can I find my User/Server/Message ID: https://support.discord.com/hc/en-us/articles/206346498-Where-can-I-find-my-User-Server-Message-ID