เพิ่ม Discord Channel
สิ่งที่ต้องเตรียมก่อนเริ่ม
| Requirement | Purpose |
|---|---|
| Discord account | ใช้สร้าง server, channel และ developer application |
| Discord server | Bot ต้องอยู่ใน server ก่อนจึงจะ access channel ได้ |
| Text channel | Images และ files จะถูกส่งไปยัง channel นี้ |
| Discord Developer Portal | ใช้สร้าง application, สร้าง bot และรับ Bot Token |
เพิ่มได้จากที่ไหน
- เปิด System Settings
- ไปที่ Upload Settings
- คลิก Add Channel ที่มุมขวาบน
- เลือก
Discord
Field Reference
| Field | ใช้ทำอะไร | Required |
|---|---|---|
| Channel name | ชื่อที่จำง่ายสำหรับ channel นี้ เช่น "Discord Primary" | Required |
| Bot Token | Discord bot token | Required |
| Channel ID | ID ของ target text channel | Required |
| Proxy URL (optional) | ใช้เฉพาะเมื่อ Discord CDN access ไม่เสถียร ใส่ full URL รวม https:// | Optional |
ขั้นตอนตั้งค่า
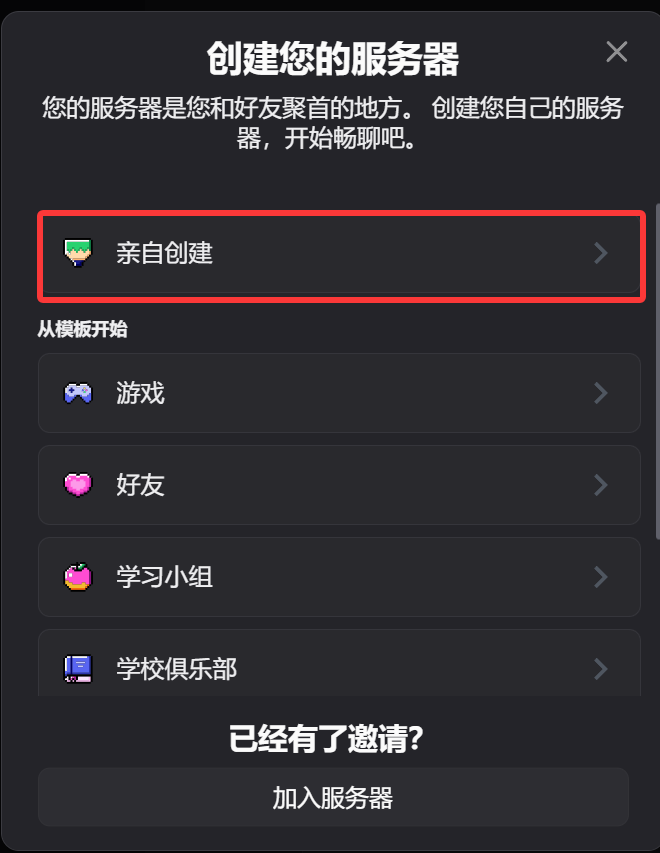
1. สร้าง Discord Server และ Text Channel
- เปิด Discord
- สร้าง server ใหม่ หรือใช้ existing server ที่คุณเป็นเจ้าของ
- สร้าง text channel ใน server นั้น
2. สร้าง Bot ใน Discord Developer Portal
- เปิด Discord Developer Portal:
https://discord.com/developers/applications - คลิก
New Application - ใส่ application name แล้วสร้าง
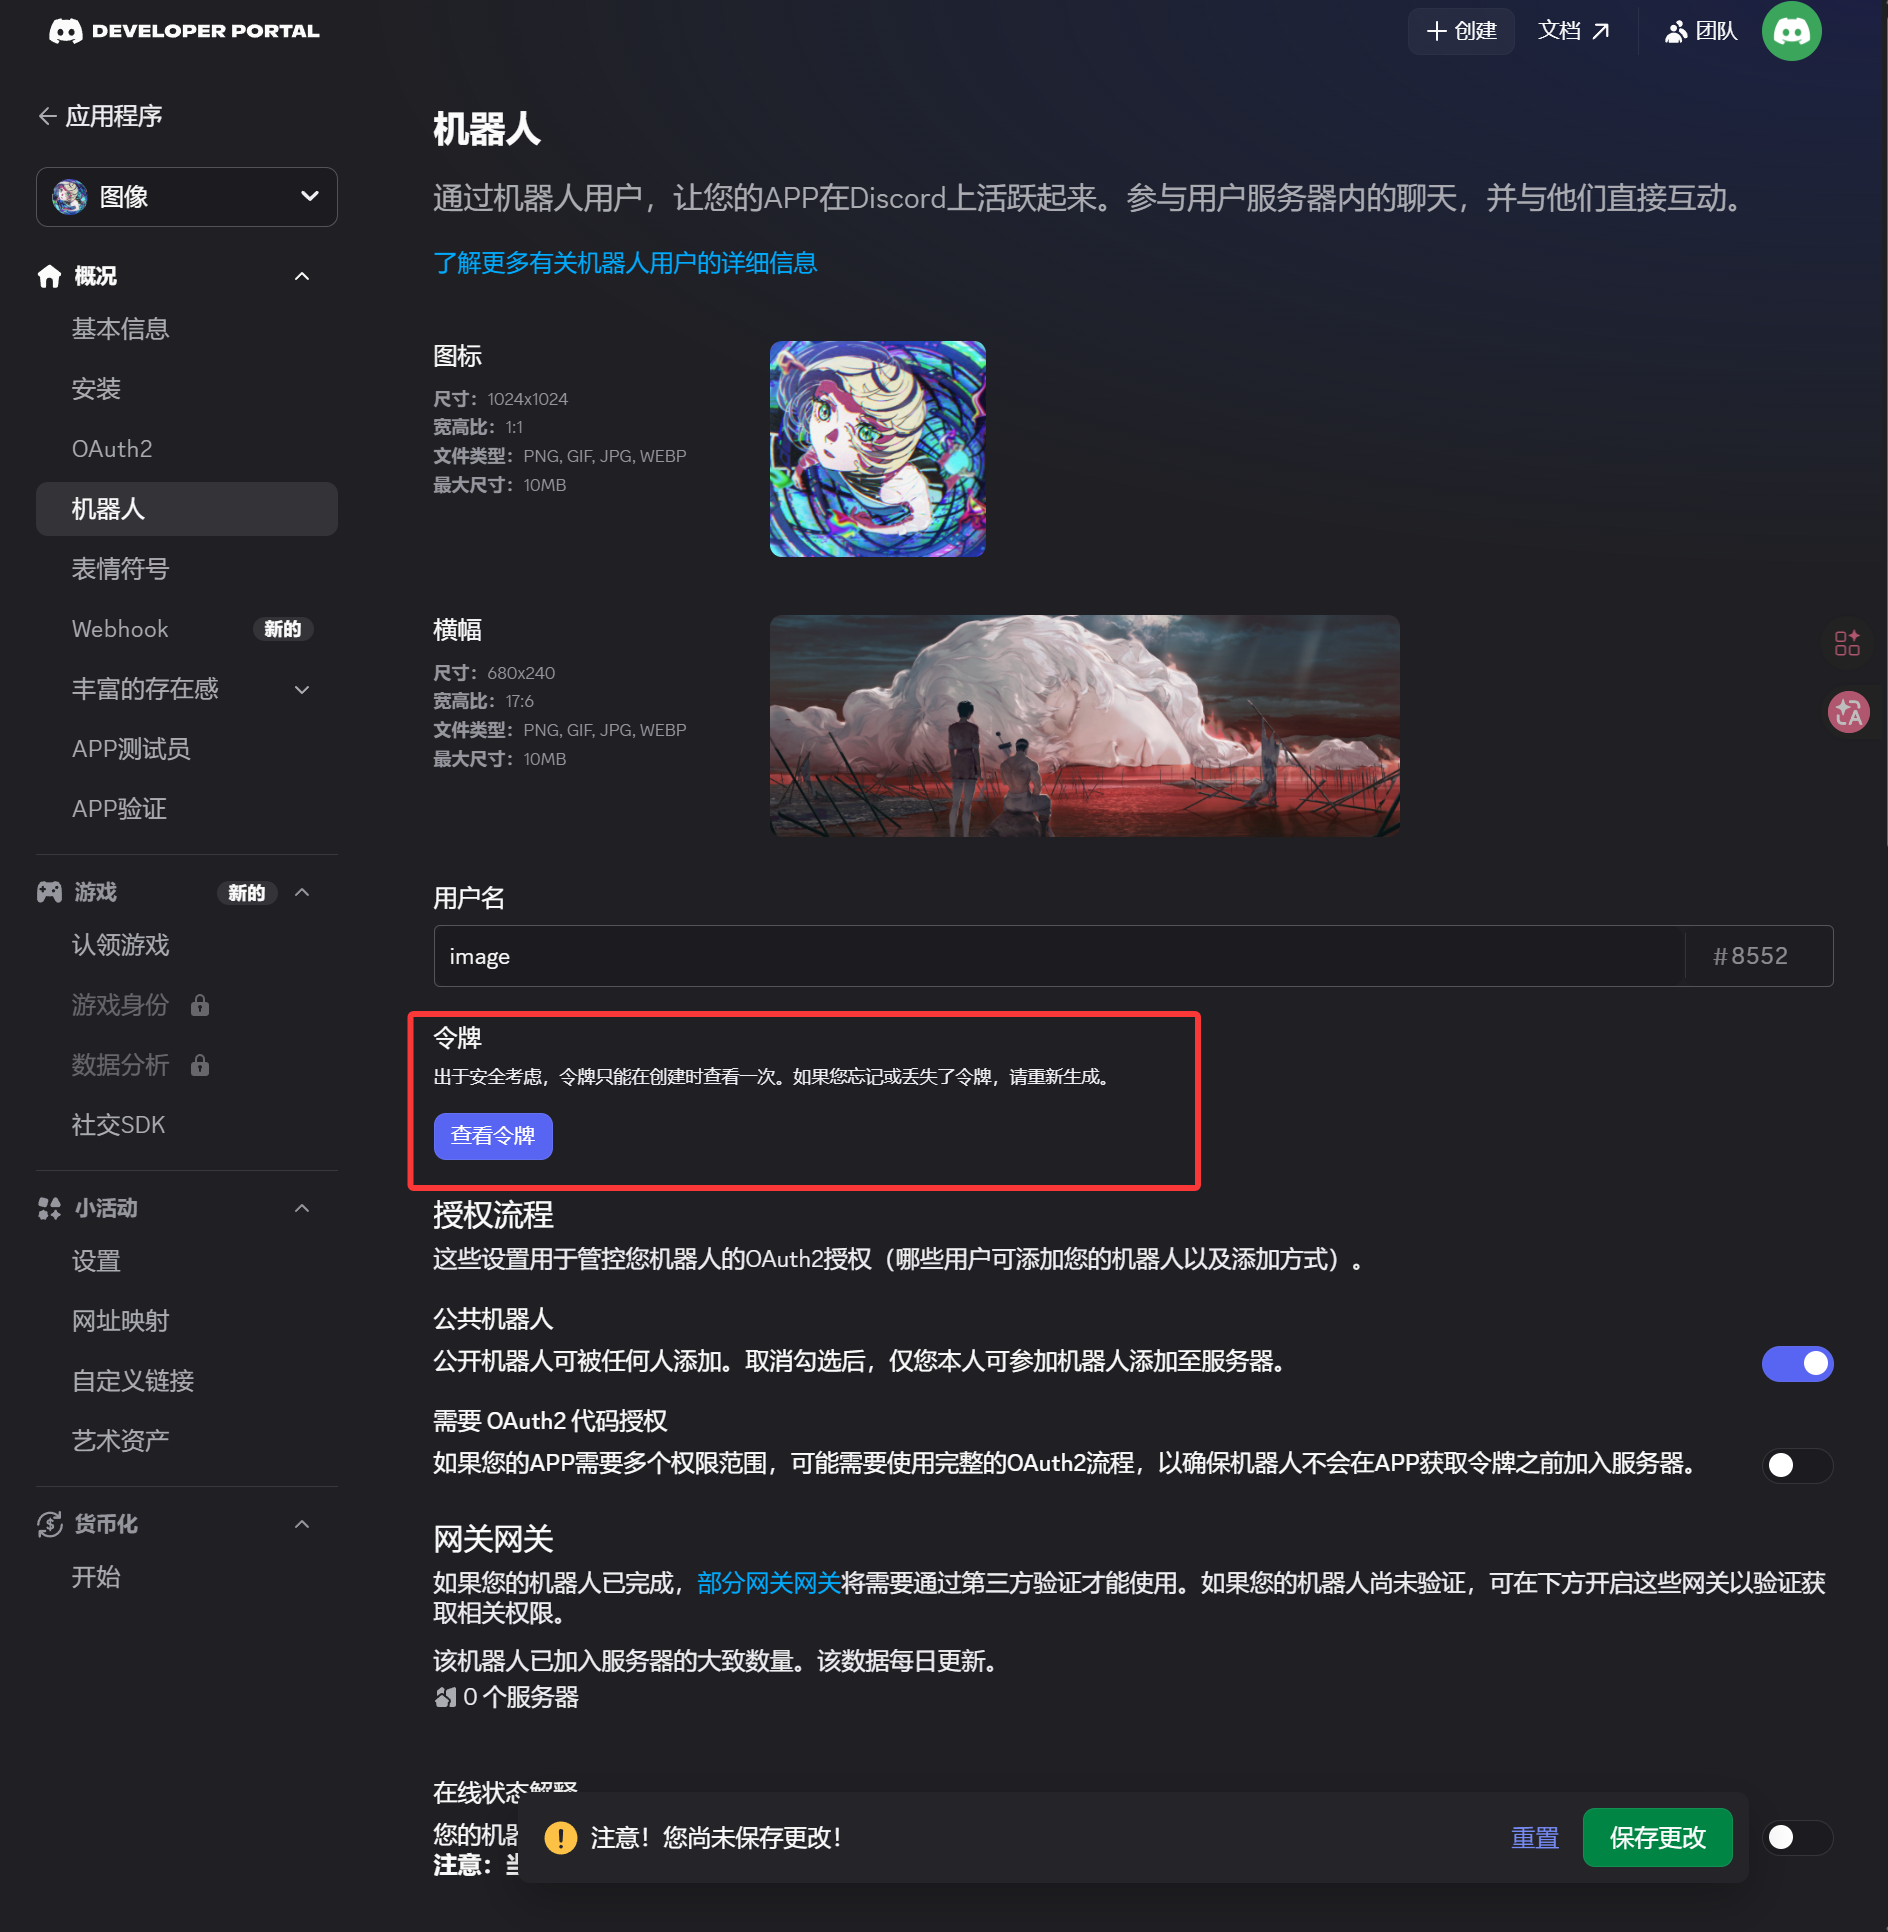
- เปิดหน้า
Botจาก left sidebar - Generate หรือ reset token ในหน้า
Bot - Save token ไว้
Token นี้คือ Bot Token ที่ต้องใส่ใน ImgBed
3. สร้าง OAuth2 Invite Link และ Install Bot
- เปิดหน้า
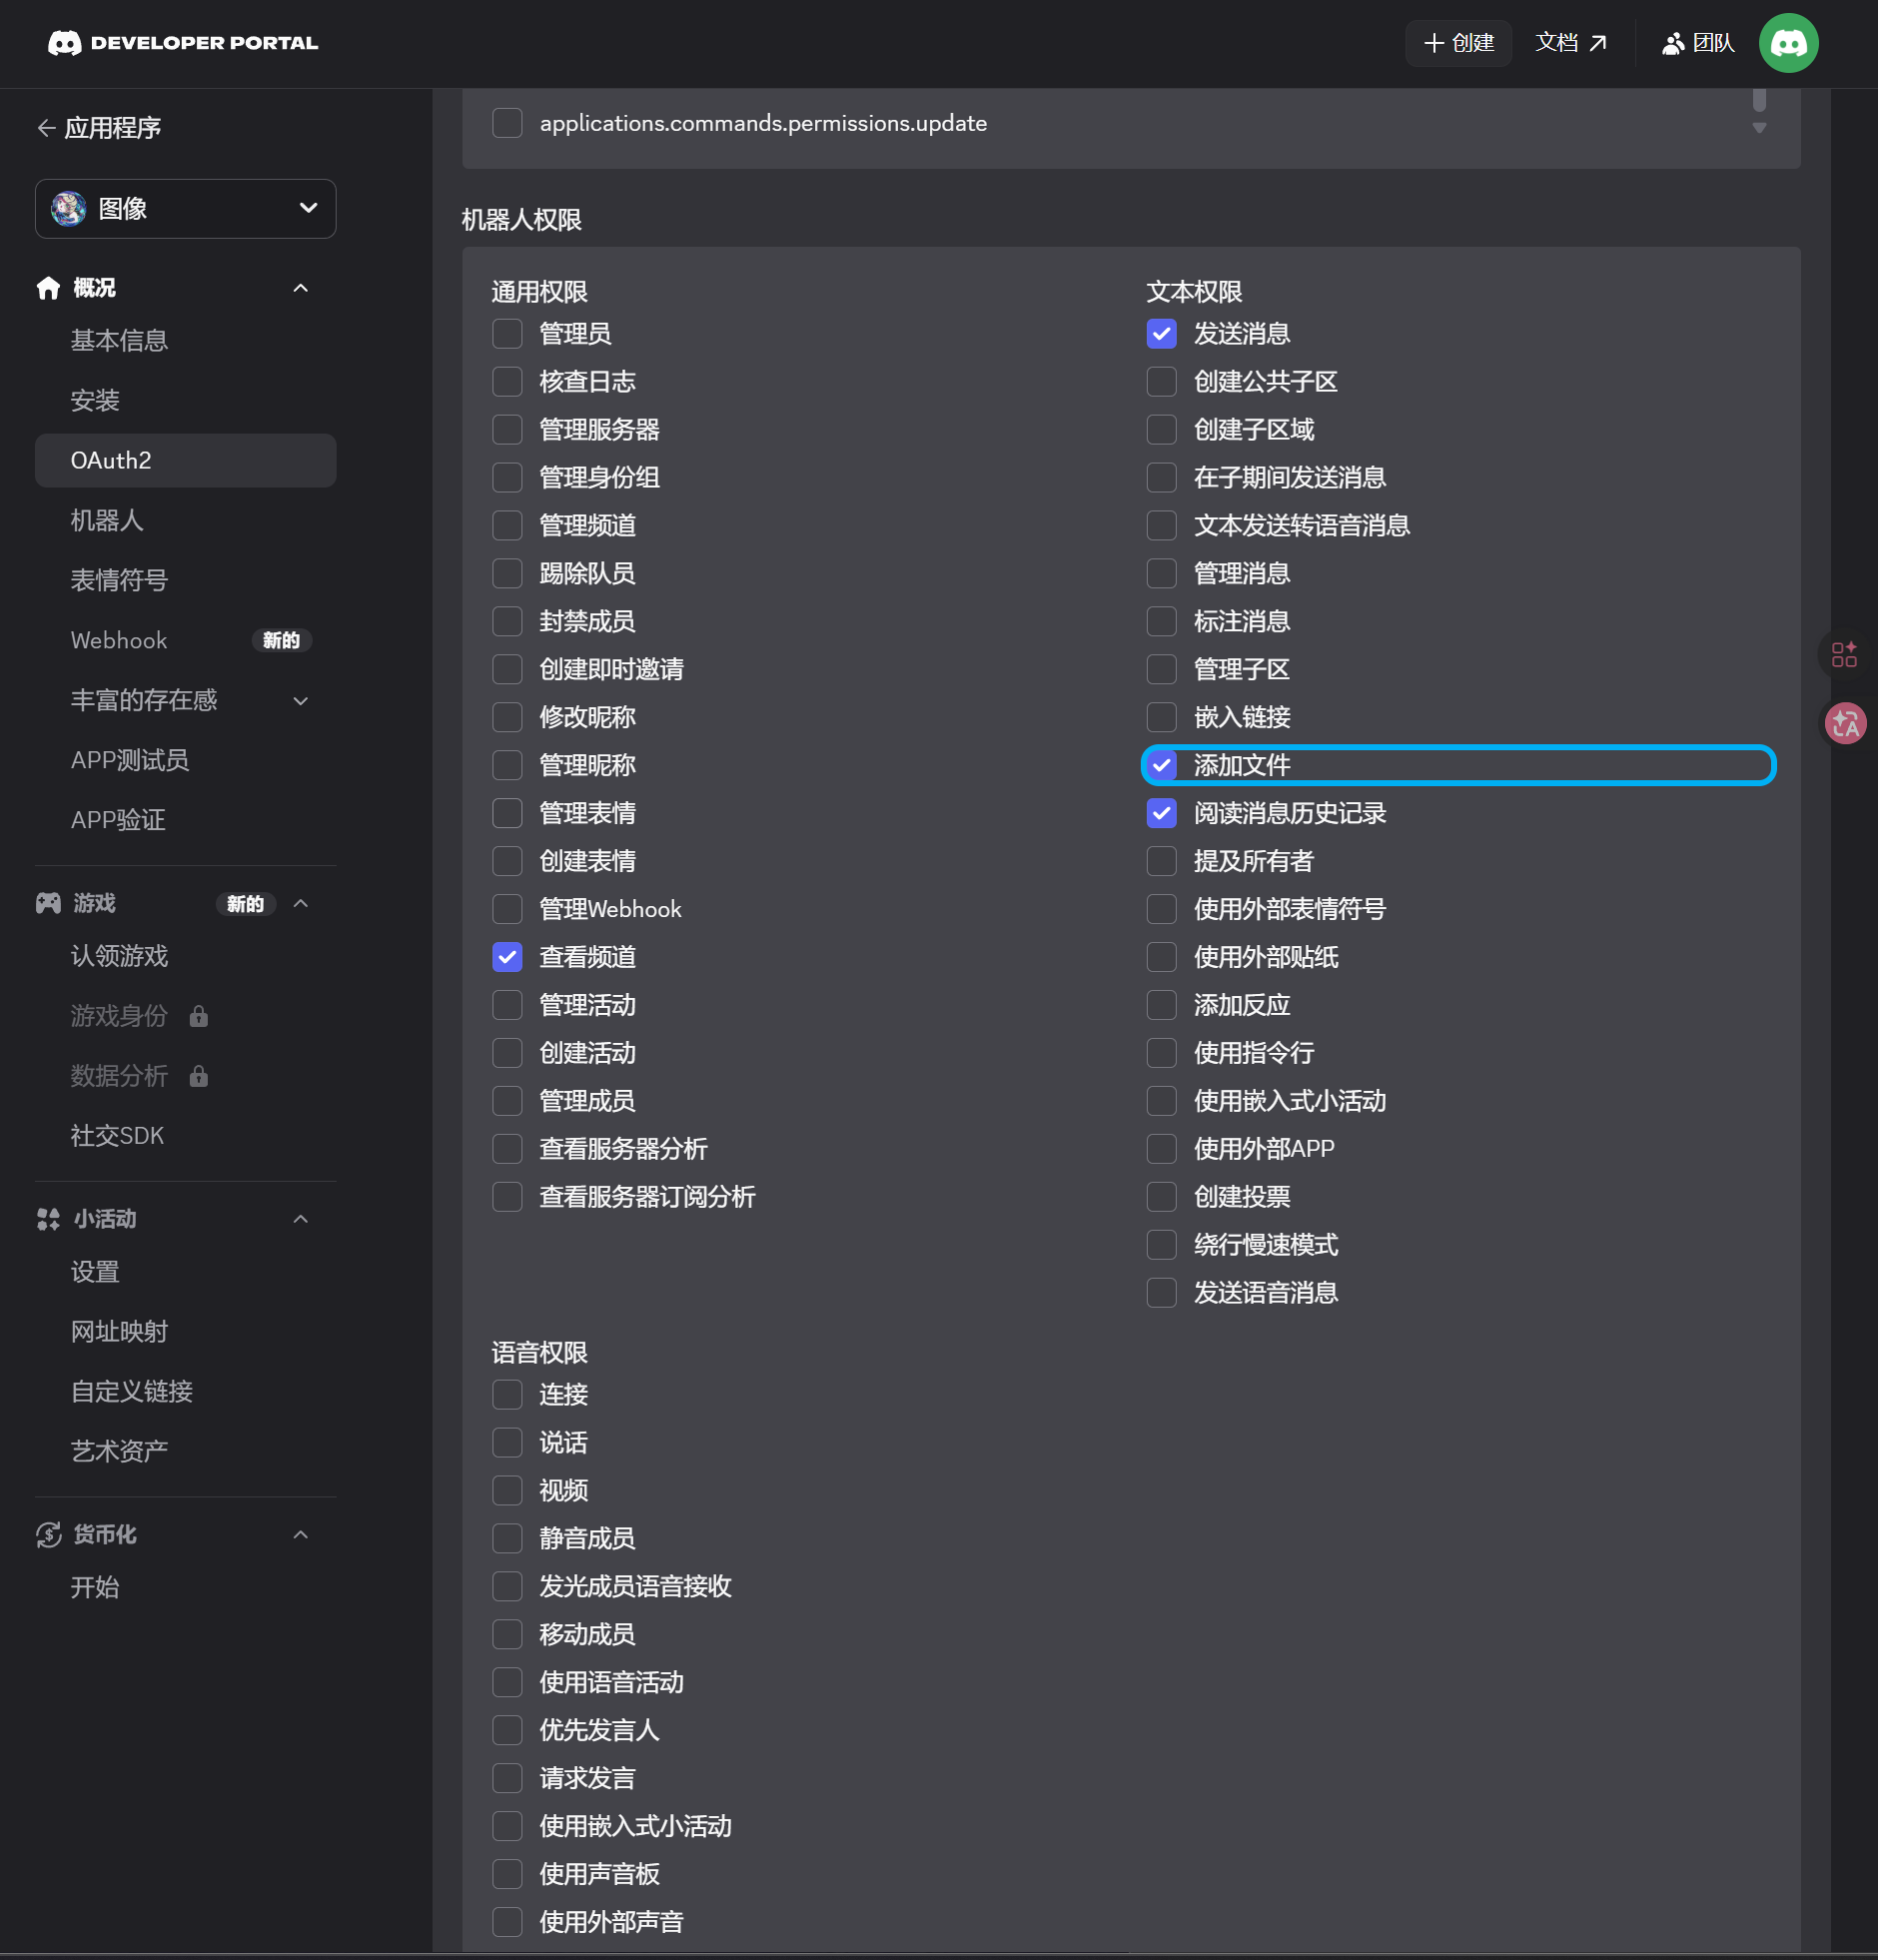
OAuth2จาก left sidebar - ใน scopes ให้เลือก
bot - ใน permission area ให้ enable permissions เหล่านี้:
| Permission | Required |
|---|---|
| View Channels | Yes |
| Send Messages | Yes |
| Attach Files | Yes |
| Read Message History | Yes |
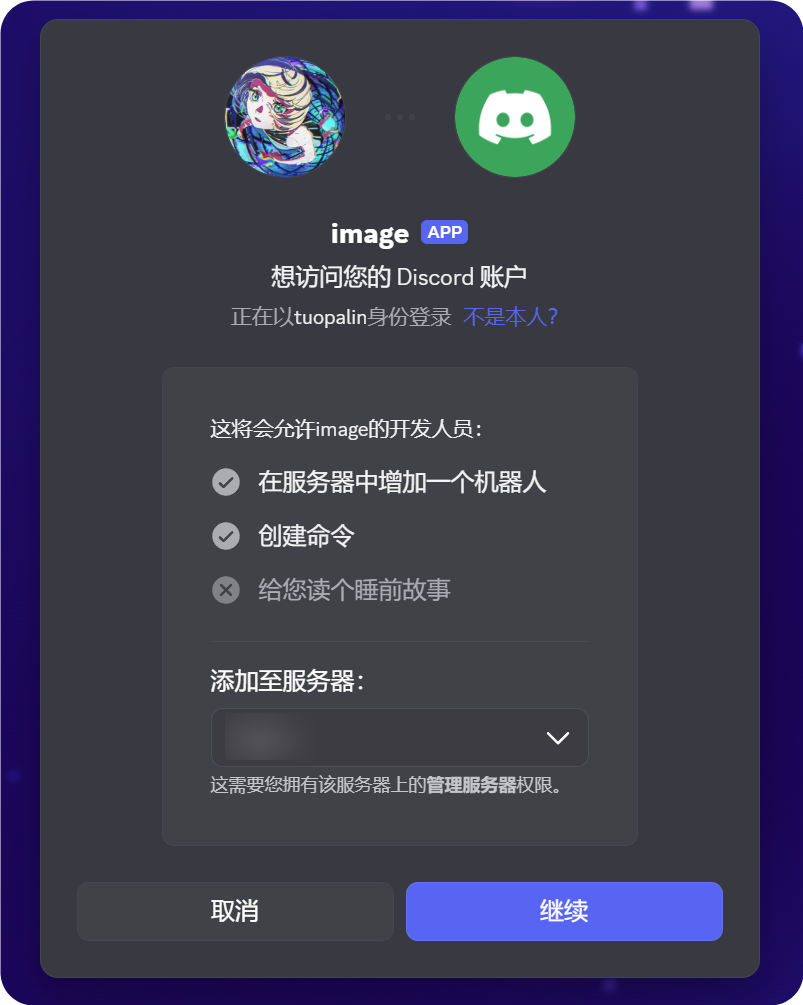
- ด้านล่างของ page ให้ confirm ว่า integration type เป็น
Guild Install - Copy generated URL
- เปิด URL นั้นใน browser
- เลือก target server
- ทำ authorization flow ให้เสร็จ
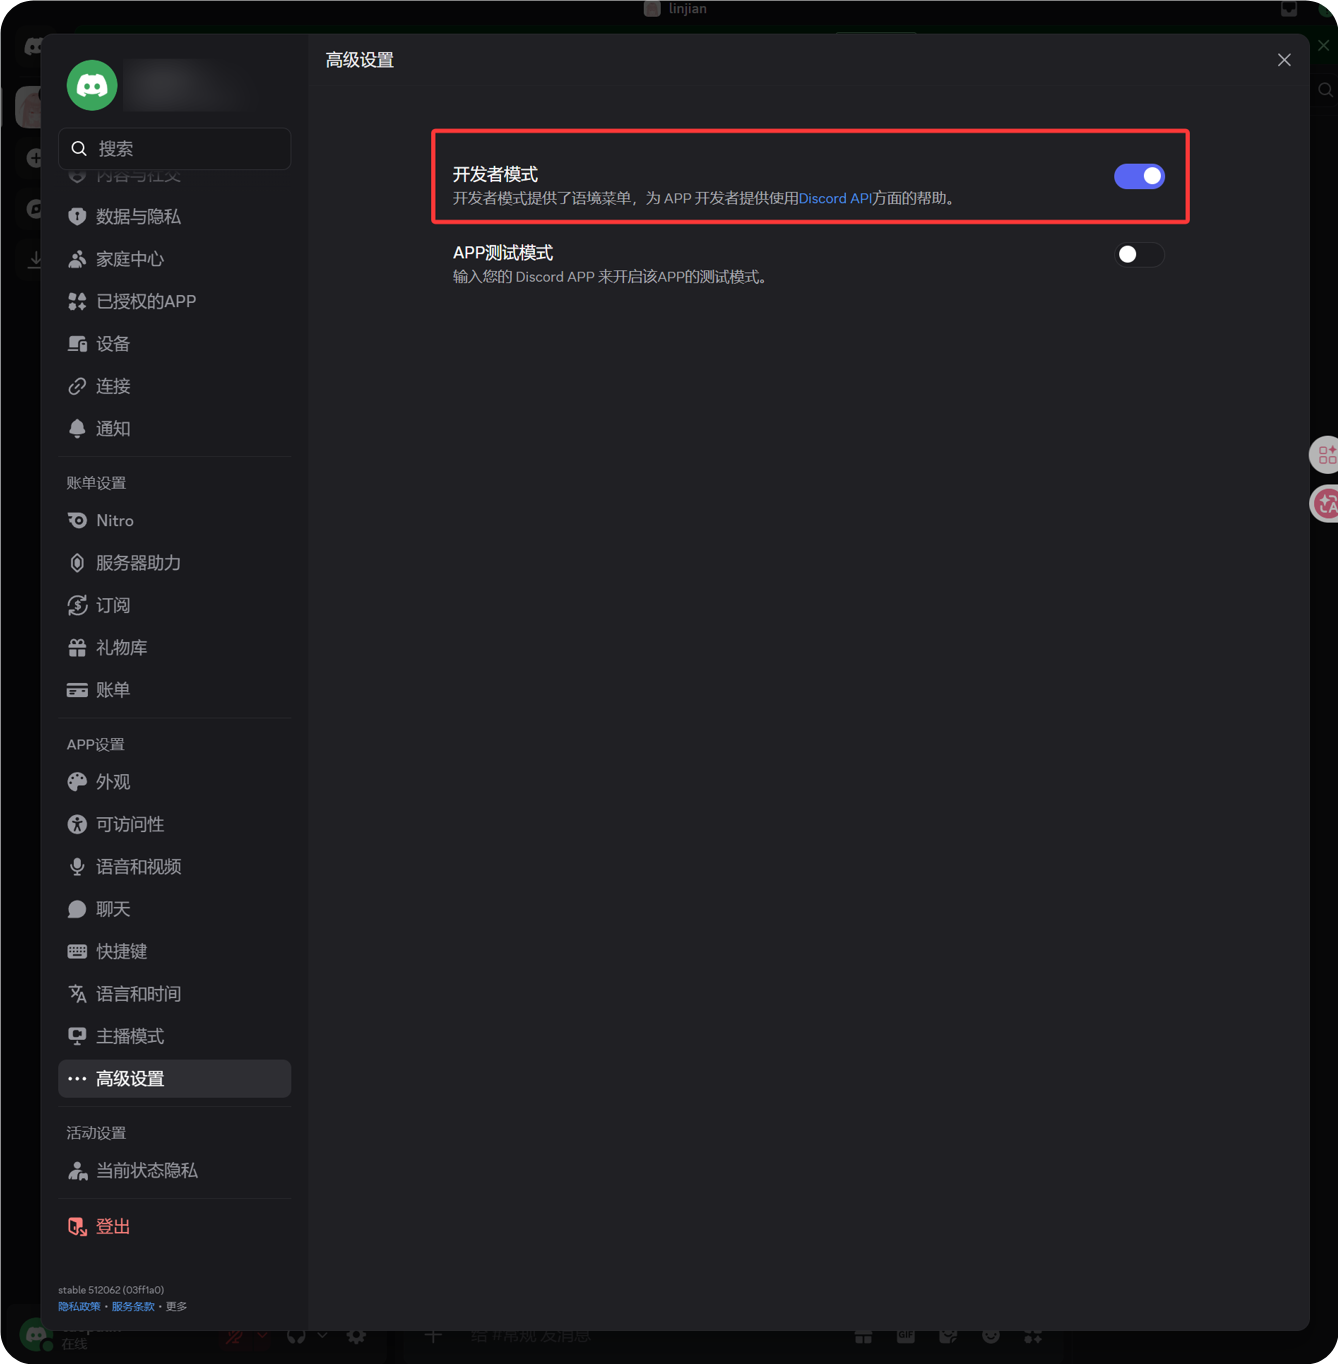
4. Enable Developer Mode และ Copy Channel ID
- คลิก gear icon ข้าง avatar มุมซ้ายล่างของ Discord
- เปิด Advanced จาก left sidebar
- Enable Developer Mode
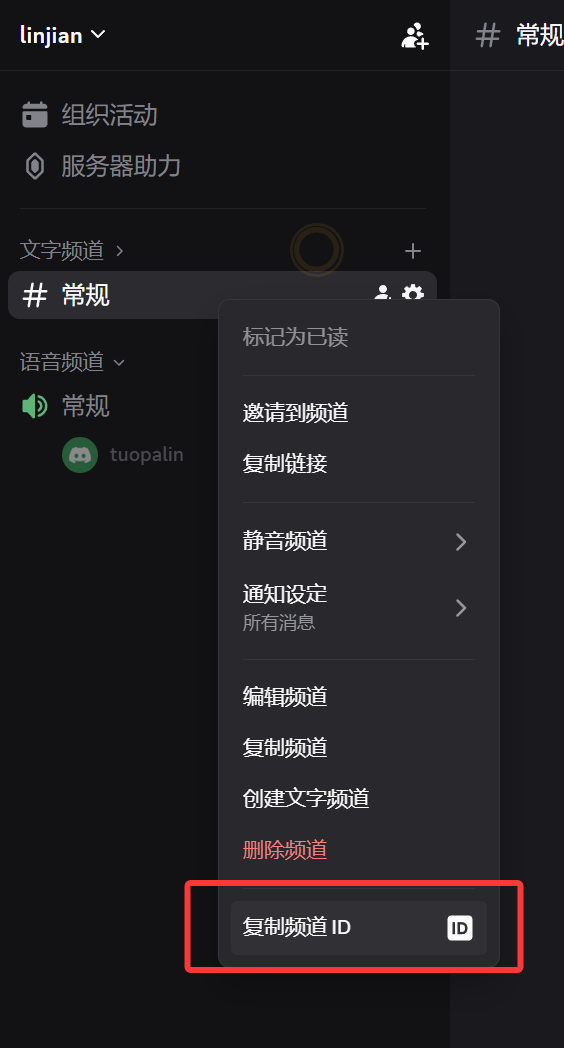
- กลับไปที่ target text channel
- Right-click ชื่อ channel
- คลิก Copy Channel ID
เลขที่ copy ได้คือ Channel ID ที่ ImgBed ต้องใช้
5. ใส่ Discord Channel ใน ImgBed
กลับไปที่ channel configuration dialog แล้วกรอกดังนี้:
| UI Field | Value |
|---|---|
| Channel name | Custom channel name เช่น DiscordPrimary |
| Bot Token | Token ที่ save จากหน้า Bot ใน Discord Developer Portal |
| Channel ID | Channel ID ที่ copy จาก Discord |
| Proxy URL (optional) | ใส่เฉพาะเมื่อจำเป็น เช่น https://your-proxy.example.com |
กรอกครบแล้วคลิก Save

วิธีตรวจสอบ
| Check | วิธีตรวจสอบ |
|---|---|
| เห็น channel card | หลัง save หน้า Upload Settings ควรแสดง Discord channel card |
| Channel เปิดใช้งานได้ | Active switch ควรอยู่ on |
| Configuration ถูกบันทึก | Detail view ควรแสดงว่า Bot Token และ Channel ID ถูกบันทึกแล้ว |
| Upload ใช้งานได้ | Upload test image แล้วตรวจว่าไปปรากฏใน target Discord text channel |
Quick Checklist
text
สร้าง Discord server
-> สร้าง text channel
-> สร้าง bot ใน Discord Developer Portal
-> Save Bot Token จากหน้า Bot
-> ใน OAuth2 เลือก bot, View Channels, Send Messages, Attach Files และ Read Message History
-> Copy generated URL แล้ว authorize bot ให้ target server
-> ตรวจว่า target text channel ให้ permissions เดียวกัน
-> Enable Developer Mode
-> Right-click target text channel แล้ว copy Channel ID
-> ใส่ Bot Token และ Channel ID ใน ImgBed
-> Save แล้ว upload test image
References
- Discord Developers Getting Started: https://docs.discord.com/developers/quick-start/getting-started
- Discord Help - Where can I find my User/Server/Message ID: https://support.discord.com/hc/en-us/articles/206346498-Where-can-I-find-my-User-Server-Message-ID