เพิ่ม Google Drive Channel
สิ่งที่ต้องเตรียมก่อน
ก่อนเริ่ม ให้เตรียมสิ่งเหล่านี้:
| Requirement | ทำไมต้องใช้ |
|---|---|
| Google account | ใช้ access Google Cloud และ authorize Google Drive |
| Google Cloud project | ใช้ enable Drive API และ create OAuth credentials |
| OAuth 2.0 client | ImgBed ใช้รับ Client ID, Client Secret และ Refresh Token |
| ImgBed domain ของคุณ | ใช้เป็น OAuth redirect URI ต้องตรงกับ domain ที่ใช้จริง |
ขั้นตอนตั้งค่า
Step 1: Enable Google Drive API
- เปิด Google Cloud Console
- สร้าง project ใหม่หรือเลือก existing project
- ไปที่
APIs & Services - คลิก
Enable APIs and Services - ค้นหา
Google Drive API - เปิดแล้วคลิก enable
Step 2: Configure OAuth Consent Screen
- ใน Google Cloud เปิด
Google Auth Platform - กรอกข้อมูลพื้นฐานใน
Brandingเช่น app name, support email และ developer contact email - เปิด
Audience - สำหรับ self-hosted personal deployments ส่วนใหญ่ ให้เลือก
External - ถ้าเลือก
Externalให้เพิ่ม Google account ที่ต้องการ authorize ในTest users - เปิด
Data Access - เพิ่ม Google Drive permissions ที่ต้องใช้
Step 3: สร้าง OAuth 2.0 Client
- ใน
Google Auth PlatformเปิดClients - สร้าง client ใหม่
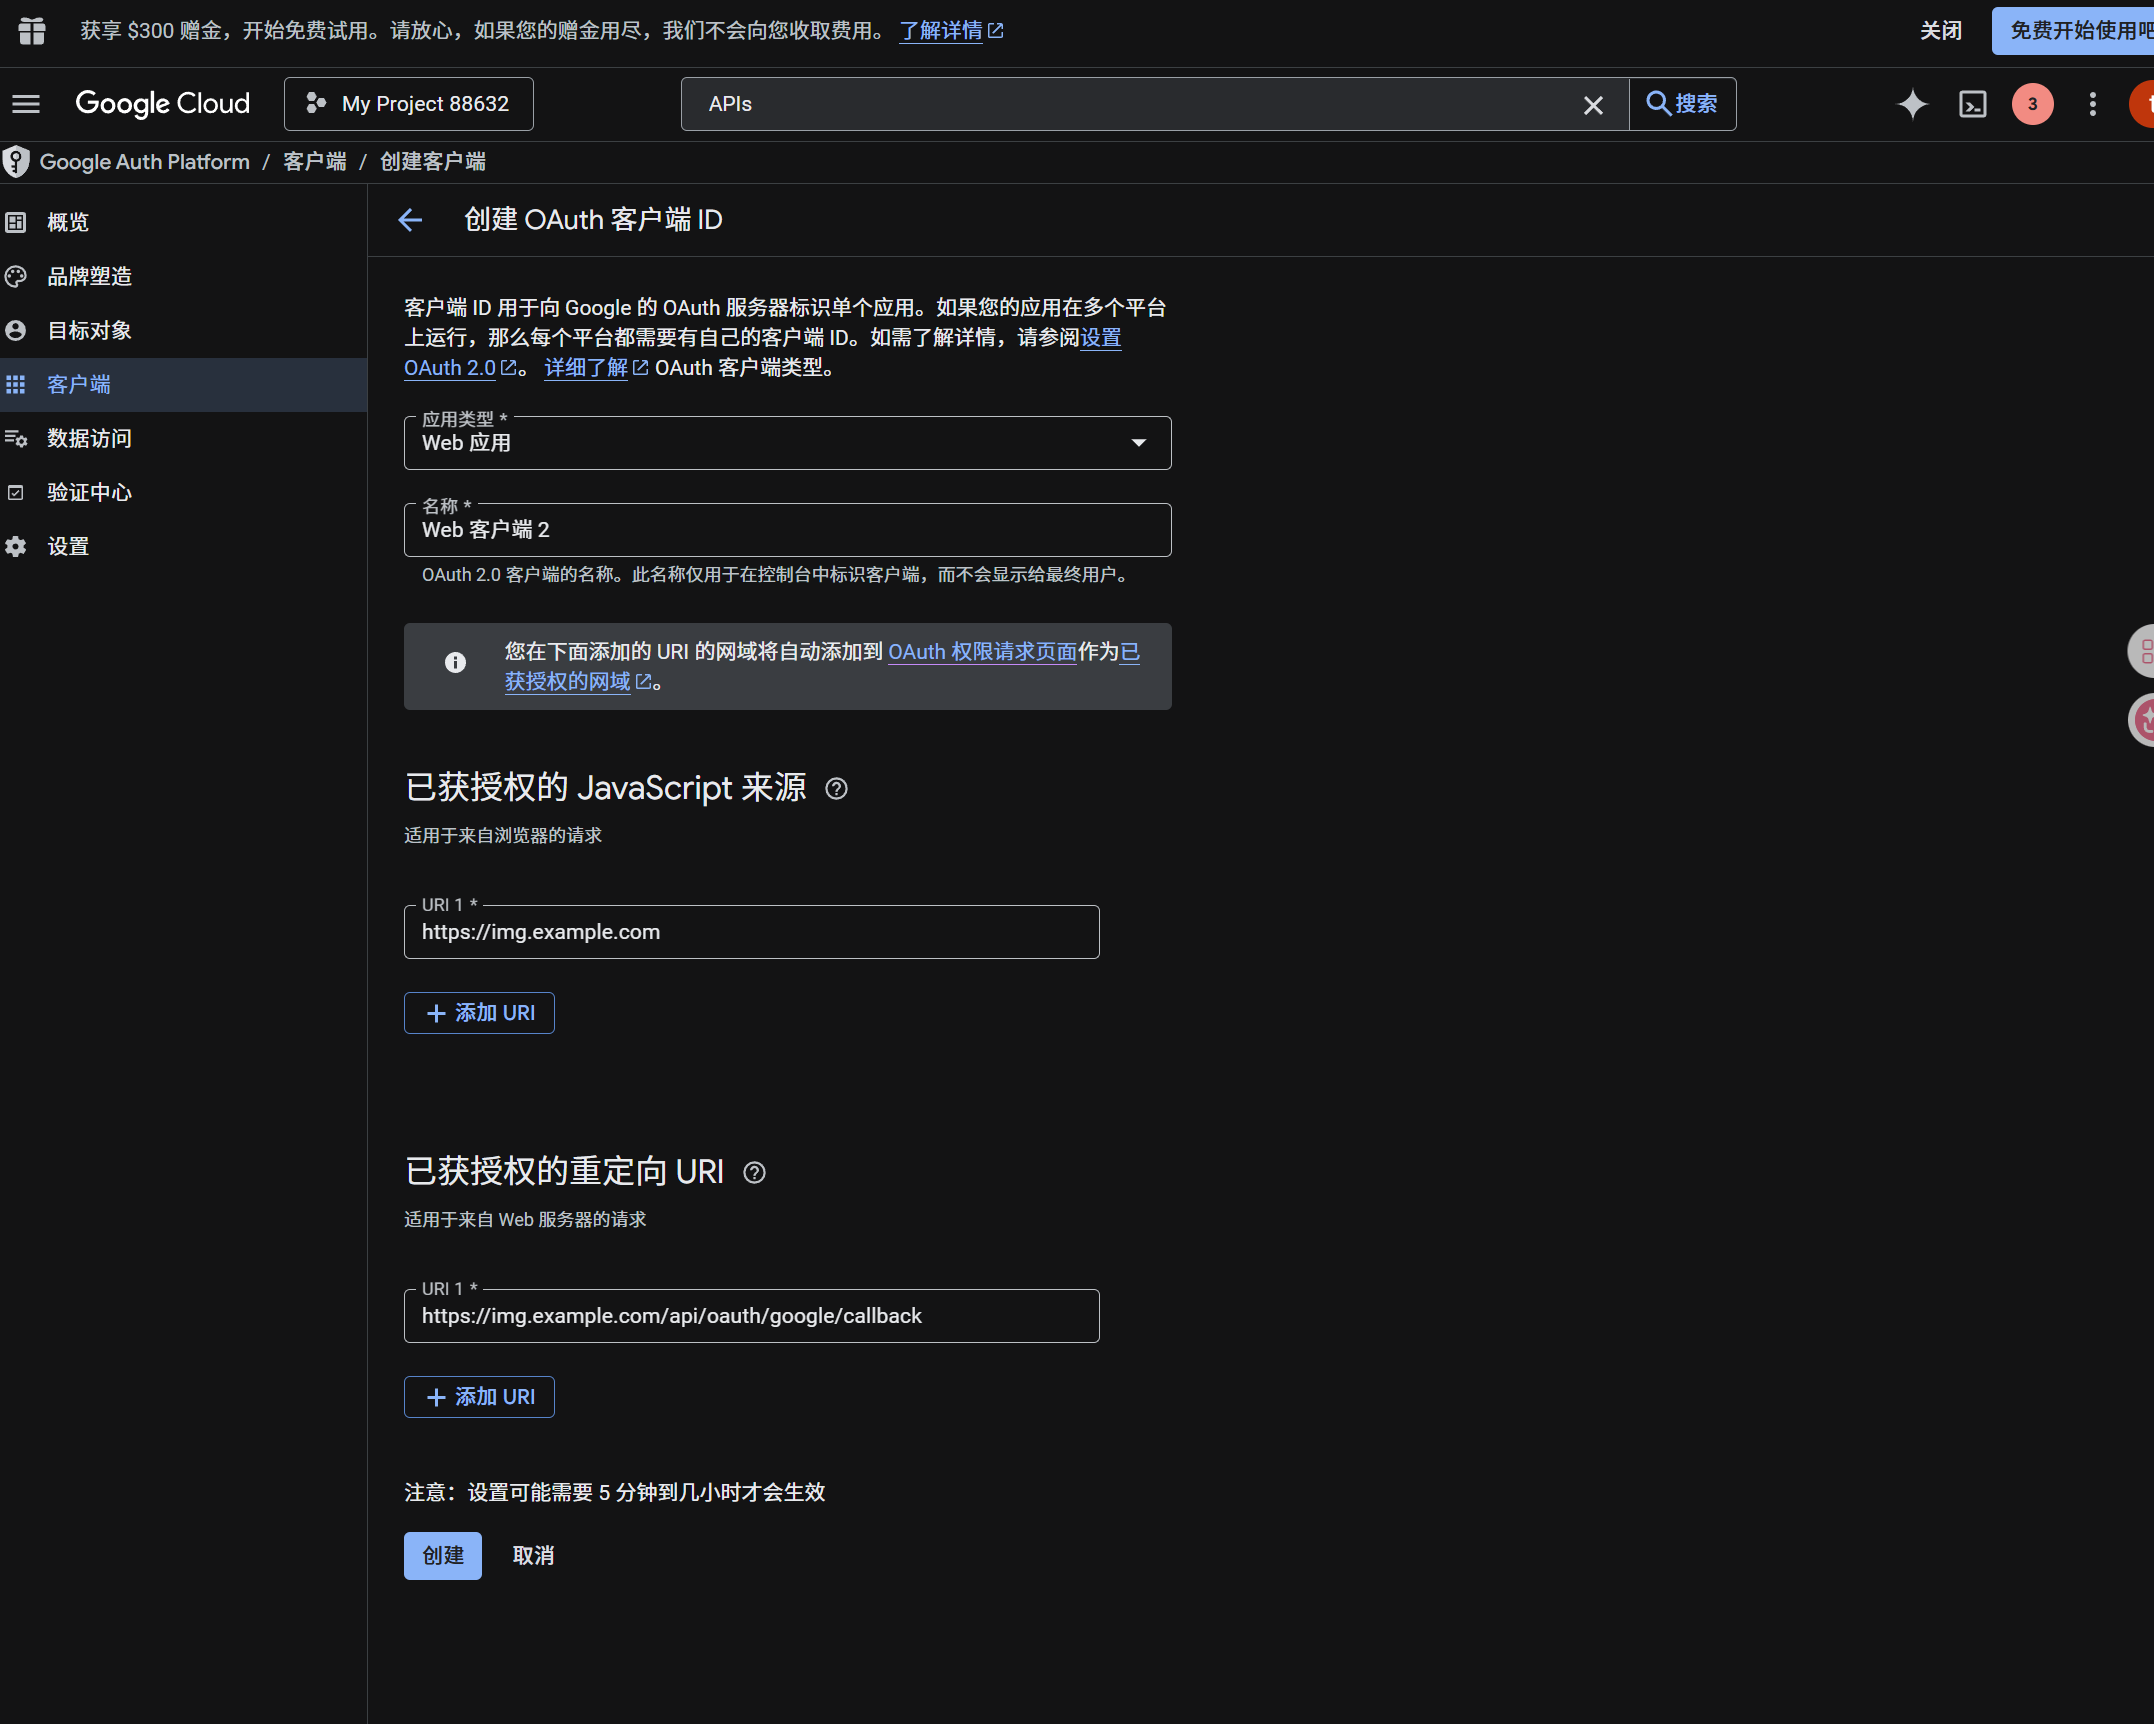
- ตั้ง application type เป็น
Web application - ตั้งชื่อ client ให้จำง่าย
- สำหรับ authorized JavaScript origins ให้ใส่ ImgBed URL เช่น:
text
https://img.example.com- สำหรับ authorized redirect URIs ให้ใส่:
text
https://img.example.com/api/oauth/google/callback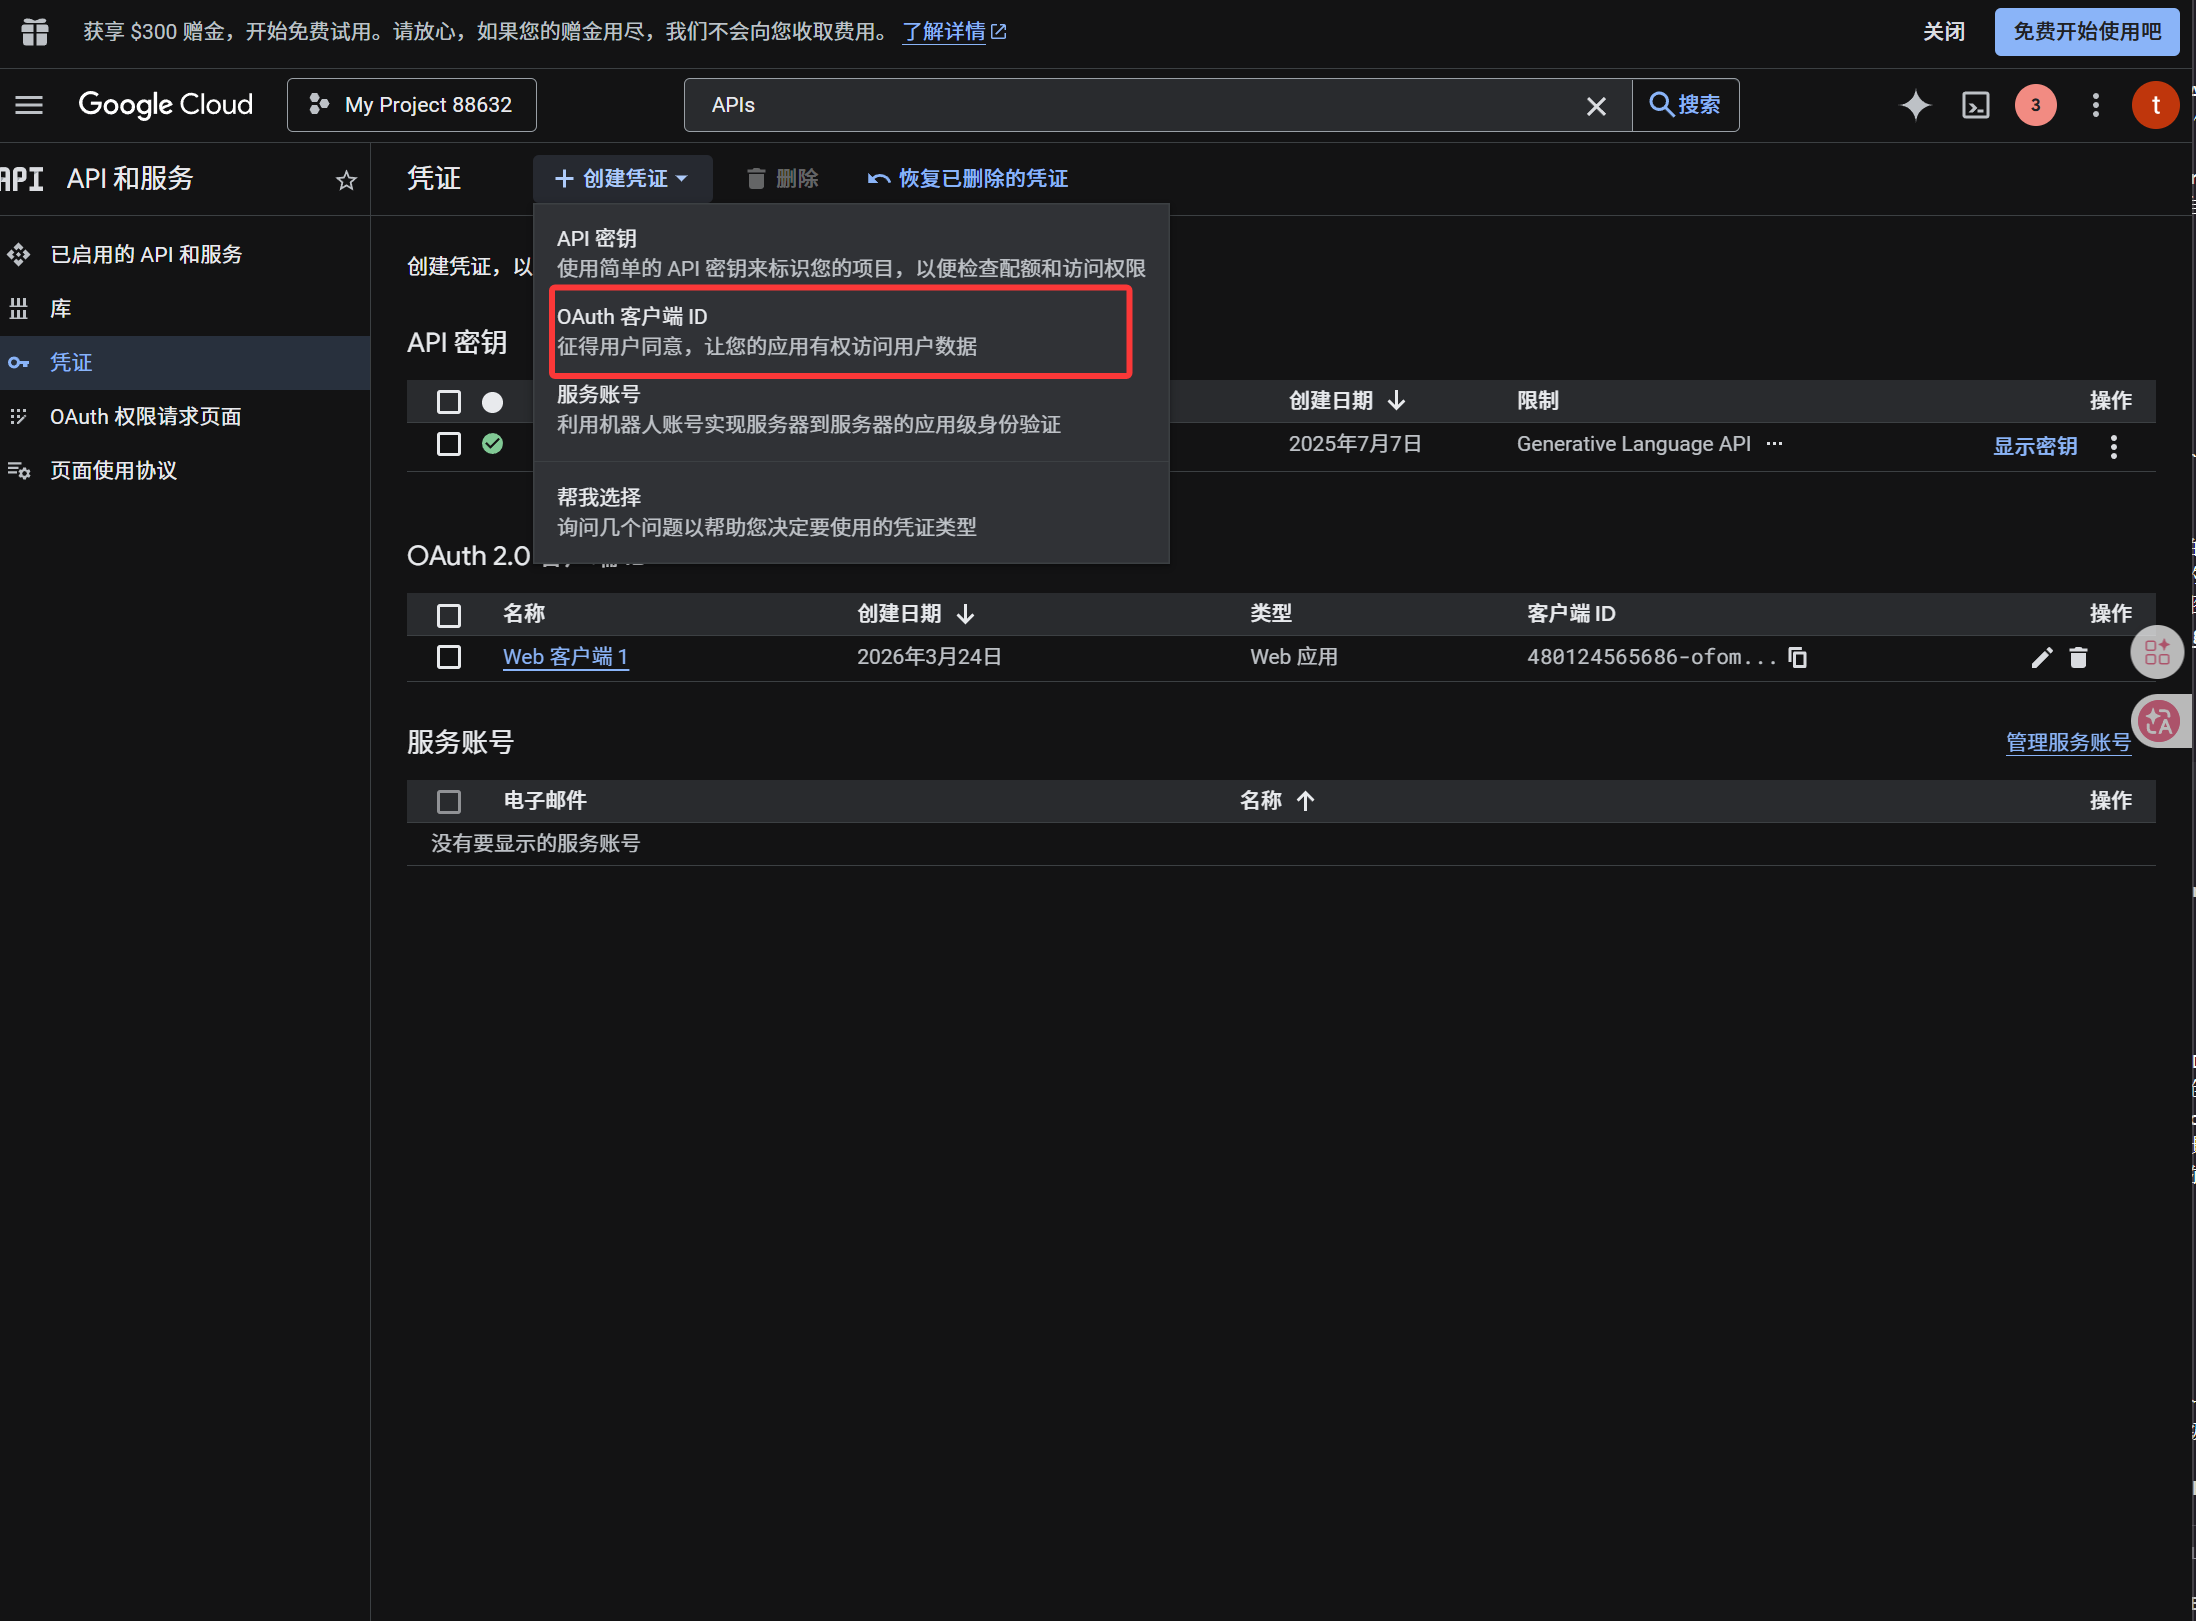
หลังสร้าง client แล้ว ให้ copy values เหล่านี้:
| Generated Value | ImgBed Field |
|---|---|
| Client ID | Client ID |
| Client Secret | Client Secret |
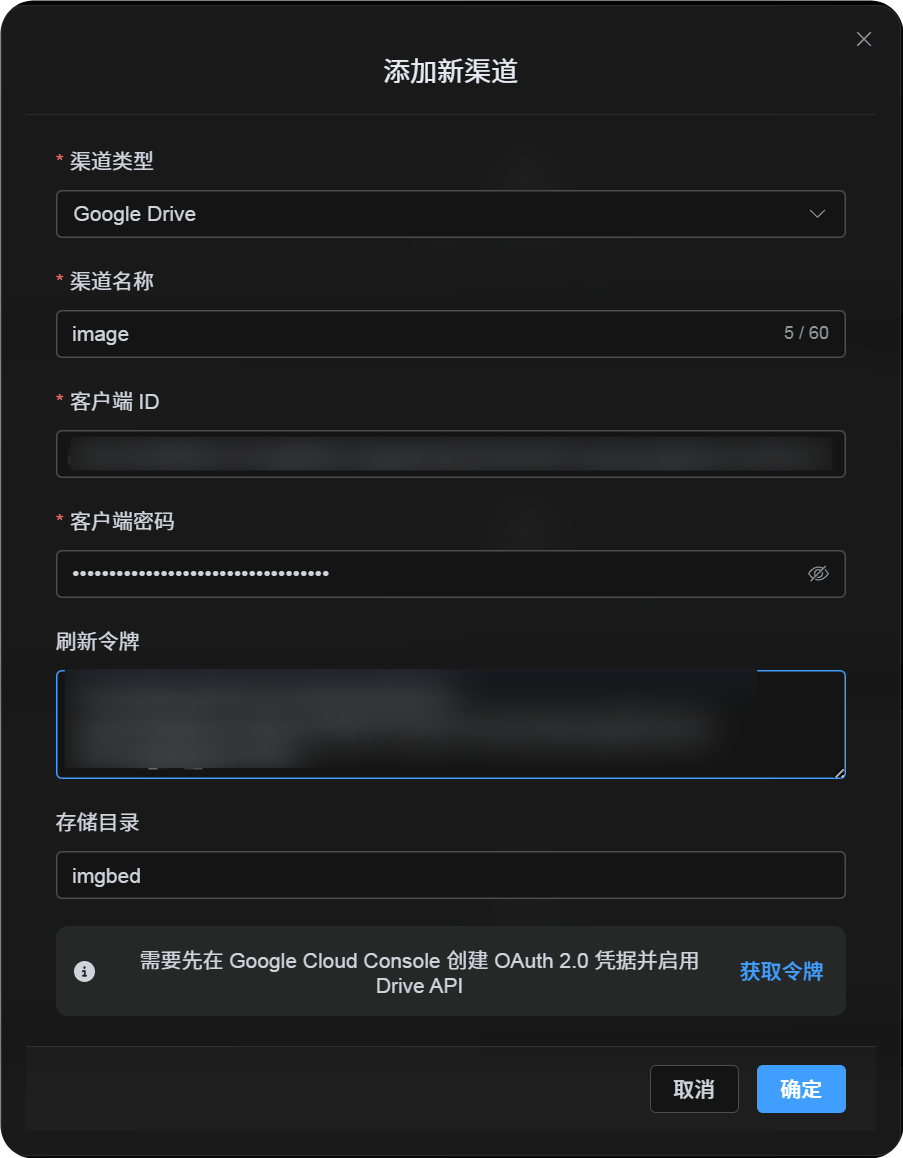
Step 4: ใส่ Google Drive Channel
ใน Upload Settings เลือก Google Drive แล้วกรอก:
| ImgBed Field | ใส่อะไร |
|---|---|
| Channel name | ชื่อที่จำง่าย เช่น Main Google Drive |
| Client ID | Client ID จาก Google Cloud |
| Client Secret | Client Secret จาก Google Cloud |
| Refresh Token | เว้นว่างไว้ก่อน รับใน step ถัดไป |
| Root directory | Optional ค่าเริ่มต้นคือ imgbed |
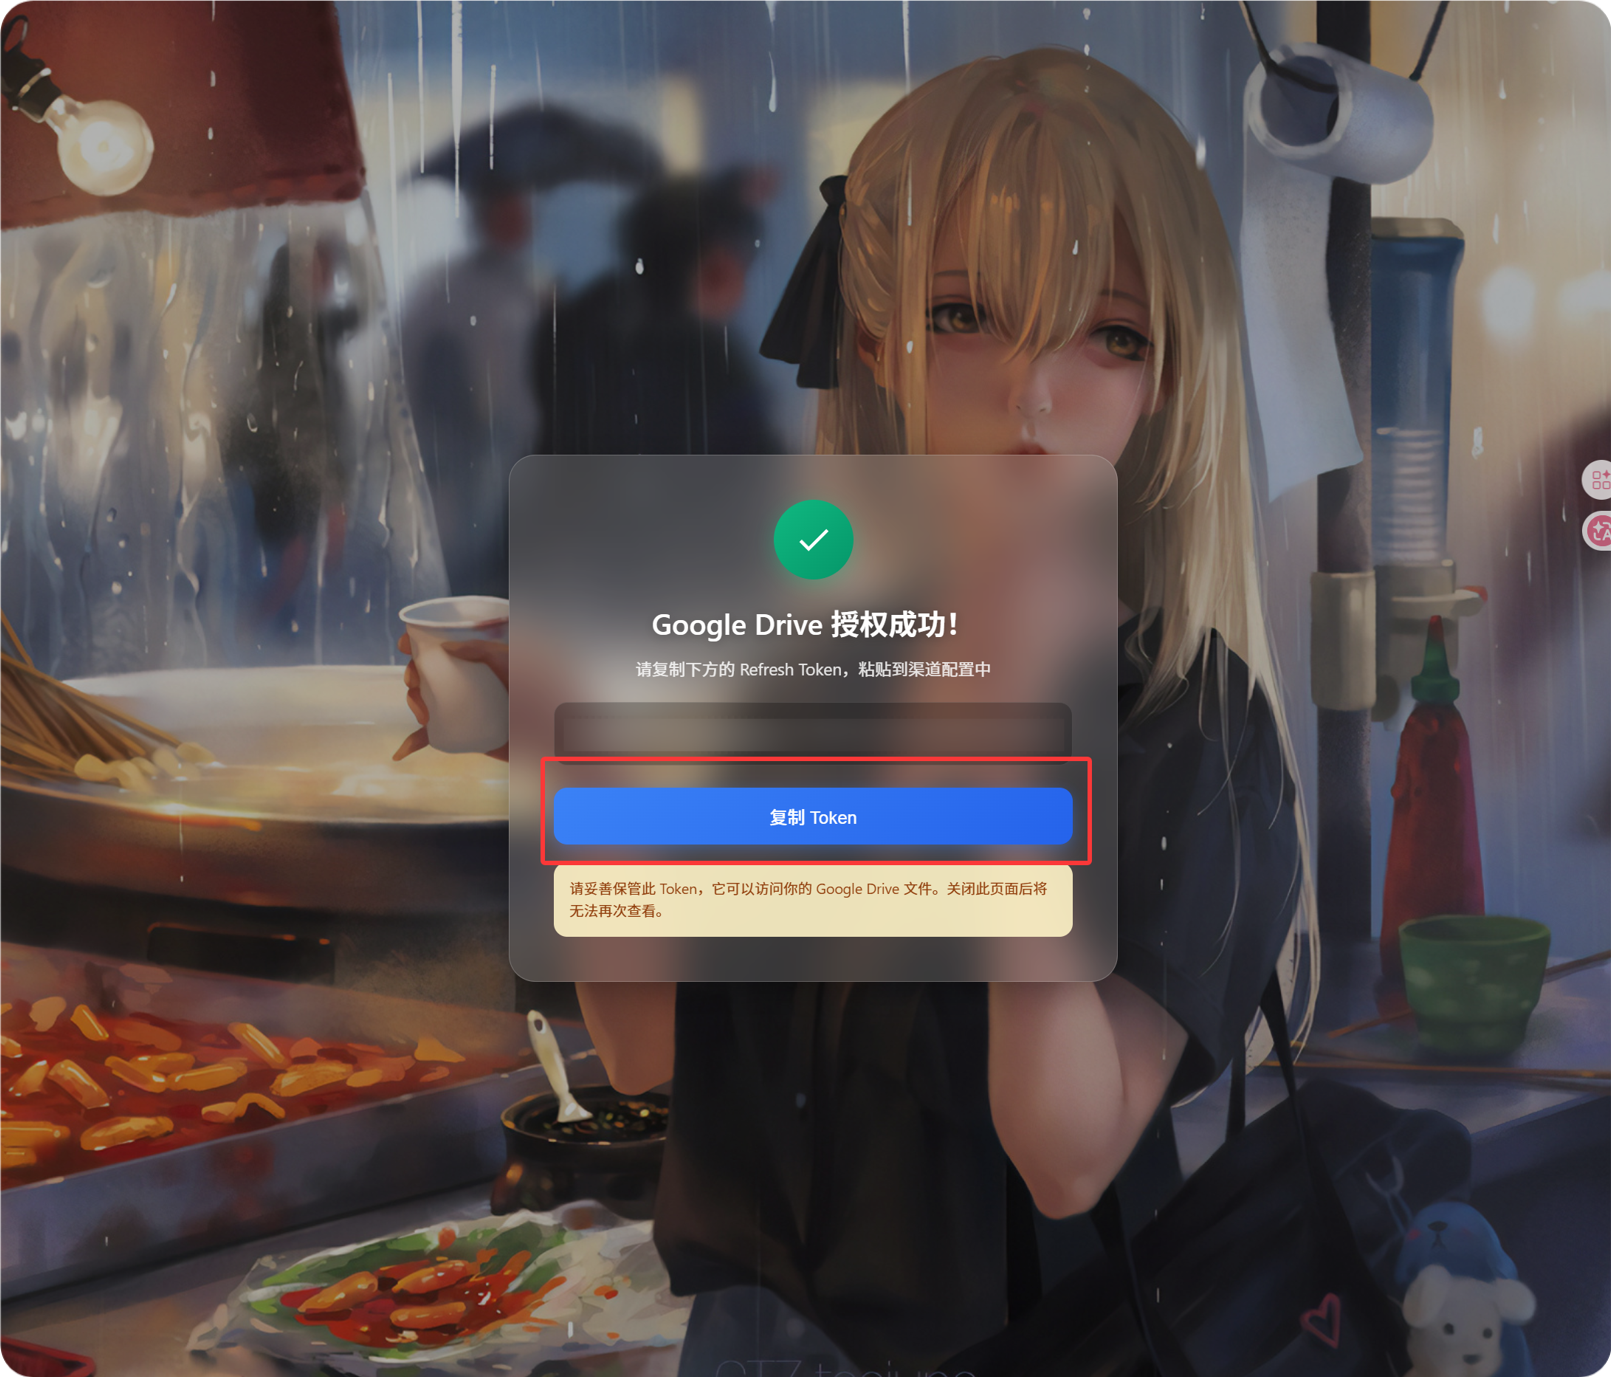
Step 5: รับ Refresh Token
- คลิก
Get Token - เลือก Google account ที่ต้องการเชื่อมต่อ
- ทำ authorization prompts ให้เสร็จ
- Callback page จะแสดง
Refresh Token - Copy token นั้น
- กลับไปที่ ImgBed แล้ว paste ใน field
Refresh Token
ถ้าภายหลังเปลี่ยน Google account, เปลี่ยน OAuth client หรือ authorization เก่าหมดอายุ ไม่จำเป็นต้องลบ channel เปิด edit page แล้วคลิก Reauthorize
Step 6: Save Channel
เมื่อกรอกครบทุก field แล้วให้ save channel
Quick Flow
text
เปิด Google Cloud
-> Create หรือ select project
-> Enable Google Drive API
-> Configure Google Auth Platform
-> ถ้า Audience เป็น External ให้เพิ่ม Google account ใน Test users
-> สร้าง Web application OAuth client
-> ใช้ https://your-domain.com/api/oauth/google/callback เป็น redirect URI
-> ใส่ Client ID และ Client Secret ใน ImgBed
-> คลิก Get Token
-> Sign in ด้วย Google และ authorize
-> Copy Refresh Token จาก callback page
-> Paste กลับเข้า ImgBed แล้ว save
-> Upload test image
References
- Google OAuth Web Server Applications: https://developers.google.com/identity/protocols/oauth2/web-server
- Google Workspace OAuth Consent Configuration: https://developers.google.com/workspace/guides/configure-oauth-consent
- Google Drive API Auth Scopes: https://developers.google.com/workspace/drive/api/guides/api-specific-auth