Google Drive चैनल जोड़ना
पहले क्या चाहिए
शुरू करने से पहले ये items तैयार रखें:
| ज़रूरत | क्यों चाहिए |
|---|---|
| Google account | Google Cloud access और Google Drive authorize करने के लिए |
| Google Cloud project | Drive API enable और OAuth credentials create करने के लिए |
| OAuth 2.0 client | ImgBed को Client ID, Client Secret और Refresh Token पाने के लिए |
| आपका ImgBed domain | OAuth redirect URI के लिए। यह आपके actual used domain से match होना चाहिए। |
Setup Steps
Step 1: Google Drive API enable करें
- Google Cloud Console खोलें।
- नया project बनाएँ या existing project चुनें।
APIs & Servicesपर जाएँ।Enable APIs and Servicesपर क्लिक करें।Google Drive APIsearch करें।- इसे खोलकर enable करें।
Step 2: OAuth Consent Screen configure करें
- Google Cloud में
Google Auth Platformखोलें। - app name, support email और developer contact email जैसी basic
Brandinginformation पूरी करें। Audienceखोलें।- अधिकतर self-hosted personal deployments के लिए
Externalचुनें। - अगर
Externalचुनते हैं, तो authorize करना वाला Google accountTest usersमें जोड़ें। Data Accessखोलें।- required Google Drive permissions जोड़ें।
Step 3: OAuth 2.0 Client बनाएँ
Google Auth PlatformमेंClientsखोलें।- नया client बनाएँ।
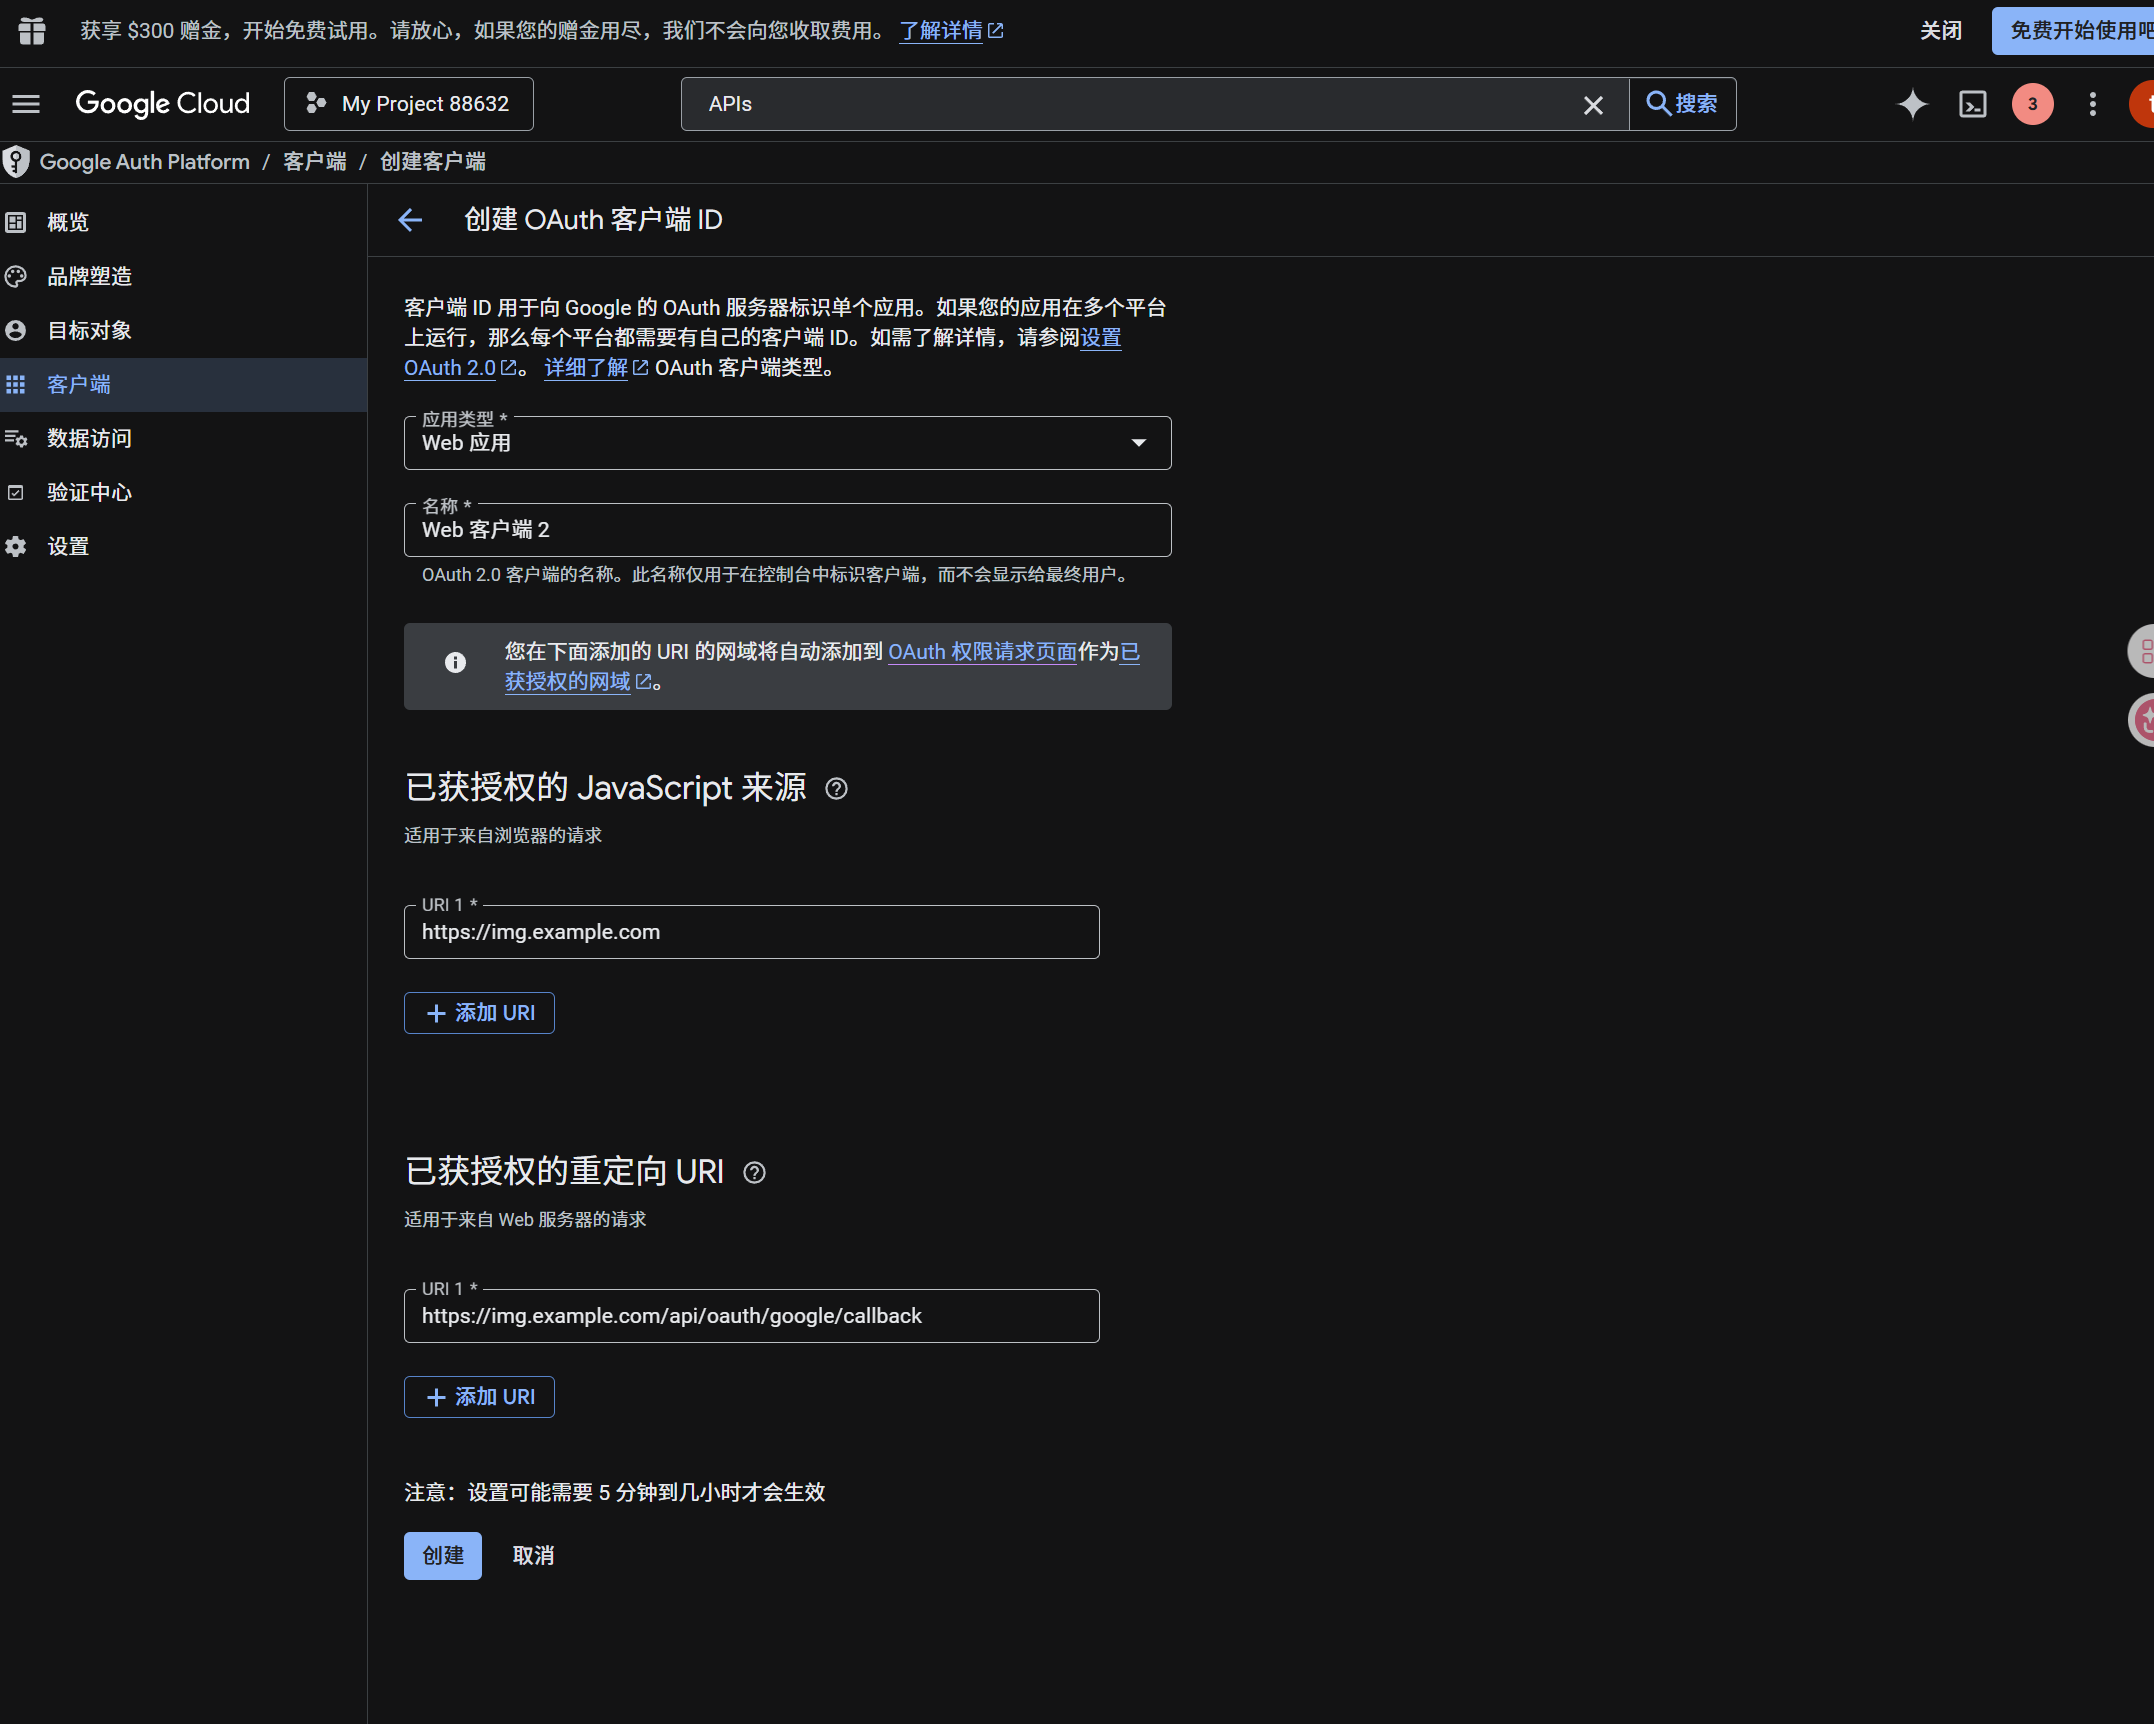
- application type को
Web applicationकरें। - client को पहचानने लायक नाम दें।
- authorized JavaScript origins में अपना ImgBed URL डालें, जैसे:
text
https://img.example.com- authorized redirect URIs में डालें:
text
https://img.example.com/api/oauth/google/callback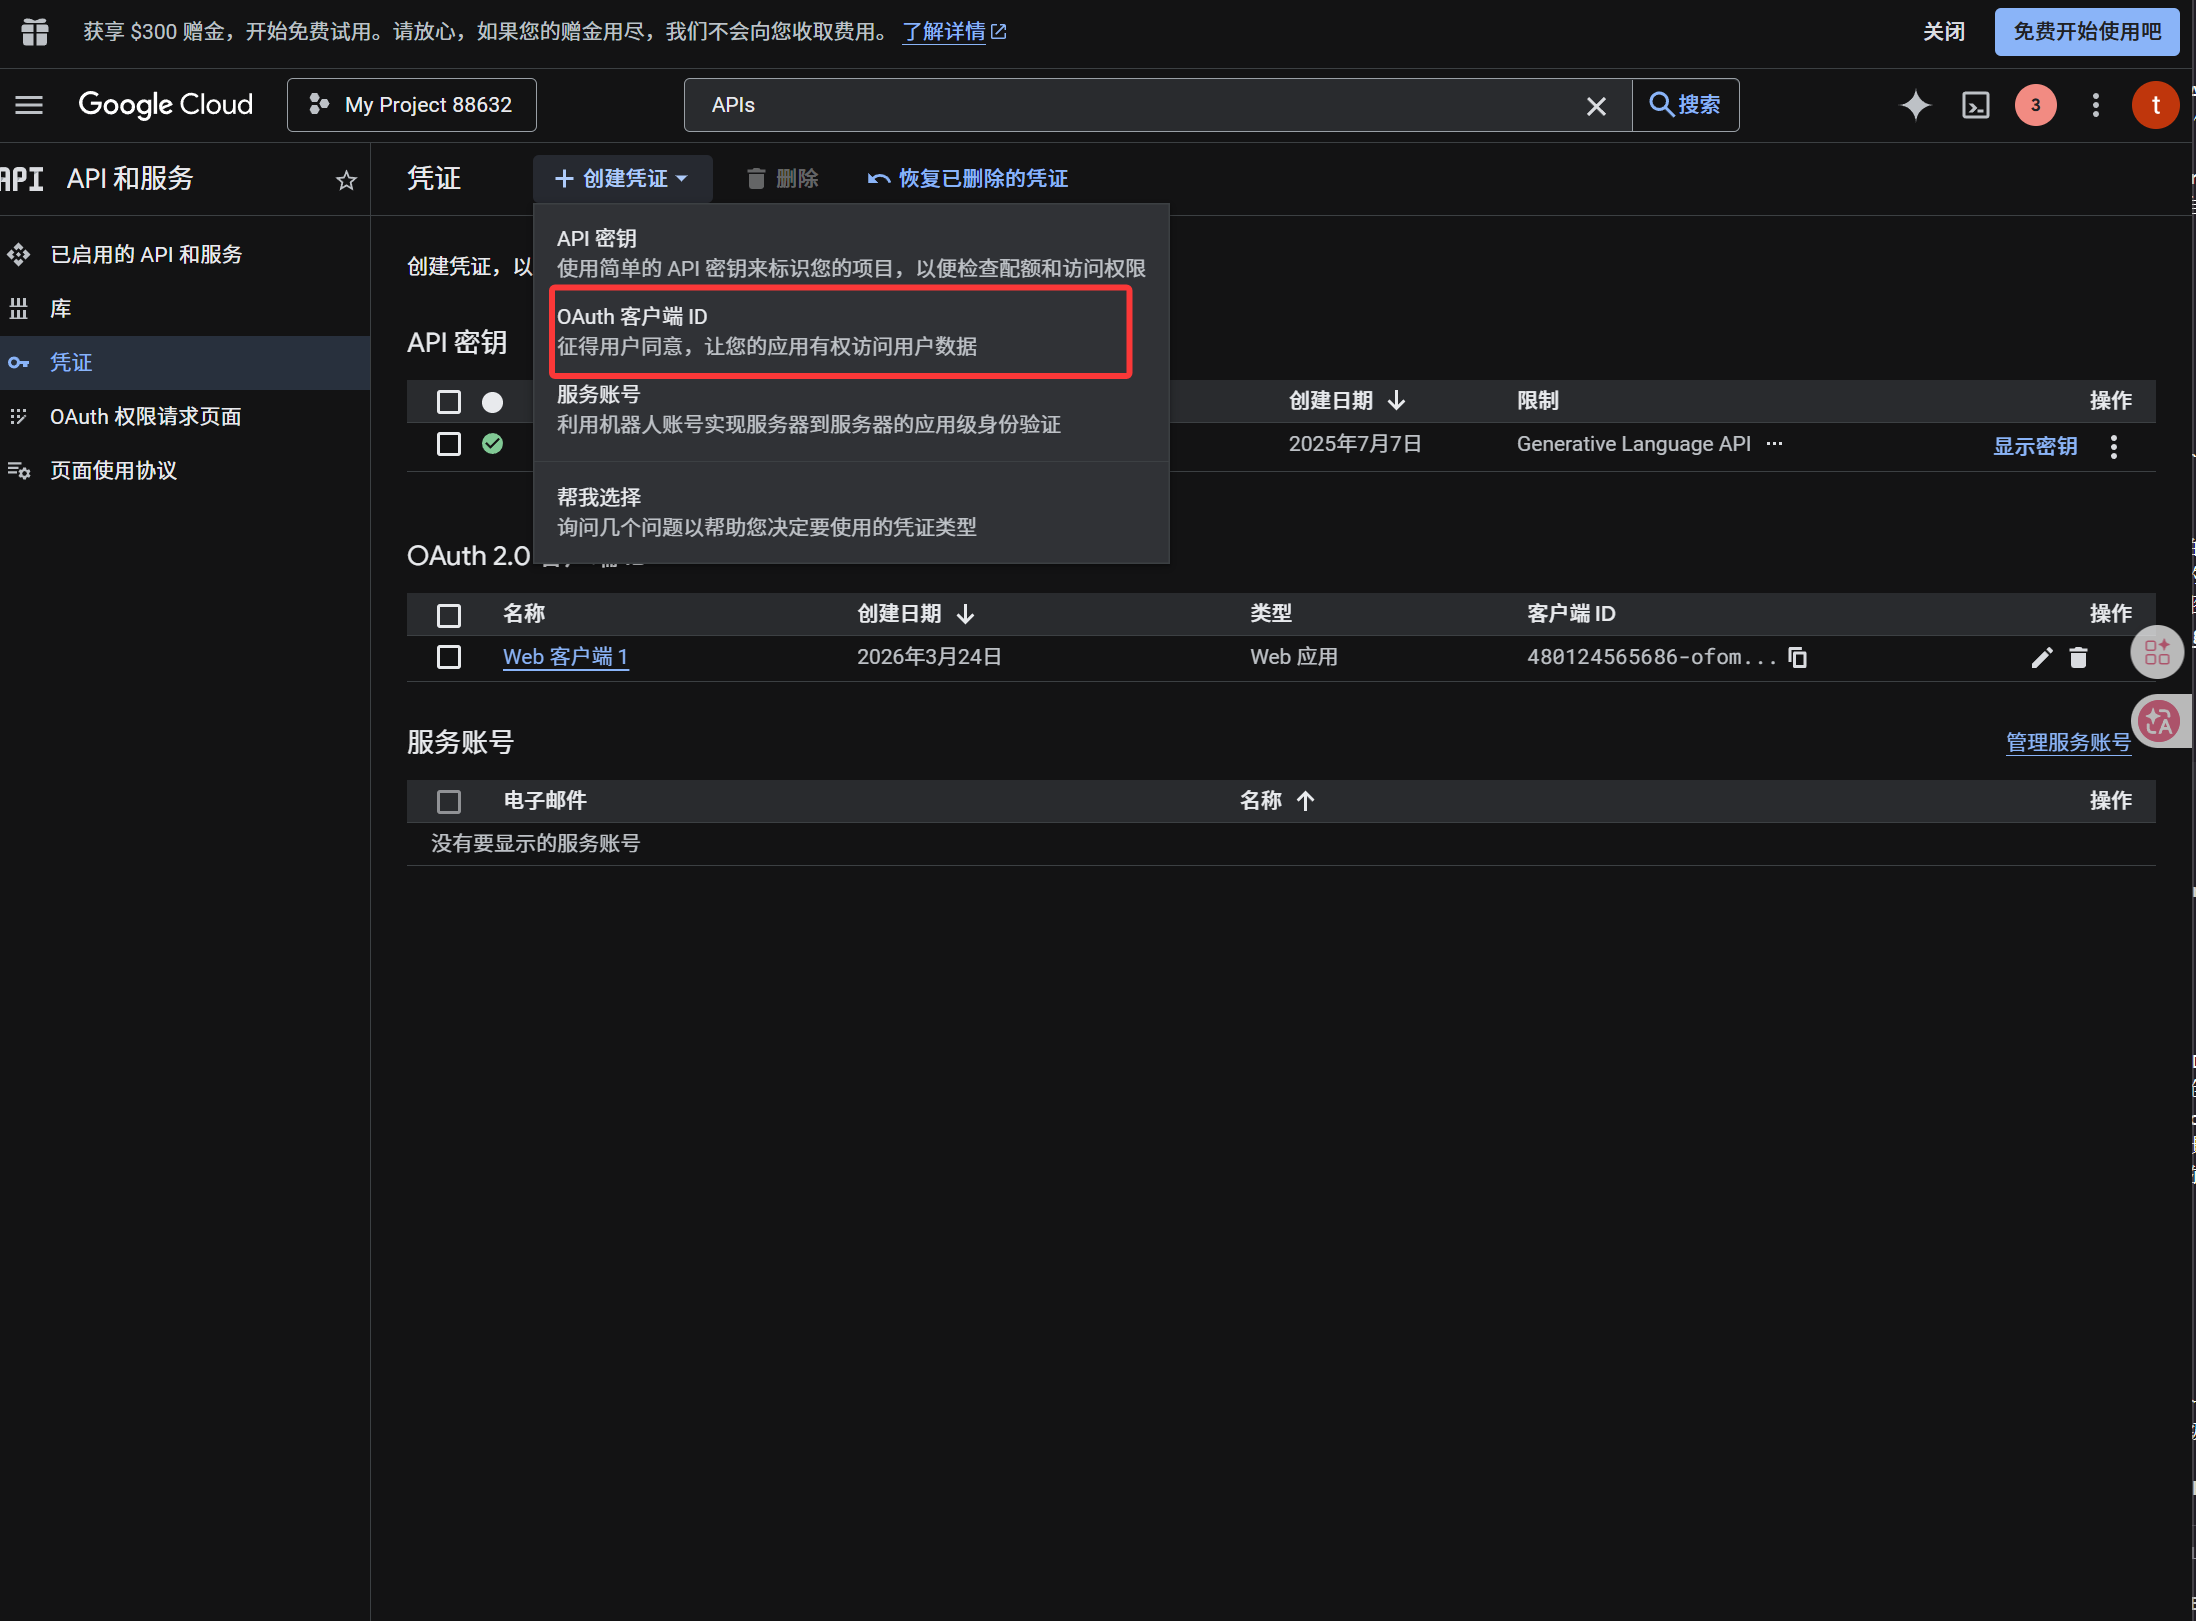
client बन जाने के बाद ये values copy करें:
| Generated Value | ImgBed Field |
|---|---|
| Client ID | Client ID |
| Client Secret | Client Secret |
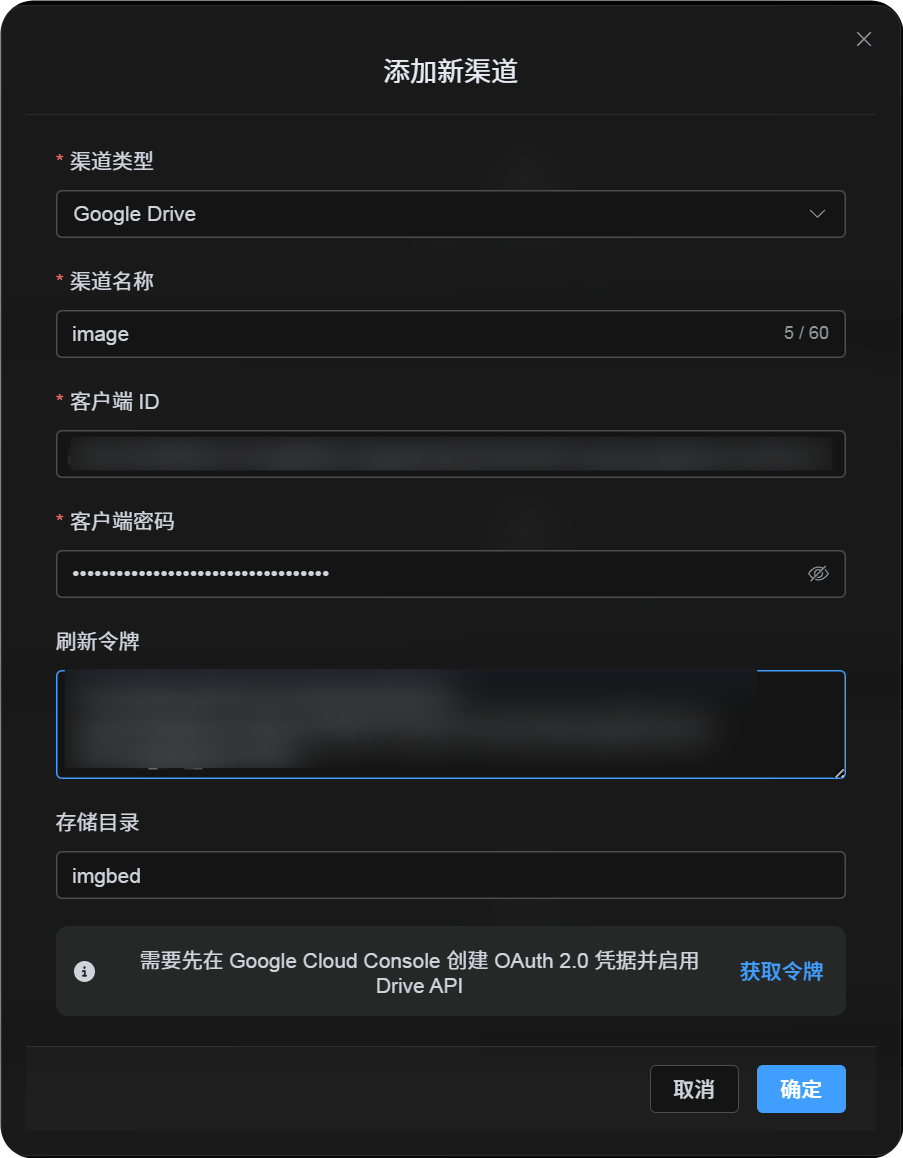
Step 4: Google Drive channel भरें
Upload Settings में Google Drive चुनें और भरें:
| ImgBed Field | क्या डालें |
|---|---|
| Channel name | पहचानने लायक नाम, जैसे Main Google Drive |
| Client ID | Google Cloud से Client ID |
| Client Secret | Google Cloud से Client Secret |
| Refresh Token | अभी खाली छोड़ें। अगले step में लें। |
| Root directory | optional। default imgbed। |
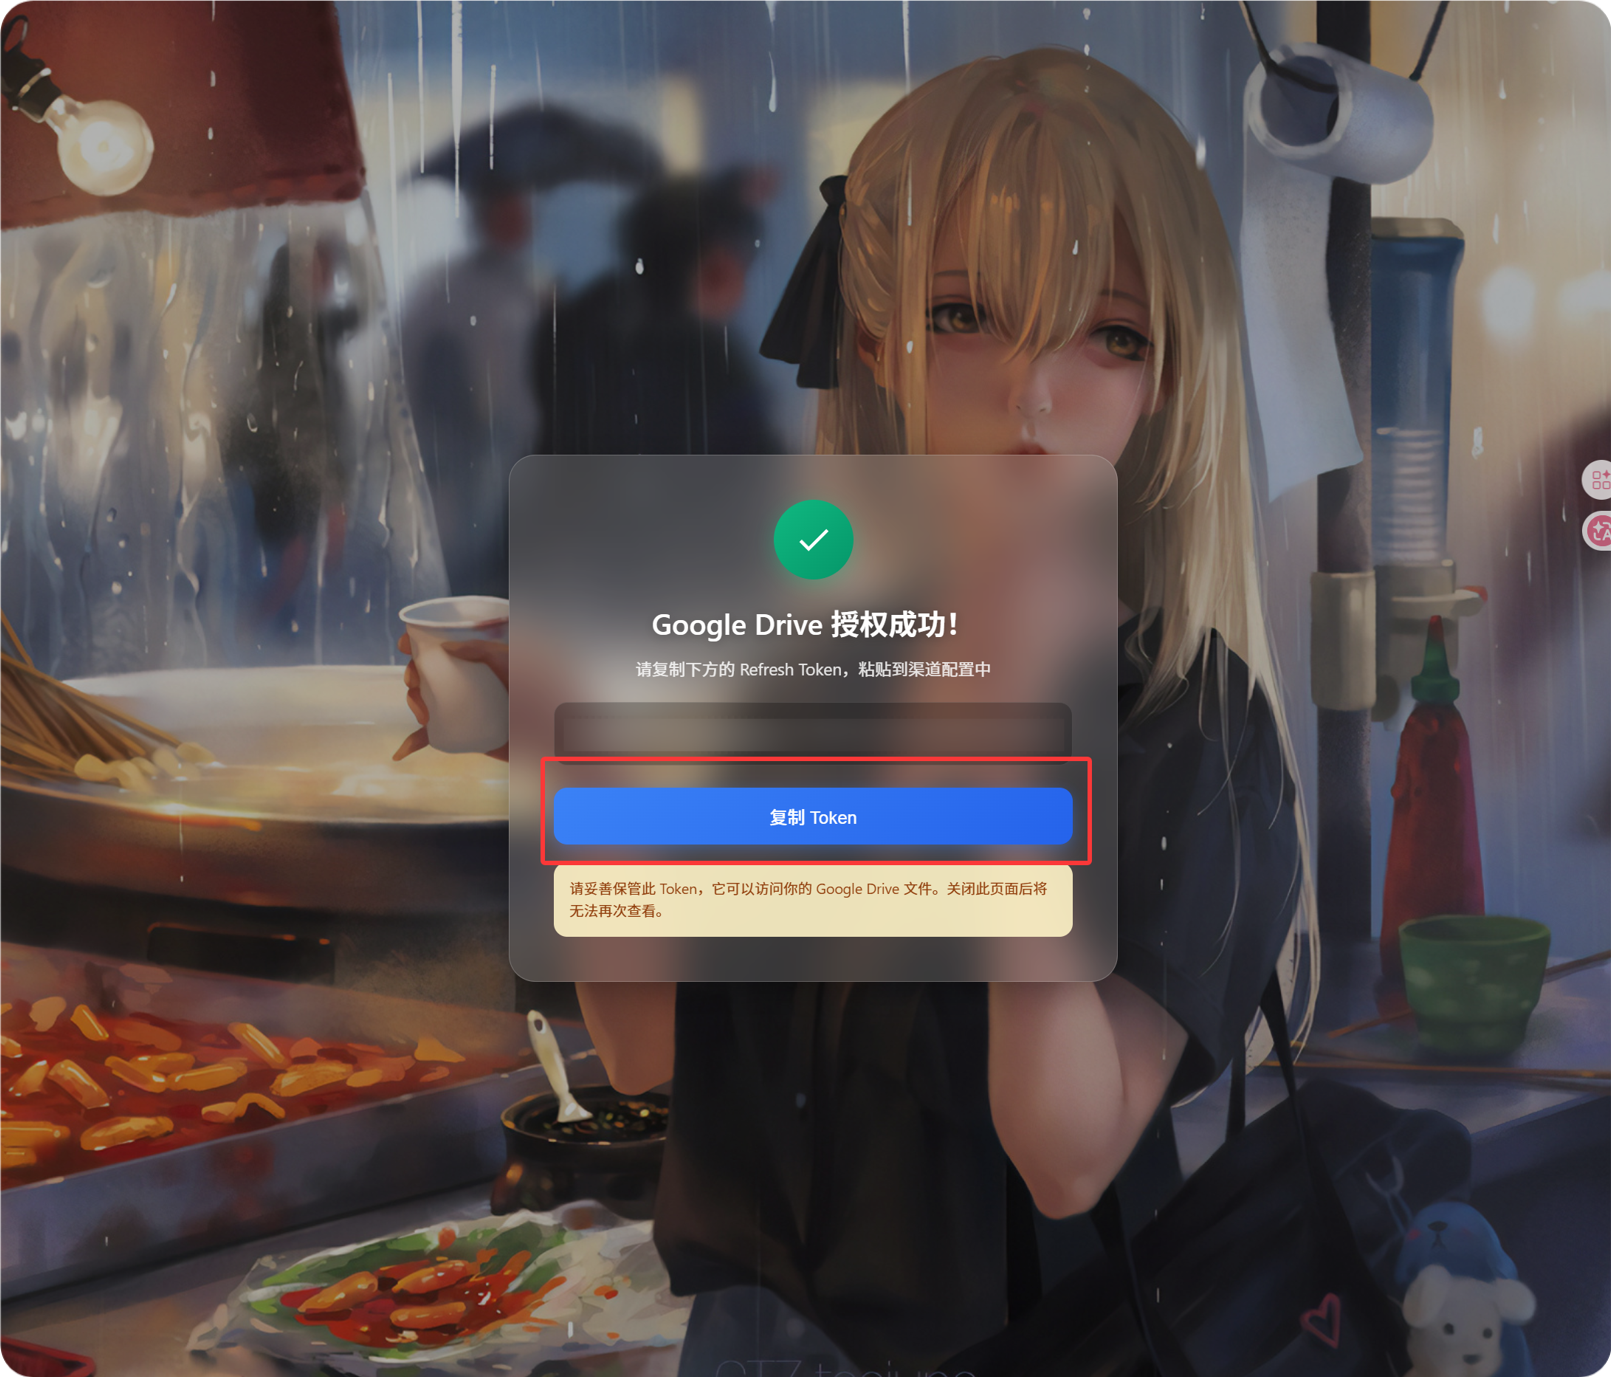
Step 5: Refresh Token लें
Get Tokenपर क्लिक करें।- जिस Google account को connect करना है उसे चुनें।
- authorization prompts complete करें।
- callback page
Refresh Tokenदिखाएगा। - इसे copy करें।
- ImgBed में लौटकर
Refresh Tokenfield में paste करें।
अगर बाद में Google account बदलते हैं, OAuth client बदलते हैं, या पुरानी authorization expire हो जाती है, तो channel delete करने की ज़रूरत नहीं। edit page खोलें और Reauthorize पर क्लिक करें।
Step 6: Channel save करें
सभी fields भरने के बाद channel save करें।
Quick Flow
text
Google Cloud खोलें
-> project बनाएँ या चुनें
-> Google Drive API enable करें
-> Google Auth Platform configure करें
-> Audience External हो तो अपना Google account Test users में जोड़ें
-> Web application OAuth client बनाएँ
-> redirect URI के रूप में https://your-domain.com/api/oauth/google/callback use करें
-> ImgBed में Client ID और Client Secret भरें
-> Get Token क्लिक करें
-> Google से sign in और authorize करें
-> callback page से Refresh Token copy करें
-> ImgBed में paste करके save करें
-> test image upload करें
References
- Google OAuth Web Server Applications: https://developers.google.com/identity/protocols/oauth2/web-server
- Google Workspace OAuth Consent Configuration: https://developers.google.com/workspace/guides/configure-oauth-consent
- Google Drive API Auth Scopes: https://developers.google.com/workspace/drive/api/guides/api-specific-auth