Google Drive チャネルを追加する
先に必要なもの
始める前に、次の項目を用意します。
| 必要なもの | 必要な理由 |
|---|---|
| Google アカウント | Google Cloud にアクセスし、Google Drive を認可するために使用します。 |
| Google Cloud プロジェクト | Drive API を有効にし、OAuth 認証情報を作成するために使用します。 |
| OAuth 2.0 client | ImgHost が Client ID、Client Secret、Refresh Token を取得するために使用します。 |
| ImgHost ドメイン | OAuth redirect URI に使用します。実際に使用するドメインと一致している必要があります。 |
設定手順
手順 1: Google Drive API を有効にする
- Google Cloud Console を開きます。
- 新しいプロジェクトを作成するか、既存のプロジェクトを選択します。
APIs & Servicesに移動します。Enable APIs and Servicesをクリックします。Google Drive APIを検索します。- 開いて有効化します。
手順 2: OAuth Consent Screen を設定する
- Google Cloud で
Google Auth Platformを開きます。 - アプリ名、サポート用メールアドレス、開発者連絡先メールアドレスなど、
Brandingの基本情報を入力します。 Audienceを開きます。- ほとんどの自己ホスト型の個人デプロイでは、
Externalを選択します。 Externalを選択した場合は、Test usersに認可したい Google アカウントを追加します。Data Accessを開きます。- 必要な Google Drive 権限を追加します。
手順 3: OAuth 2.0 Client を作成する
Google Auth PlatformでClientsを開きます。- 新しい client を作成します。
- アプリケーション種別を
Web applicationに設定します。 - client に識別しやすい名前を付けます。
- 承認済み JavaScript origin には ImgHost の URL を入力します。例:
text
https://img.example.com- authorized redirect URIs には次を入力します。
text
https://img.example.com/api/oauth/google/callback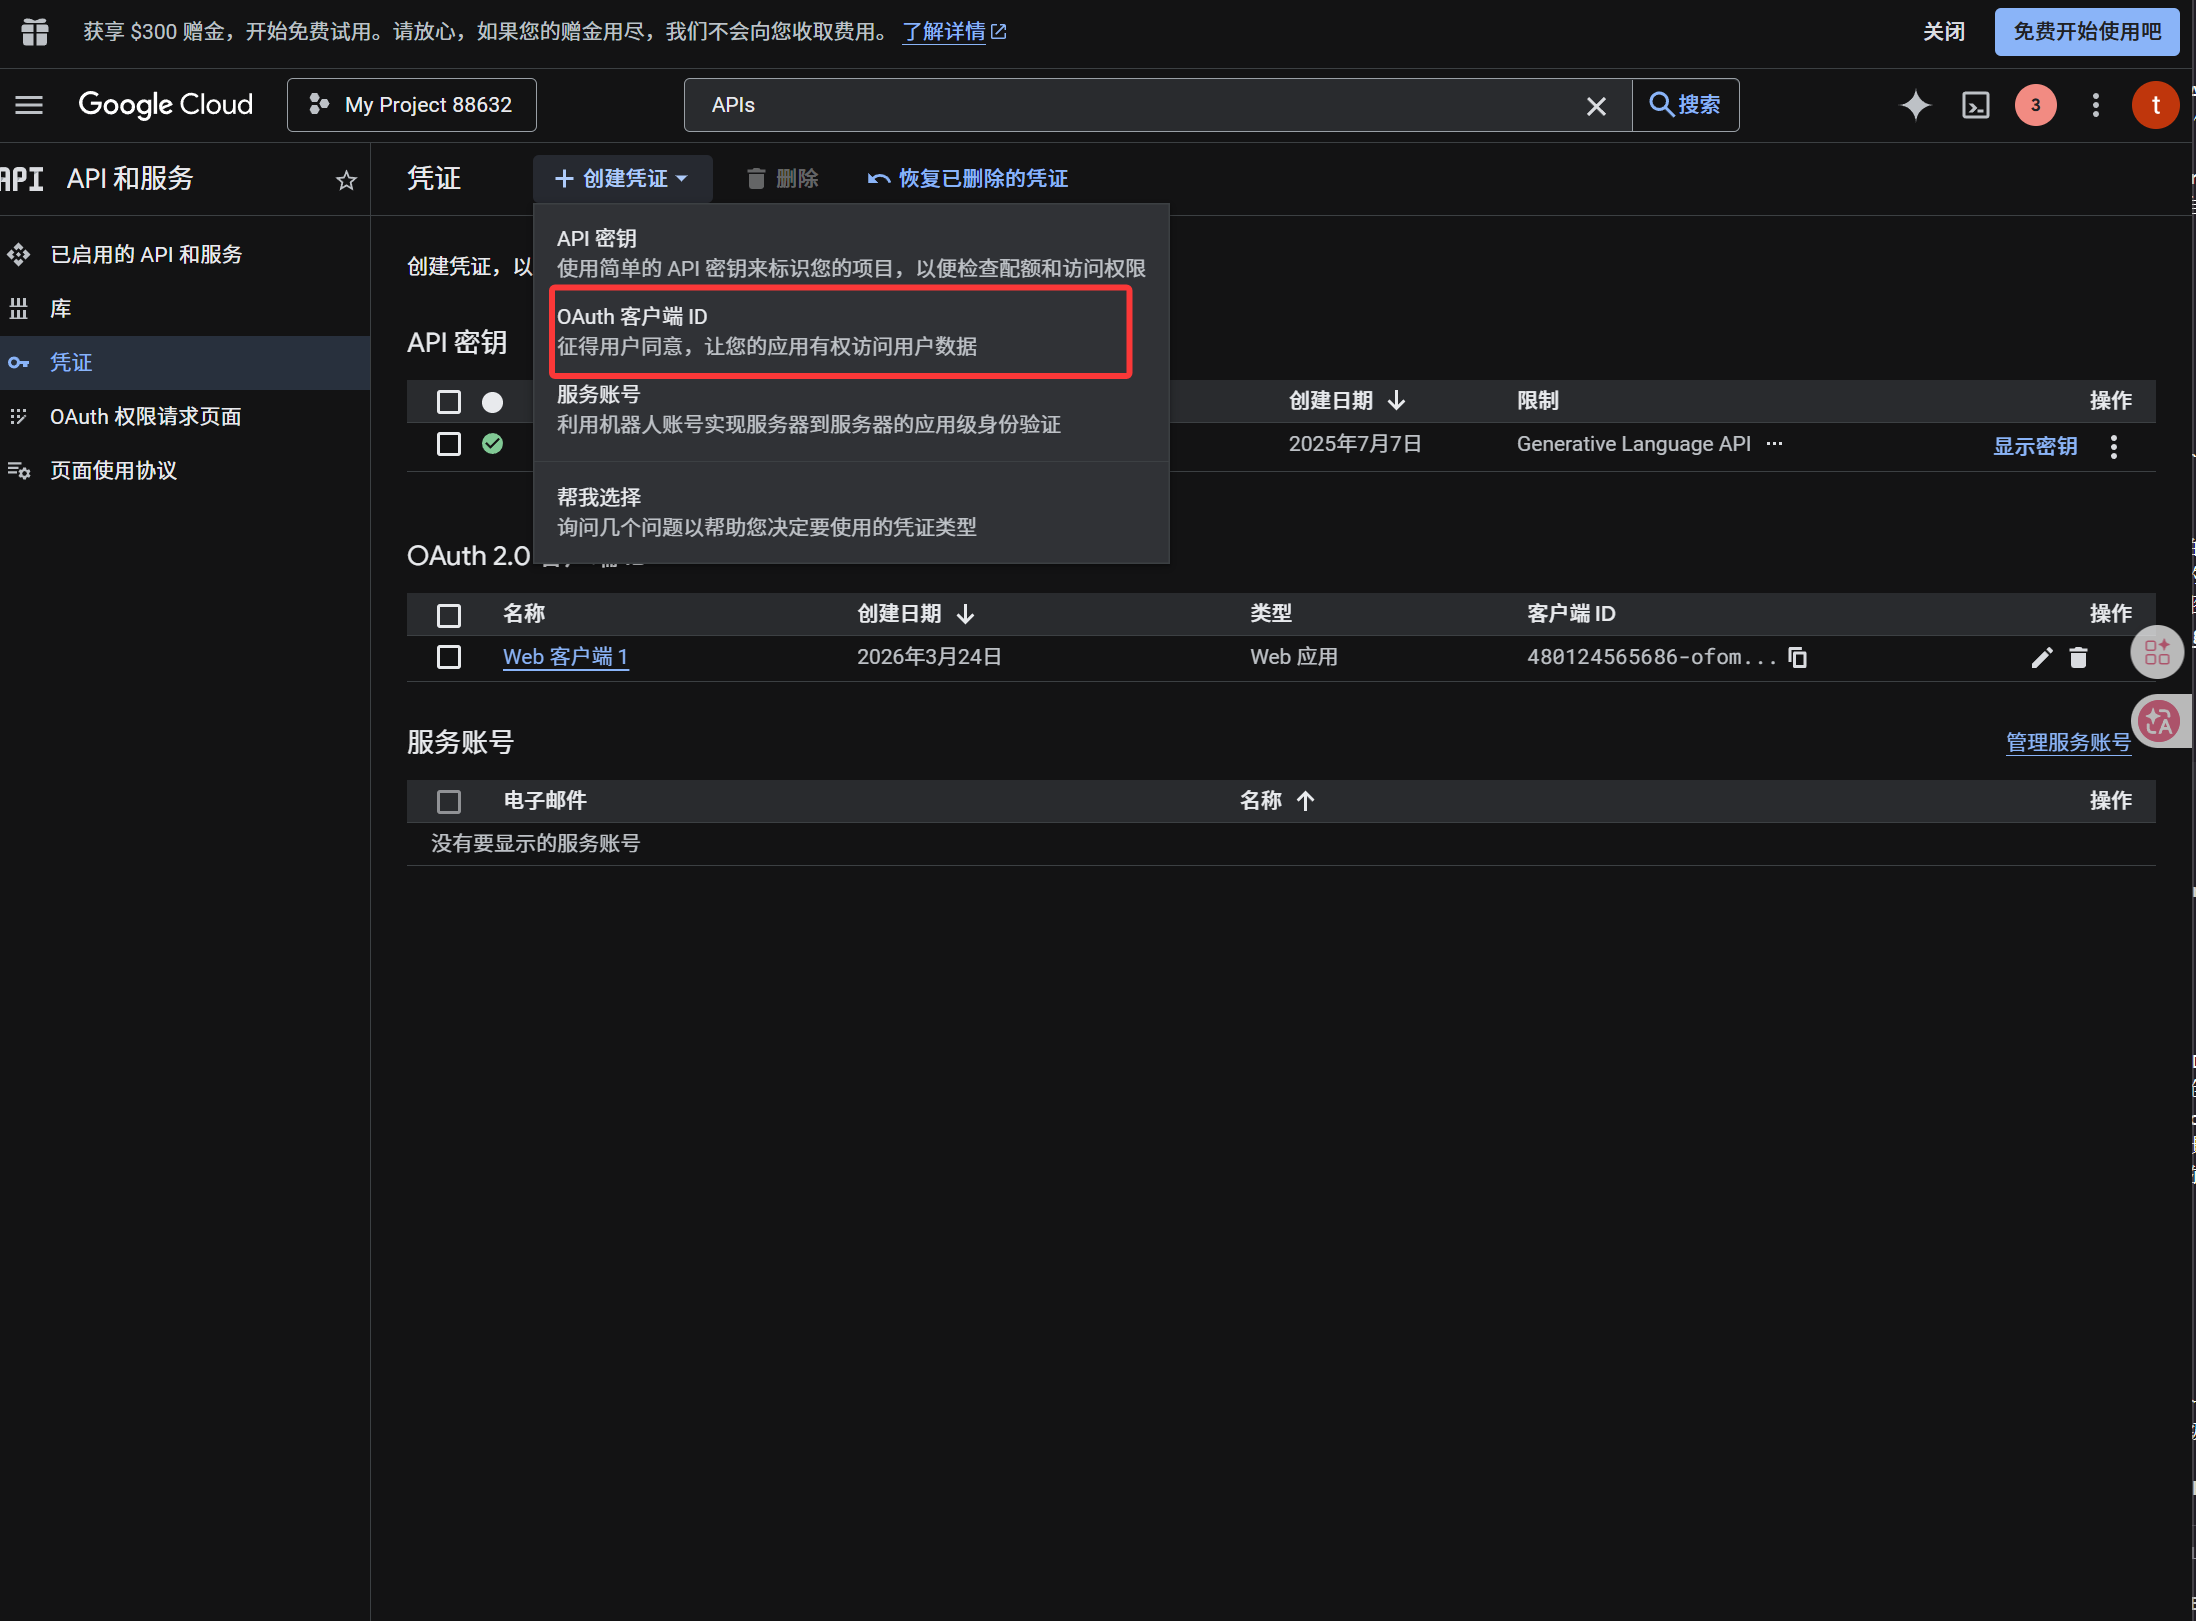
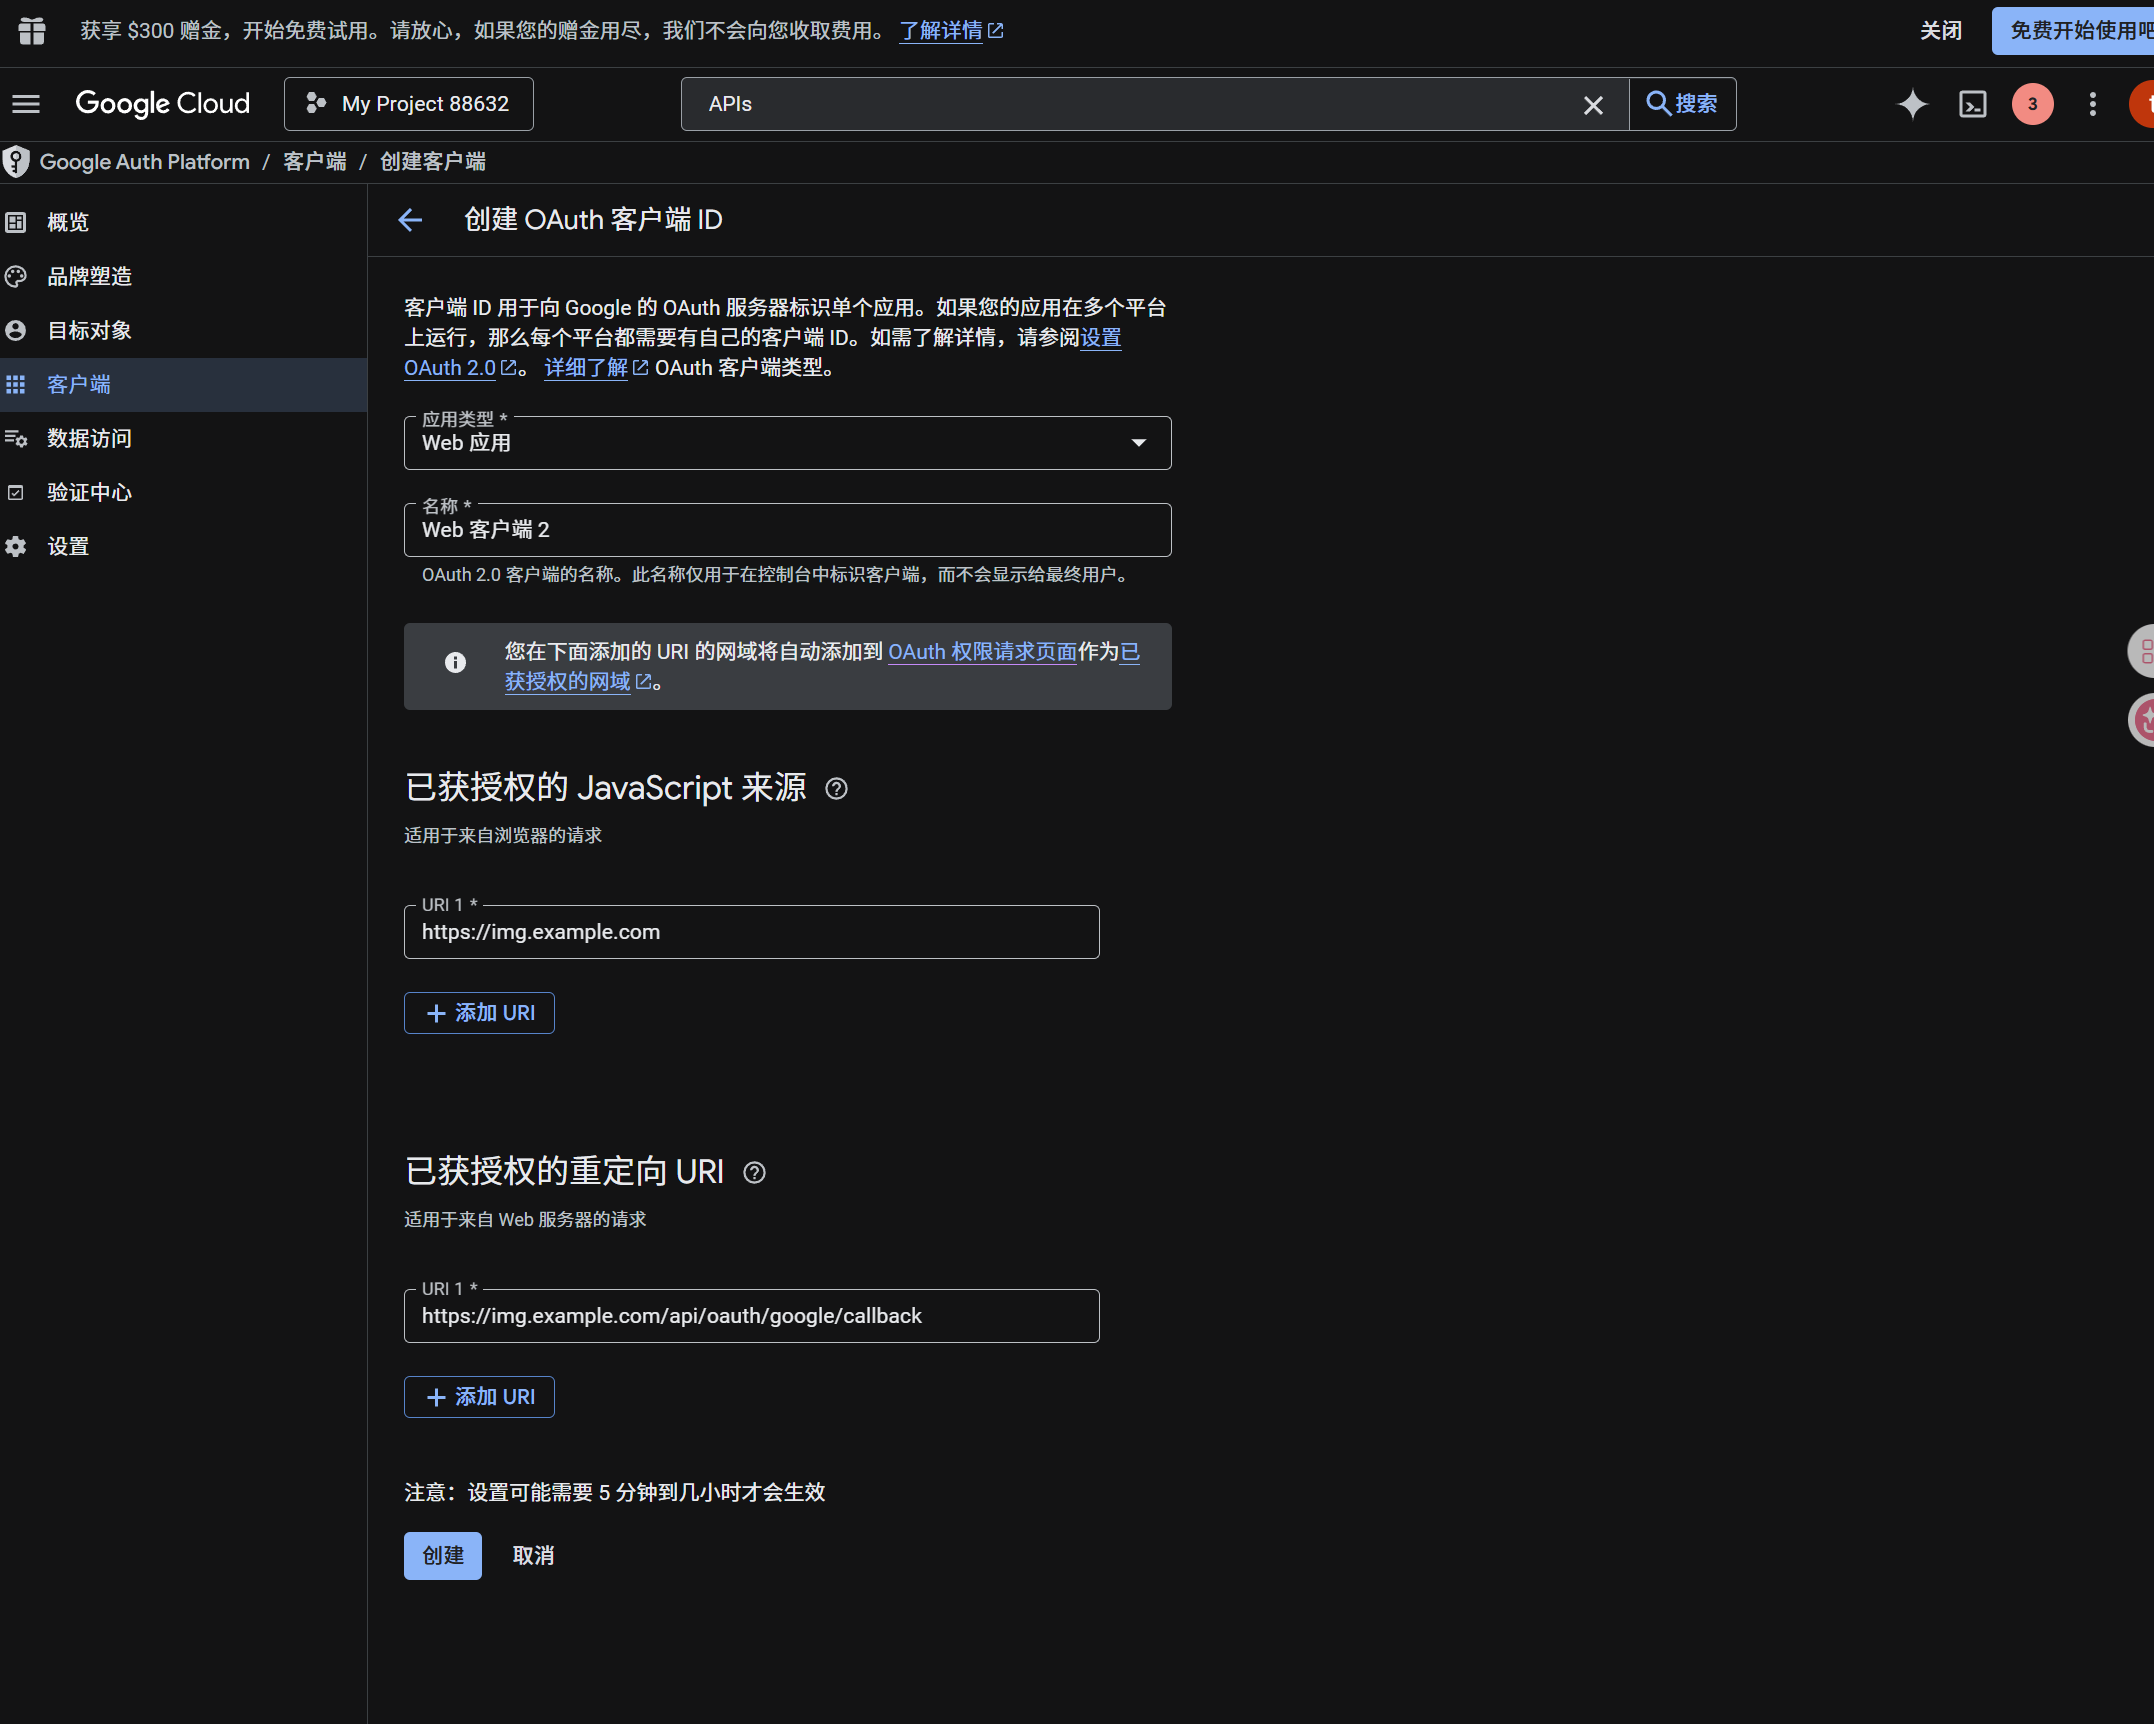
client を作成したら、次の値をコピーします。
| 生成された値 | ImgHost 項目 |
|---|---|
| Client ID | Client ID |
| Client Secret | Client Secret |
手順 4: Google Drive チャネルを入力する
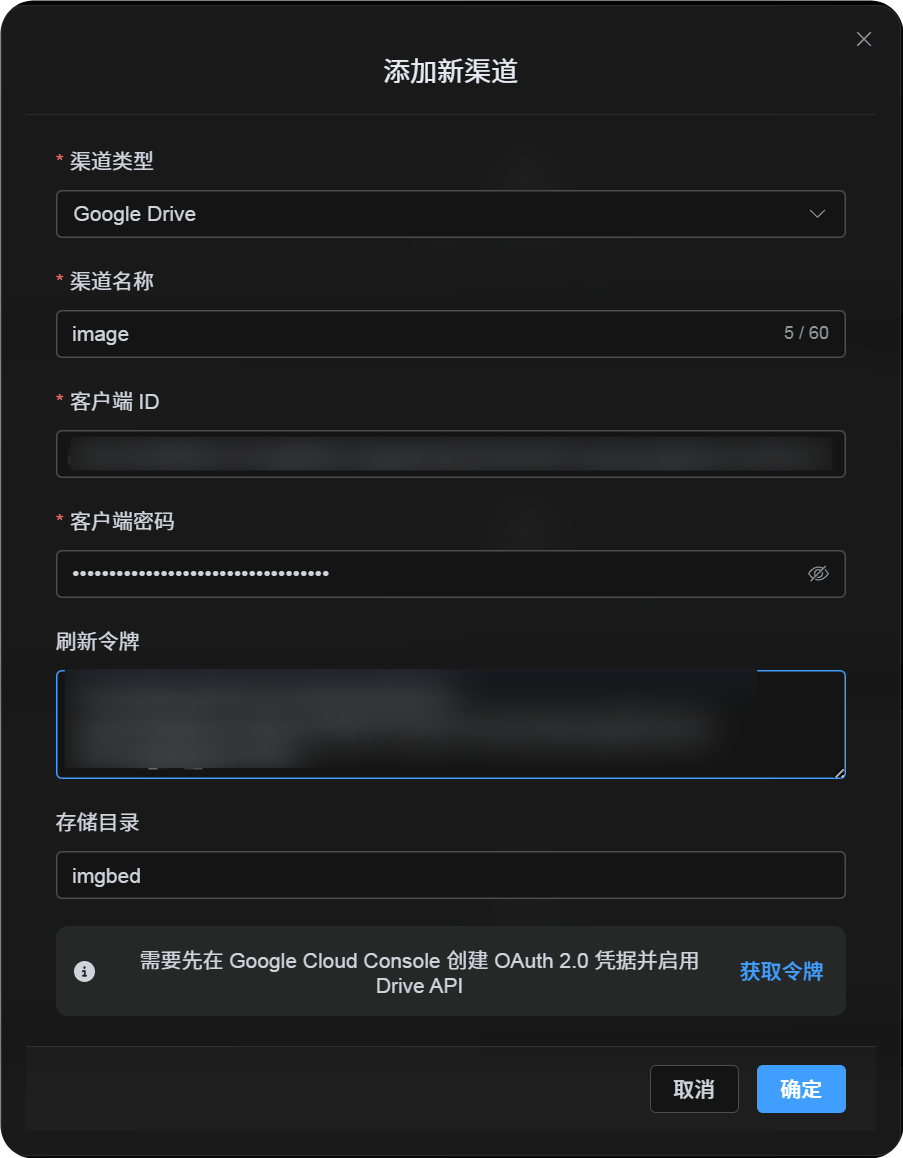
アップロード設定で Google Drive を選択し、次を入力します。
| ImgHost 項目 | 入力内容 |
|---|---|
| チャネル名 | 識別しやすい名前。例: Main Google Drive |
| Client ID | Google Cloud の Client ID |
| Client Secret | Google Cloud の Client Secret |
| Refresh Token | 今は空のままにします。次の手順で取得します。 |
| Root directory | 任意。デフォルトは imgbed です。 |
手順 5: Refresh Token を取得する
Get Tokenをクリックします。- 接続する Google アカウントを選択します。
- 認可プロンプトを完了します。
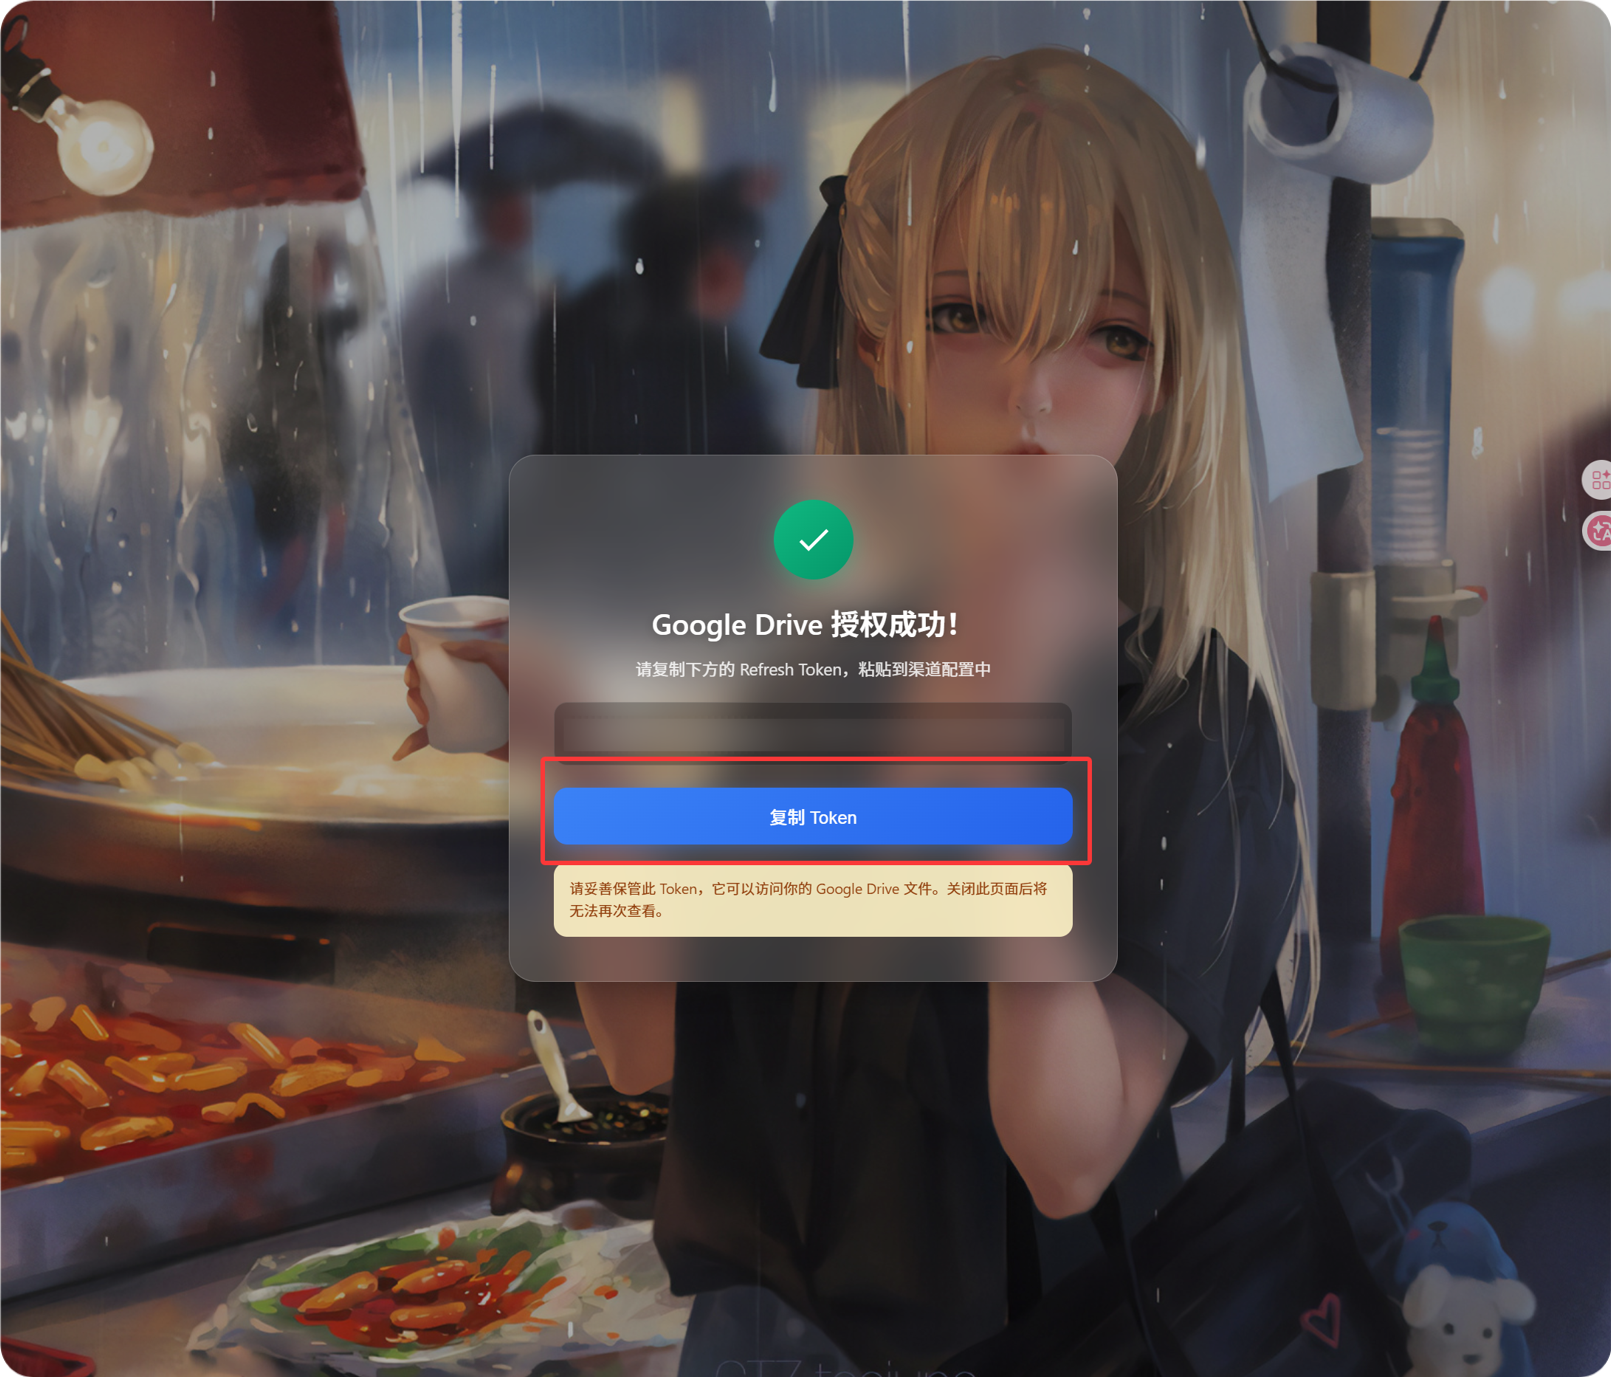
- callback ページに
Refresh Tokenが表示されます。 - コピーします。
- ImgHost に戻り、
Refresh Token項目に貼り付けます。
後で Google アカウントを切り替える、OAuth client を変更する、または古い認可が期限切れになる場合でも、チャネルを削除する必要はありません。編集ページを開き、Reauthorize をクリックします。
手順 6: チャネルを保存する
すべての項目を入力したら、チャネルを保存します。
クイックフロー
text
Open Google Cloud
-> Create or select a project
-> Enable Google Drive API
-> Configure Google Auth Platform
-> If Audience is External, add your Google account to Test users
-> Create a Web application OAuth client
-> Use https://your-domain.com/api/oauth/google/callback as the redirect URI
-> Fill Client ID and Client Secret into ImgHost
-> Click Get Token
-> Sign in with Google and authorize
-> Copy the Refresh Token from the callback page
-> Paste it back into ImgHost and save
-> Upload a test image
参考
- Google OAuth Web Server アプリケーション: https://developers.google.com/identity/protocols/oauth2/web-server
- Google Workspace OAuth 同意設定: https://developers.google.com/workspace/guides/configure-oauth-consent
- Google Drive API 認可スコープ: https://developers.google.com/workspace/drive/api/guides/api-specific-auth