إضافة قناة Google Drive
ما الذي تحتاجه أولًا؟
قبل البدء جهّز هذه العناصر:
| المتطلب | لماذا تحتاجه |
|---|---|
| حساب Google | للوصول إلى Google Cloud وتفويض Google Drive |
| مشروع Google Cloud | لتفعيل Drive API وإنشاء OAuth credentials |
| OAuth 2.0 client | يستخدمه ImgBed للحصول على Client ID و Client Secret و Refresh Token |
| نطاق ImgBed الخاص بك | لاستخدامه في OAuth redirect URI. يجب أن يطابق النطاق الذي تستخدمه فعليًا. |
خطوات الإعداد
الخطوة 1: فعّل Google Drive API
- افتح Google Cloud Console.
- أنشئ مشروعًا جديدًا أو اختر مشروعًا موجودًا.
- انتقل إلى
APIs & Services. - اضغط
Enable APIs and Services. - ابحث عن
Google Drive API. - افتحه واضغط enable.
الخطوة 2: اضبط OAuth Consent Screen
- في Google Cloud افتح
Google Auth Platform. - أكمل معلومات
Brandingالأساسية، مثل اسم التطبيق وبريد الدعم وبريد تواصل المطور. - افتح
Audience. - لمعظم عمليات النشر الشخصية ذاتية الاستضافة اختر
External. - إذا اخترت
Externalفأضف حساب Google الذي تريد تفويضه ضمنTest users. - افتح
Data Access. - أضف صلاحيات Google Drive المطلوبة.
الخطوة 3: أنشئ OAuth 2.0 Client
- في
Google Auth PlatformافتحClients. - أنشئ client جديدًا.
- اجعل application type هو
Web application. - أعطِ الـ client اسمًا واضحًا.
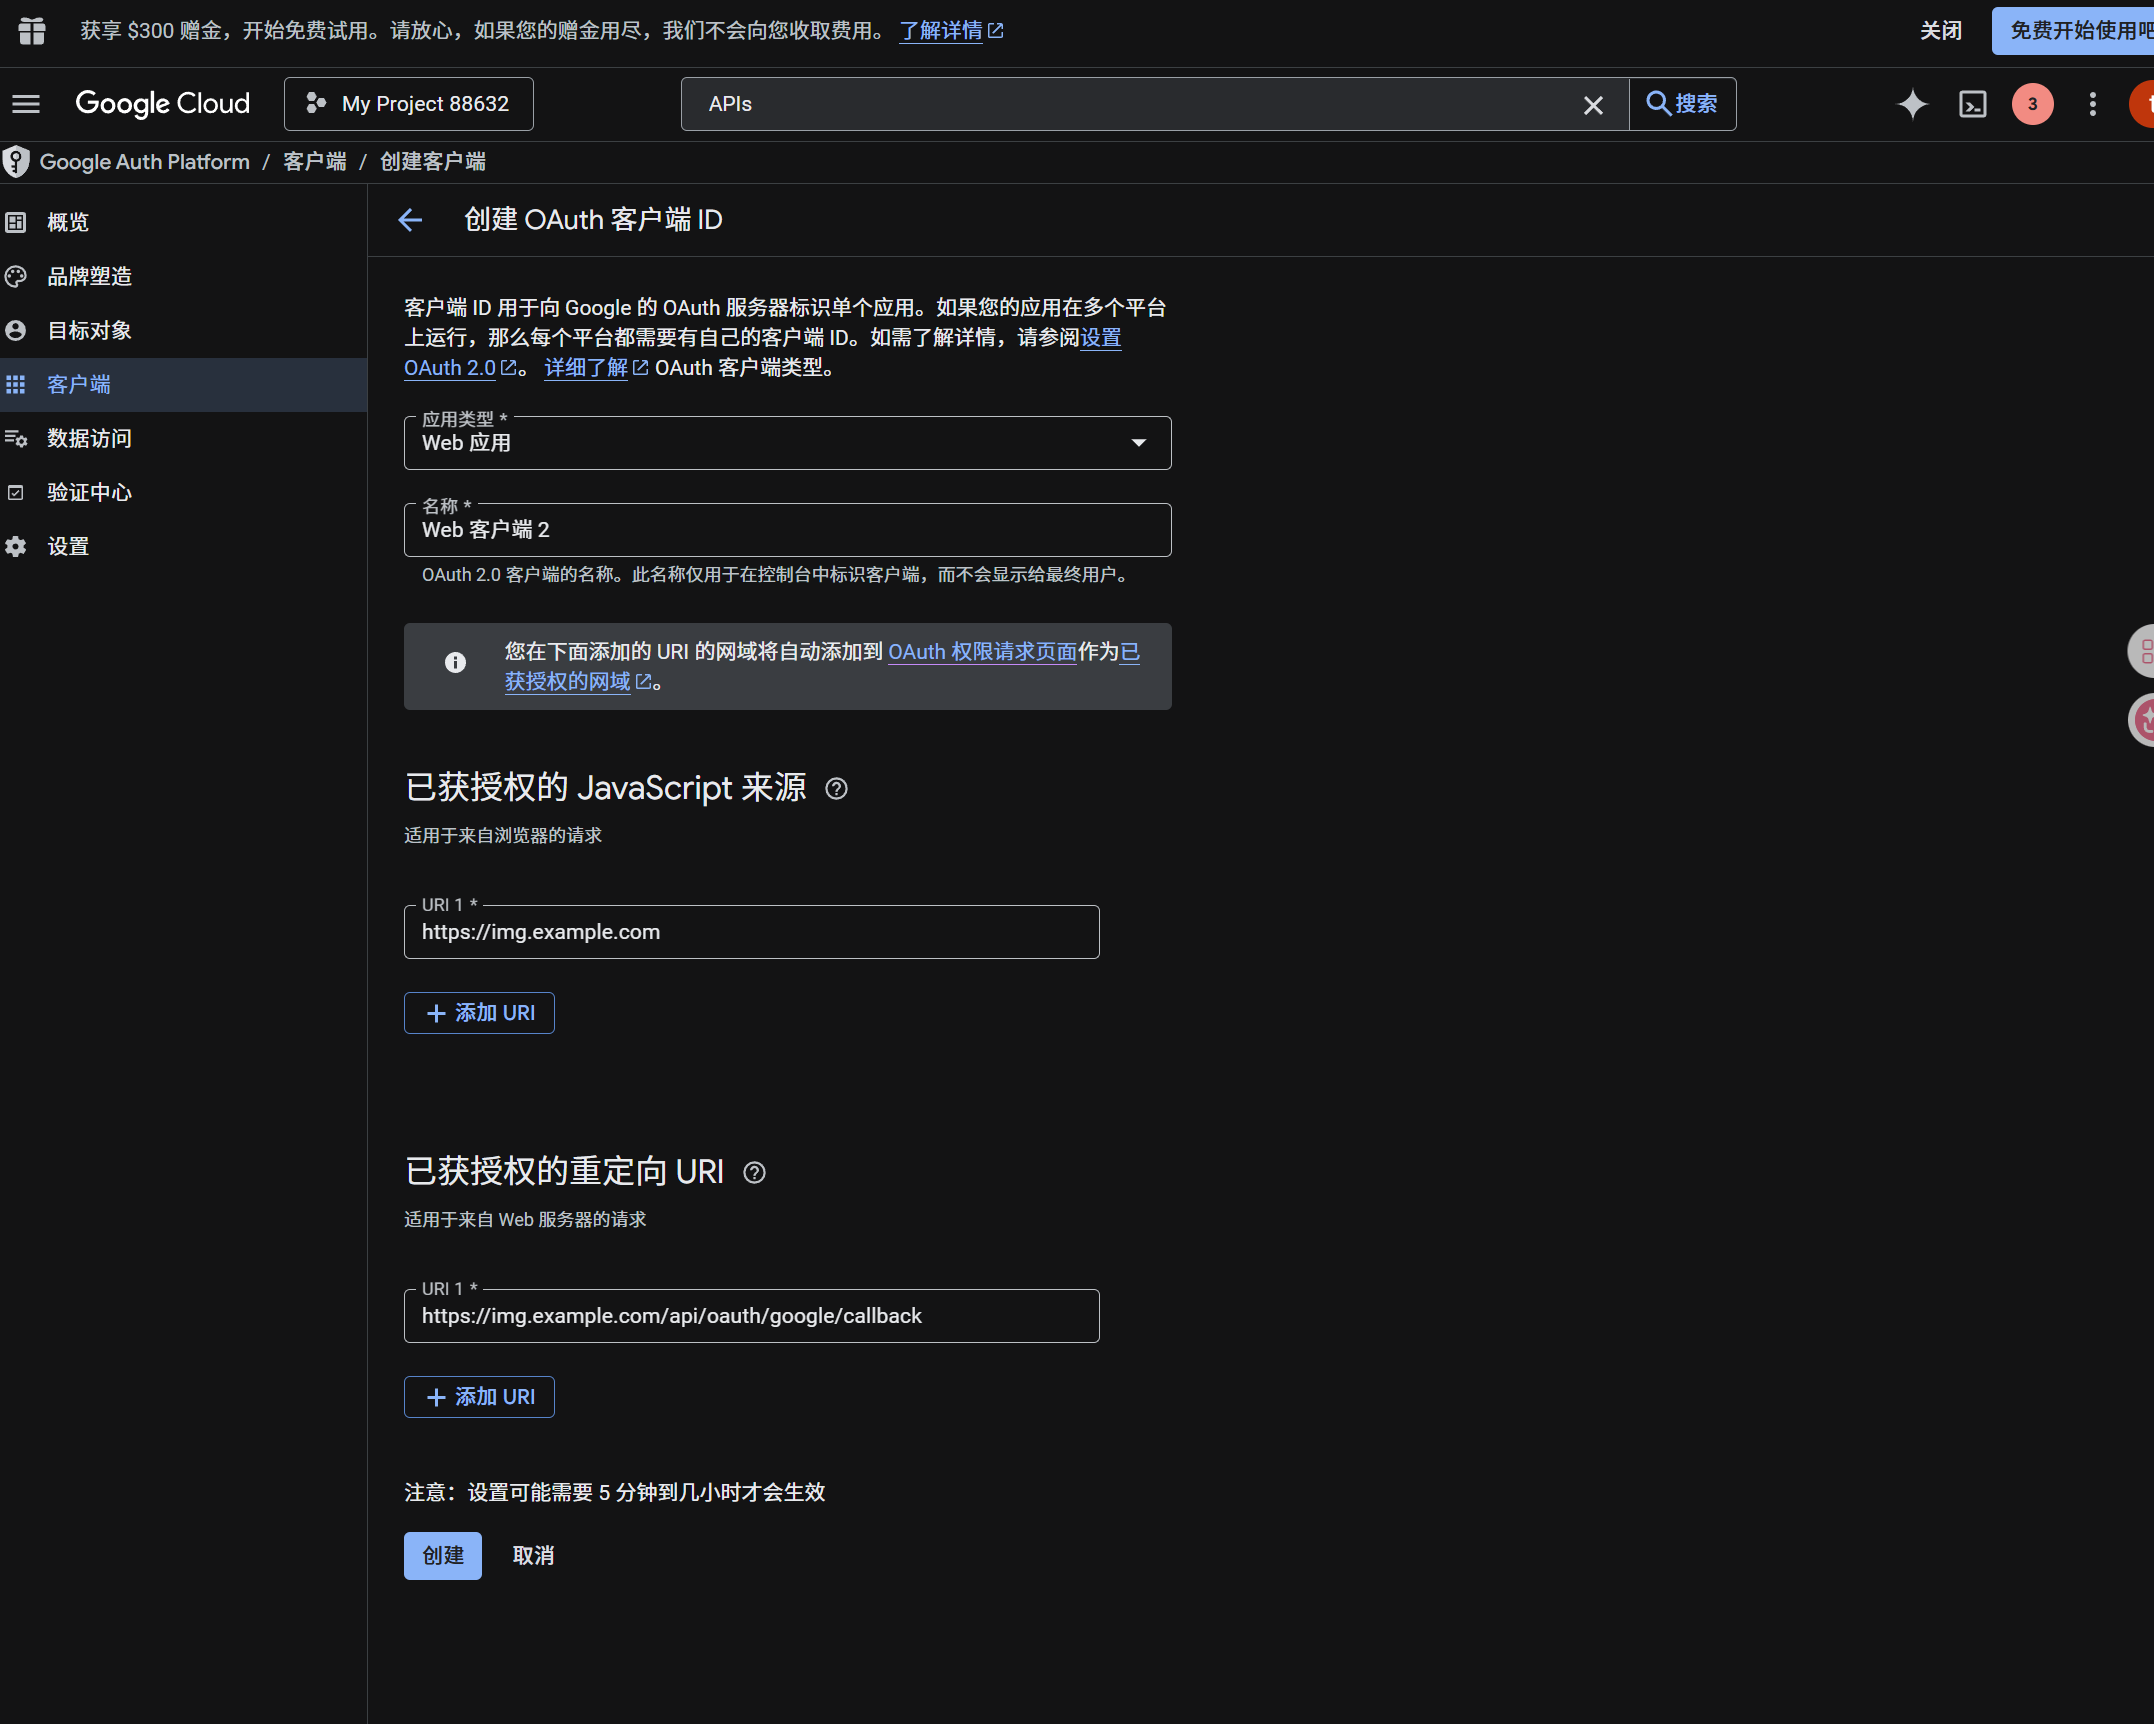
- في authorized JavaScript origins أدخل رابط ImgBed، مثل:
text
https://img.example.com- في authorized redirect URIs أدخل:
text
https://img.example.com/api/oauth/google/callback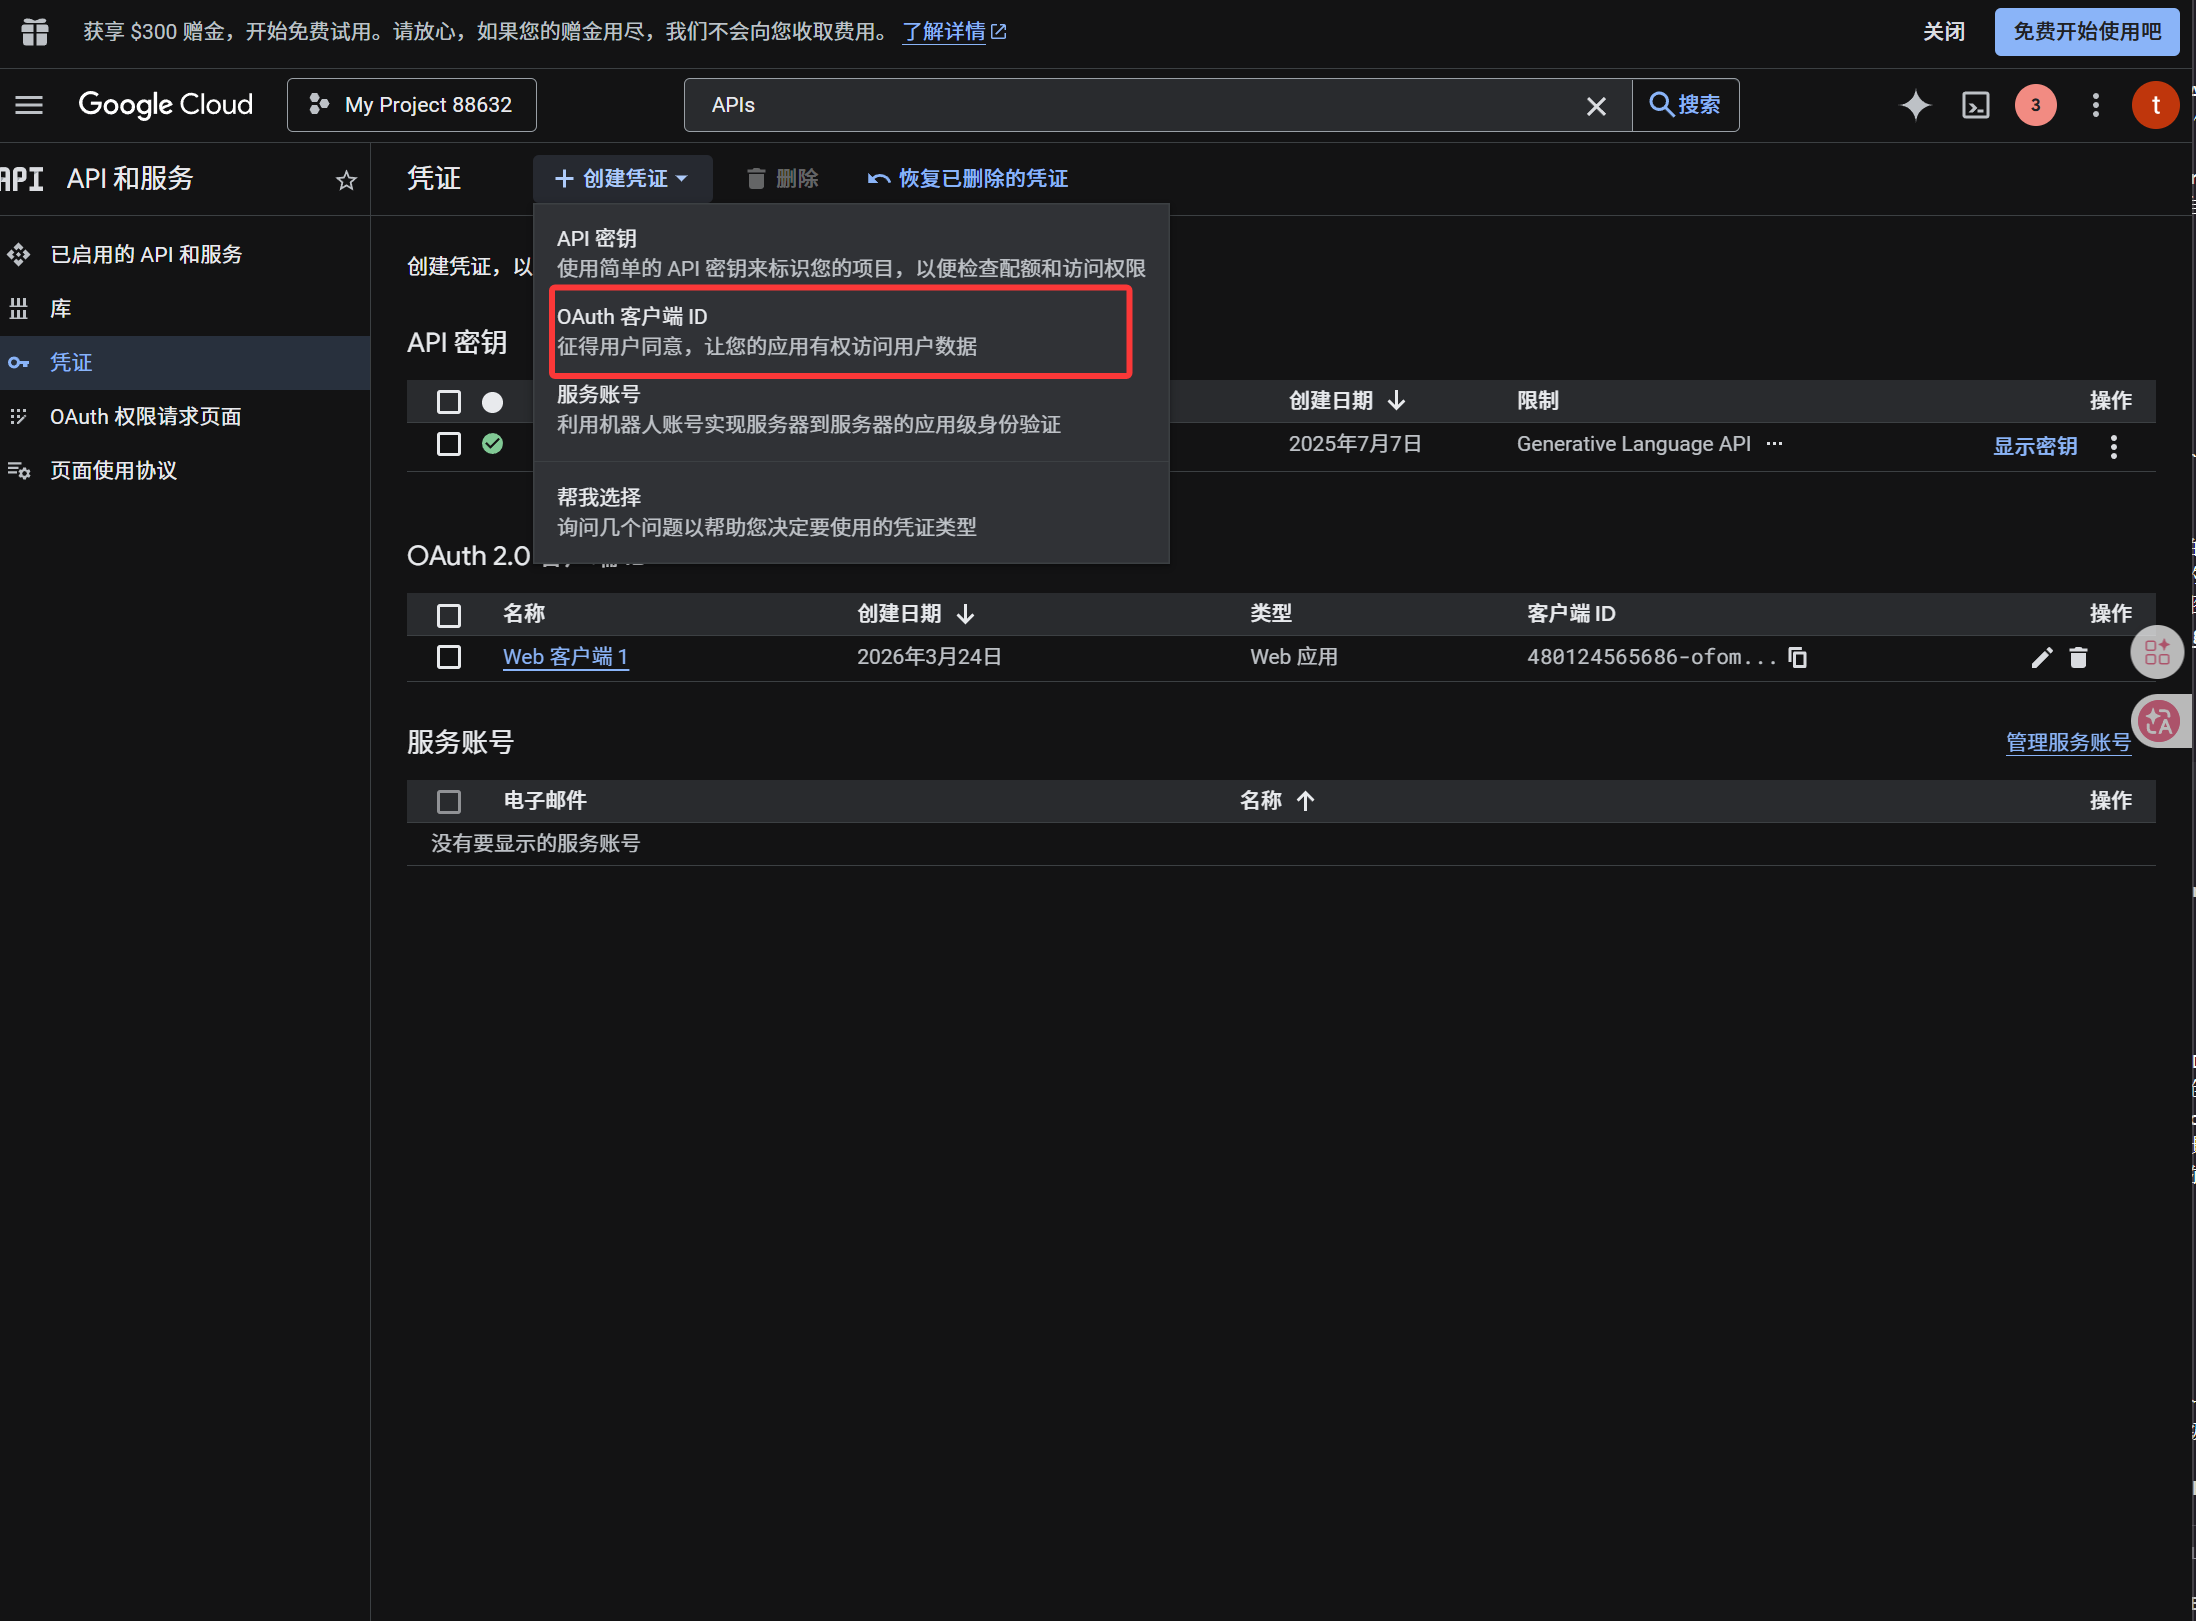
بعد إنشاء client انسخ القيم التالية:
| القيمة الناتجة | حقل ImgBed |
|---|---|
| Client ID | Client ID |
| Client Secret | Client Secret |
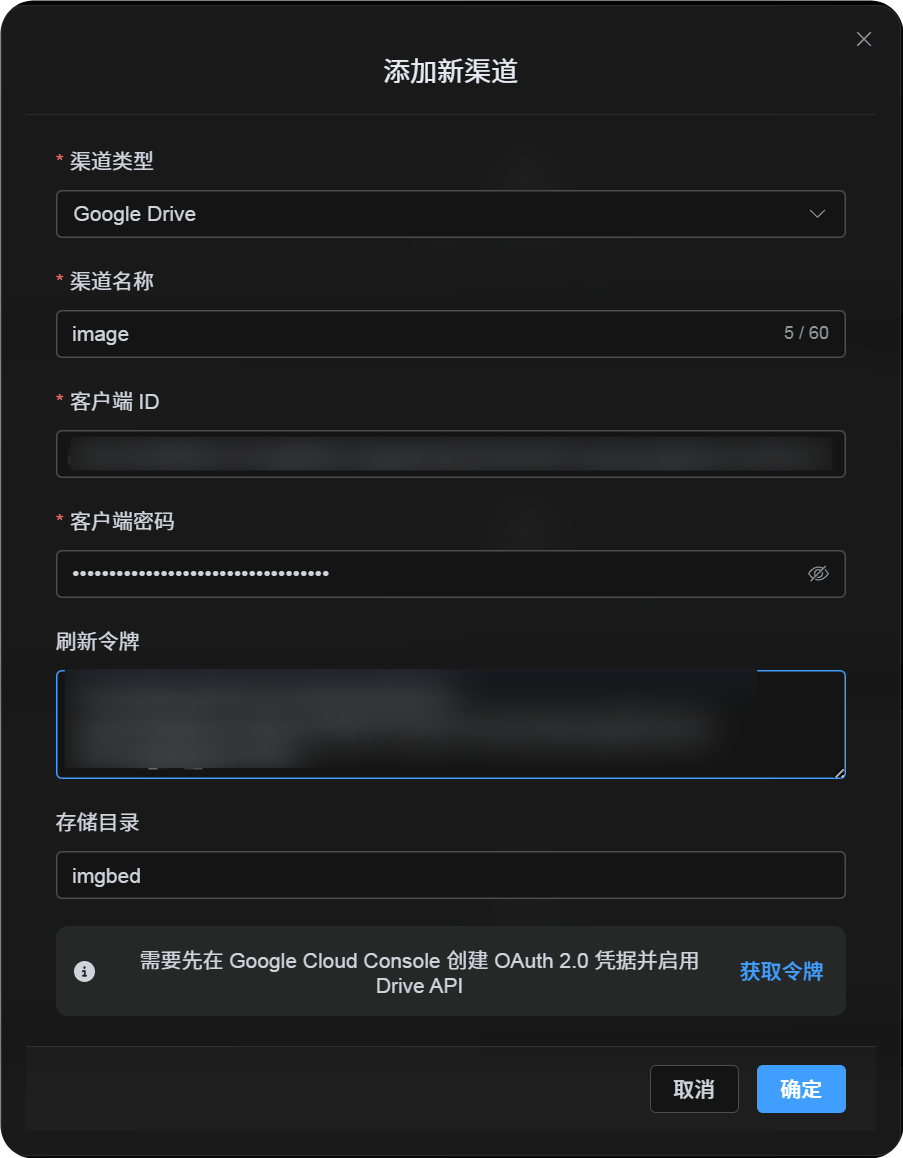
الخطوة 4: املأ قناة Google Drive
في إعدادات الرفع اختر Google Drive واملأ:
| حقل ImgBed | ما الذي تدخله |
|---|---|
| Channel name | اسم واضح، مثل Main Google Drive |
| Client ID | Client ID من Google Cloud |
| Client Secret | Client Secret من Google Cloud |
| Refresh Token | اتركه فارغًا الآن. تحصل عليه في الخطوة التالية. |
| Root directory | اختياري. الافتراضي imgbed. |
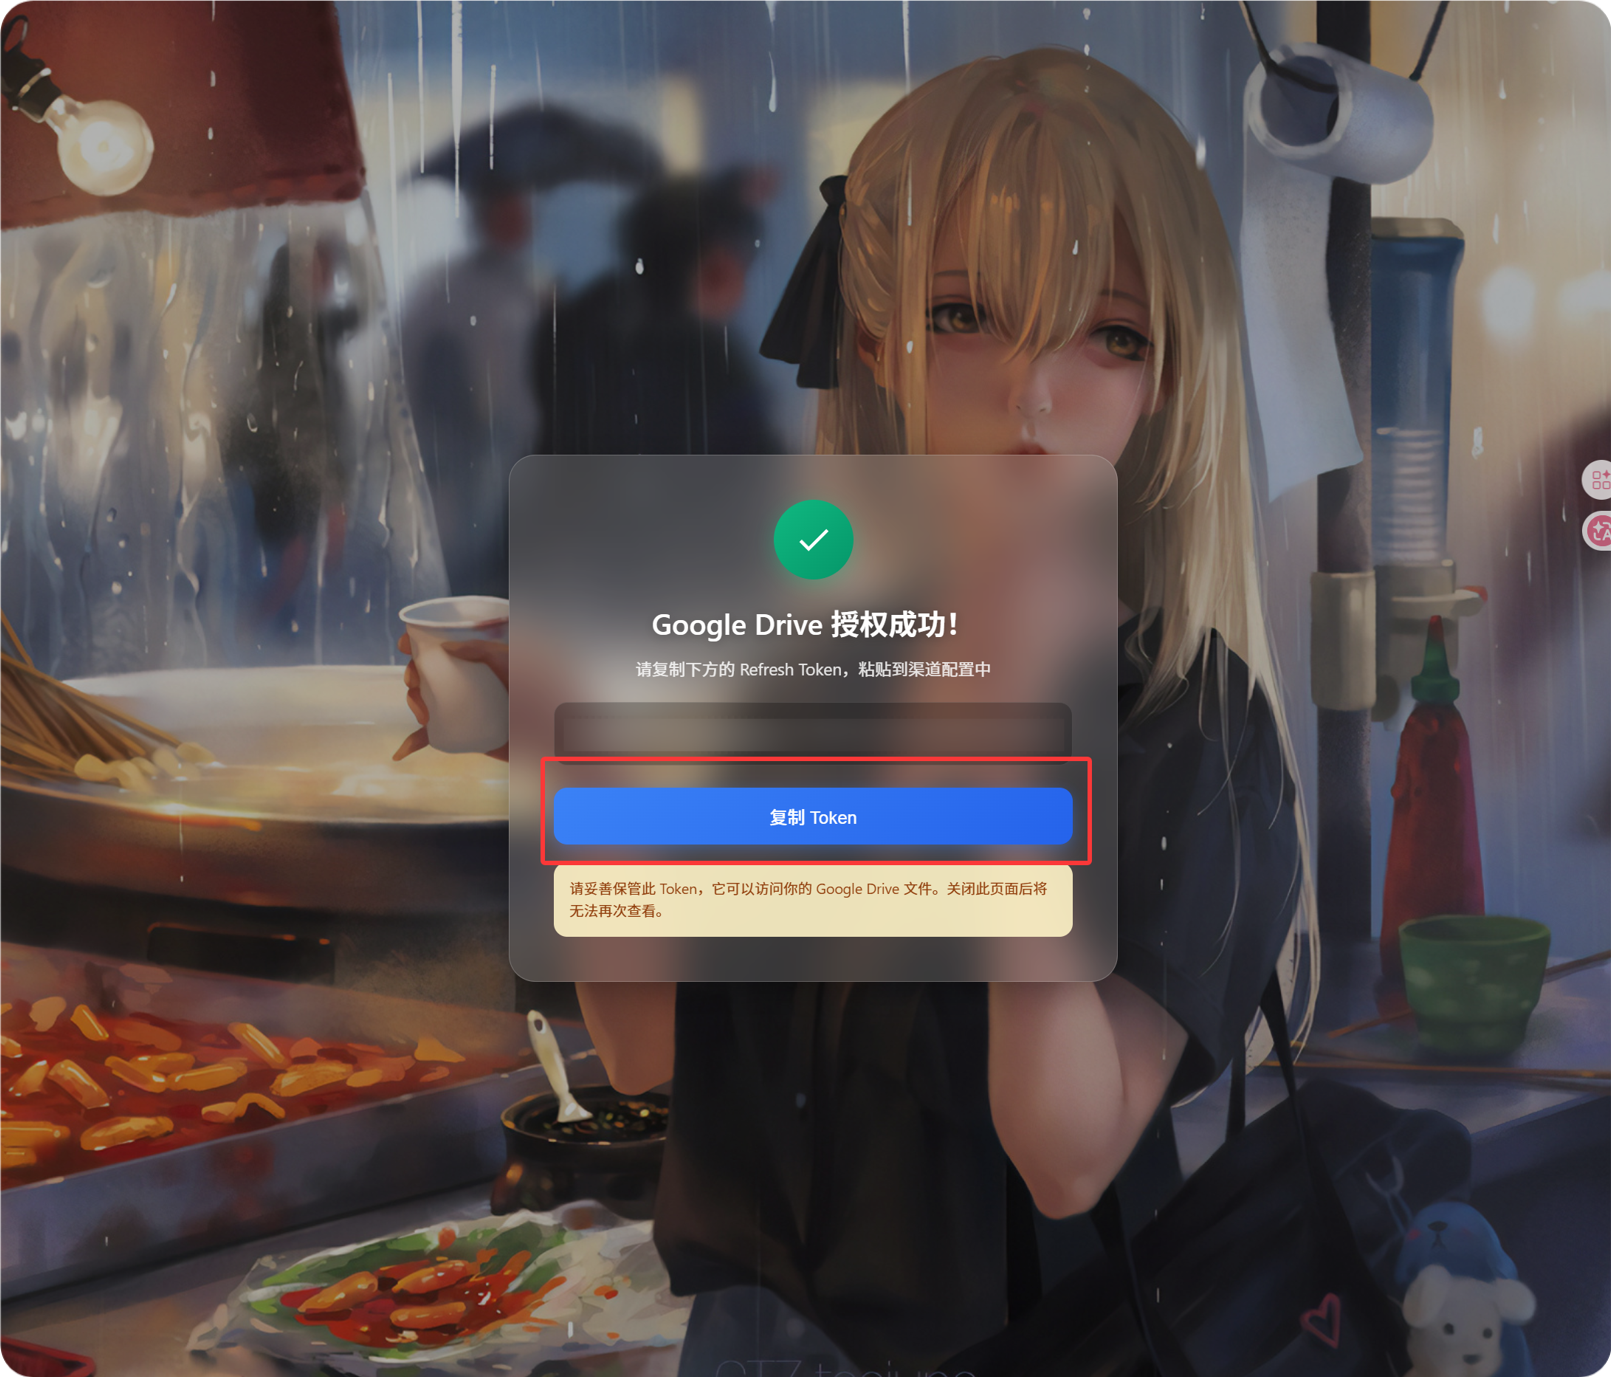
الخطوة 5: احصل على Refresh Token
- اضغط
Get Token. - اختر حساب Google الذي تريد ربطه.
- أكمل رسائل التفويض.
- ستعرض صفحة callback قيمة
Refresh Token. - انسخها.
- ارجع إلى ImgBed والصقها في حقل
Refresh Token.
إذا غيّرت حساب Google لاحقًا، أو بدّلت OAuth client، أو انتهت صلاحية التفويض القديم، فلا تحتاج إلى حذف القناة. افتح صفحة التحرير واضغط Reauthorize.
الخطوة 6: احفظ القناة
بعد ملء جميع الحقول احفظ القناة.
المسار السريع
text
افتح Google Cloud
-> أنشئ مشروعًا أو اختر مشروعًا
-> فعّل Google Drive API
-> اضبط Google Auth Platform
-> إذا كان Audience هو External فأضف حساب Google إلى Test users
-> أنشئ Web application OAuth client
-> استخدم https://your-domain.com/api/oauth/google/callback كـ redirect URI
-> أدخل Client ID و Client Secret في ImgBed
-> اضغط Get Token
-> سجّل الدخول بـ Google وفوّض
-> انسخ Refresh Token من صفحة callback
-> الصقه في ImgBed واحفظ
-> ارفع صورة تجريبية
مراجع
- Google OAuth Web Server Applications: https://developers.google.com/identity/protocols/oauth2/web-server
- Google Workspace OAuth Consent Configuration: https://developers.google.com/workspace/guides/configure-oauth-consent
- Google Drive API Auth Scopes: https://developers.google.com/workspace/drive/api/guides/api-specific-auth