新增 Google Drive 渠道
新增前要準備什麼
| 需要準備 | 用途 |
|---|---|
| Google 帳號 | 登入 Google Cloud 並授權 Google Drive |
| Google Cloud 專案 | 啟用 Drive API、建立 OAuth 2.0 憑證 |
| OAuth 2.0 Client | 取得 Client ID、Client Secret 和 Refresh Token |
| 目前 ImgBed 網域 | 設定授權回呼網址,必須和實際使用網域一致 |
新增步驟
第一步:啟用 Google Drive API
- 打開 Google Cloud Console。
- 建立新專案,或選擇既有專案。
- 進入
APIs & Services。 - 點
Enable APIs and Services。 - 搜尋
Google Drive API。 - 進入後啟用。
第二步:設定 OAuth 同意畫面
- 進入
Google Auth Platform。 - 先完成
Branding的基本資訊,例如應用名稱、支援信箱、開發者聯絡信箱。 - 進入
Audience。 - 大多數個人自架情境選
External即可。 - 如果選
External,把你要授權的 Google 帳號加到Test users。 - 進入
Data Access。 - 加入 Google Drive 權限。
第三步:建立 OAuth 2.0 Client
- 在
Google Auth Platform打開Clients。 - 建立新的 Client。
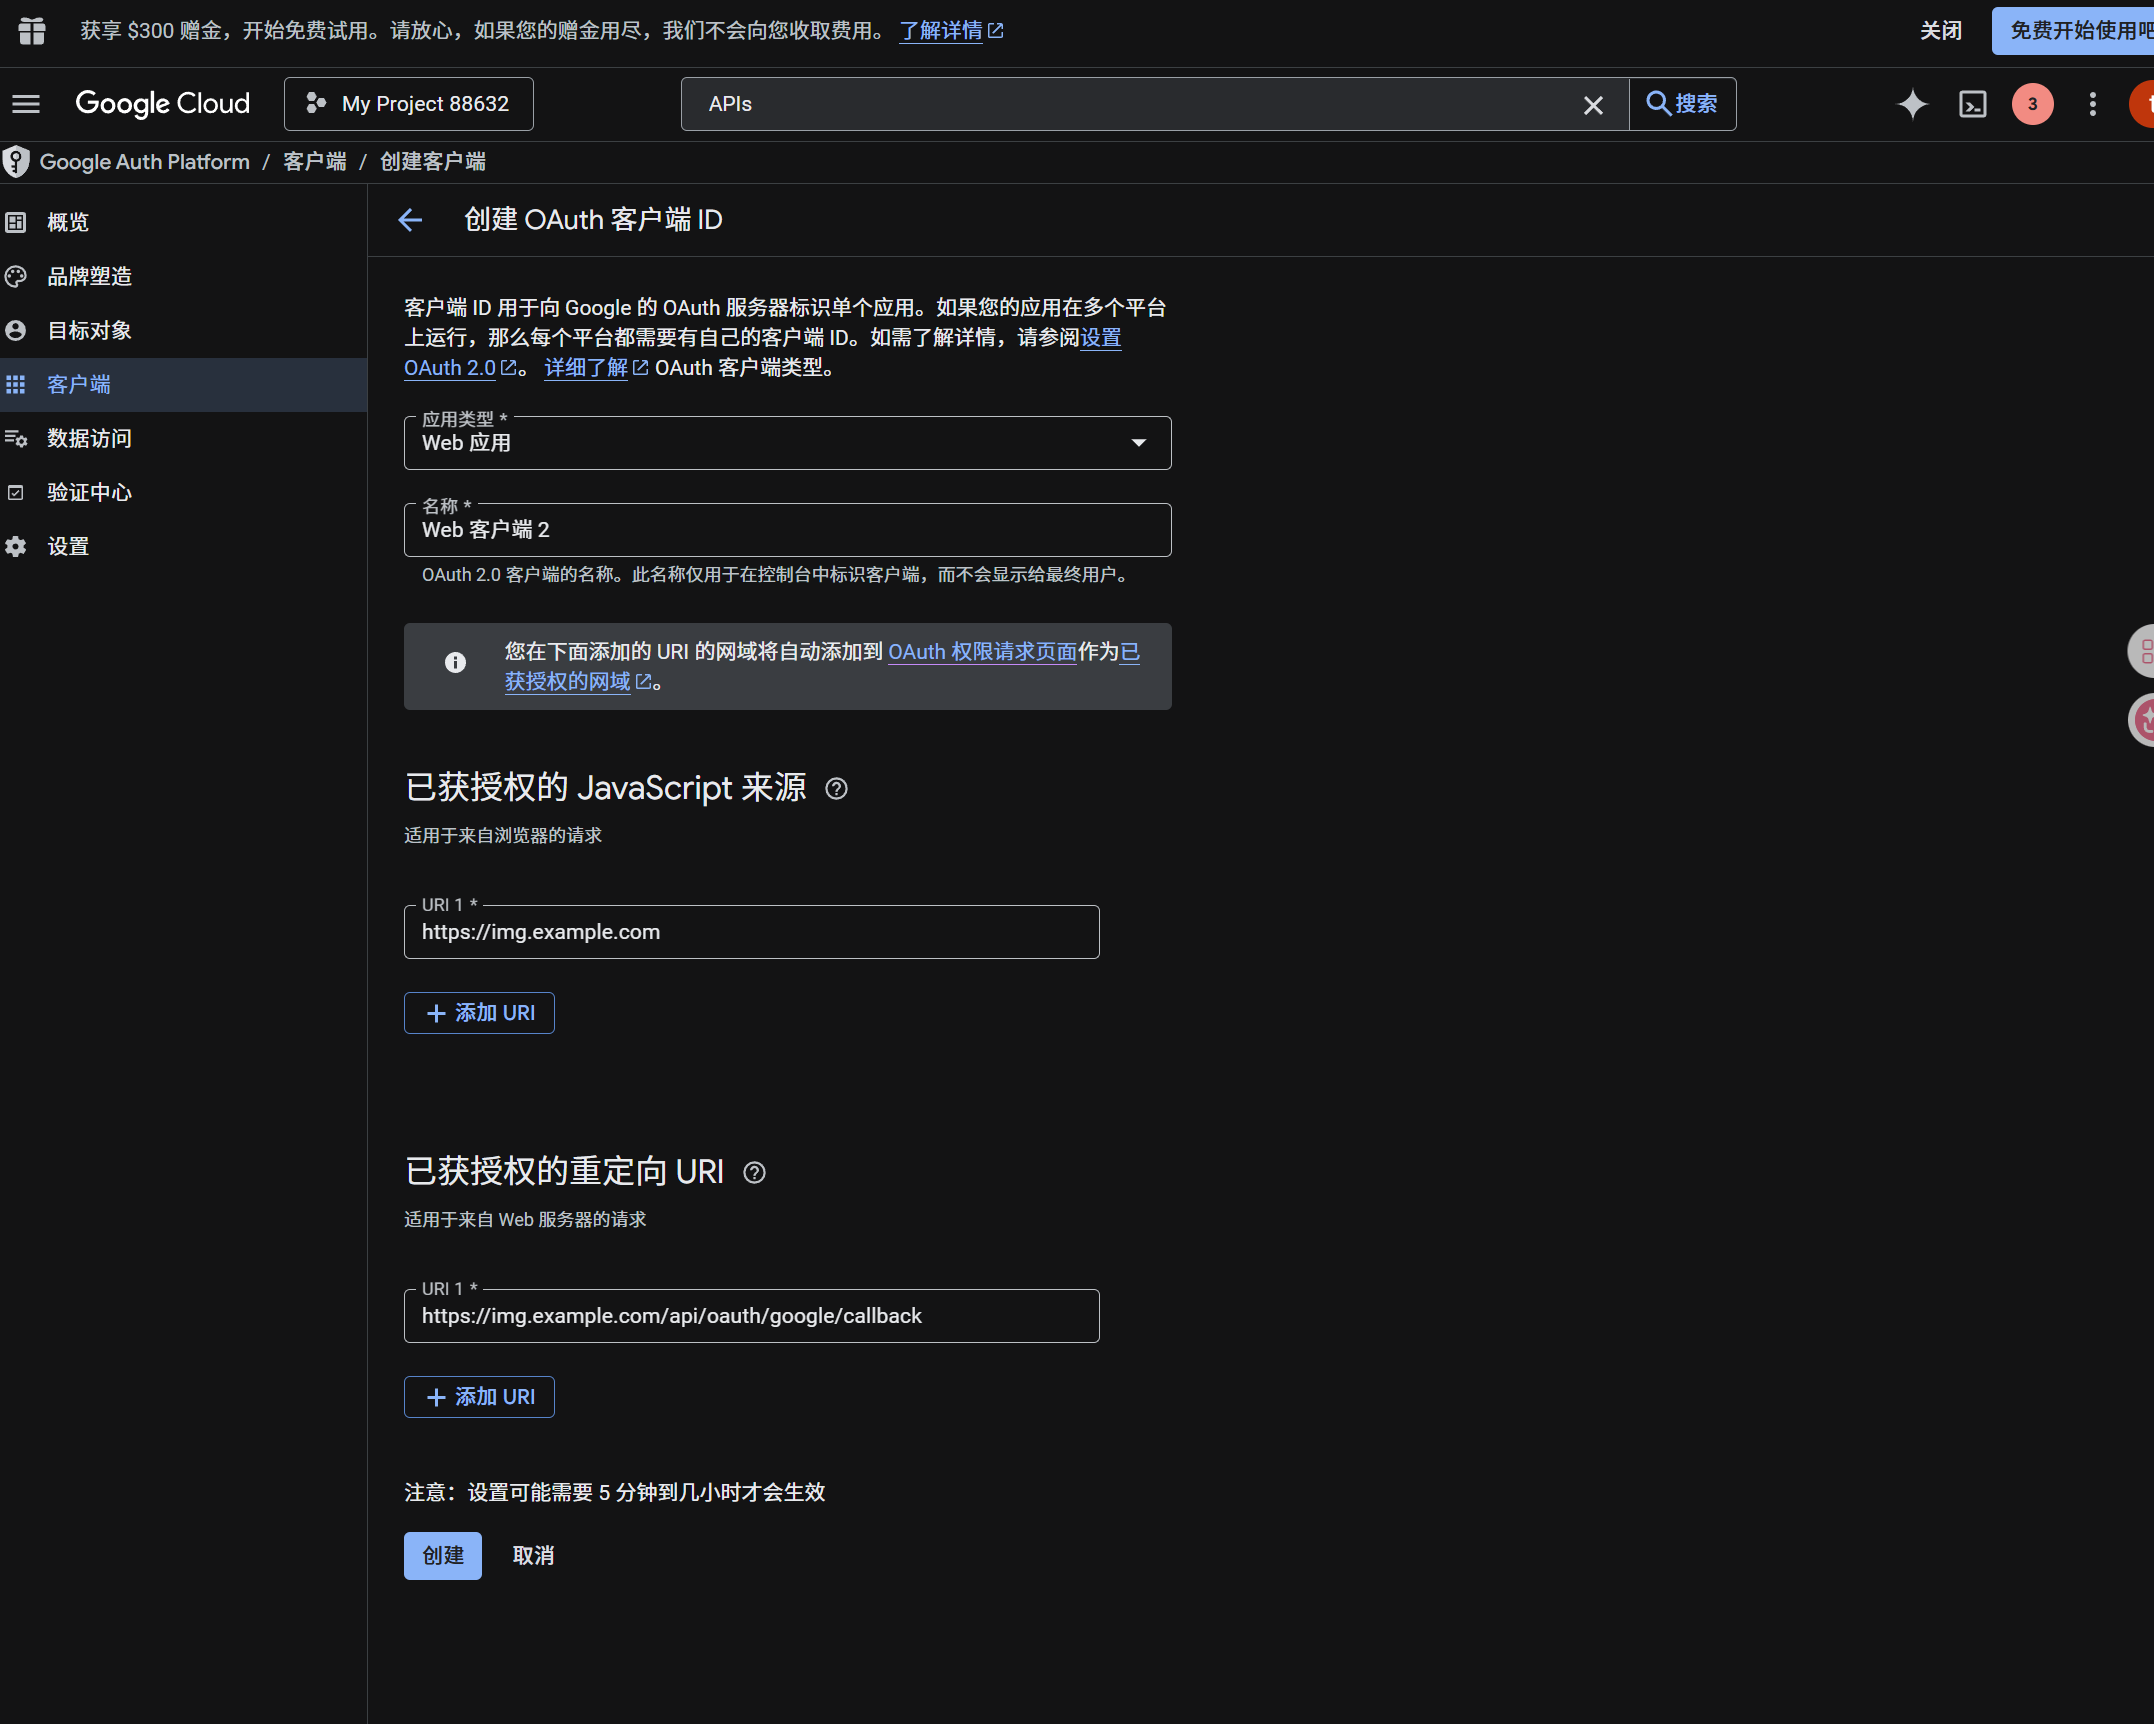
- 應用程式類型選
Web application。 - 取一個好辨識的名稱。
- Authorized JavaScript origins 填你的 ImgBed 網址,例如:
text
https://img.example.com- Authorized redirect URIs 填:
text
https://img.example.com/api/oauth/google/callback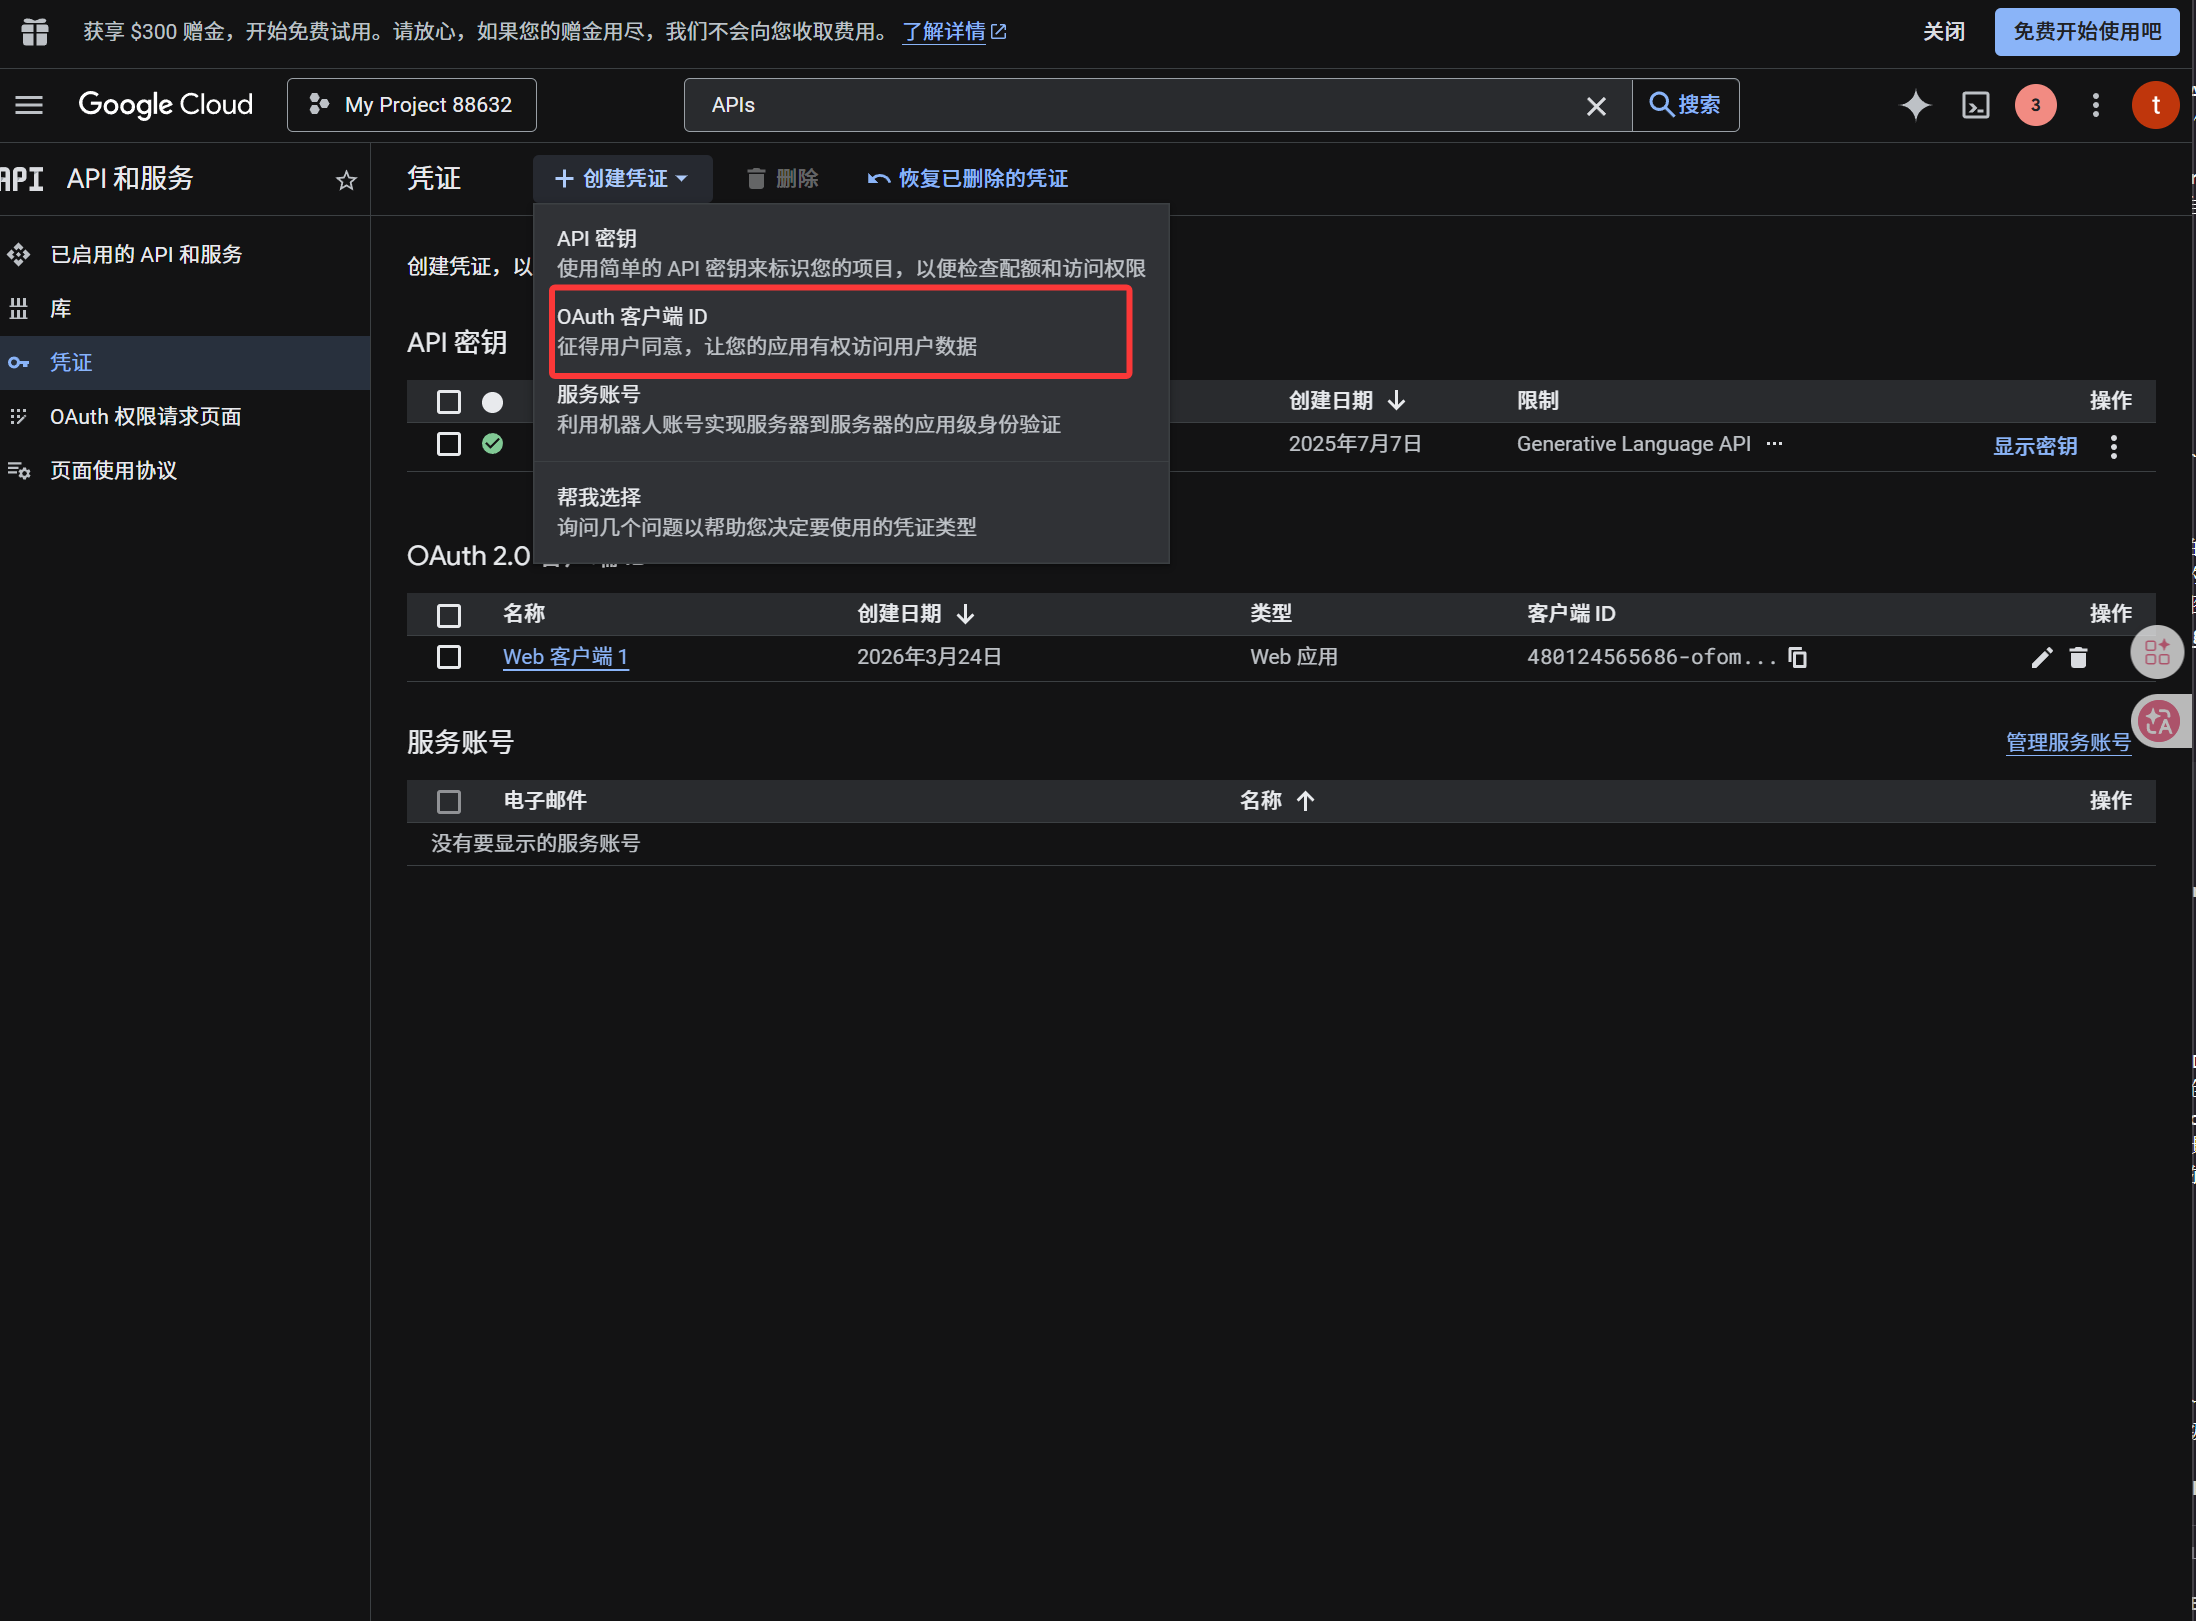
建立完成後,複製:
| 產生結果 | ImgBed 欄位 |
|---|---|
| Client ID | Client ID |
| Client Secret | Client Secret |
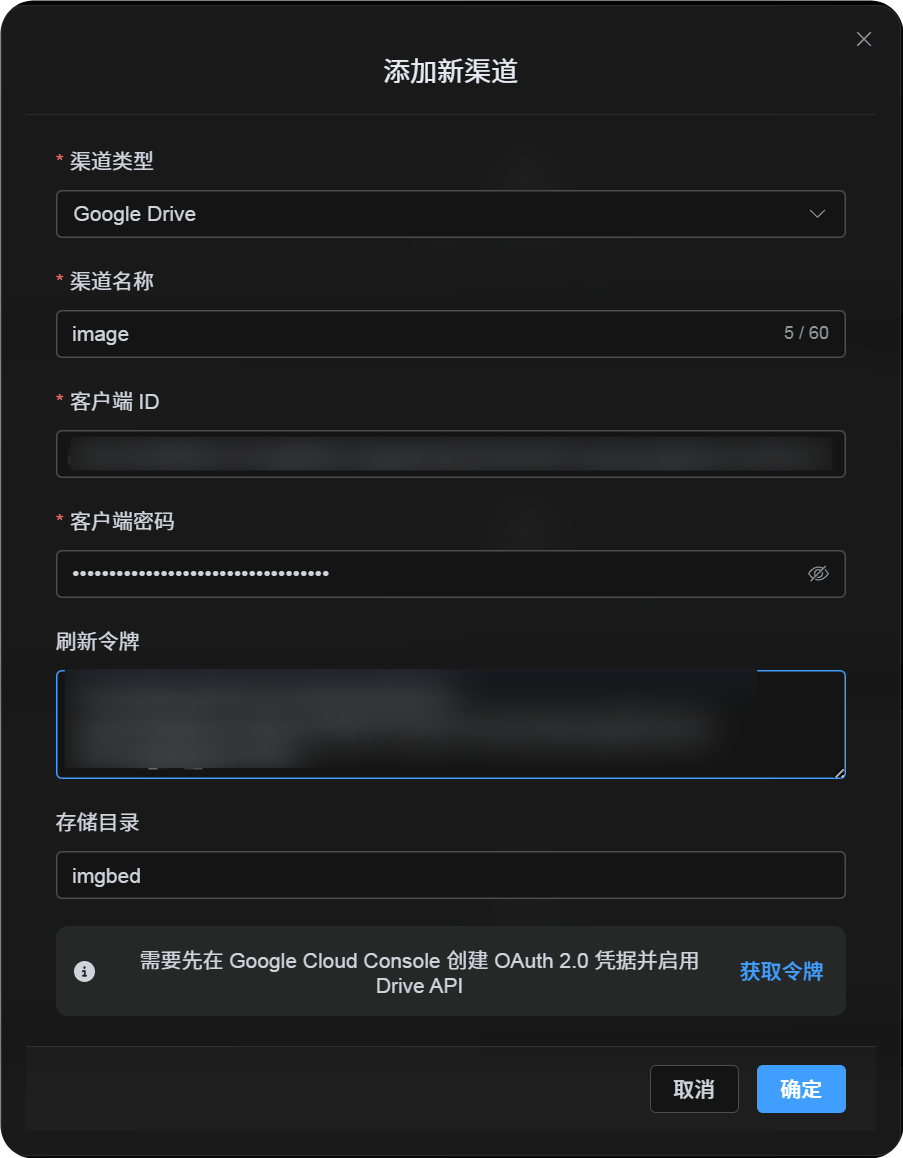
第四步:回 ImgBed 填寫 Google Drive 渠道
| 頁面欄位 | 填寫內容 |
|---|---|
| 渠道名稱 | 自己取,例如 GoogleDrive主帳號 |
| Client ID | Google Cloud 建立出的 Client ID |
| Client Secret | Google Cloud 建立出的 Client Secret |
| Refresh Token | 先留空,下一步取得 |
| 根目錄 | 選填,預設 imgbed |
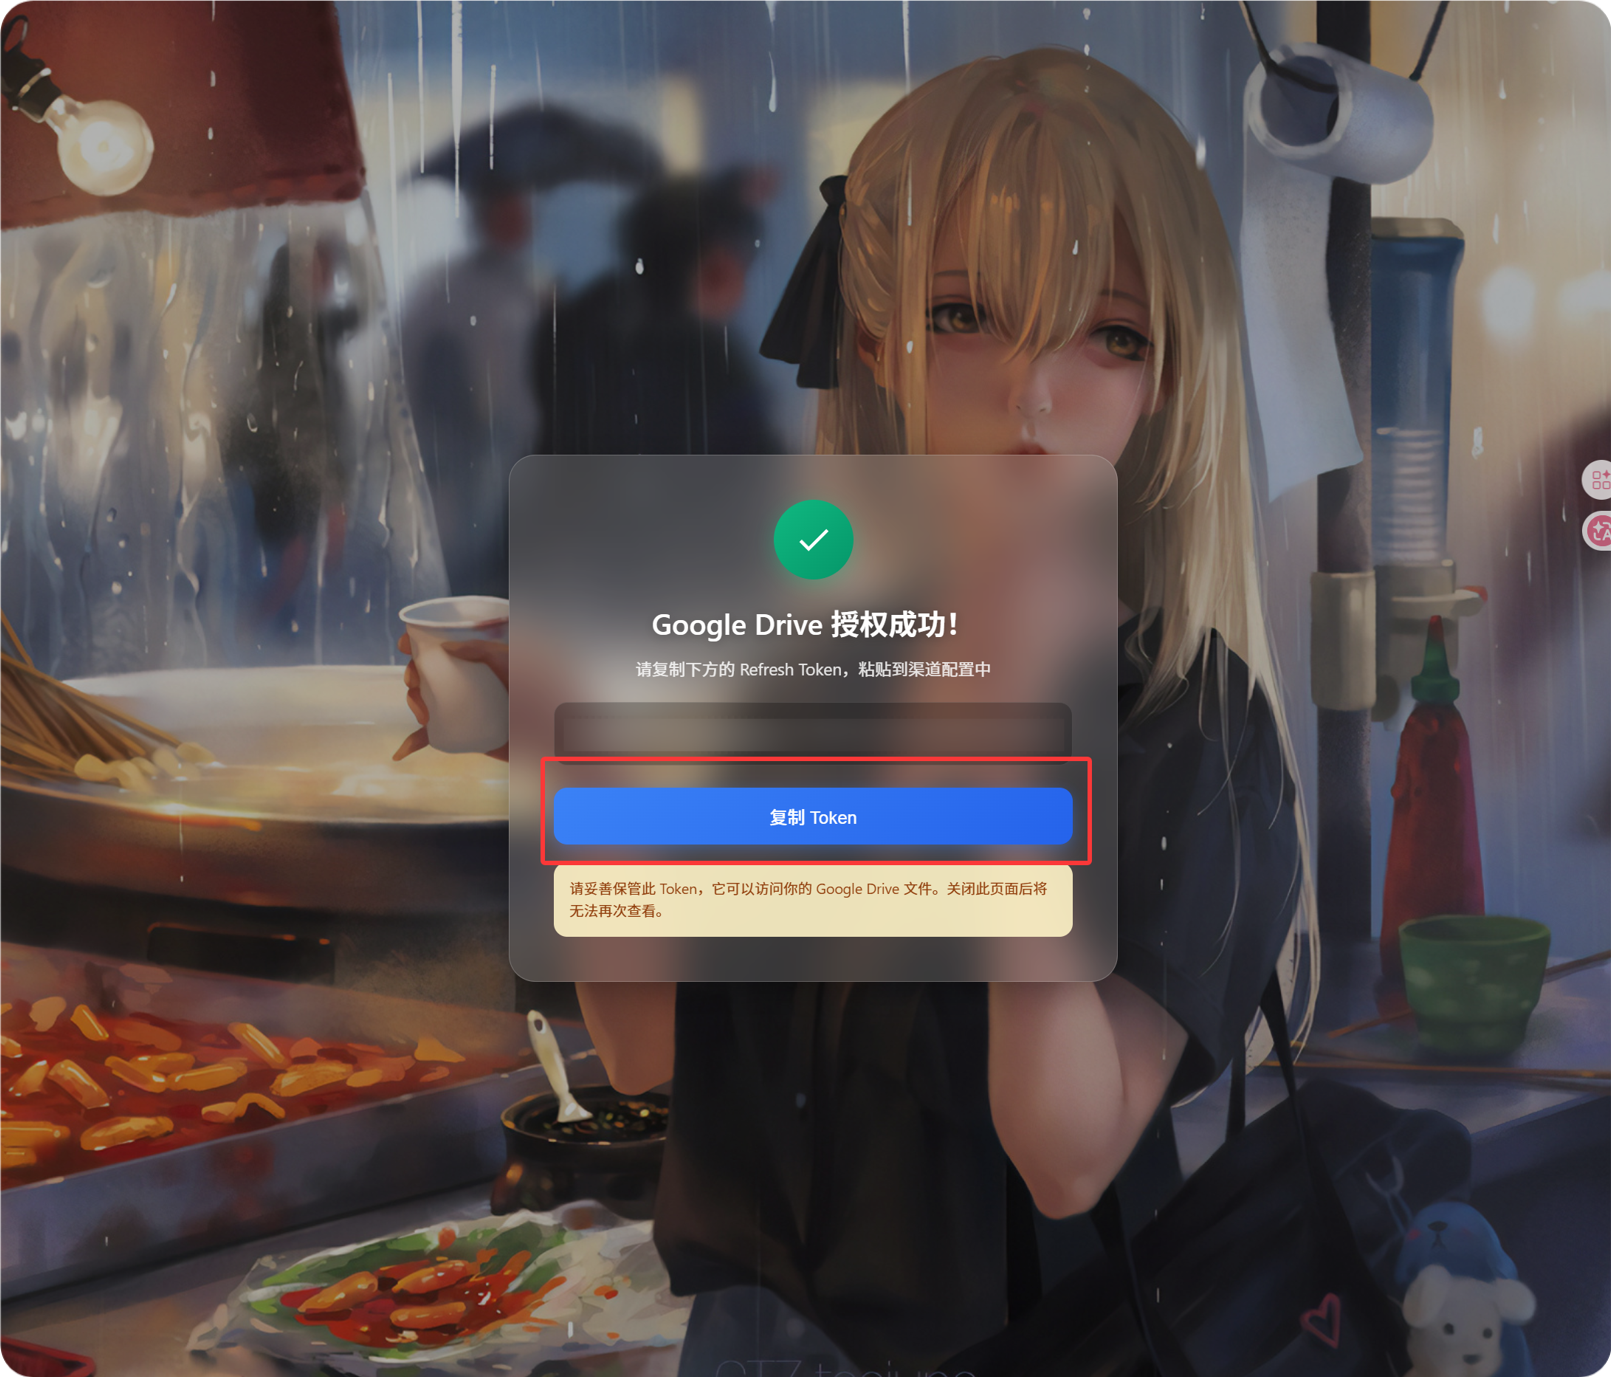
第五步:取得 Refresh Token
- 點「取得 Token」。
- 選擇要綁定的 Google 帳號。
- 依頁面提示完成授權。
- 成功後,回呼頁會顯示
Refresh Token。 - 複製它。
- 回到 ImgBed,貼到
Refresh Token欄位。
如果之後換 Google 帳號、修改 Client,或舊授權失效,不用刪渠道,直接在編輯頁點「重新授權」即可。
第六步:儲存渠道
欄位填好後直接儲存。
快速流程
text
登入 Google Cloud
-> 建立或選擇專案
-> 啟用 Google Drive API
-> 設定 Google Auth Platform
-> Audience 選 External 時,把自己的帳號加入 Test users
-> 建立 Web application OAuth Client
-> 回呼填 https://你的網域/api/oauth/google/callback
-> 回 ImgBed 填 Client ID 和 Client Secret
-> 點取得 Token
-> Google 登入並授權
-> 複製 Refresh Token
-> 貼回 ImgBed 儲存
-> 上傳測試圖片