Google Drive 채널 추가
먼저 필요한 항목
시작하기 전에 다음 항목을 준비합니다.
| 요구 사항 | 필요한 이유 |
|---|---|
| Google 계정 | Google Cloud에 접근하고 Google Drive를 승인하는 데 사용합니다. |
| Google Cloud 프로젝트 | Drive API를 활성화하고 OAuth 자격 증명을 만드는 데 사용합니다. |
| OAuth 2.0 client | ImgHost가 Client ID, Client Secret, Refresh Token을 얻는 데 사용합니다. |
| ImgHost 도메인 | OAuth redirect URI에 사용합니다. 실제 사용하는 도메인과 일치해야 합니다. |
설정 단계
단계 1: Google Drive API 활성화
- Google Cloud Console을 엽니다.
- 새 프로젝트를 만들거나 기존 프로젝트를 선택합니다.
APIs & Services로 이동합니다.Enable APIs and Services를 클릭합니다.Google Drive API를 검색합니다.- 열고 활성화합니다.
단계 2: OAuth Consent Screen 설정
- Google Cloud에서
Google Auth Platform을 엽니다. - 앱 이름, 지원 이메일, 개발자 연락처 이메일 등
Branding의 기본 정보를 입력합니다. Audience를 엽니다.- 대부분의 자체 호스팅 개인 배포에서는
External을 선택합니다. External을 선택했다면Test users에 승인할 Google 계정을 추가합니다.Data Access를 엽니다.- 필요한 Google Drive 권한을 추가합니다.
단계 3: OAuth 2.0 Client 만들기
Google Auth Platform에서Clients를 엽니다.- 새 client를 만듭니다.
- application type을
Web application으로 설정합니다. - client에 알아보기 쉬운 이름을 지정합니다.
- authorized JavaScript origins에는 ImgHost URL을 입력합니다. 예:
text
https://img.example.com- authorized redirect URIs에는 다음을 입력합니다.
text
https://img.example.com/api/oauth/google/callback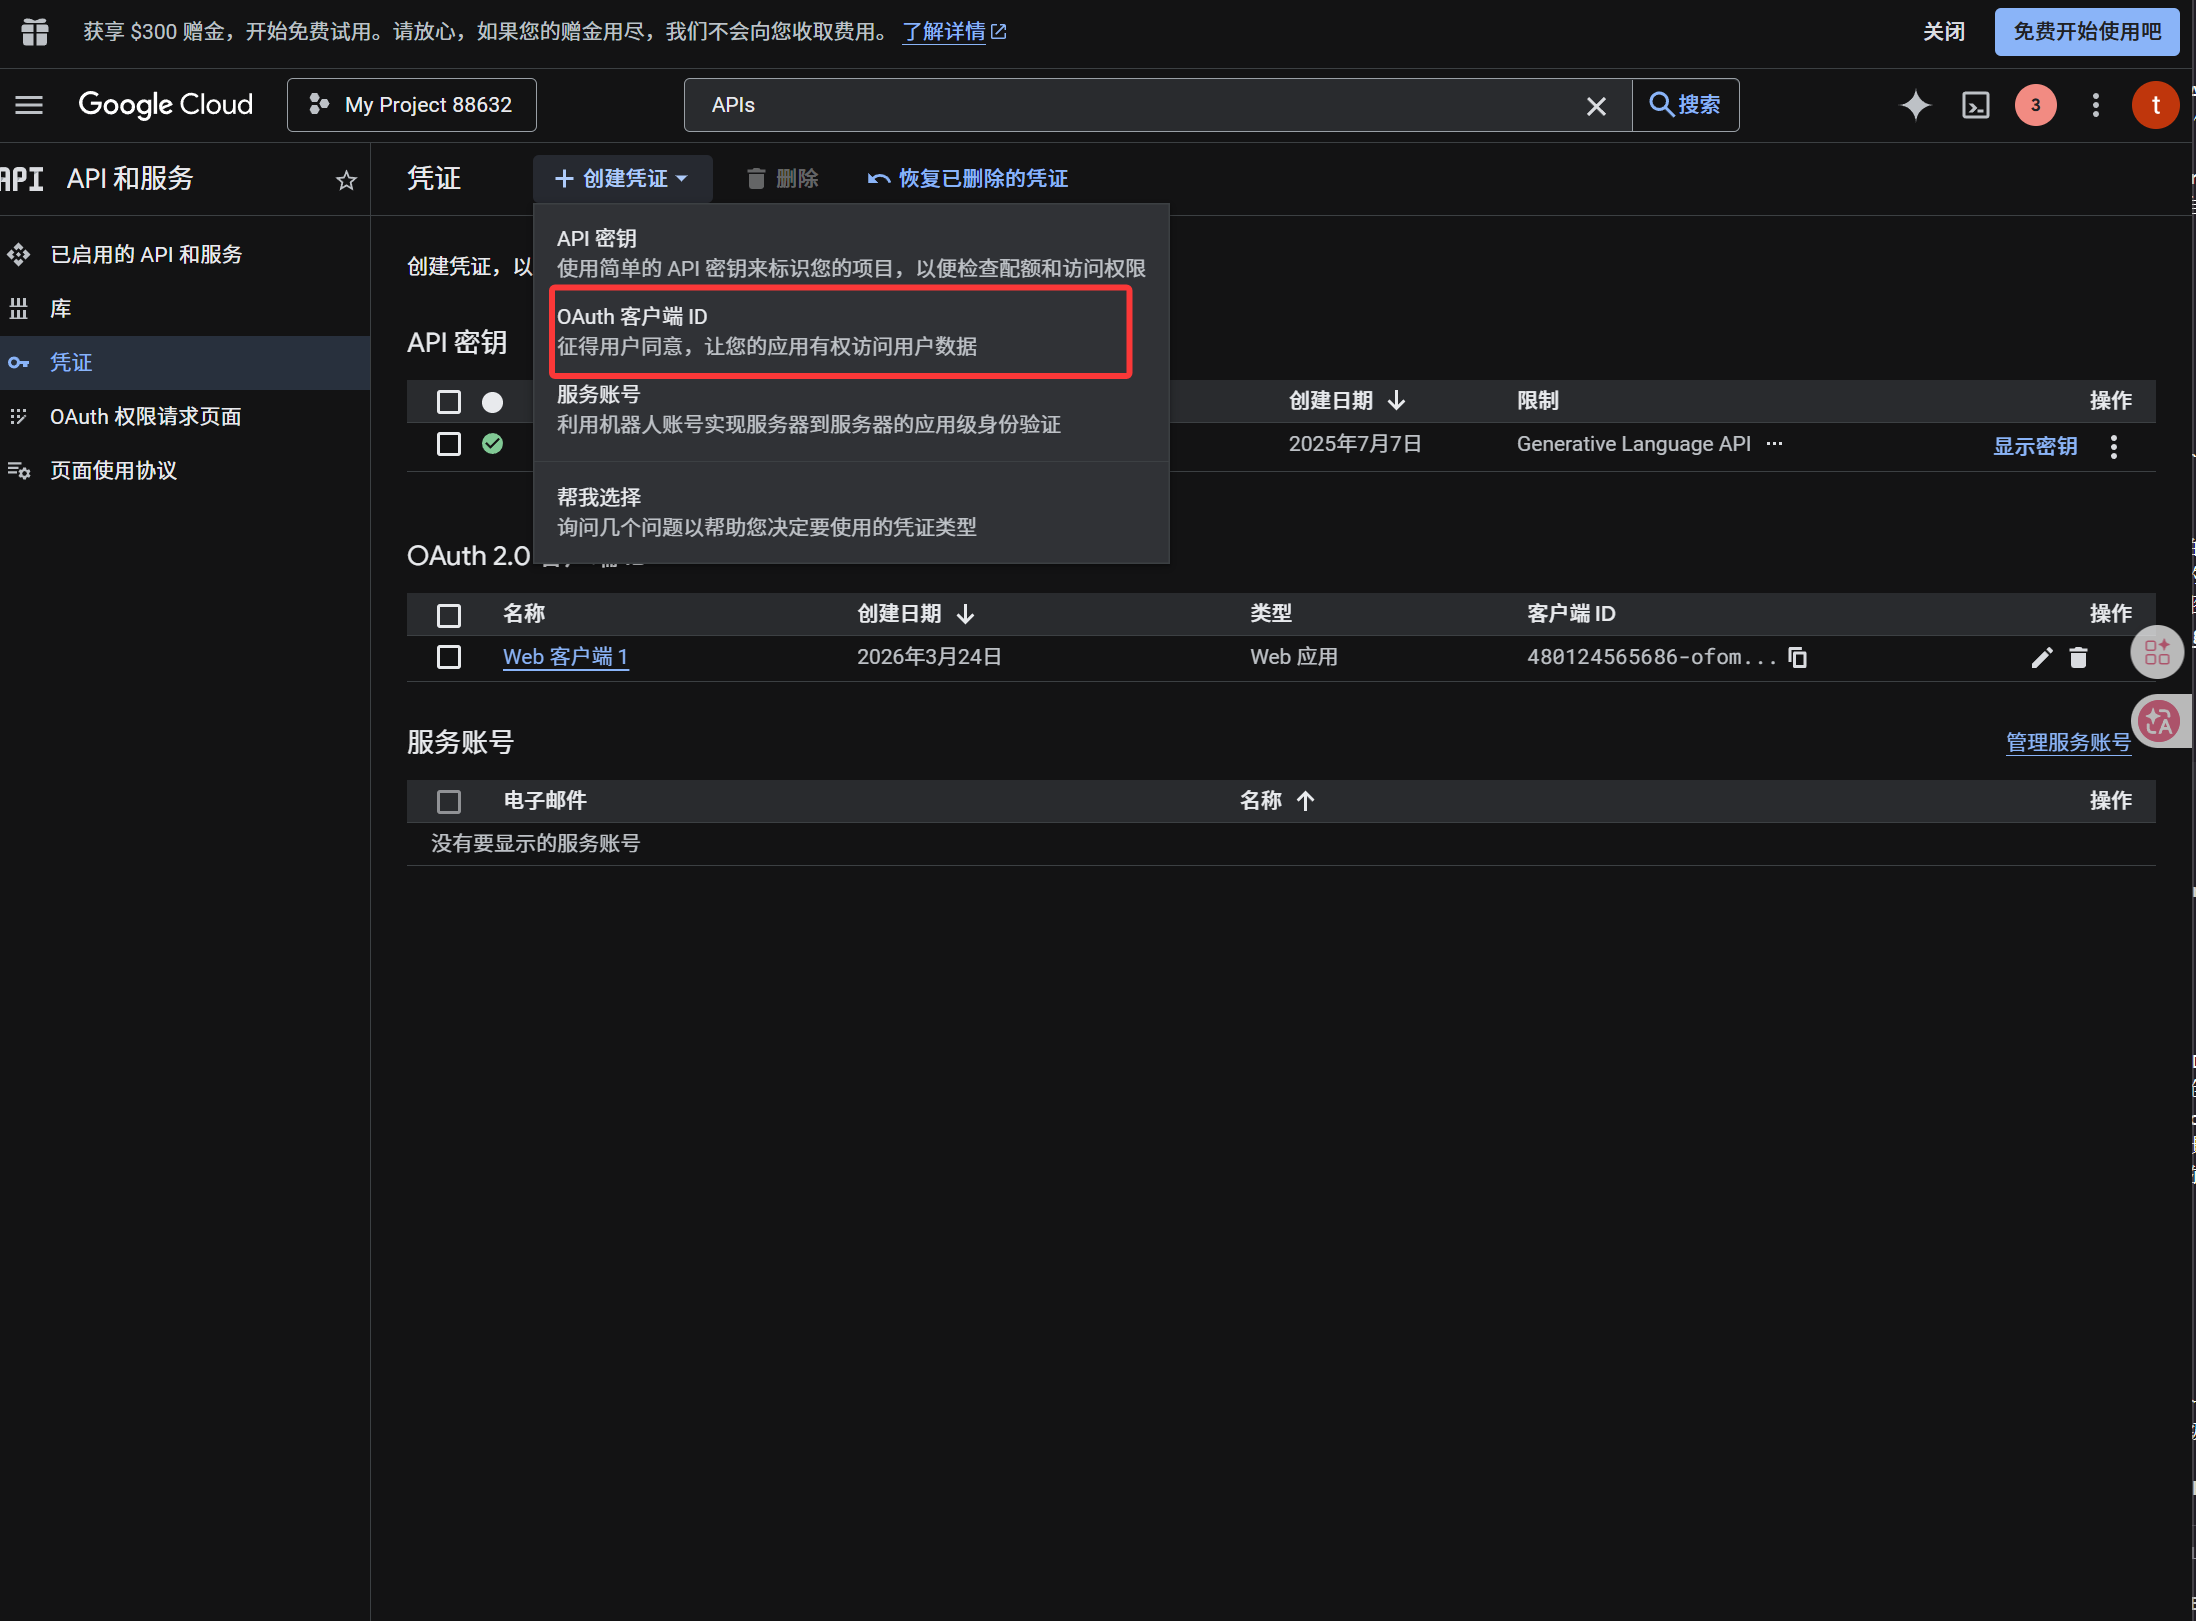
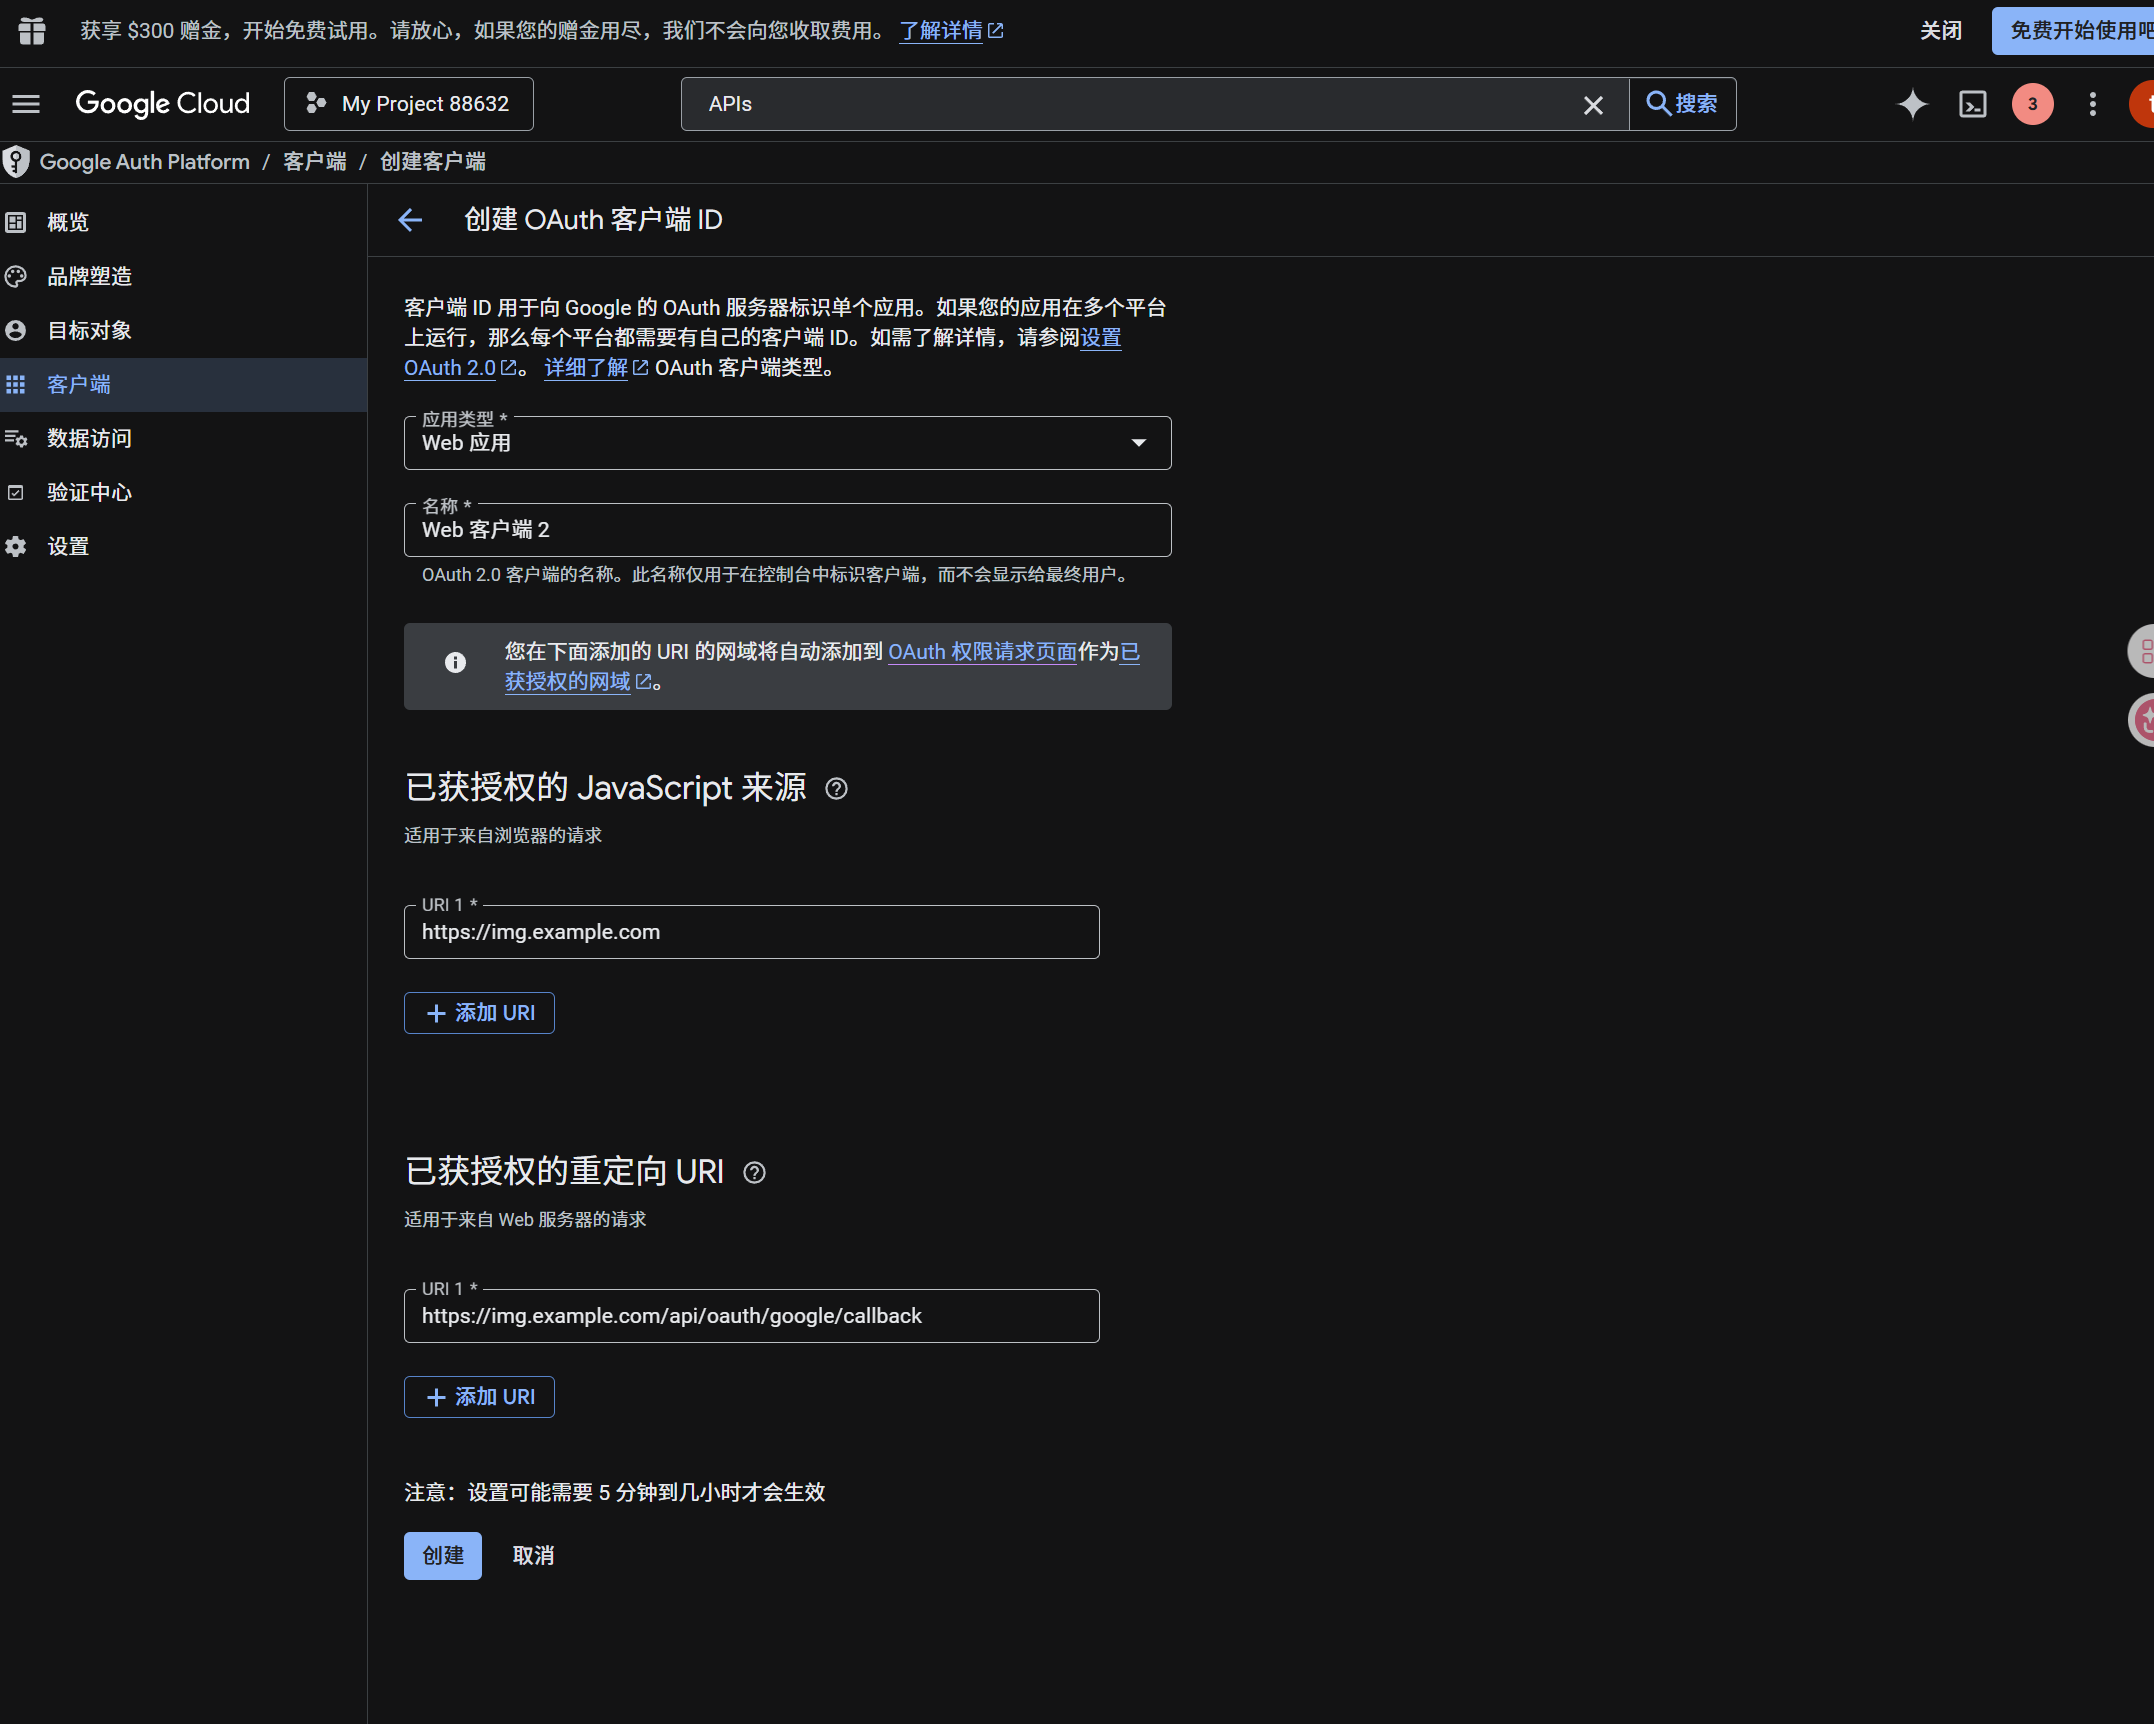
client가 생성되면 다음 값을 복사합니다.
| 생성된 값 | ImgHost 필드 |
|---|---|
| Client ID | Client ID |
| Client Secret | Client Secret |
단계 4: Google Drive 채널 입력
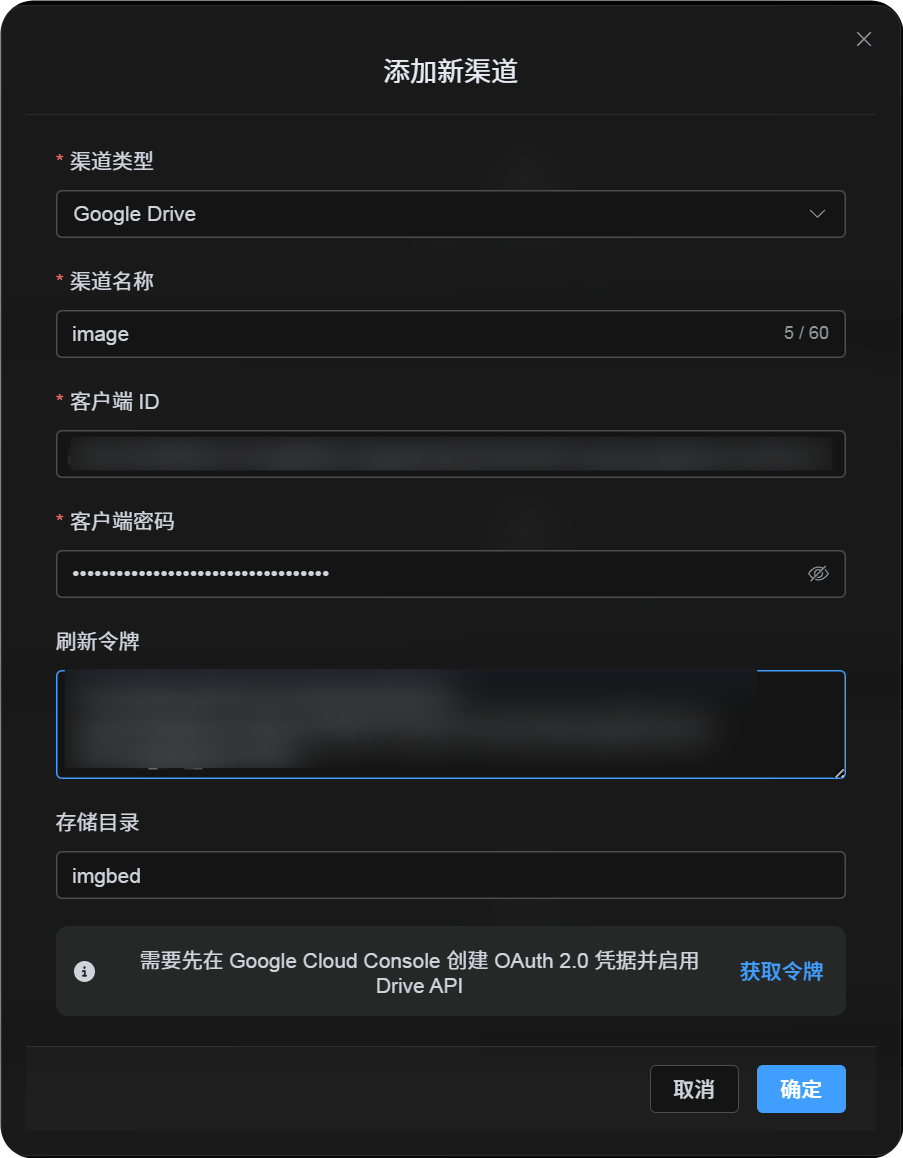
업로드 설정에서 Google Drive를 선택하고 다음을 입력합니다.
| ImgHost 필드 | 입력할 내용 |
|---|---|
| 채널 이름 | 알아보기 쉬운 이름. 예: Main Google Drive |
| Client ID | Google Cloud의 Client ID |
| Client Secret | Google Cloud의 Client Secret |
| Refresh Token | 지금은 비워 둡니다. 다음 단계에서 받습니다. |
| Root directory | 선택 사항. 기본값은 imgbed입니다. |
단계 5: Refresh Token 받기
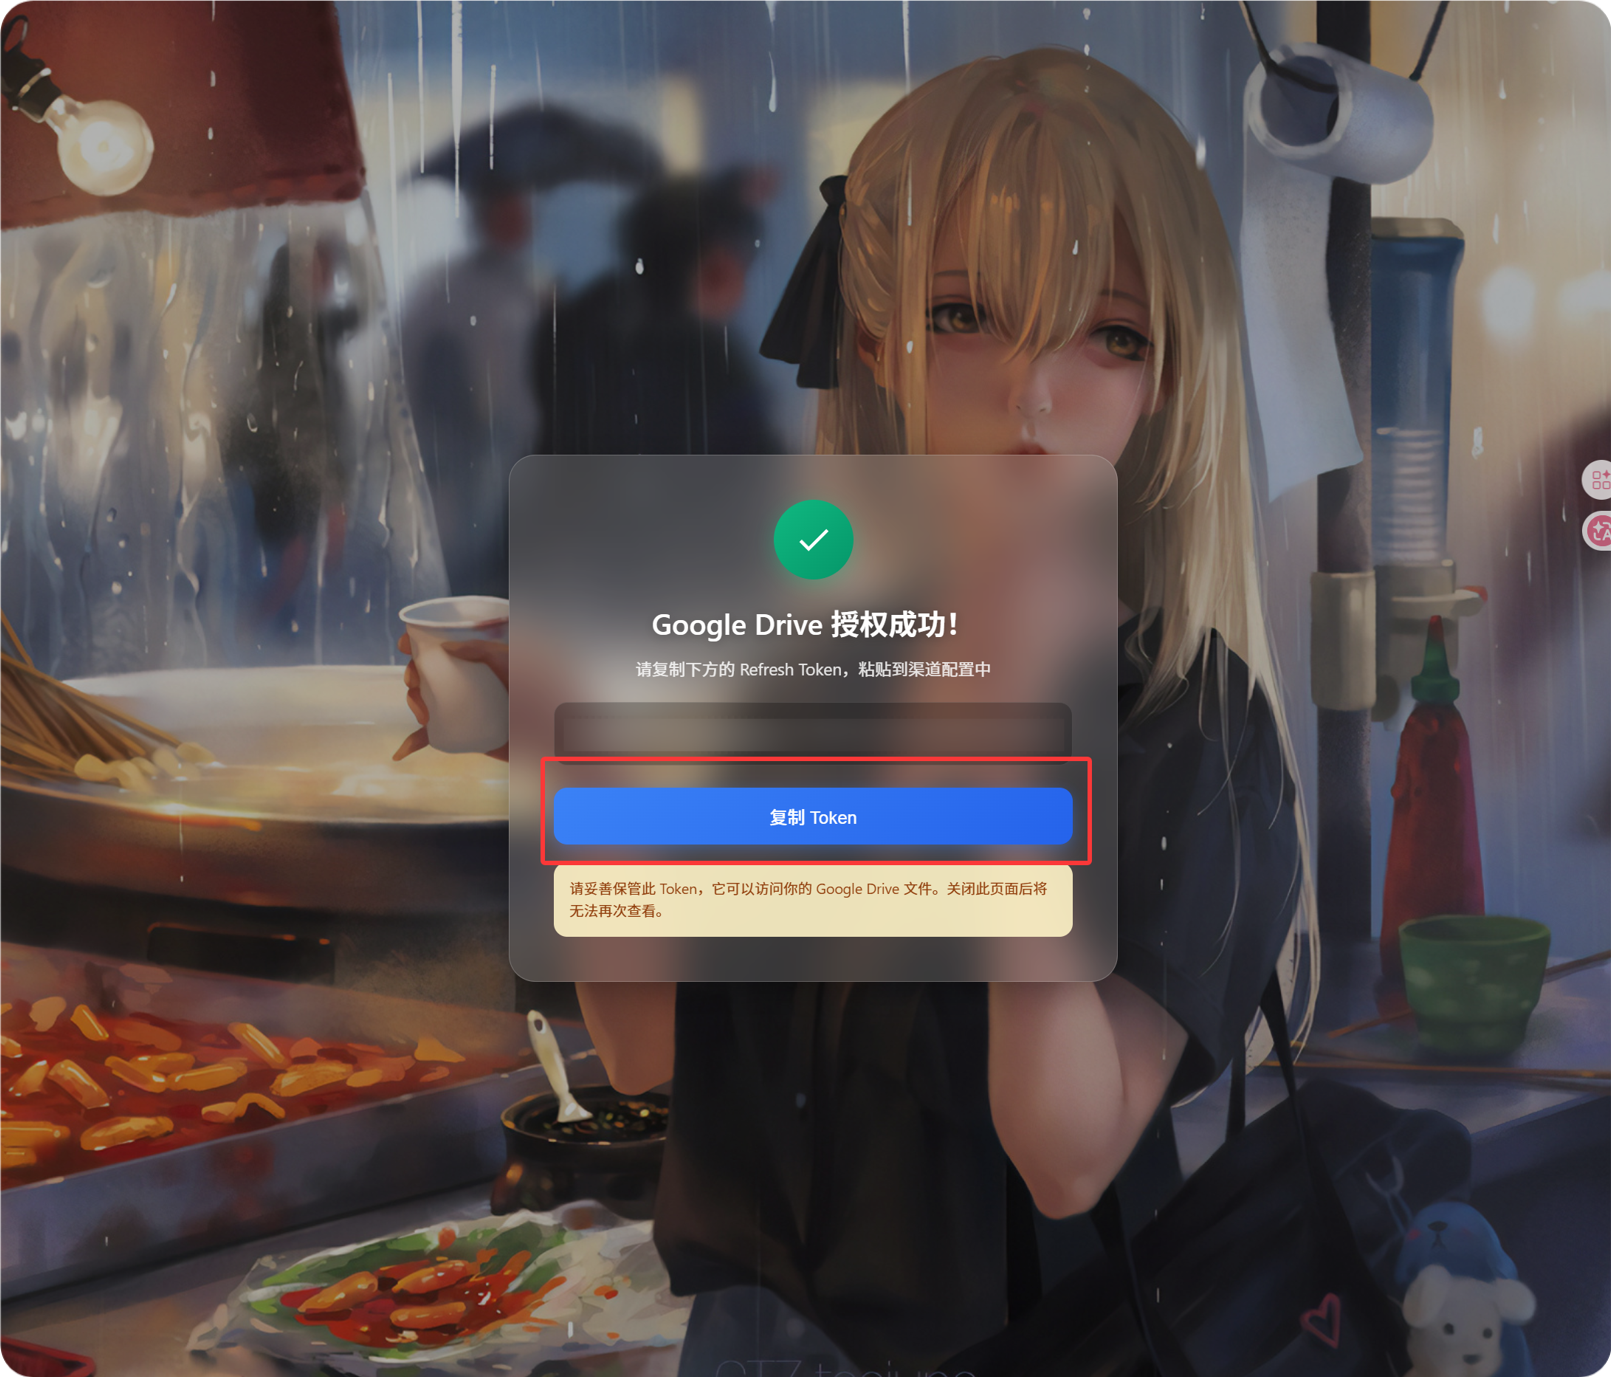
Get Token을 클릭합니다.- 연결할 Google 계정을 선택합니다.
- 승인 요청을 완료합니다.
- callback 페이지에
Refresh Token이 표시됩니다. - 복사합니다.
- ImgHost로 돌아가
Refresh Token필드에 붙여 넣습니다.
나중에 Google 계정을 바꾸거나, OAuth client를 변경하거나, 기존 승인이 만료되어도 채널을 삭제할 필요는 없습니다. 편집 페이지를 열고 Reauthorize를 클릭합니다.
단계 6: 채널 저장
모든 필드를 입력한 뒤 채널을 저장합니다.
빠른 흐름
text
Open Google Cloud
-> Create or select a project
-> Enable Google Drive API
-> Configure Google Auth Platform
-> If Audience is External, add your Google account to Test users
-> Create a Web application OAuth client
-> Use https://your-domain.com/api/oauth/google/callback as the redirect URI
-> Fill Client ID and Client Secret into ImgHost
-> Click Get Token
-> Sign in with Google and authorize
-> Copy the Refresh Token from the callback page
-> Paste it back into ImgHost and save
-> Upload a test image
참고
- Google OAuth Web Server Applications: https://developers.google.com/identity/protocols/oauth2/web-server
- Google Workspace OAuth Consent Configuration: https://developers.google.com/workspace/guides/configure-oauth-consent
- Google Drive API Auth Scopes: https://developers.google.com/workspace/drive/api/guides/api-specific-auth