Google Drive Channel যোগ করা
আগে যা লাগবে
শুরু করার আগে এগুলো প্রস্তুত রাখুন:
| Requirement | কেন লাগবে |
|---|---|
| Google account | Google Cloud access এবং Google Drive authorize করতে লাগে |
| Google Cloud project | Drive API enable এবং OAuth credentials তৈরি করতে লাগে |
| OAuth 2.0 client | ImgBed Client ID, Client Secret এবং Refresh Token নিতে এটি ব্যবহার করে |
| আপনার ImgBed domain | OAuth redirect URI-এর জন্য লাগে। আপনি যে domain ব্যবহার করেন সেটির সঙ্গে match করতে হবে। |
Setup Steps
Step 1: Google Drive API Enable করুন
- Google Cloud Console খুলুন।
- নতুন project তৈরি করুন অথবা existing project নির্বাচন করুন।
APIs & Services-এ যান।Enable APIs and Servicesক্লিক করুন।Google Drive APIsearch করুন।- খুলে enable ক্লিক করুন।
Step 2: OAuth Consent Screen Configure করুন
- Google Cloud-এ
Google Auth Platformখুলুন। - App name, support email এবং developer contact email-এর মতো basic
Brandinginformation পূরণ করুন। Audienceখুলুন।- বেশিরভাগ self-hosted personal deployment-এর জন্য
Externalনির্বাচন করুন। Externalনির্বাচন করলে যে Google account authorize করতে চান সেটিTest users-এ যোগ করুন।Data Accessখুলুন।- প্রয়োজনীয় Google Drive permissions যোগ করুন।
Step 3: OAuth 2.0 Client তৈরি করুন
Google Auth Platform-এClientsখুলুন।- নতুন client তৈরি করুন।
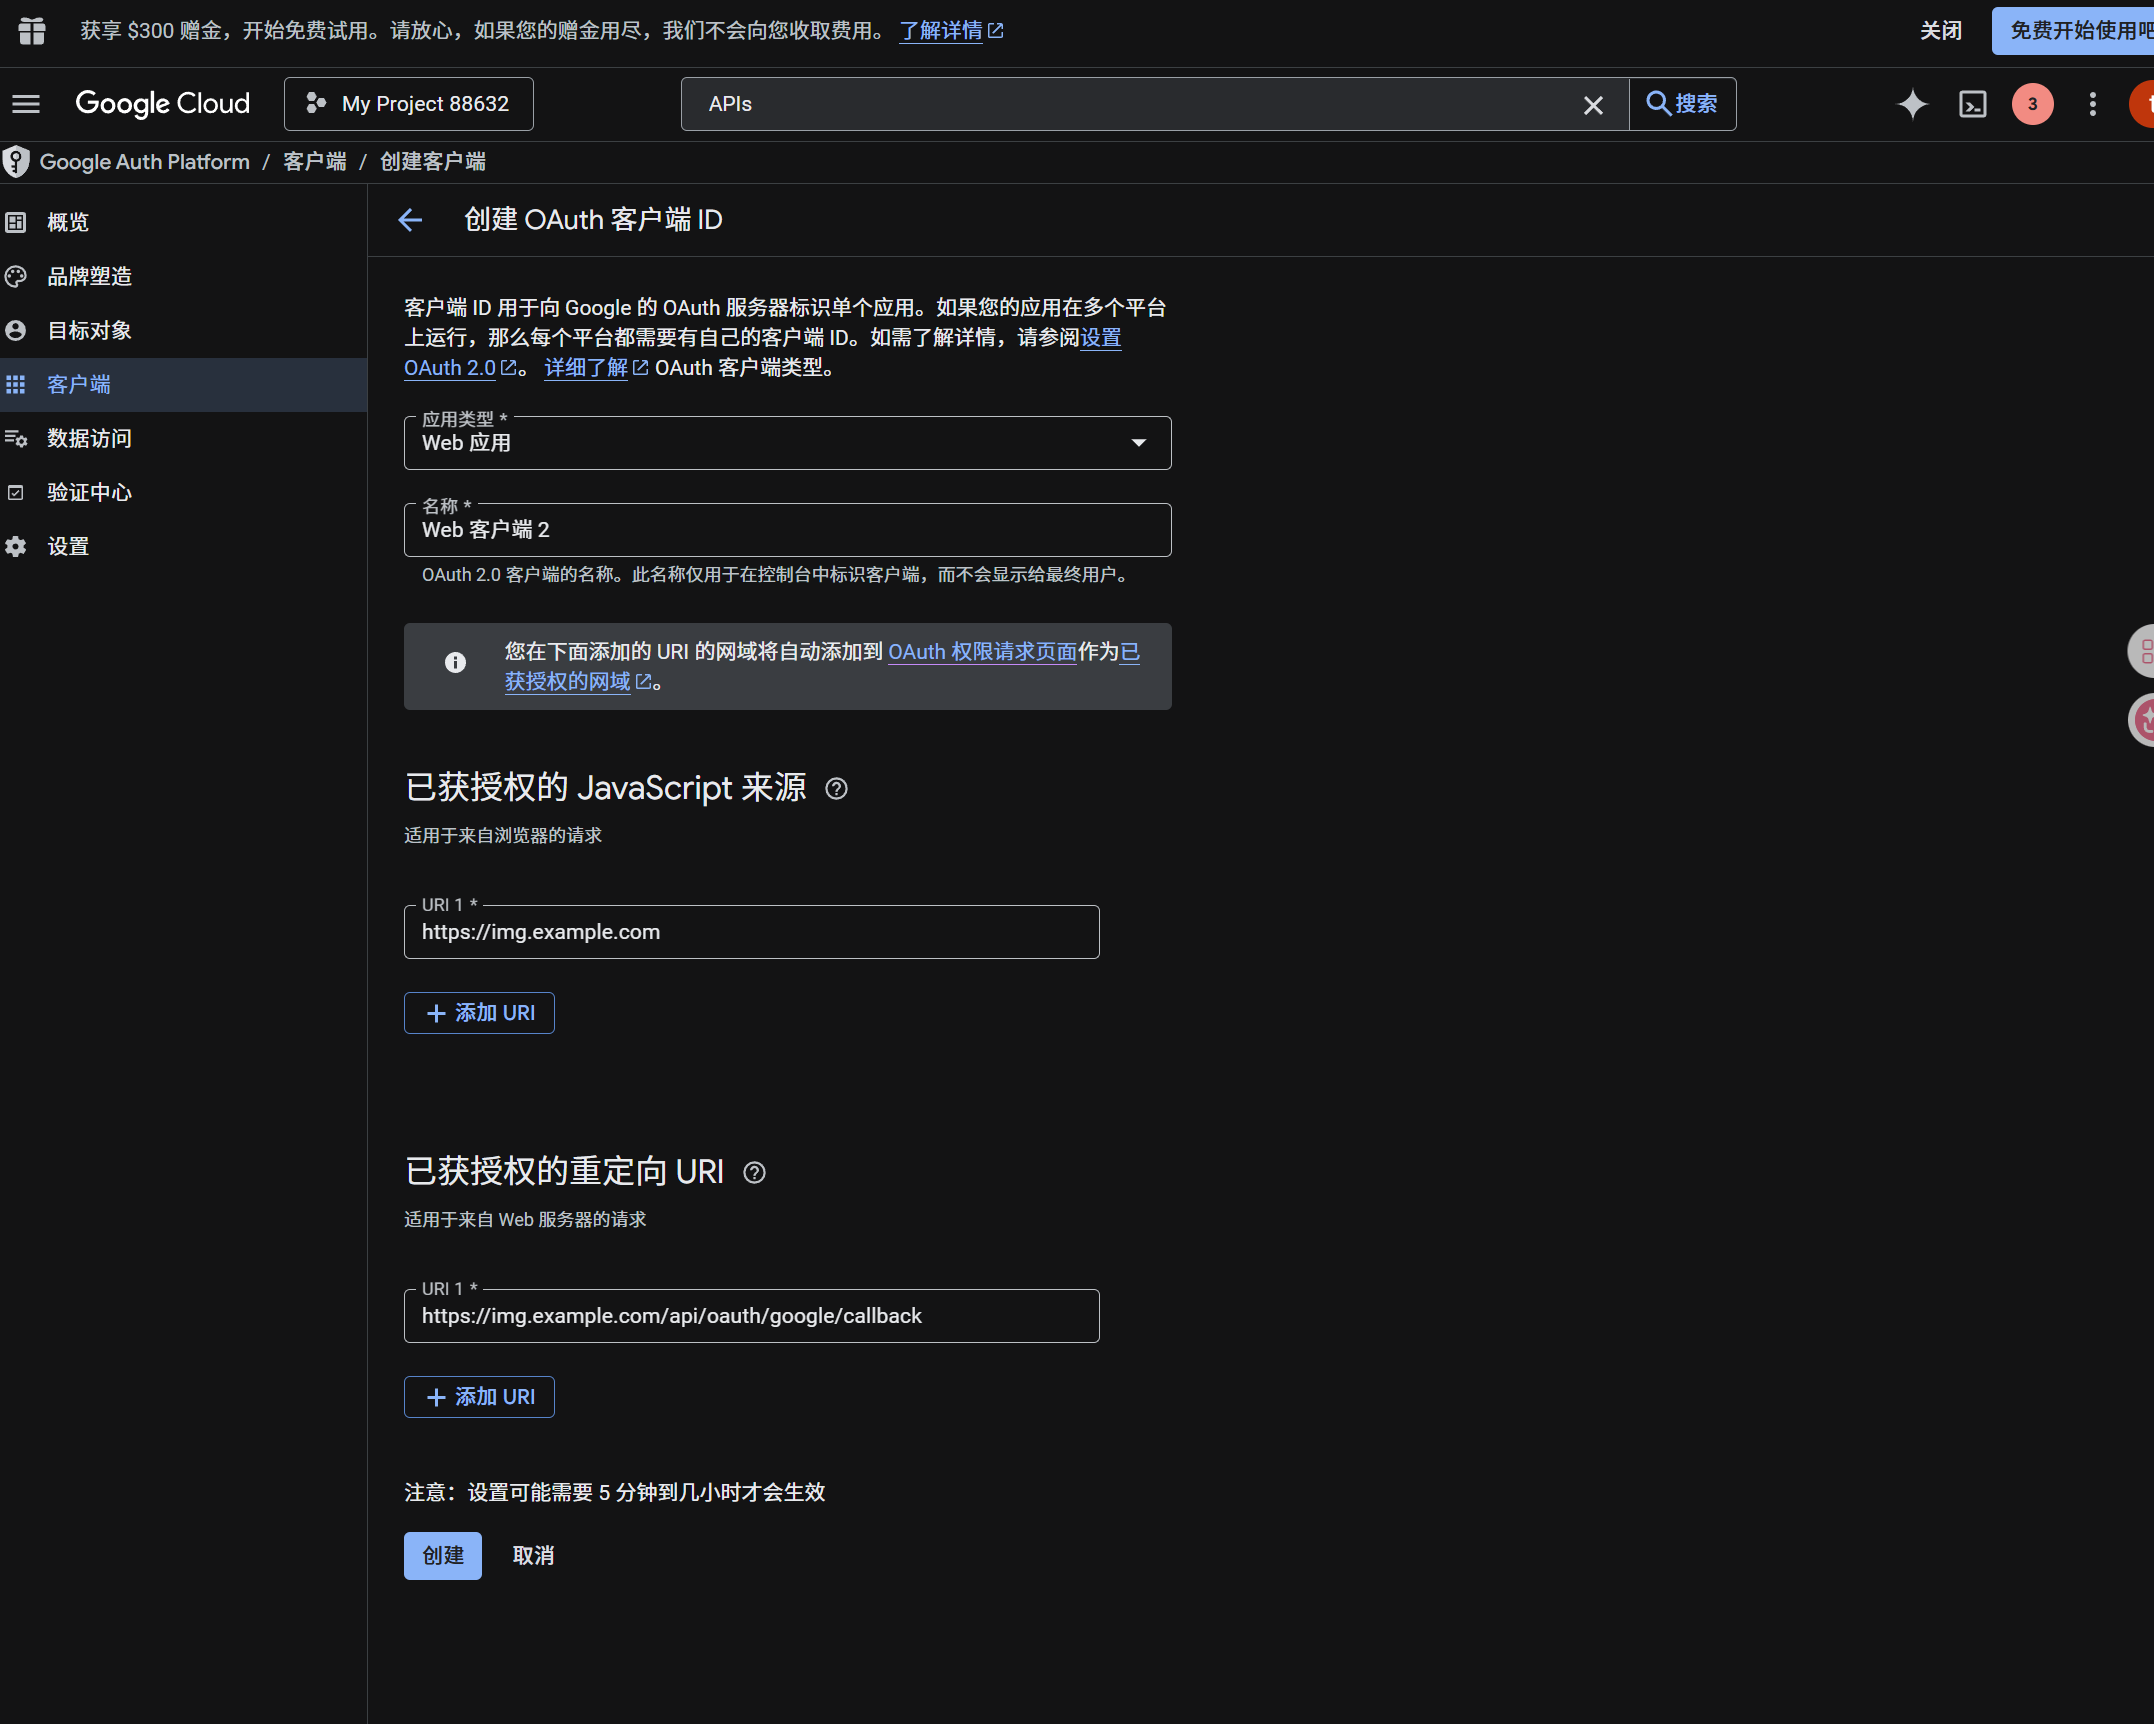
- Application type
Web applicationসেট করুন। - Client-এর চেনা যায় এমন নাম দিন।
- Authorized JavaScript origins-এ আপনার ImgBed URL দিন, যেমন:
text
https://img.example.com- Authorized redirect URIs-এ দিন:
text
https://img.example.com/api/oauth/google/callback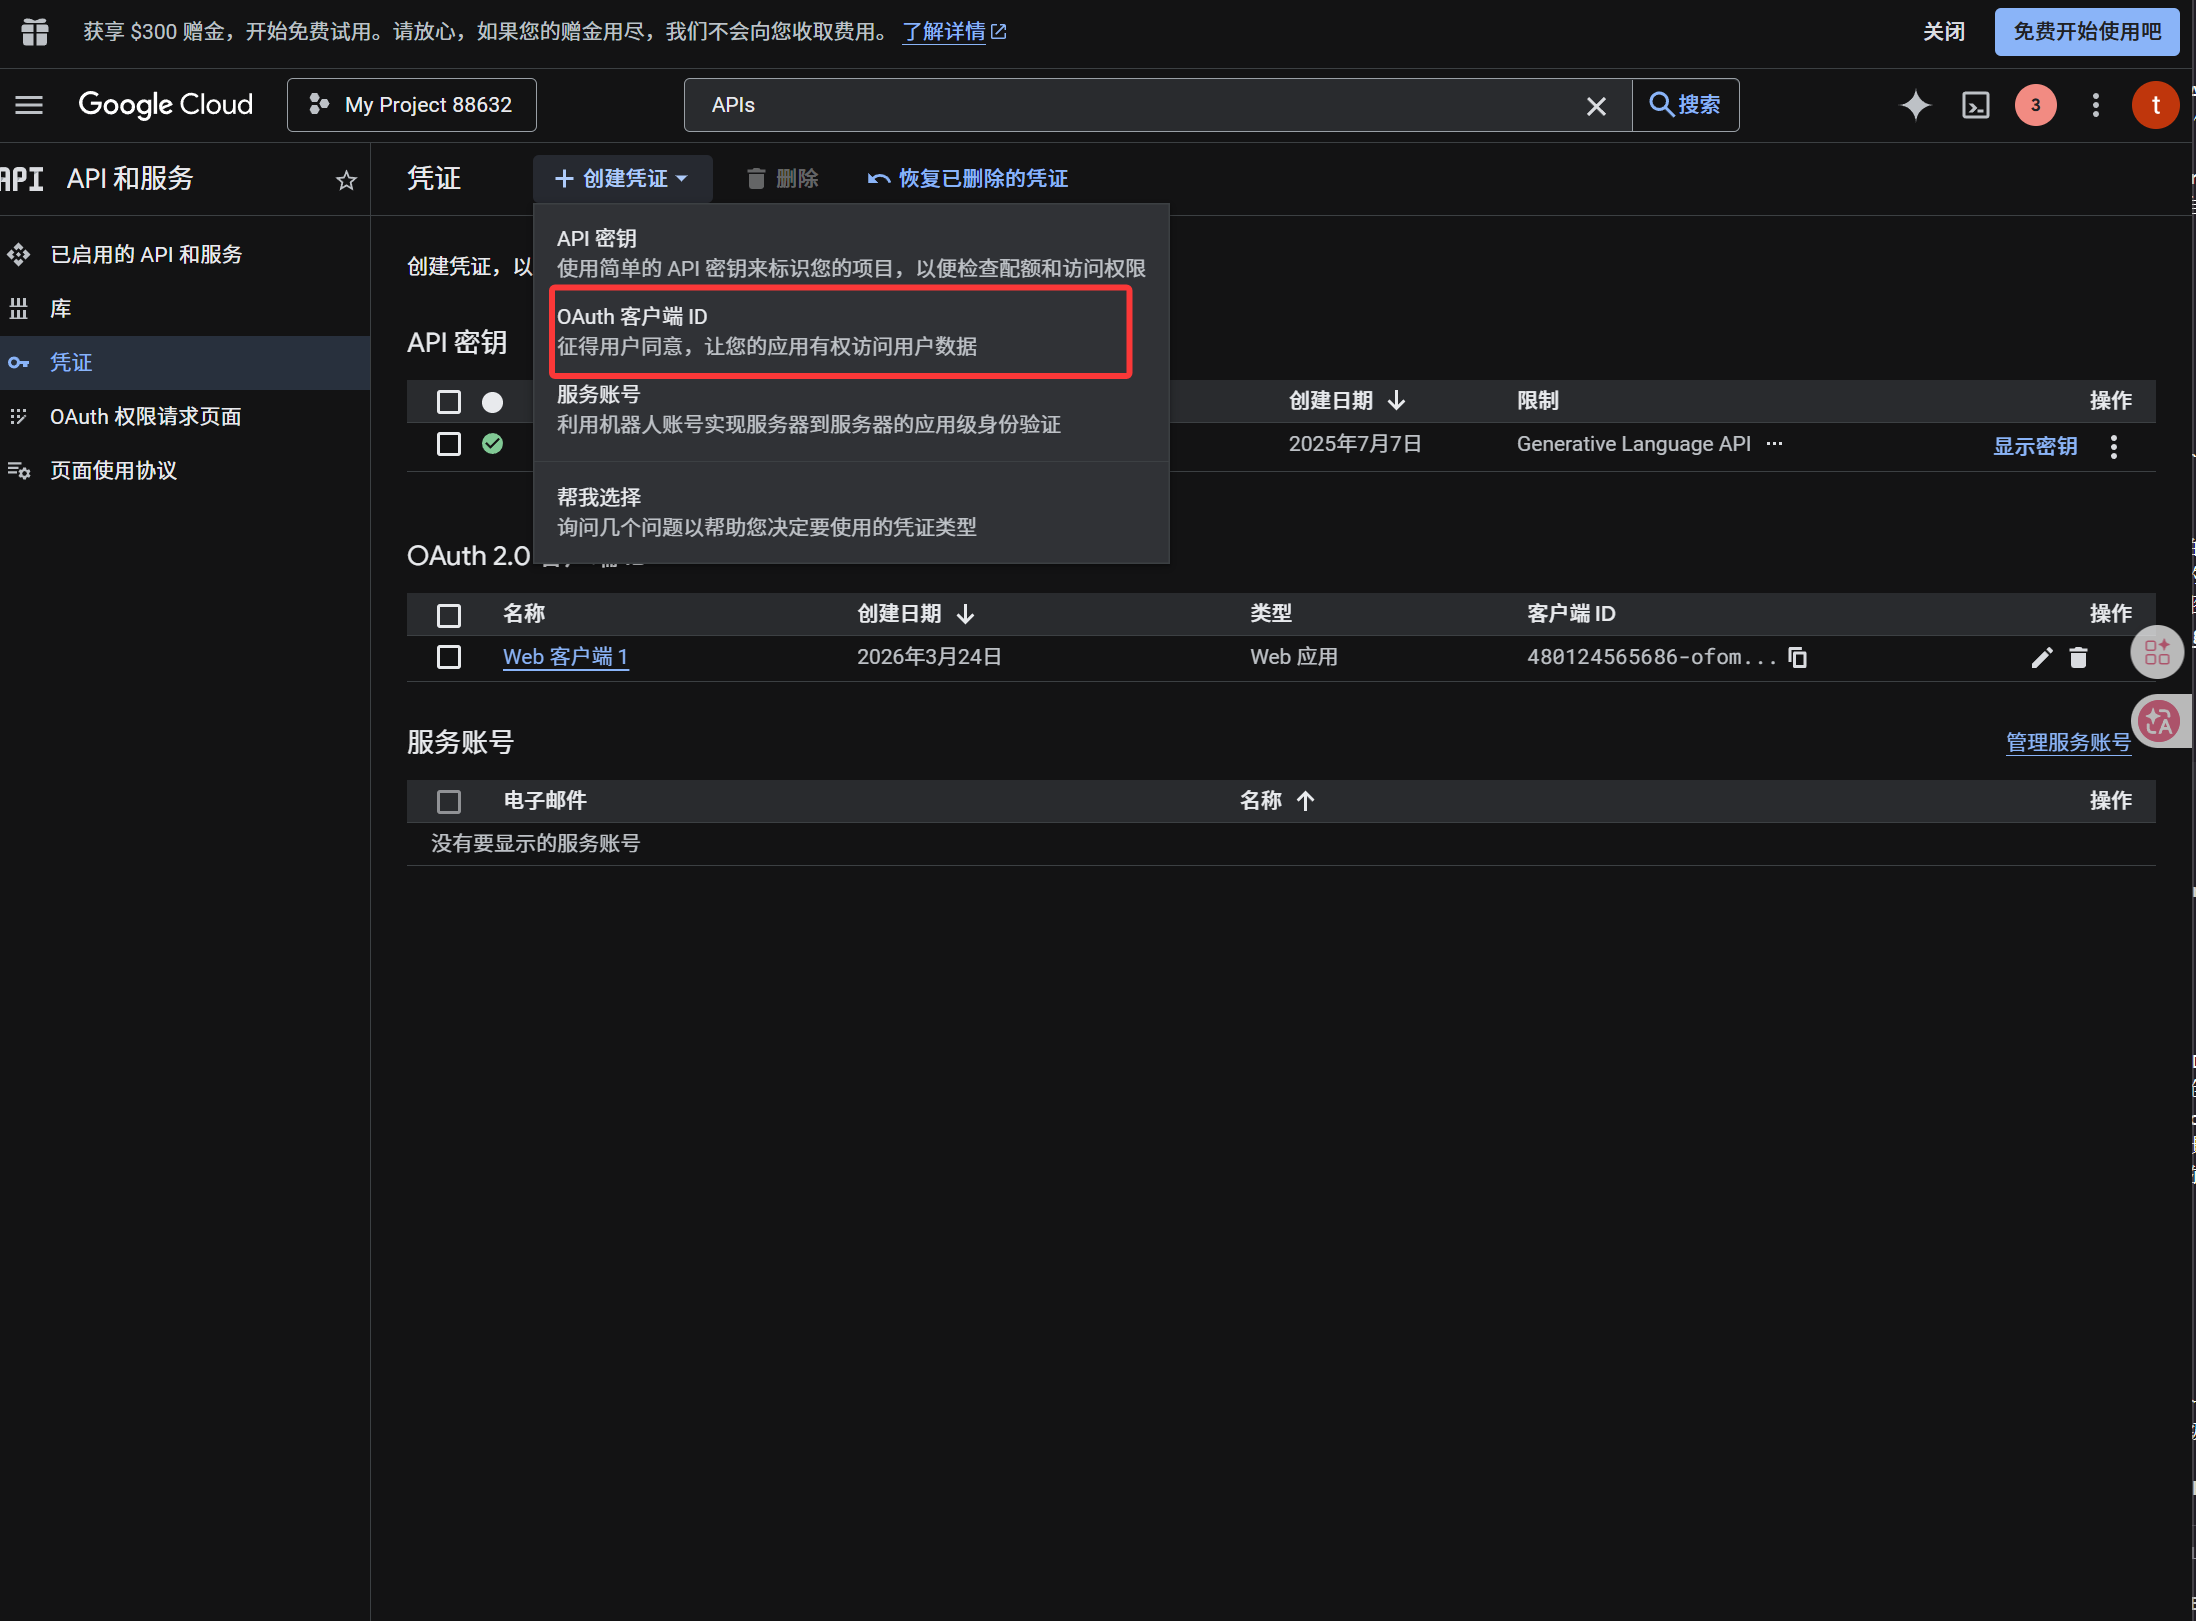
Client তৈরি হলে এই values copy করুন:
| Generated Value | ImgBed Field |
|---|---|
| Client ID | Client ID |
| Client Secret | Client Secret |
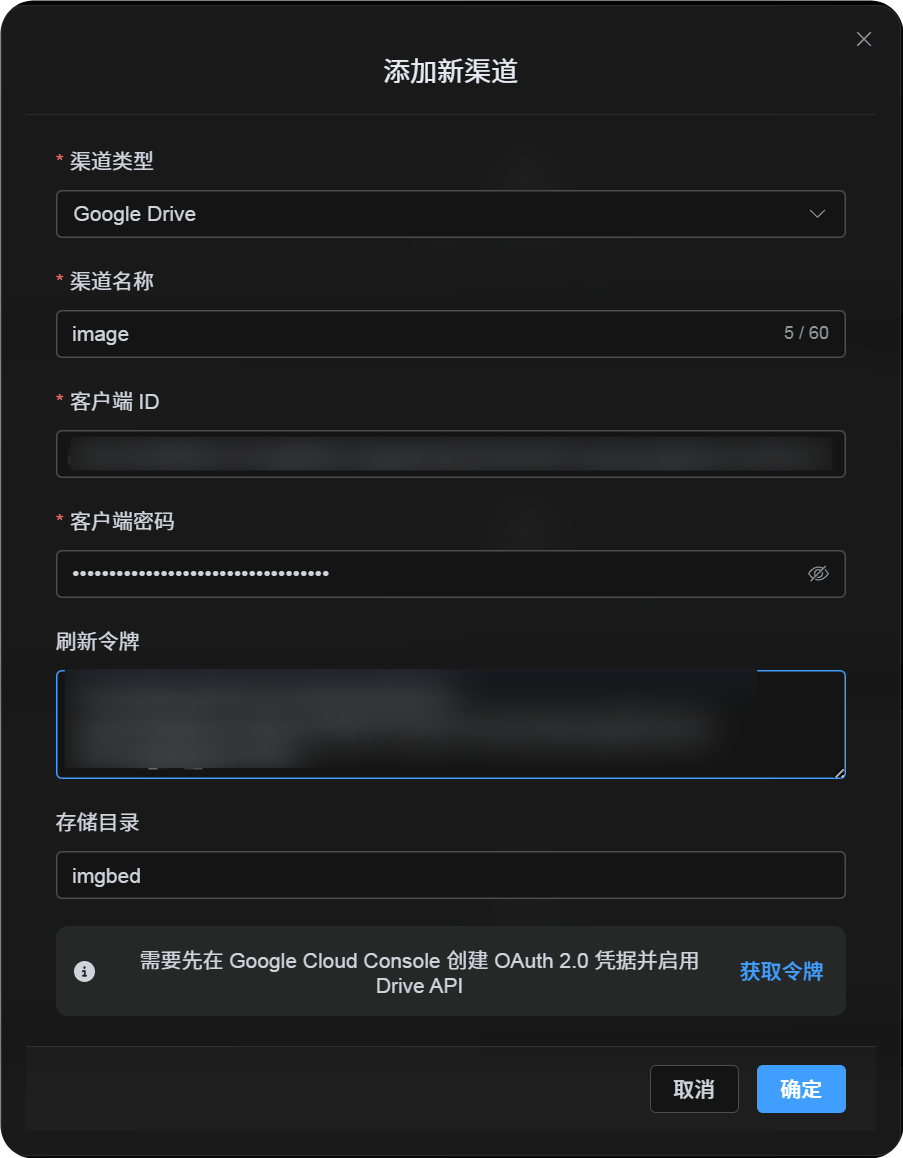
Step 4: Google Drive Channel পূরণ করুন
Upload Settings-এ Google Drive নির্বাচন করে পূরণ করুন:
| ImgBed Field | কী দেবেন |
|---|---|
| Channel name | চেনা যায় এমন নাম, যেমন Main Google Drive |
| Client ID | Google Cloud থেকে পাওয়া Client ID |
| Client Secret | Google Cloud থেকে পাওয়া Client Secret |
| Refresh Token | আপাতত empty রাখুন। পরের step-এ নেবেন। |
| Root directory | Optional। Default imgbed। |
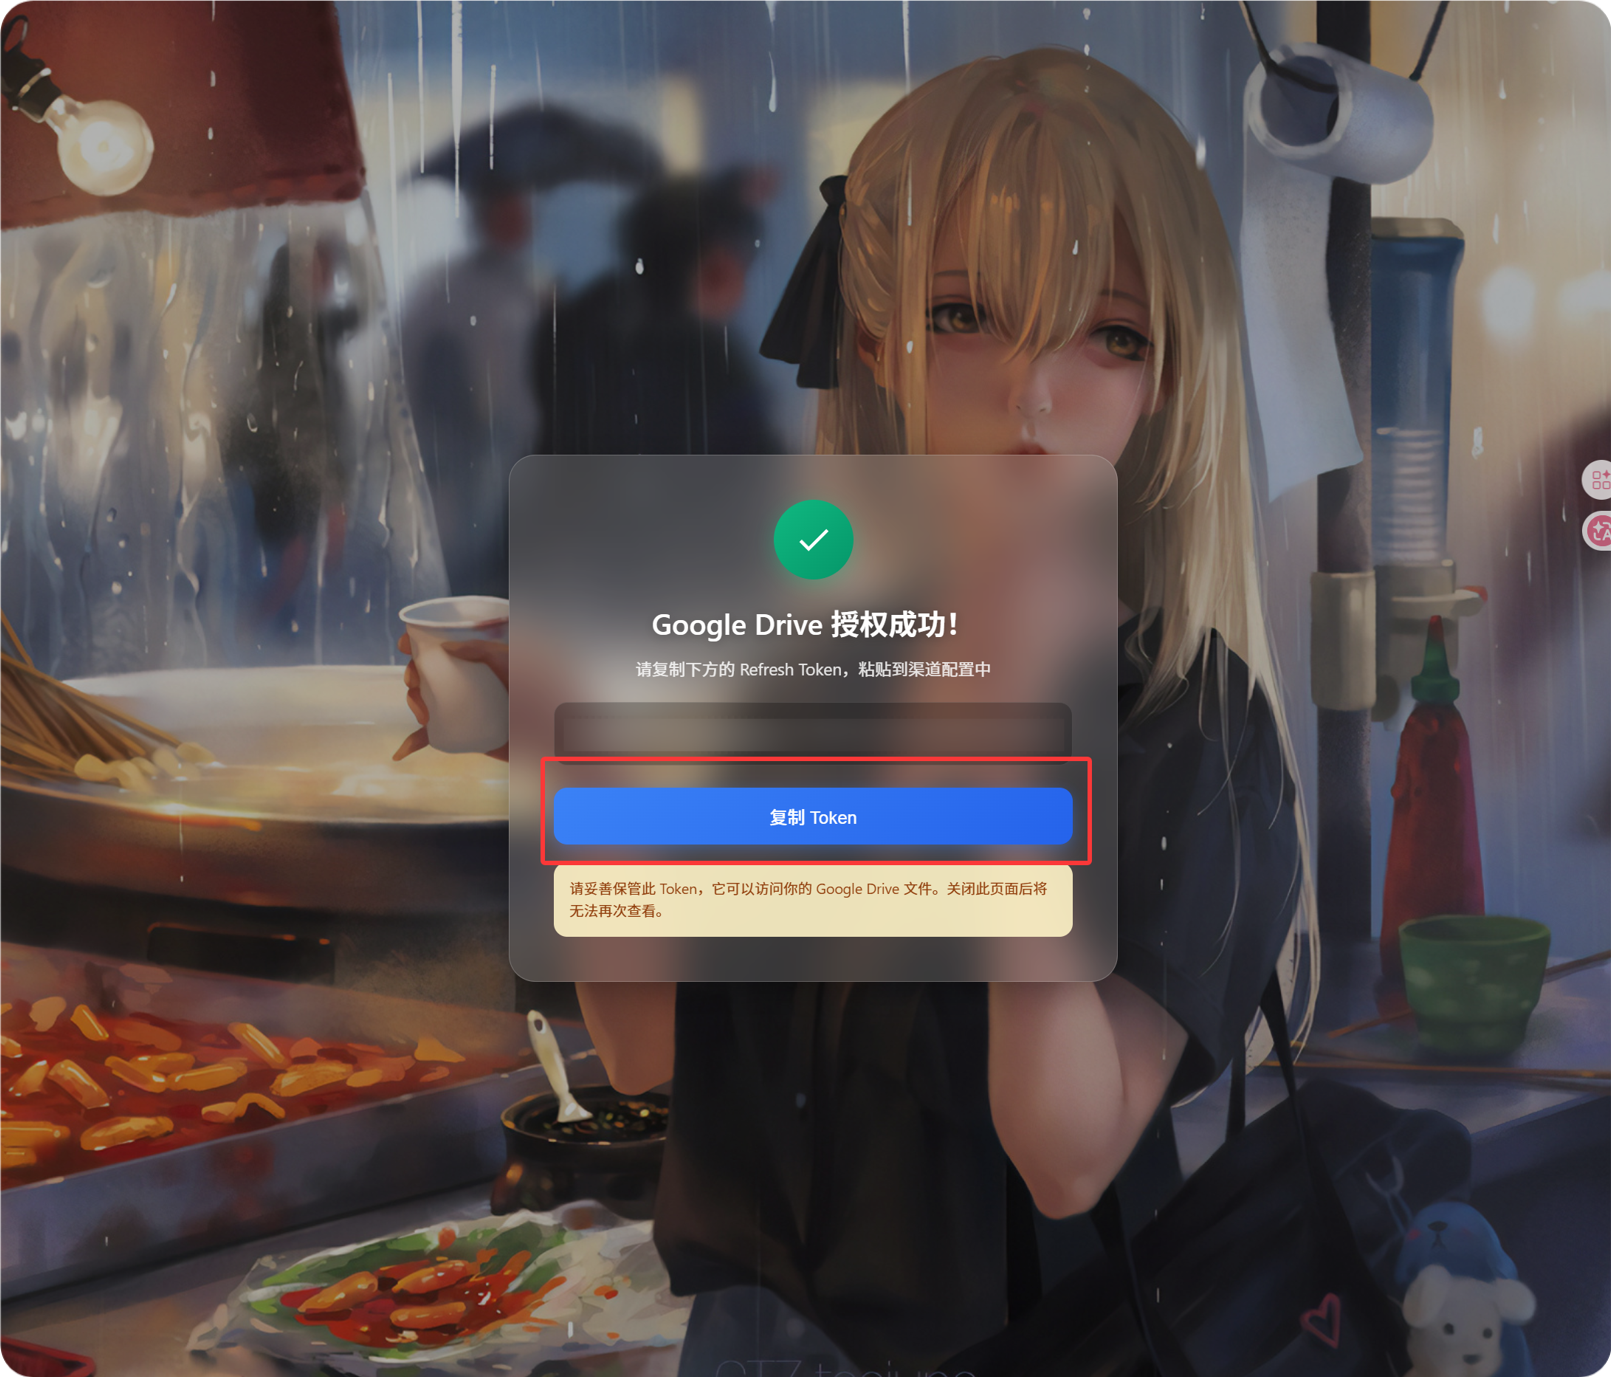
Step 5: Refresh Token নিন
Get Tokenক্লিক করুন।- যে Google account connect করতে চান সেটি নির্বাচন করুন।
- Authorization prompts complete করুন।
- Callback page একটি
Refresh Tokenদেখাবে। - সেটি copy করুন।
- ImgBed-এ ফিরে
Refresh Tokenfield-এ paste করুন।
পরে Google account বদলালে, OAuth client বদলালে, বা পুরোনো authorization expire হলে channel delete করার দরকার নেই। Edit page খুলে Reauthorize ক্লিক করুন।
Step 6: Channel Save করুন
সব fields পূরণ হলে channel save করুন।
Quick Flow
text
Google Cloud খুলুন
-> Project create বা select করুন
-> Google Drive API enable করুন
-> Google Auth Platform configure করুন
-> Audience External হলে আপনার Google account Test users-এ যোগ করুন
-> Web application OAuth client তৈরি করুন
-> Redirect URI হিসেবে https://your-domain.com/api/oauth/google/callback ব্যবহার করুন
-> ImgBed-এ Client ID এবং Client Secret পূরণ করুন
-> Get Token ক্লিক করুন
-> Google দিয়ে sign in করে authorize করুন
-> Callback page থেকে Refresh Token copy করুন
-> ImgBed-এ paste করে save করুন
-> Test image upload করুন
References
- Google OAuth Web Server Applications: https://developers.google.com/identity/protocols/oauth2/web-server
- Google Workspace OAuth Consent Configuration: https://developers.google.com/workspace/guides/configure-oauth-consent
- Google Drive API Auth Scopes: https://developers.google.com/workspace/drive/api/guides/api-specific-auth