Thêm Google Drive Channel
Cần chuẩn bị trước
Trước khi bắt đầu, chuẩn bị các mục sau:
| Requirement | Vì sao cần |
|---|---|
| Google account | Dùng để access Google Cloud và authorize Google Drive |
| Google Cloud project | Dùng để enable Drive API và tạo OAuth credentials |
| OAuth 2.0 client | ImgBed dùng để lấy Client ID, Client Secret và Refresh Token |
| ImgBed domain của bạn | Dùng cho OAuth redirect URI. Phải khớp với domain bạn thực sự dùng. |
Các bước thiết lập
Step 1: Enable Google Drive API
- Mở Google Cloud Console.
- Tạo project mới hoặc chọn project có sẵn.
- Vào
APIs & Services. - Nhấn
Enable APIs and Services. - Tìm
Google Drive API. - Mở và nhấn enable.
Step 2: Configure OAuth Consent Screen
- Trong Google Cloud, mở
Google Auth Platform. - Hoàn tất thông tin
Brandingcơ bản, như app name, support email và developer contact email. - Mở
Audience. - Với hầu hết self-hosted personal deployments, chọn
External. - Nếu chọn
External, thêm Google account bạn muốn authorize vàoTest users. - Mở
Data Access. - Thêm Google Drive permissions cần thiết.
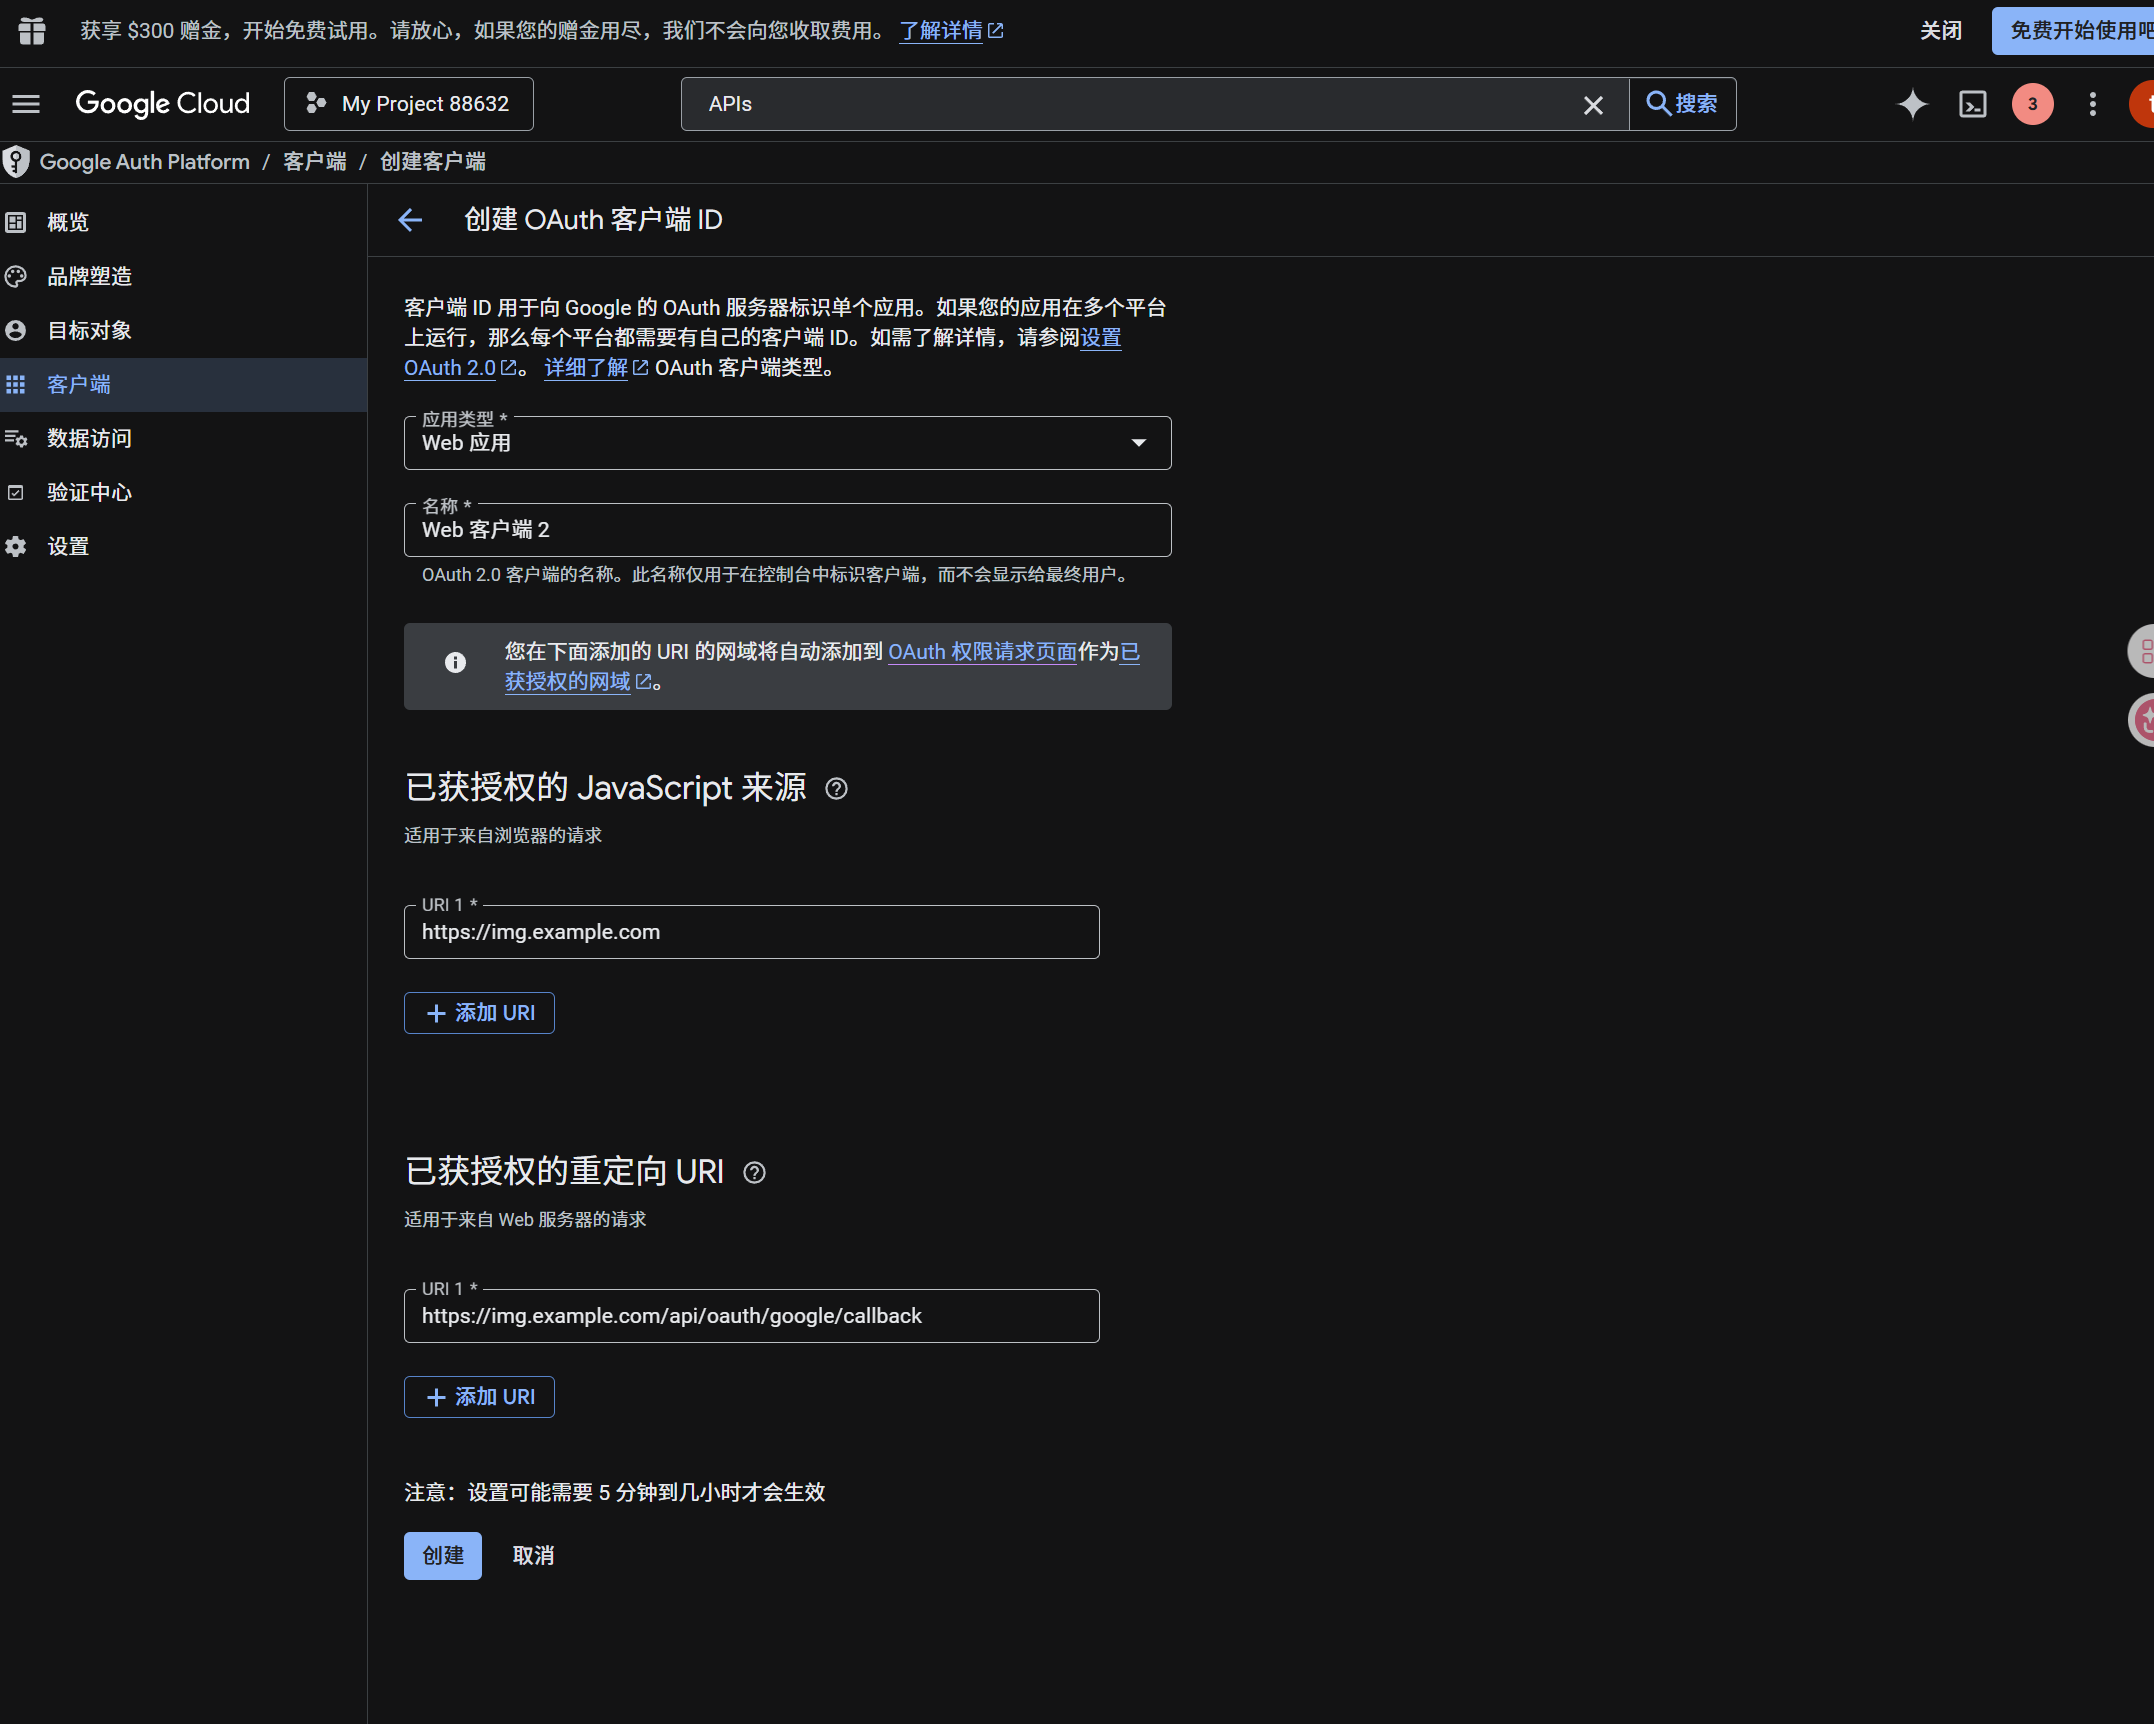
Step 3: Tạo OAuth 2.0 Client
- Trong
Google Auth Platform, mởClients. - Tạo client mới.
- Đặt application type là
Web application. - Đặt tên client dễ nhận biết.
- Với authorized JavaScript origins, nhập ImgBed URL, ví dụ:
text
https://img.example.com- Với authorized redirect URIs, nhập:
text
https://img.example.com/api/oauth/google/callback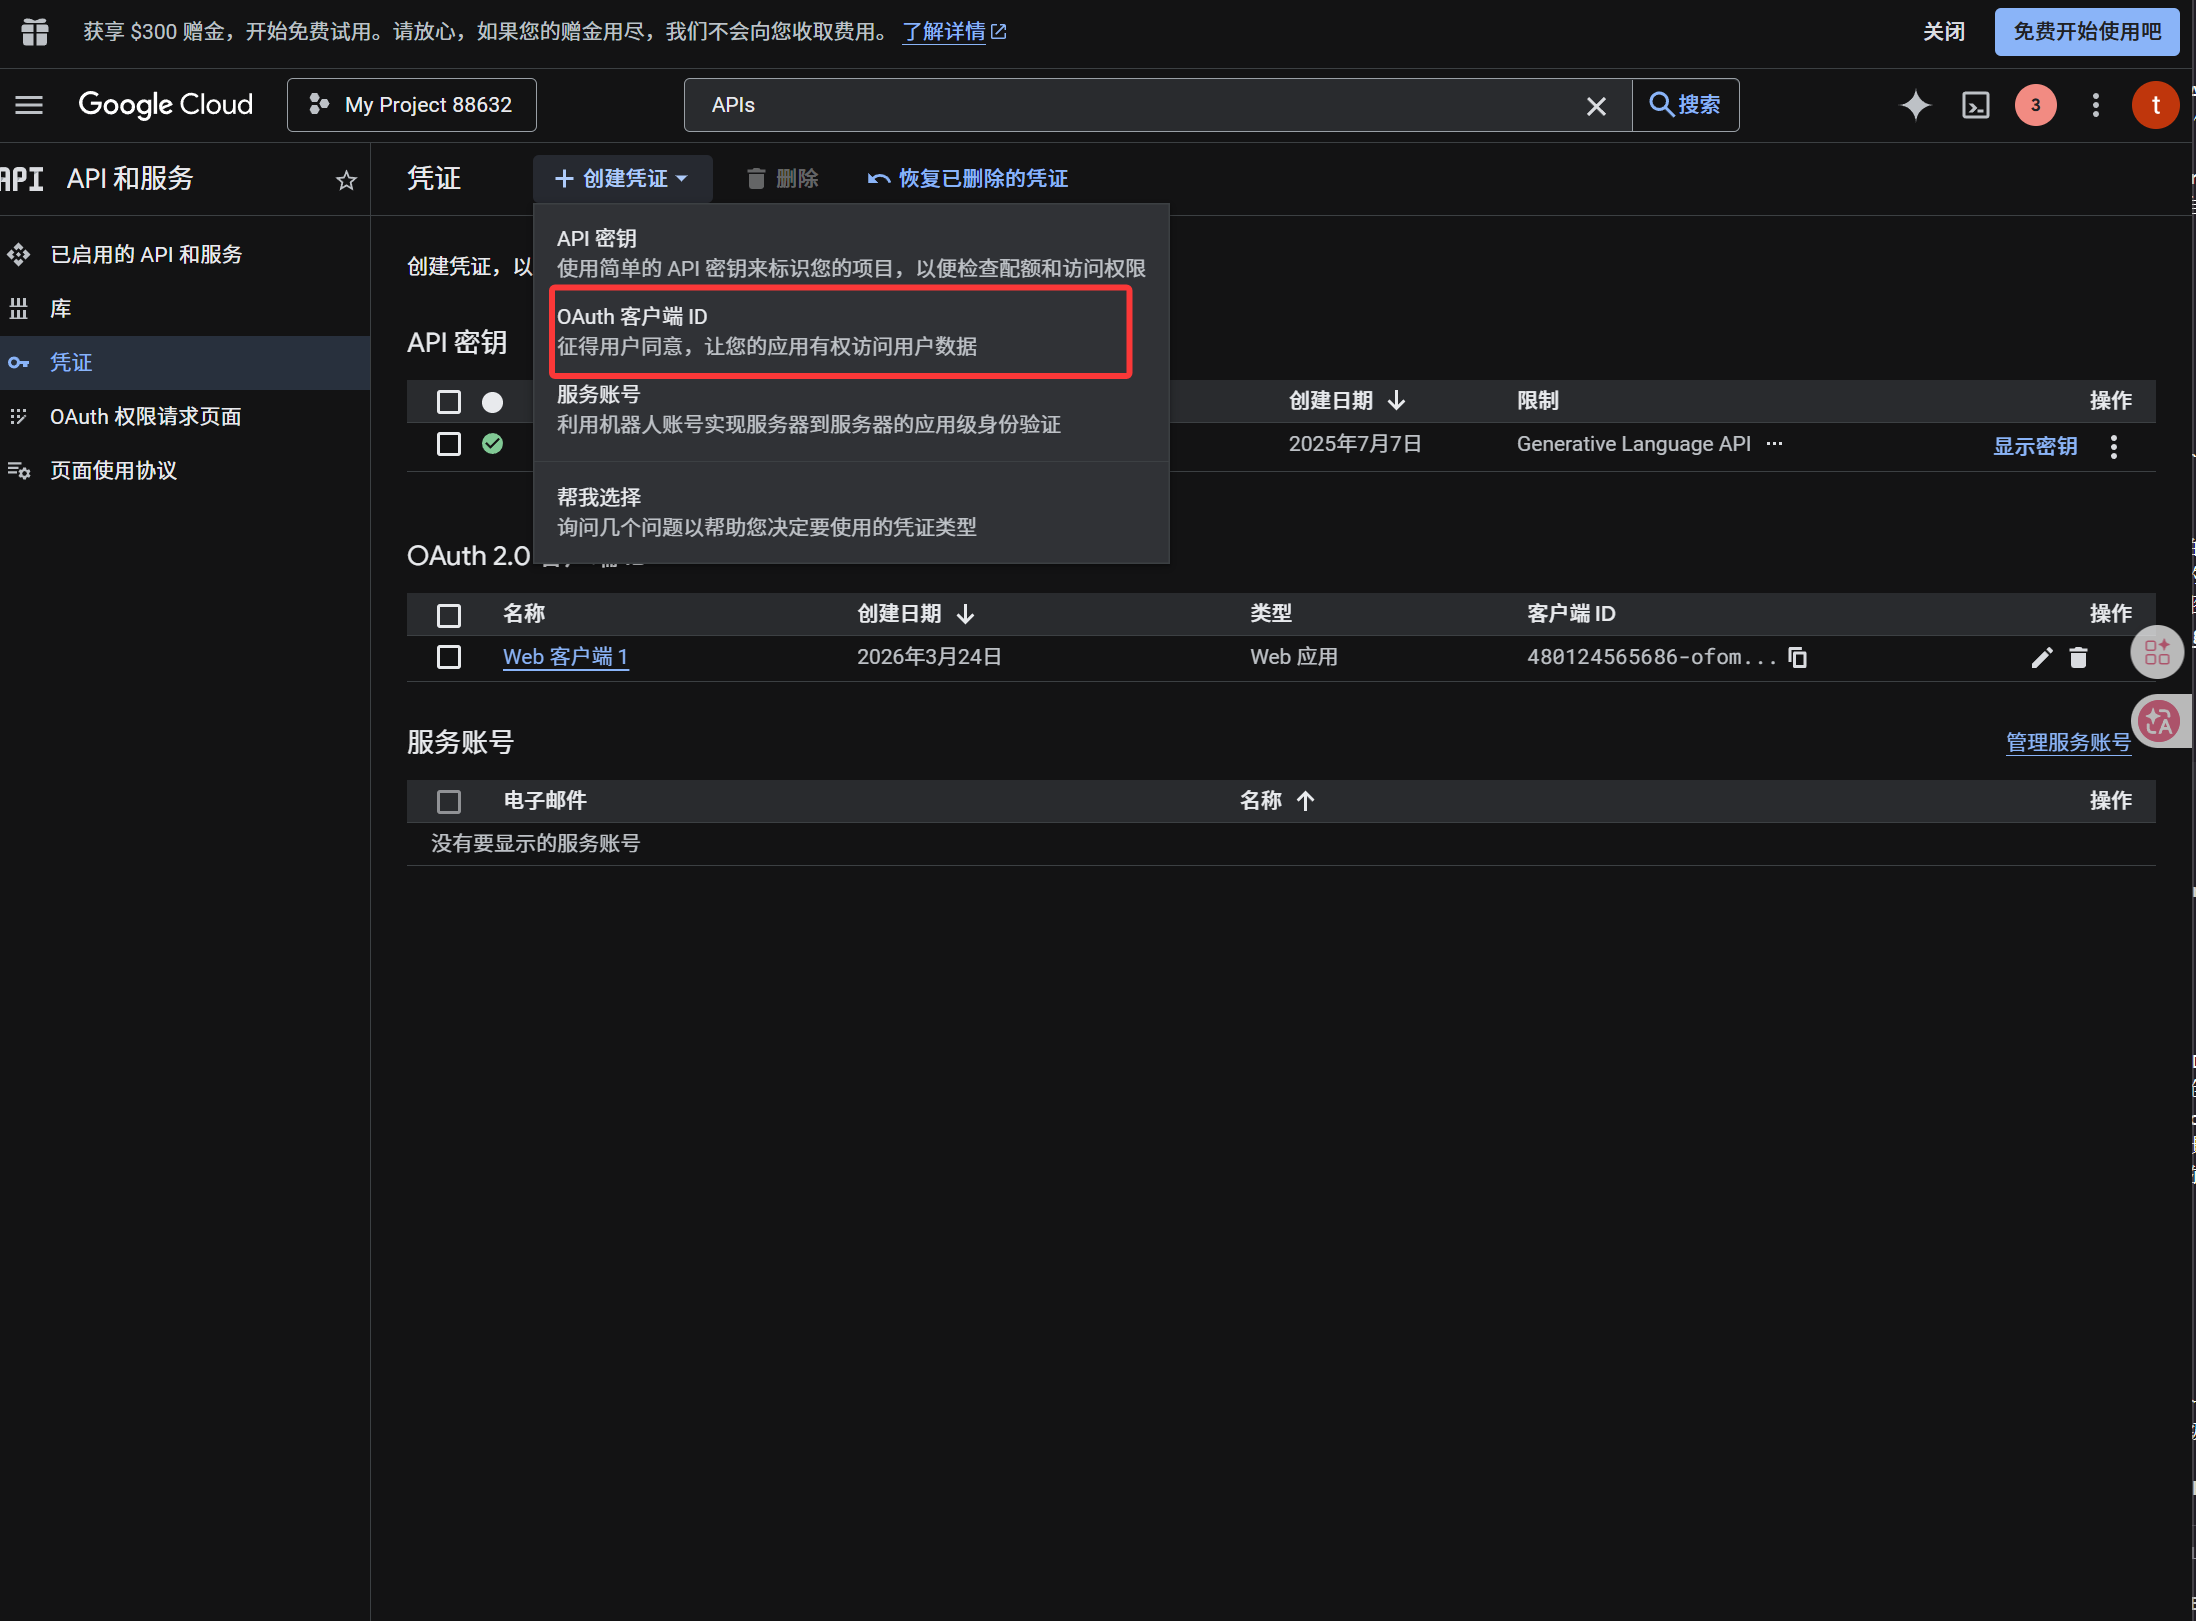
Sau khi client được tạo, copy các giá trị này:
| Generated Value | ImgBed Field |
|---|---|
| Client ID | Client ID |
| Client Secret | Client Secret |
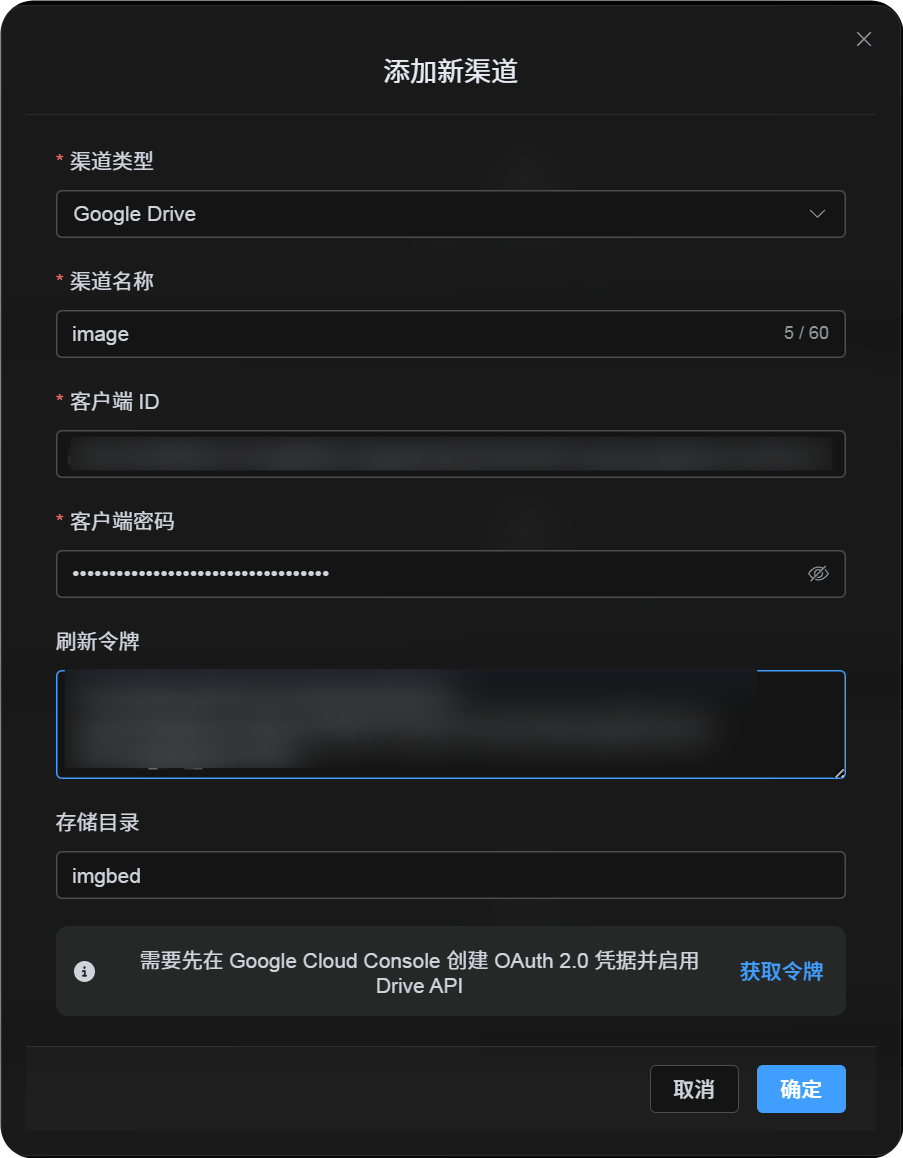
Step 4: Điền Google Drive Channel
Trong Upload Settings, chọn Google Drive và điền:
| ImgBed Field | Nhập gì |
|---|---|
| Channel name | Tên dễ nhận biết, ví dụ Main Google Drive |
| Client ID | Client ID từ Google Cloud |
| Client Secret | Client Secret từ Google Cloud |
| Refresh Token | Tạm thời để trống. Lấy ở bước tiếp theo. |
| Root directory | Optional. Mặc định là imgbed. |
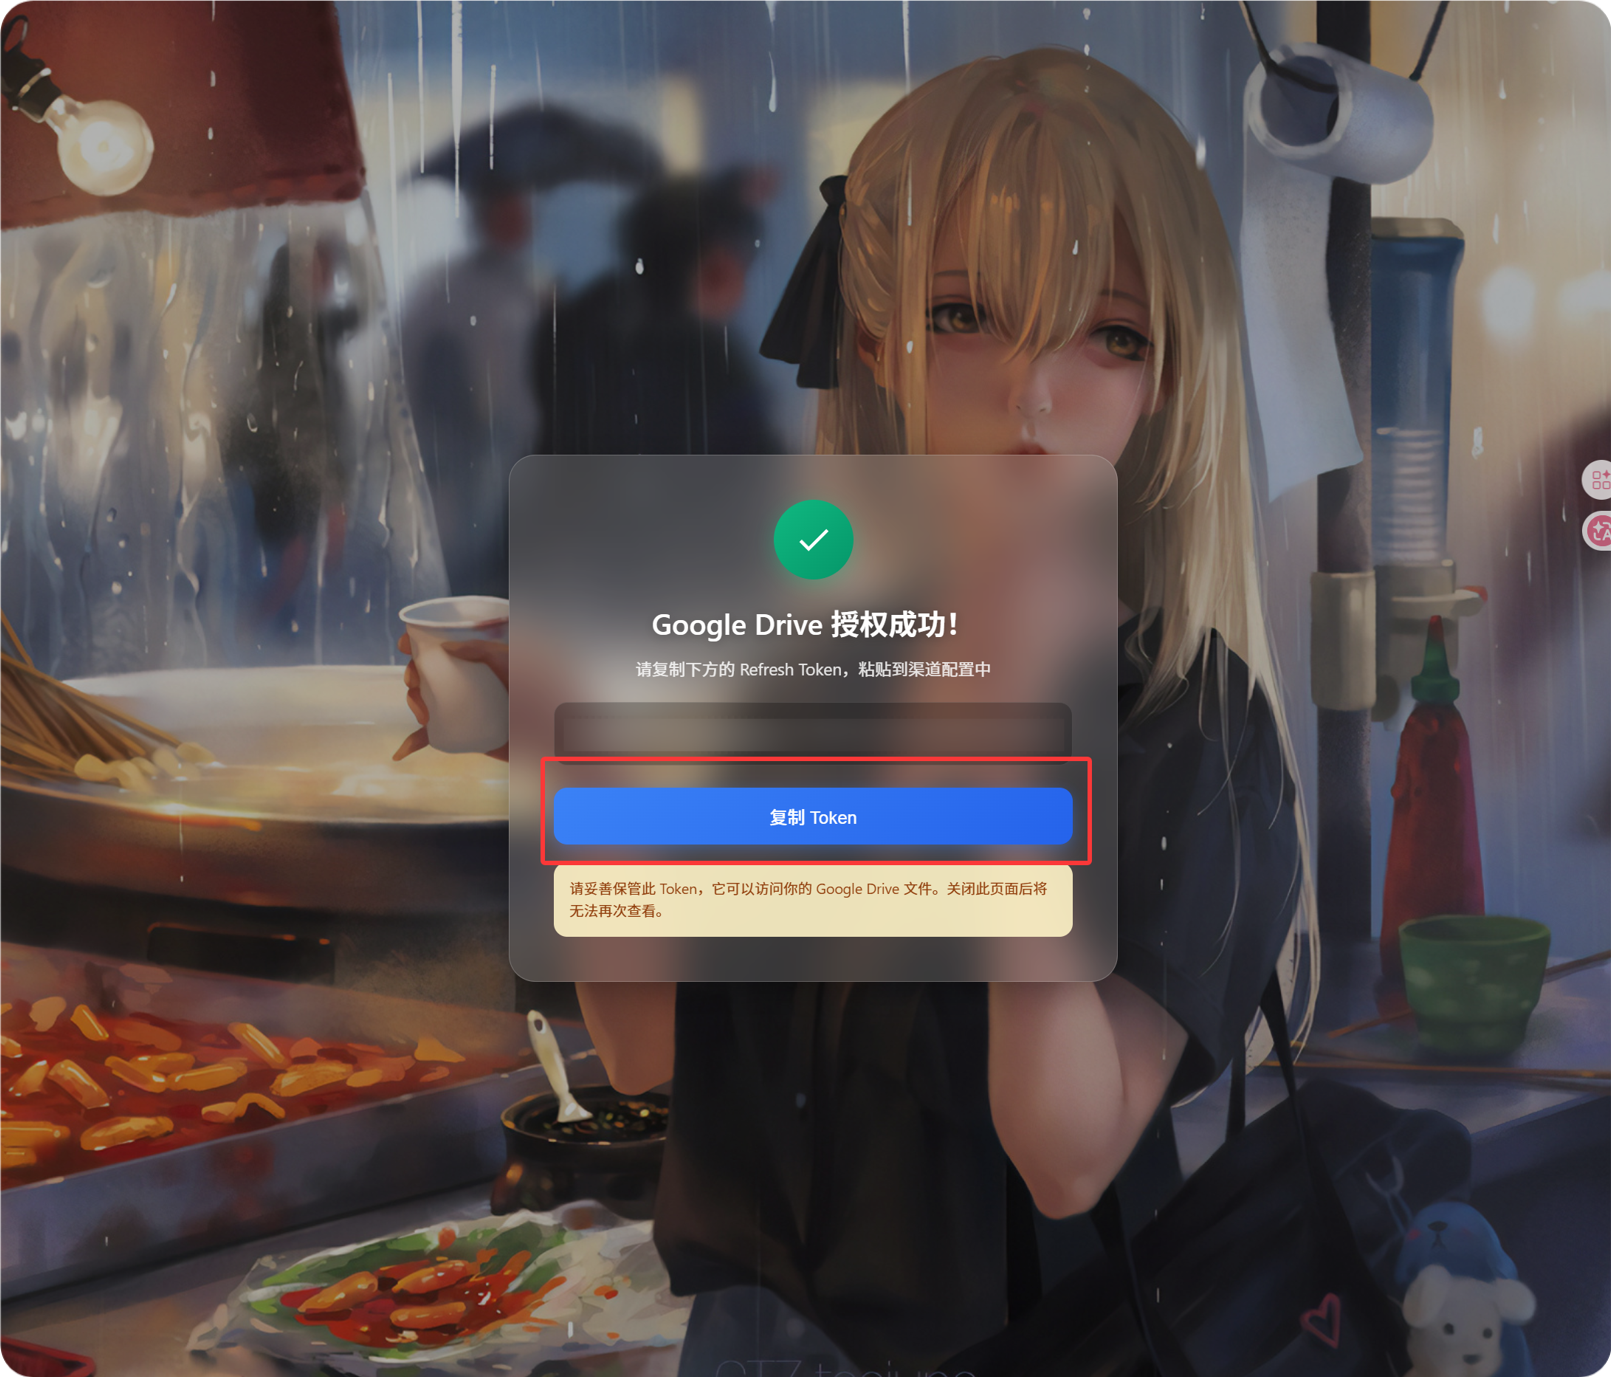
Step 5: Lấy Refresh Token
- Nhấn
Get Token. - Chọn Google account bạn muốn kết nối.
- Hoàn tất authorization prompts.
- Callback page sẽ hiển thị
Refresh Token. - Copy token đó.
- Quay lại ImgBed và paste vào field
Refresh Token.
Nếu sau này đổi Google account, đổi OAuth client hoặc authorization cũ hết hạn, bạn không cần xóa channel. Mở edit page và nhấn Reauthorize.
Step 6: Save Channel
Sau khi điền đủ fields, save channel.
Quick Flow
text
Mở Google Cloud
-> Tạo hoặc chọn project
-> Enable Google Drive API
-> Configure Google Auth Platform
-> Nếu Audience là External, thêm Google account của bạn vào Test users
-> Tạo Web application OAuth client
-> Dùng https://your-domain.com/api/oauth/google/callback làm redirect URI
-> Điền Client ID và Client Secret vào ImgBed
-> Nhấn Get Token
-> Sign in bằng Google và authorize
-> Copy Refresh Token từ callback page
-> Paste lại vào ImgBed và save
-> Upload test image
References
- Google OAuth Web Server Applications: https://developers.google.com/identity/protocols/oauth2/web-server
- Google Workspace OAuth Consent Configuration: https://developers.google.com/workspace/guides/configure-oauth-consent
- Google Drive API Auth Scopes: https://developers.google.com/workspace/drive/api/guides/api-specific-auth