Thêm OneDrive Channel
Cần chuẩn bị trước
| Yêu cầu | Vì sao cần |
|---|---|
| Microsoft account | Dùng để access Microsoft admin pages và authorize OneDrive |
| ImgHost domain của bạn | Dùng cho OAuth callback URL |
| App registration | Dùng để generate Client ID và Client Secret |
| OneDrive account | Dùng làm nơi lưu file thực tế |
Các bước thiết lập
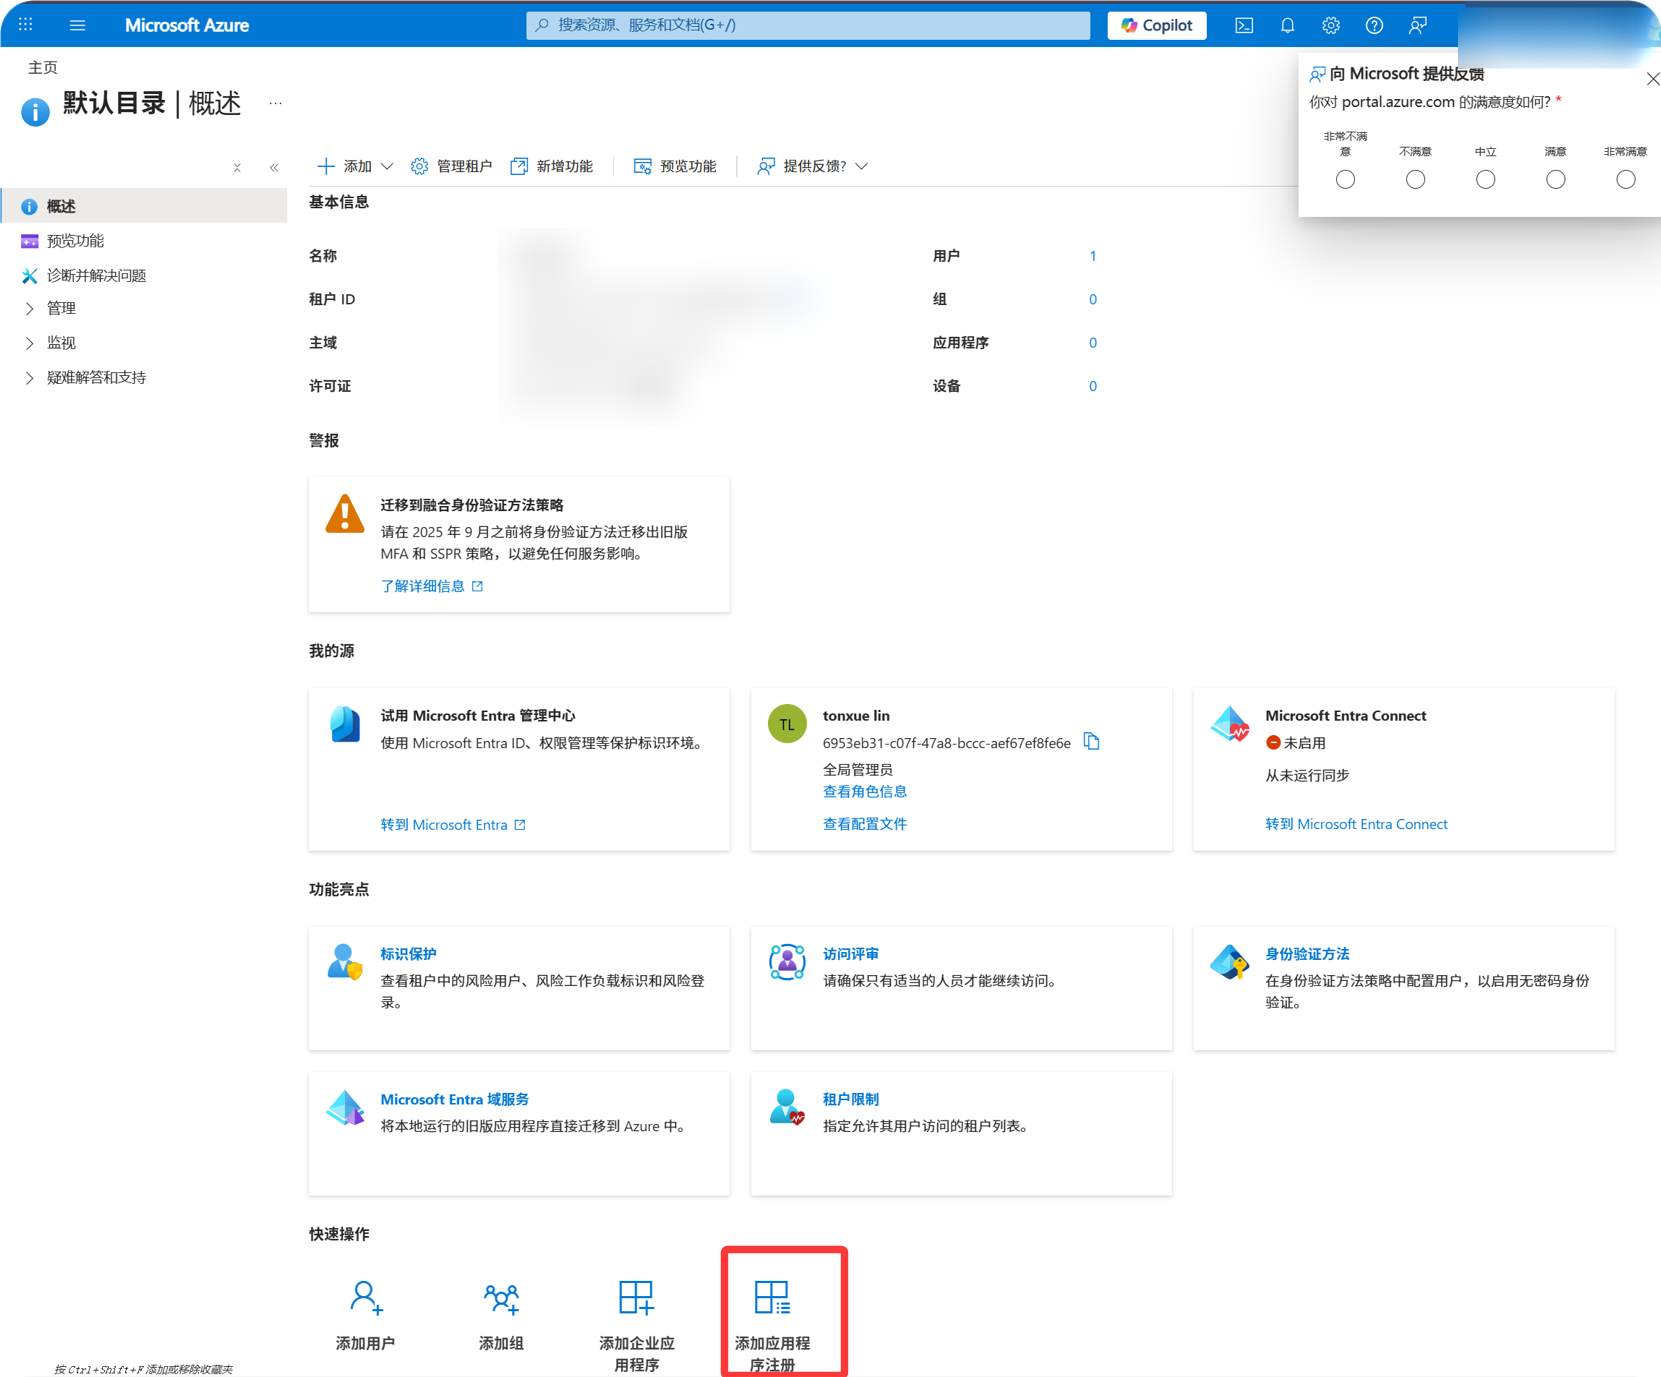
Bước 1: Mở Microsoft Entra ID
- Mở
portal.azure.com. - Tìm
Microsoft Entra IDở phía trên. - Nếu trang cần tìm không hiện trong dropdown, chọn:
text
Continue searching in Microsoft Entra ID- Mở
Microsoft Entra ID. - Mở
App registrations. - Nhấn
New registration.
Bước 2: Register App
Trên trang New registration, điền:
| Trường | Nhập gì |
|---|---|
| Name | Tên dễ nhận biết, ví dụ imgbed-onedrive |
| Supported account types | Chọn theo bảng bên dưới |
| Redirect URI type | Web |
| Redirect URI | https://your-domain.com/api/oauth/onedrive/callback |
Gợi ý chọn account type:
| Tình huống của bạn | Supported Account Types |
|---|---|
| Chỉ dùng personal OneDrive | Chọn option cho personal Microsoft account. |
| Dùng cả personal và work/school accounts | Chọn option hỗ trợ cả personal và organizational accounts. |
| Chỉ dùng company hoặc school OneDrive | Chọn organizational account option. |
Điền xong thì nhấn register.
Bước 3: Sao chép App Information
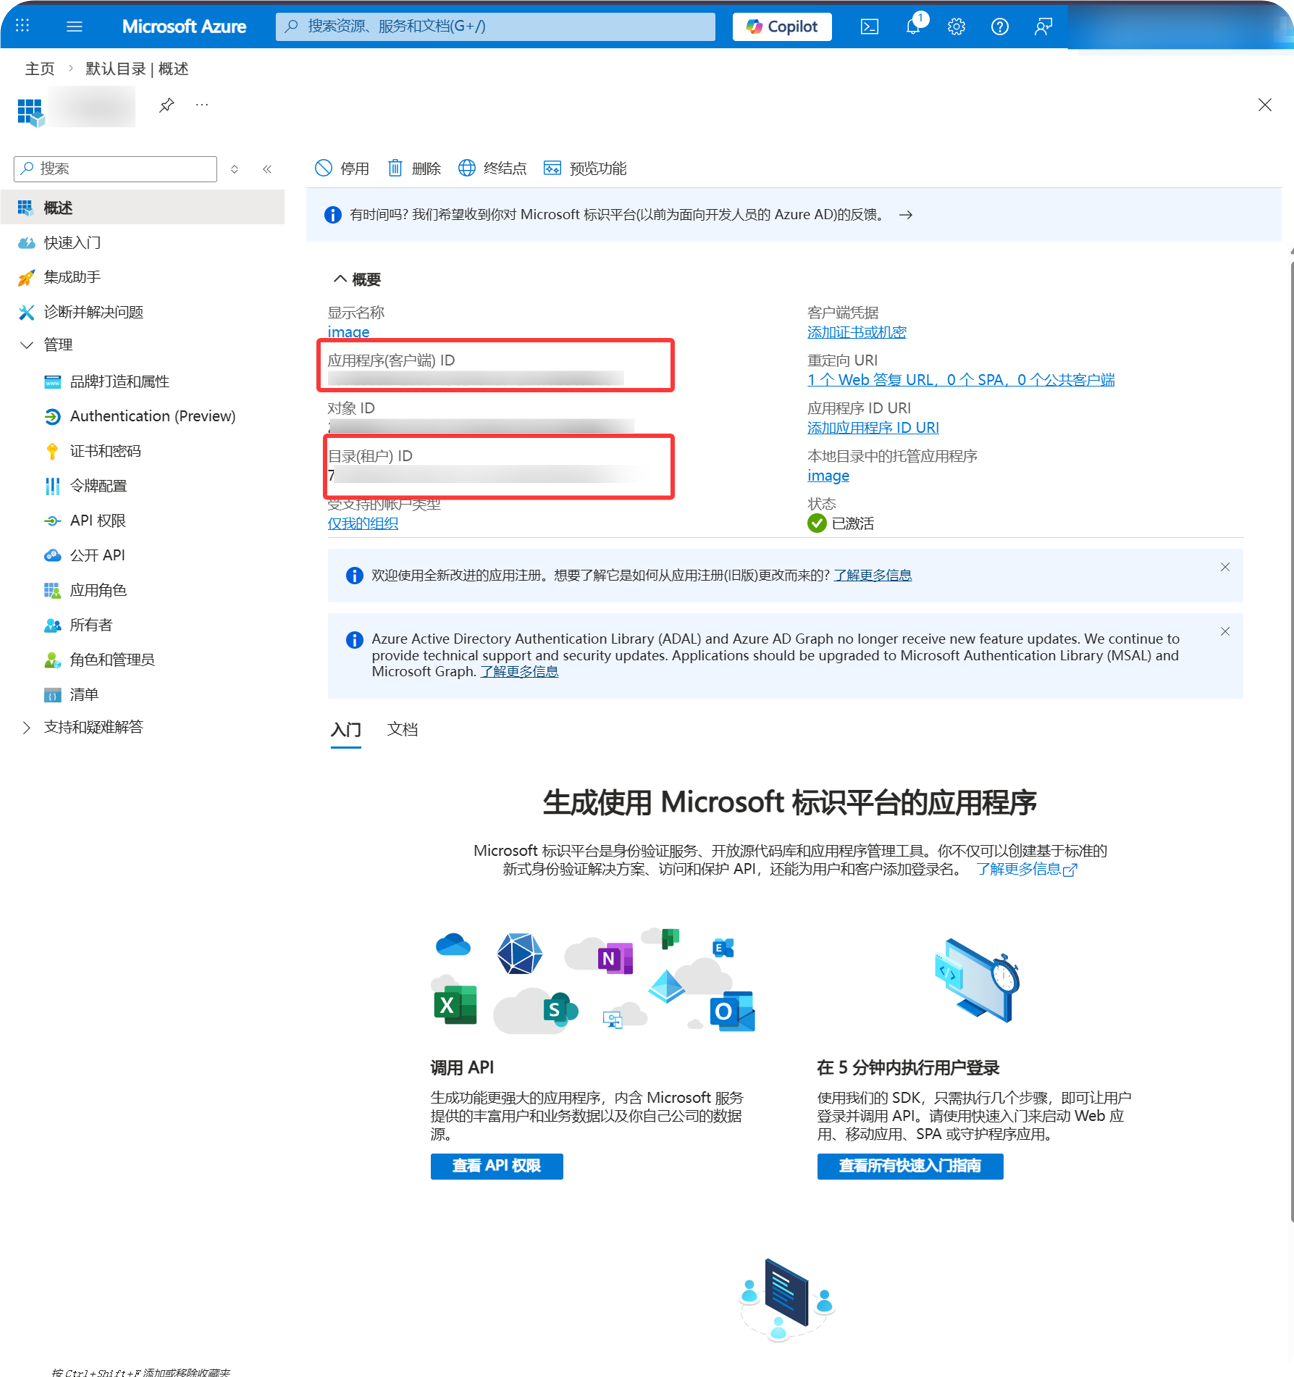
Sau khi app được tạo, sao chép các giá trị này từ overview page:
| Trường Microsoft | Trường ImgHost |
|---|---|
Application (client) ID | Client ID |
Directory (tenant) ID | Tenant ID cho organizational accounts |
Bước 4: Tạo Client Secret
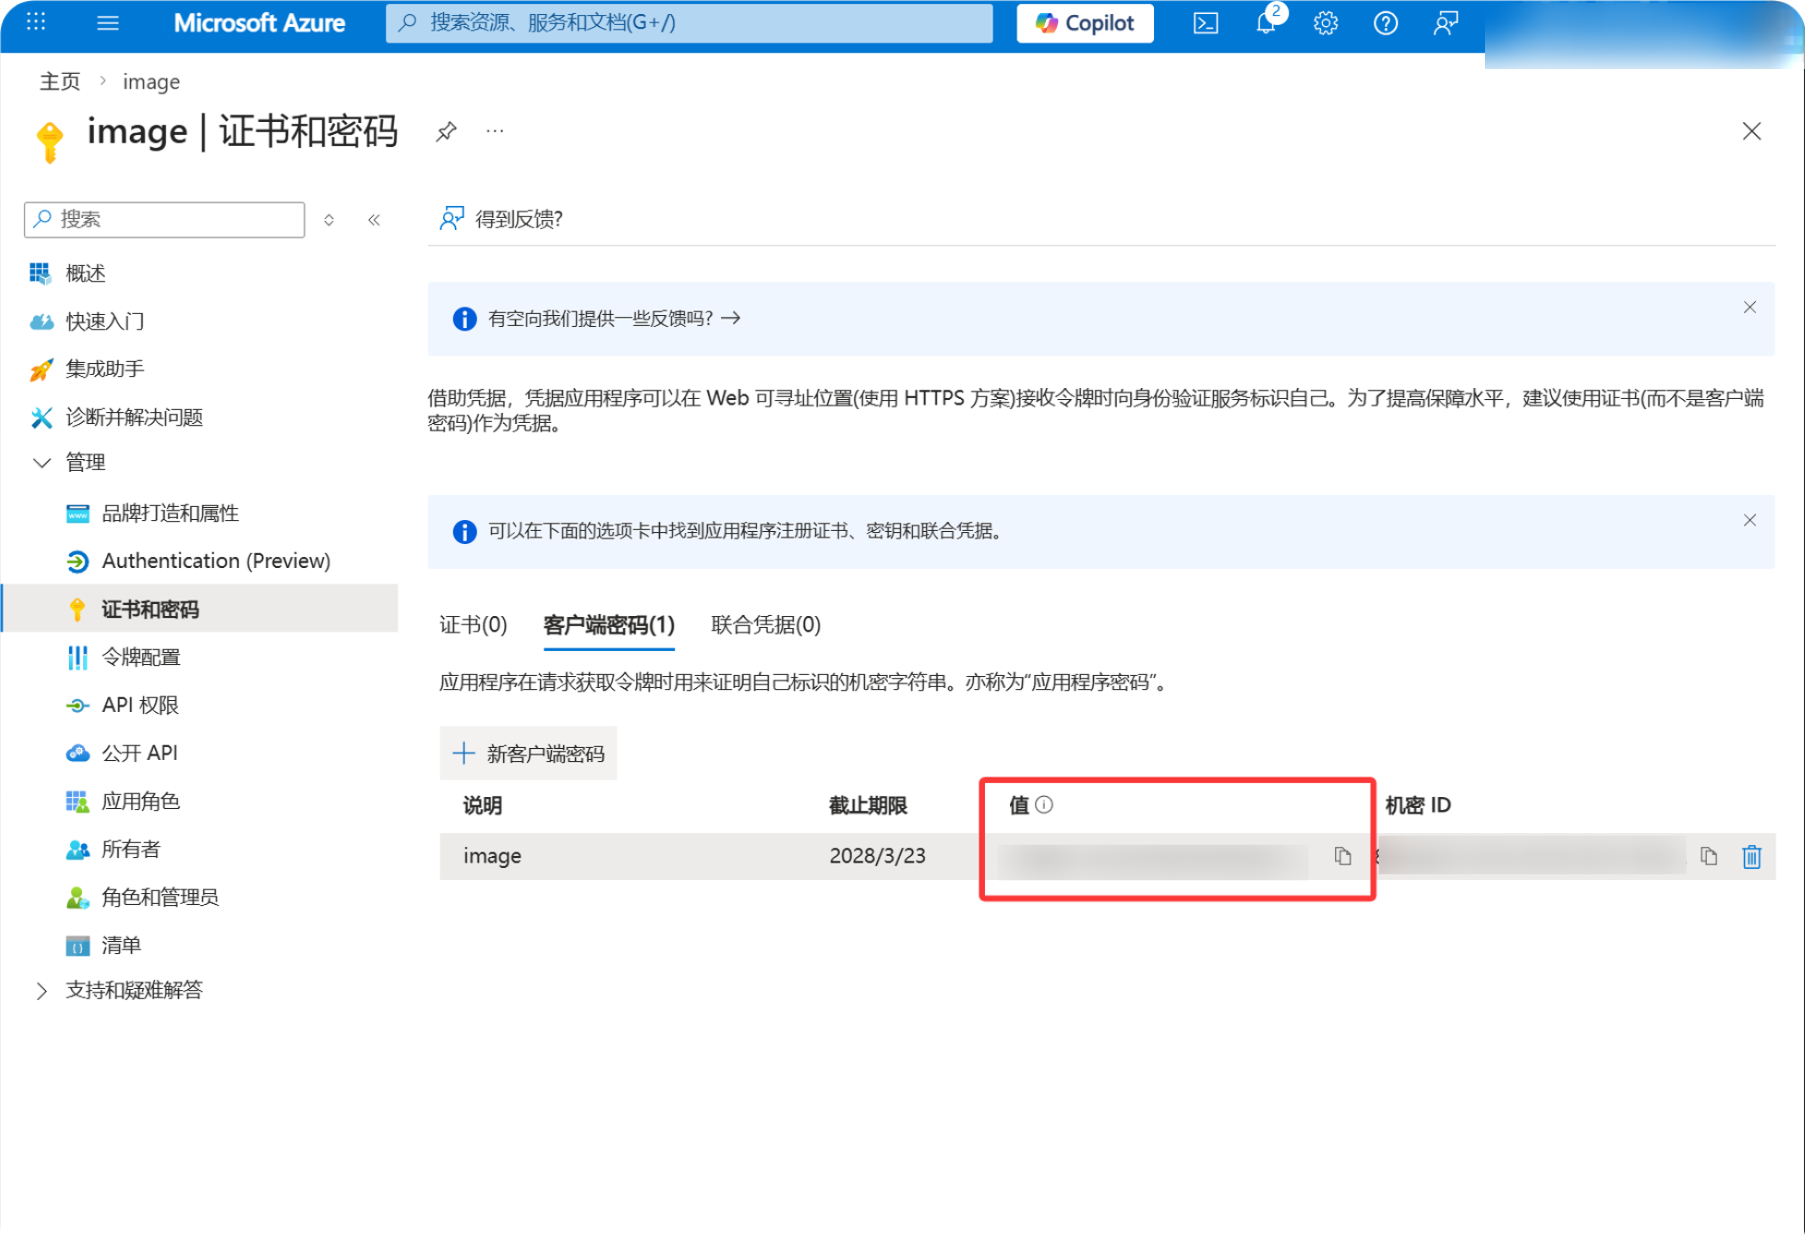
- Mở
Certificates & secrets. - Nhấn
New client secret. - Nhập mô tả tùy ý.
- Chọn expiration period.
- Sao chép
Valuengay sau khi tạo.
Bước 5: Thêm API Quyềns
- Mở
API permissions. - Nhấn
Add a permission. - Chọn
Microsoft Graph. - Chọn
Delegated permissions. - Thêm các permissions này:
| Quyền | Mục đích |
|---|---|
Files.ReadWrite.All | Upload files, tạo folders và xóa files |
offline_access | Cho phép ImgHost lấy Refresh Token |
User.Read | Đọc account và quota information |
Bước 6: Điền OneDrive Channel
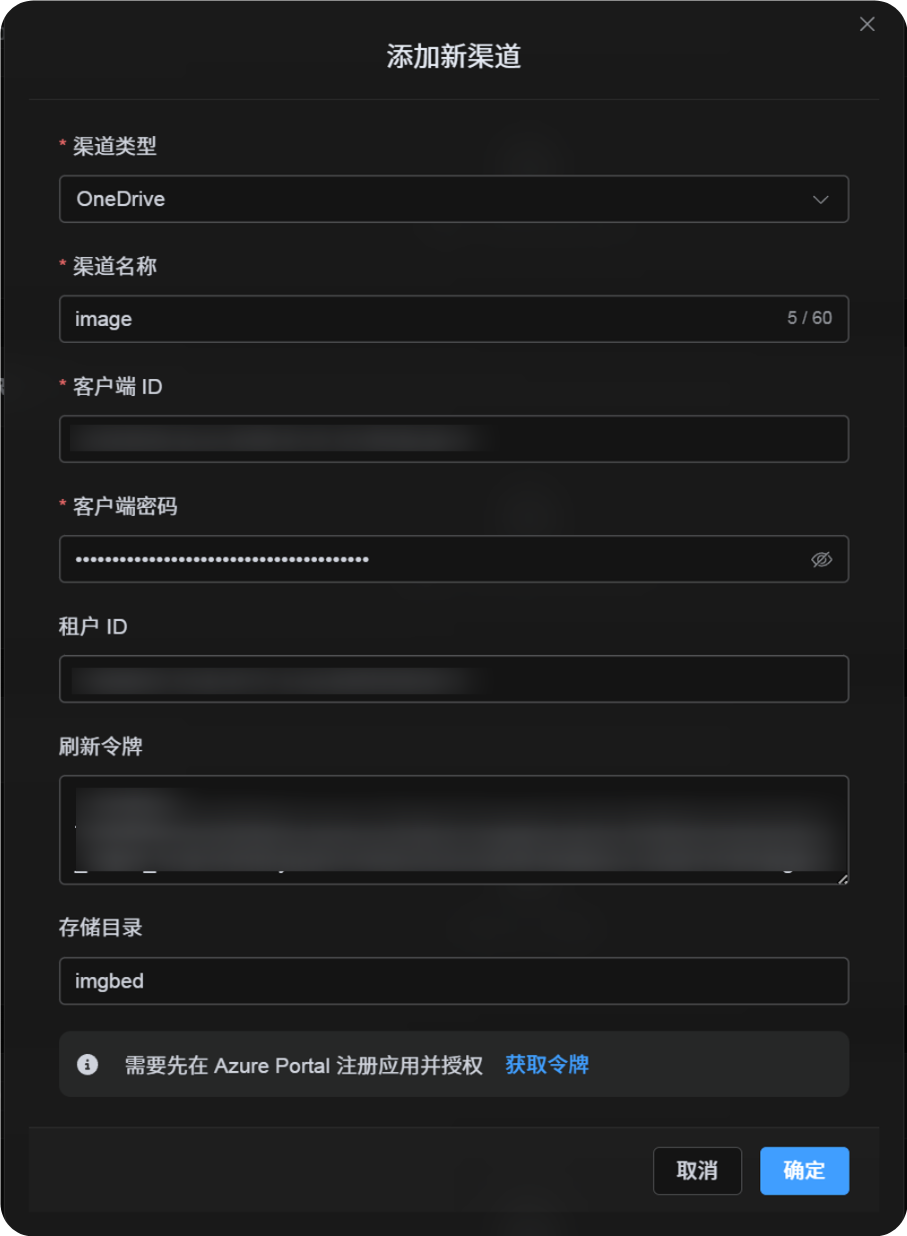
Trong Cài đặt tải lên, chọn OneDrive và điền:
| Trường ImgHost | Nhập gì |
|---|---|
| Channel name | Tên dễ nhận biết, ví dụ Main OneDrive |
| Client ID | Microsoft Application (client) ID |
| Client Secret | Client Secret Value đã sao chép |
| Tenant ID | Dùng bảng bên dưới |
| Refresh Token | Tạm thời để trống |
| Root directory | Không bắt buộc. Mặc định là imgbed. |
| Khôngte | Không bắt buộc |
Cách điền Tenant ID:
| Account Type You Chose | ImgHost Tenant ID |
|---|---|
| Personal accounts | consumers |
| Personal + organizational accounts | common |
| Chỉ tổ chức hiện tại | Directory (tenant) ID |
Bước 7: Lấy Refresh Token
- Trong ImgHost, nhấn
Get Token. - Sign in vào Microsoft account bạn muốn kết nối.
- Phê duyệt authorization prompt.
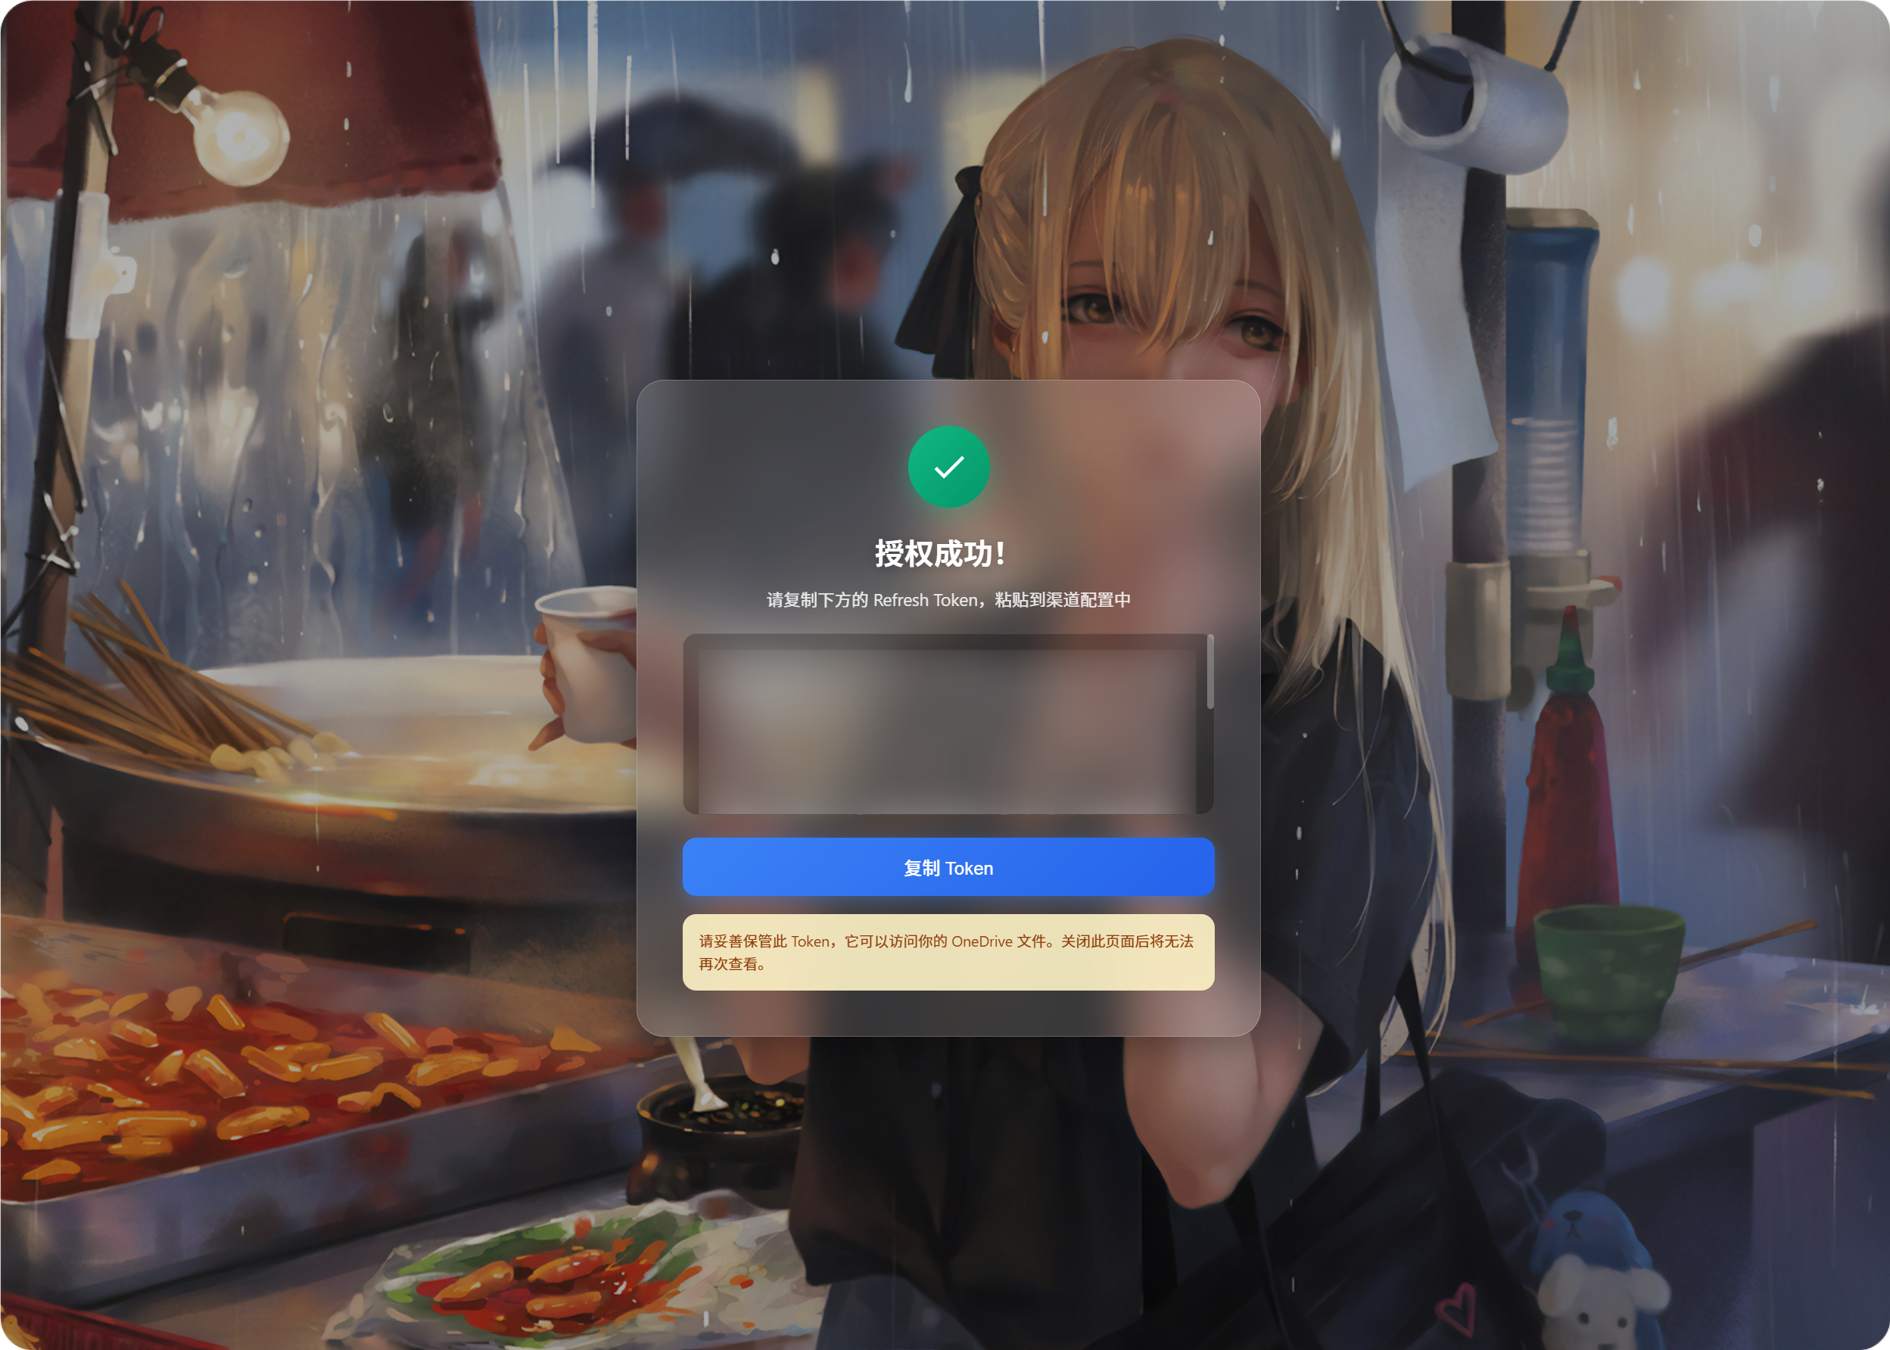
- Callback page sẽ hiển thị
Refresh Token. - Sao chép token đó.
- Quay lại ImgHost và dán vào trường
Refresh Token.
Bước 8: Save Channel
Sau khi điền đủ trường, save channel.
Luồng nhanh
text
Open portal.azure.com
-> Search for Microsoft Entra ID
-> Open App registrations
-> Register a new app
-> Fill Name / Supported account types / Web redirect URI
-> Register
-> Copy Application (client) ID
-> Check the callback URL in Authentication
-> Create a Client Secret in Certificates & secrets
-> Add permissions in API permissions
-> Fill Client ID / Client Secret / Tenant ID into ImgHost
-> Click Get Token
-> Copy the Refresh Token from the callback page
-> Paste it back into ImgHost and save
Tài liệu tham khảo
- Microsoft Entra app registration: https://learn.microsoft.com/en-us/entra/identity-platform/quickstart-register-app
- Microsoft identity platform authorization code flow: https://learn.microsoft.com/en-us/entra/identity-platform/v2-oauth2-auth-code-flow
- Microsoft Graph user authentication: https://learn.microsoft.com/en-us/graph/auth-v2-user