Google Drive Channel شامل کریں
شروع کرنے سے پہلے کیا چاہیے
شروع کرنے سے پہلے یہ items تیار کریں:
| ضرورت | وجہ |
|---|---|
| Google account | Google Cloud تک access اور Google Drive authorize کرنے کے لیے |
| Google Cloud project | Drive API enable کرنے اور OAuth credentials بنانے کے لیے |
| OAuth 2.0 client | ImgBed کے لیے Client ID، Client Secret، اور Refresh Token حاصل کرنے کے لیے |
| آپ کا ImgBed domain | OAuth redirect URI کے لیے۔ یہ اسی domain سے match ہونا چاہیے جو آپ واقعی استعمال کرتے ہیں۔ |
Setup Steps
Step 1: Google Drive API Enable کریں
- Google Cloud Console کھولیں۔
- نیا project بنائیں یا existing project منتخب کریں۔
APIs & Servicesمیں جائیں۔Enable APIs and Servicesپر کلک کریں۔Google Drive APIتلاش کریں۔- اسے کھولیں اور enable پر کلک کریں۔
Step 2: OAuth Consent Screen Configure کریں
- Google Cloud میں
Google Auth Platformکھولیں۔ - basic
Brandinginformation مکمل کریں، جیسے app name، support email، اور developer contact email۔ Audienceکھولیں۔- زیادہ تر self-hosted personal deployments کے لیے
Externalمنتخب کریں۔ - اگر
Externalمنتخب کرتے ہیں تو جس Google account کو authorize کرنا ہے اسےTest usersمیں شامل کریں۔ Data Accessکھولیں۔- درکار Google Drive permissions شامل کریں۔
Step 3: OAuth 2.0 Client بنائیں
Google Auth PlatformمیںClientsکھولیں۔- نیا client بنائیں۔
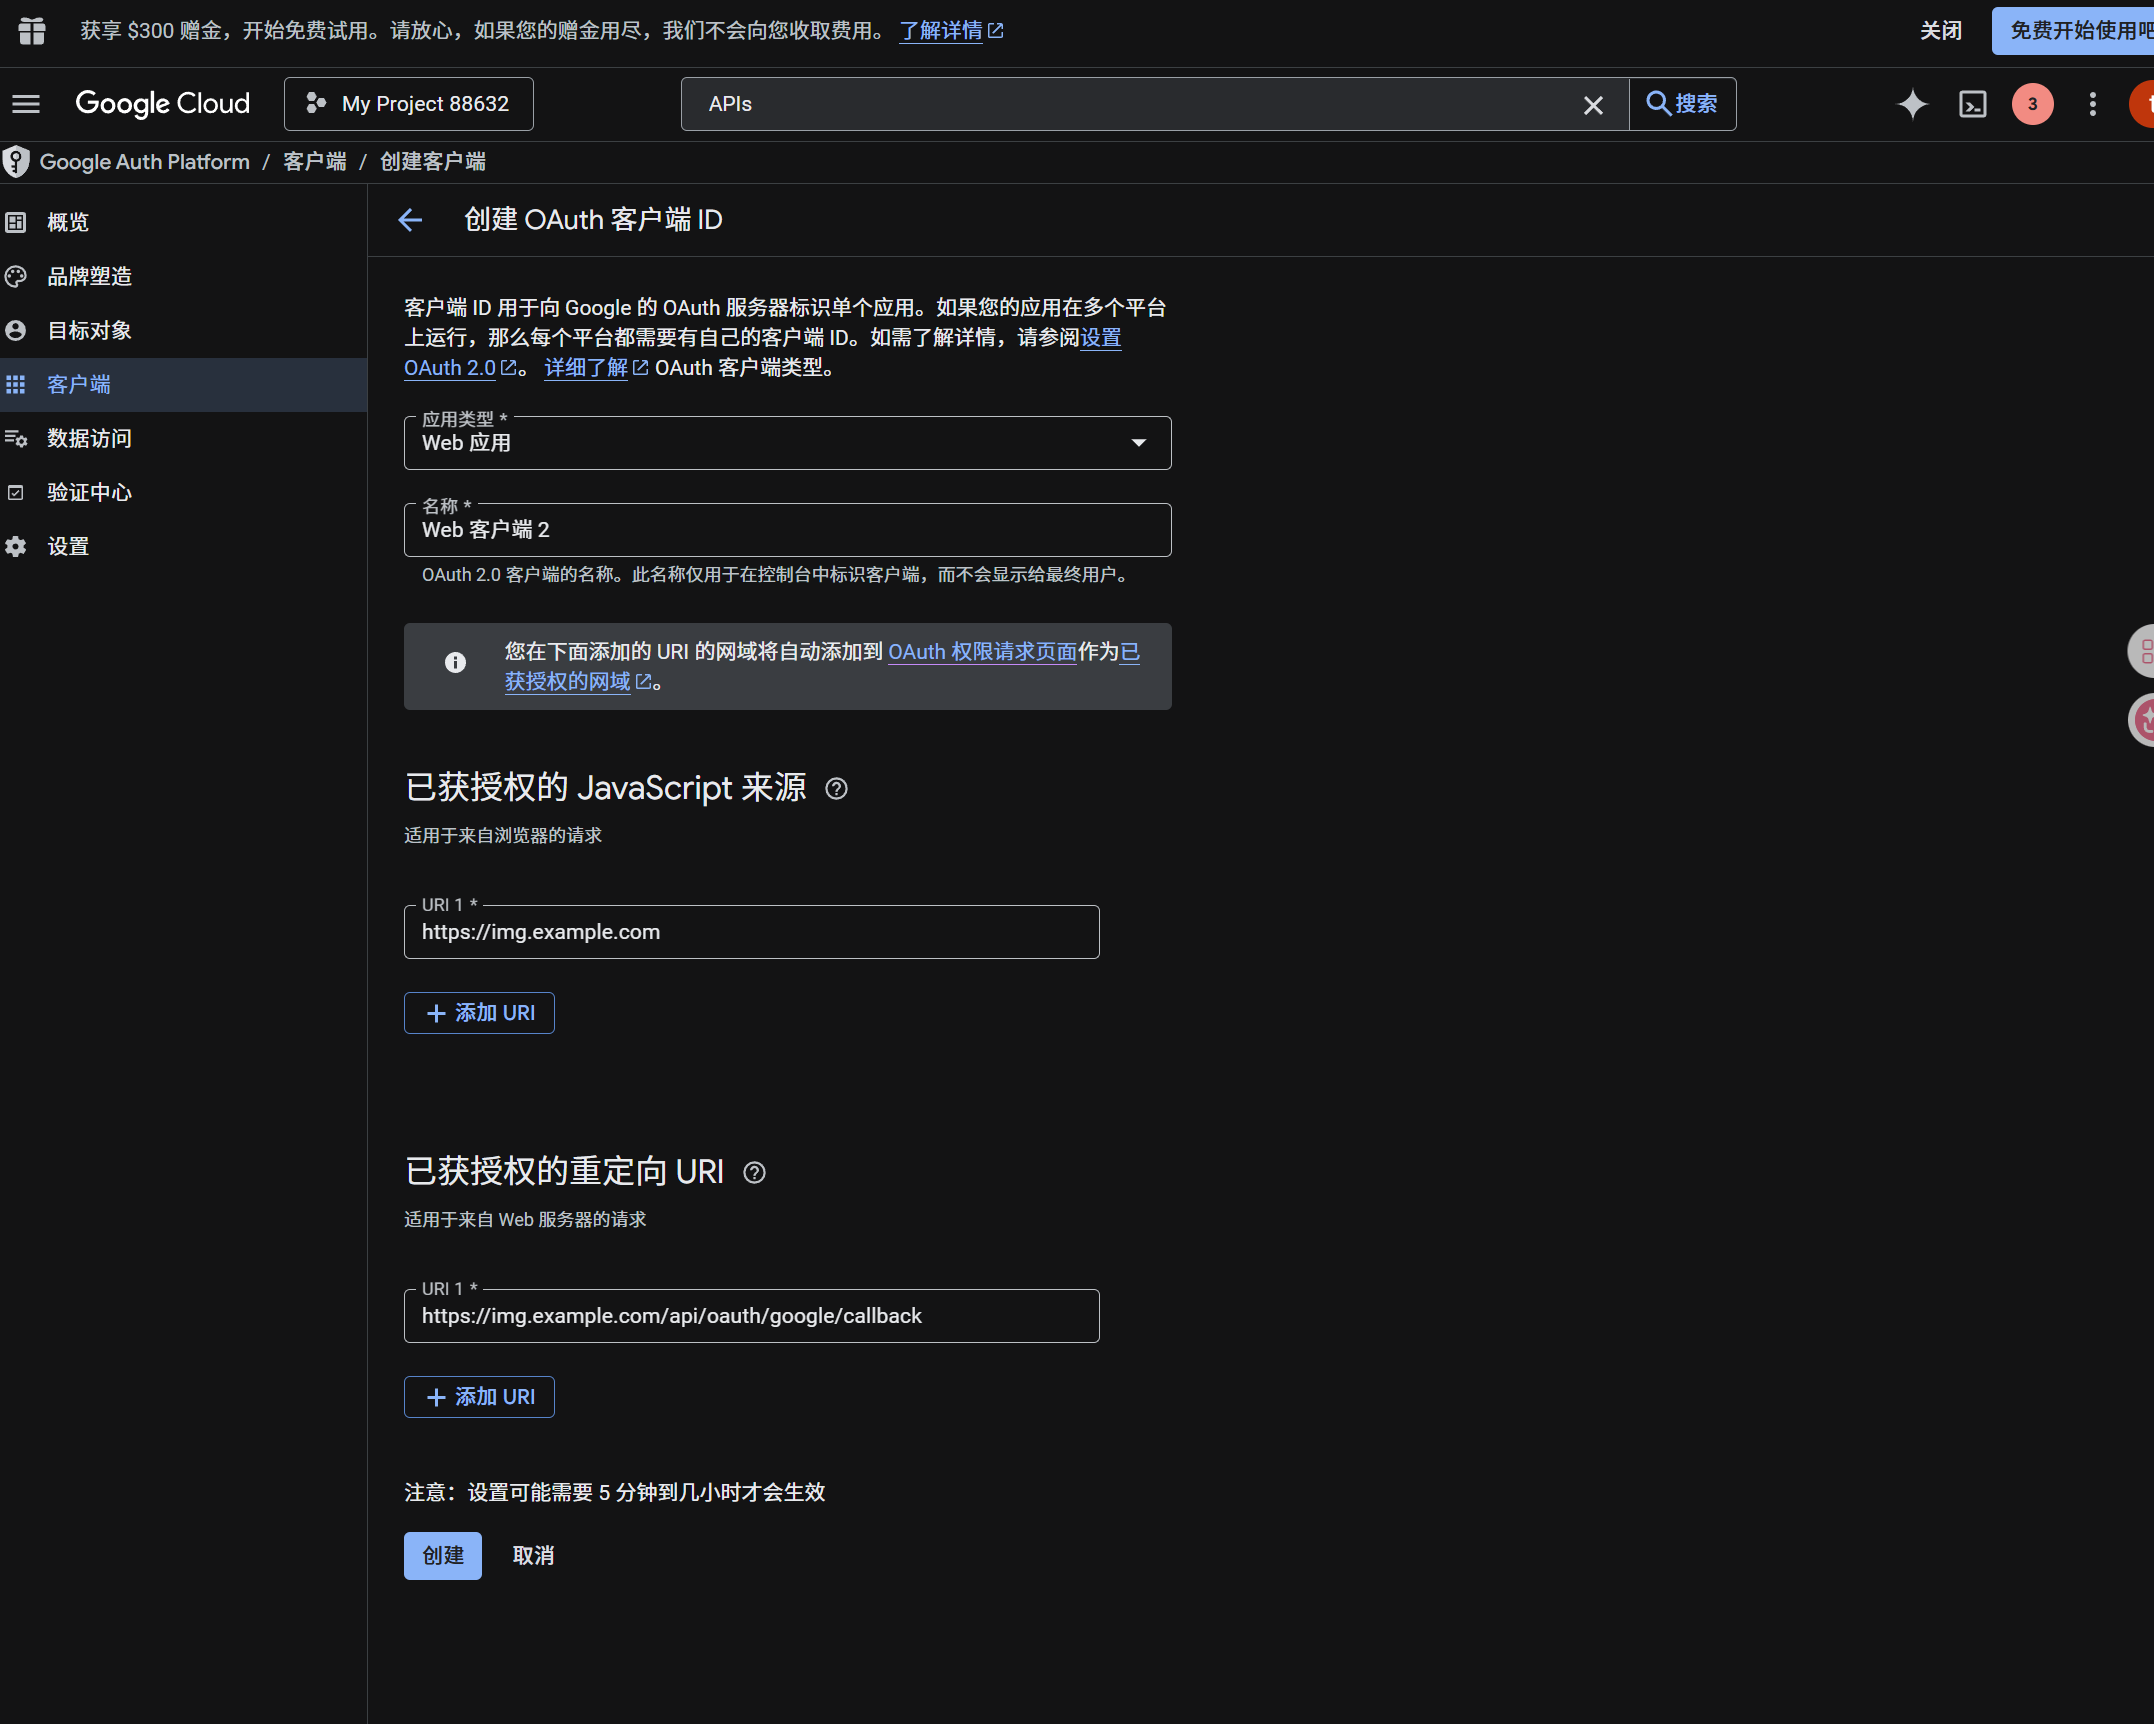
- application type کو
Web applicationرکھیں۔ - client کو قابل شناخت نام دیں۔
- authorized JavaScript origins میں اپنا ImgBed URL درج کریں، مثلاً:
text
https://img.example.com- authorized redirect URIs میں درج کریں:
text
https://img.example.com/api/oauth/google/callback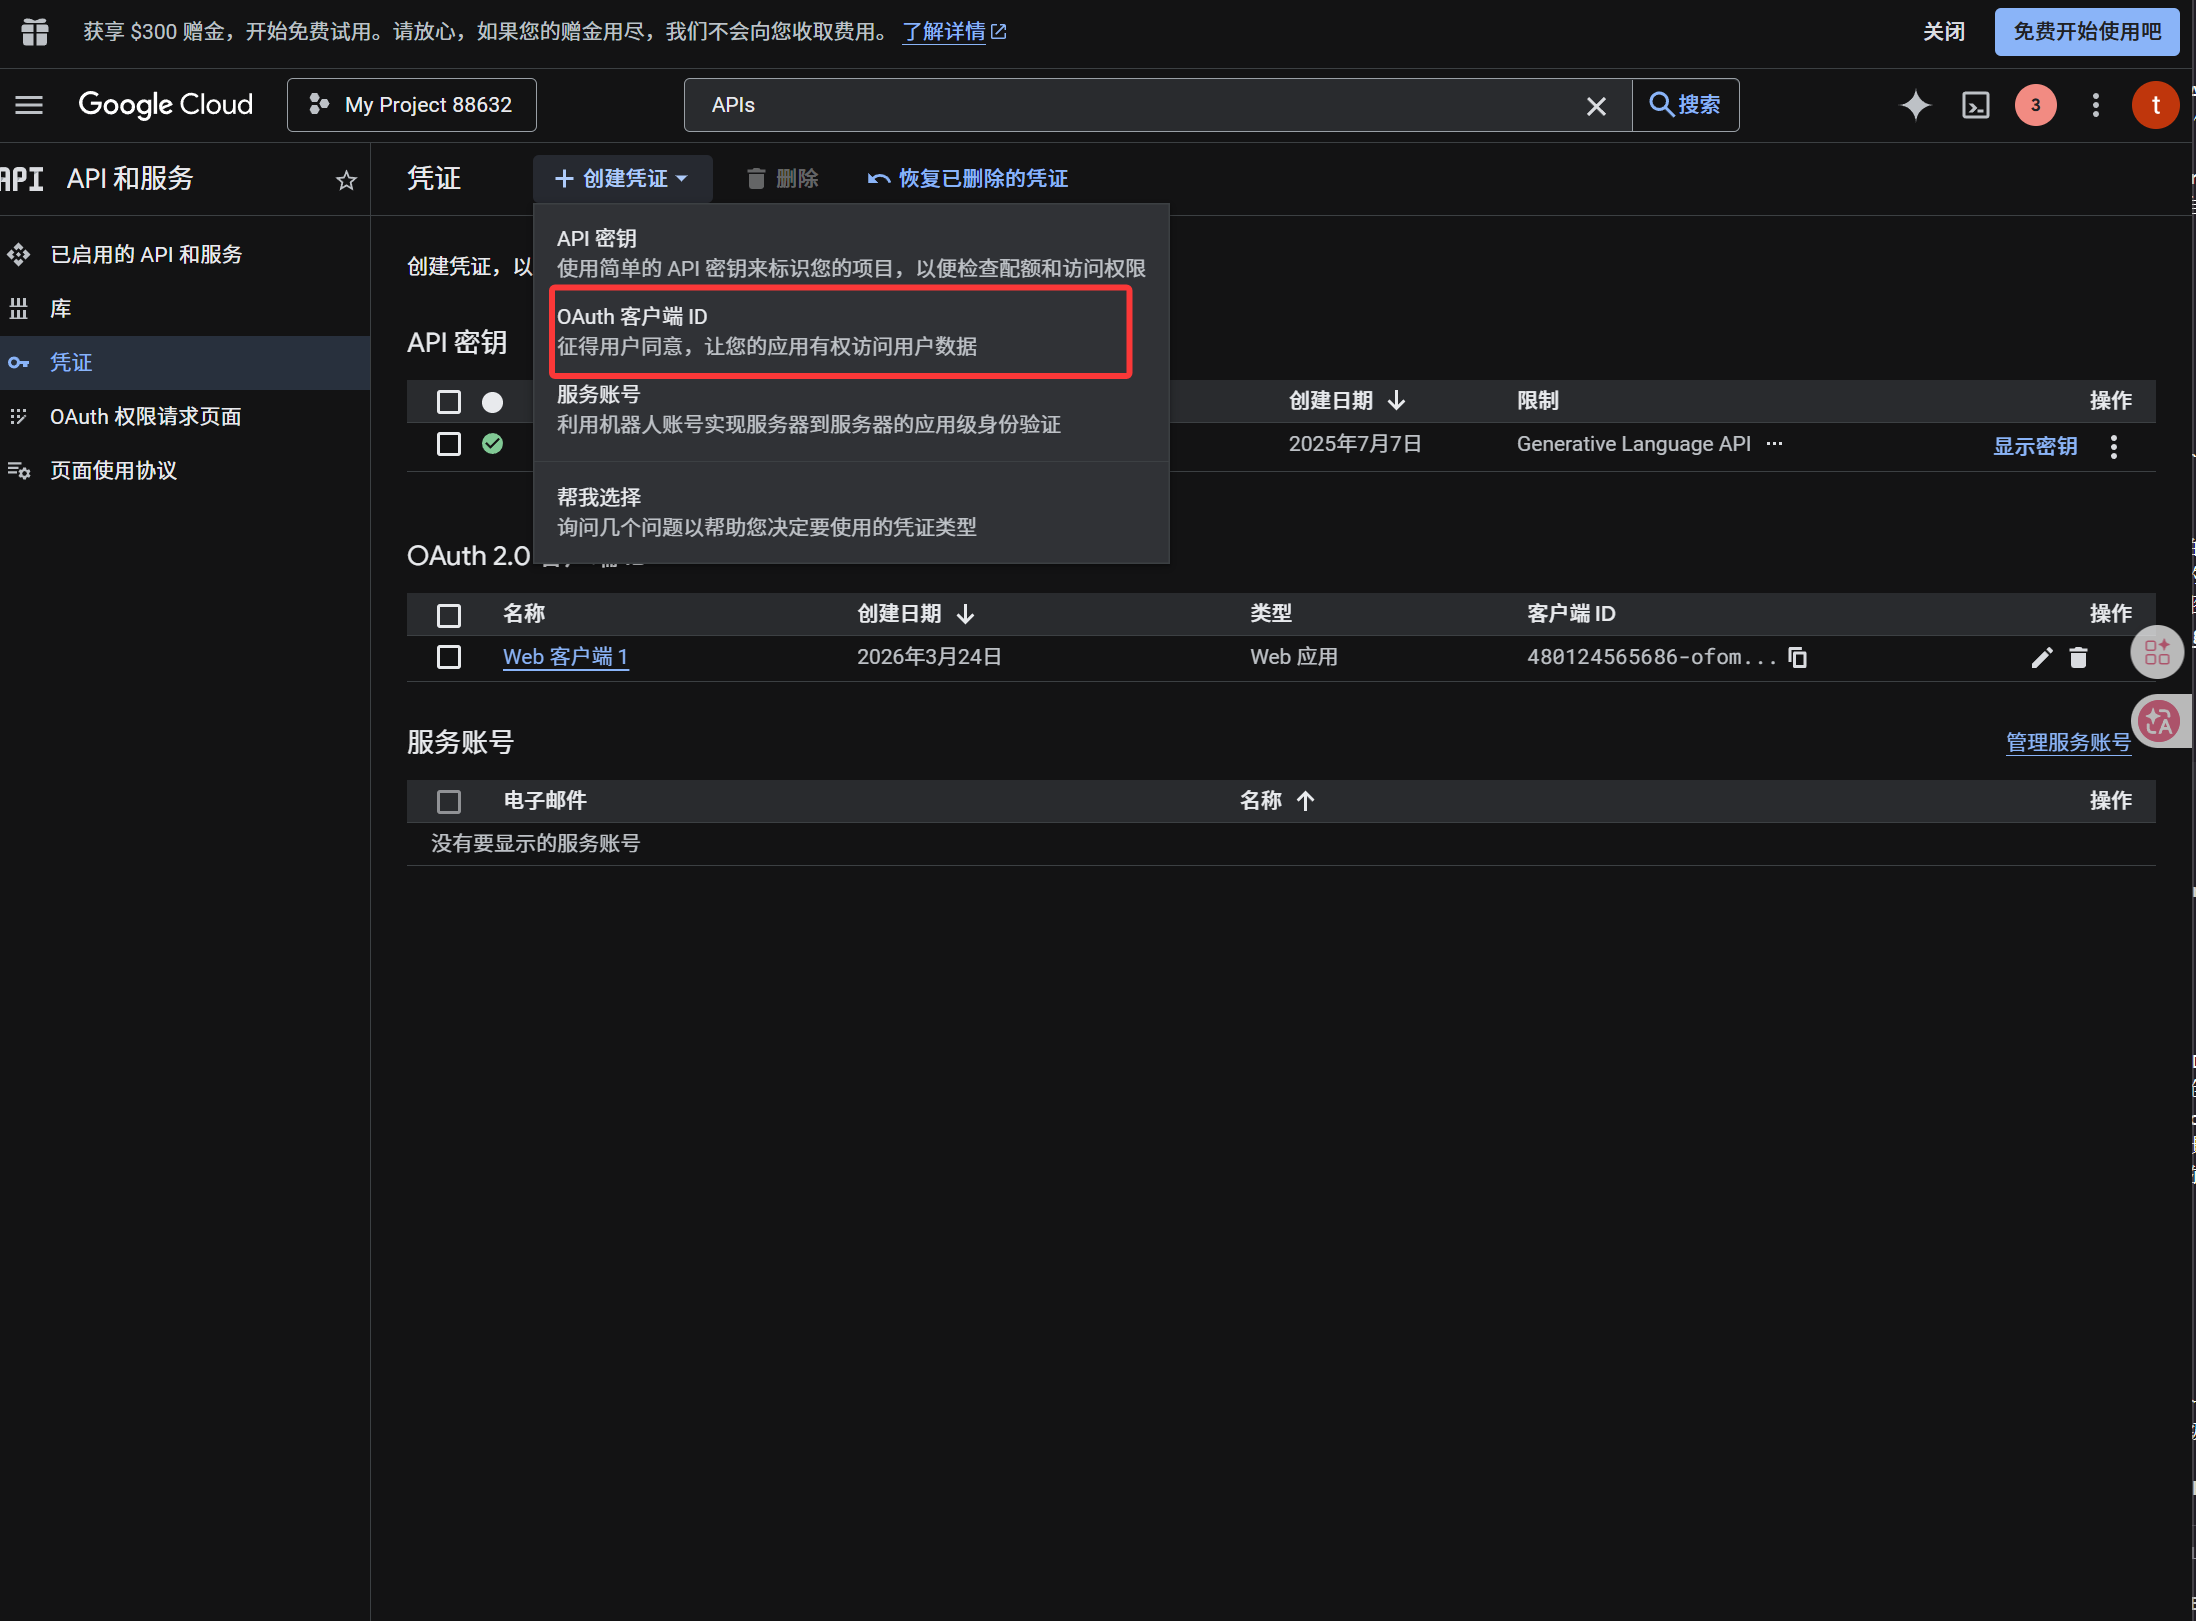
client بننے کے بعد یہ values copy کریں:
| Generated Value | ImgBed Field |
|---|---|
| Client ID | Client ID |
| Client Secret | Client Secret |
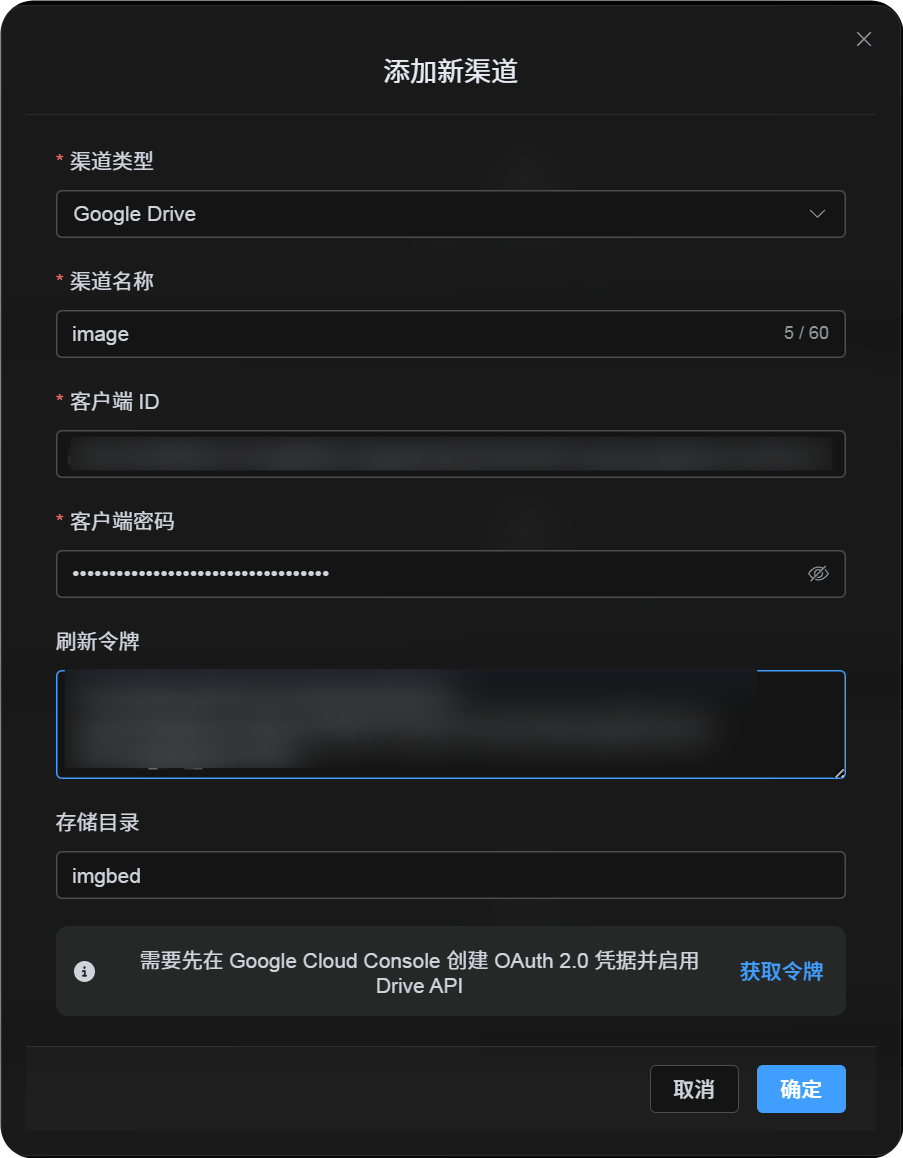
Step 4: ImgBed میں Google Drive Channel بھریں
Upload Settings میں Google Drive منتخب کریں اور یہ fields بھریں:
| ImgBed Field | What To Enter |
|---|---|
| Channel name | قابل شناخت نام، مثلاً Main Google Drive |
| Client ID | Google Cloud سے لیا ہوا Client ID |
| Client Secret | Google Cloud سے لیا ہوا Client Secret |
| Refresh Token | ابھی خالی چھوڑ دیں۔ اگلے step میں حاصل کریں۔ |
| Root directory | Optional۔ default imgbed ہے۔ |
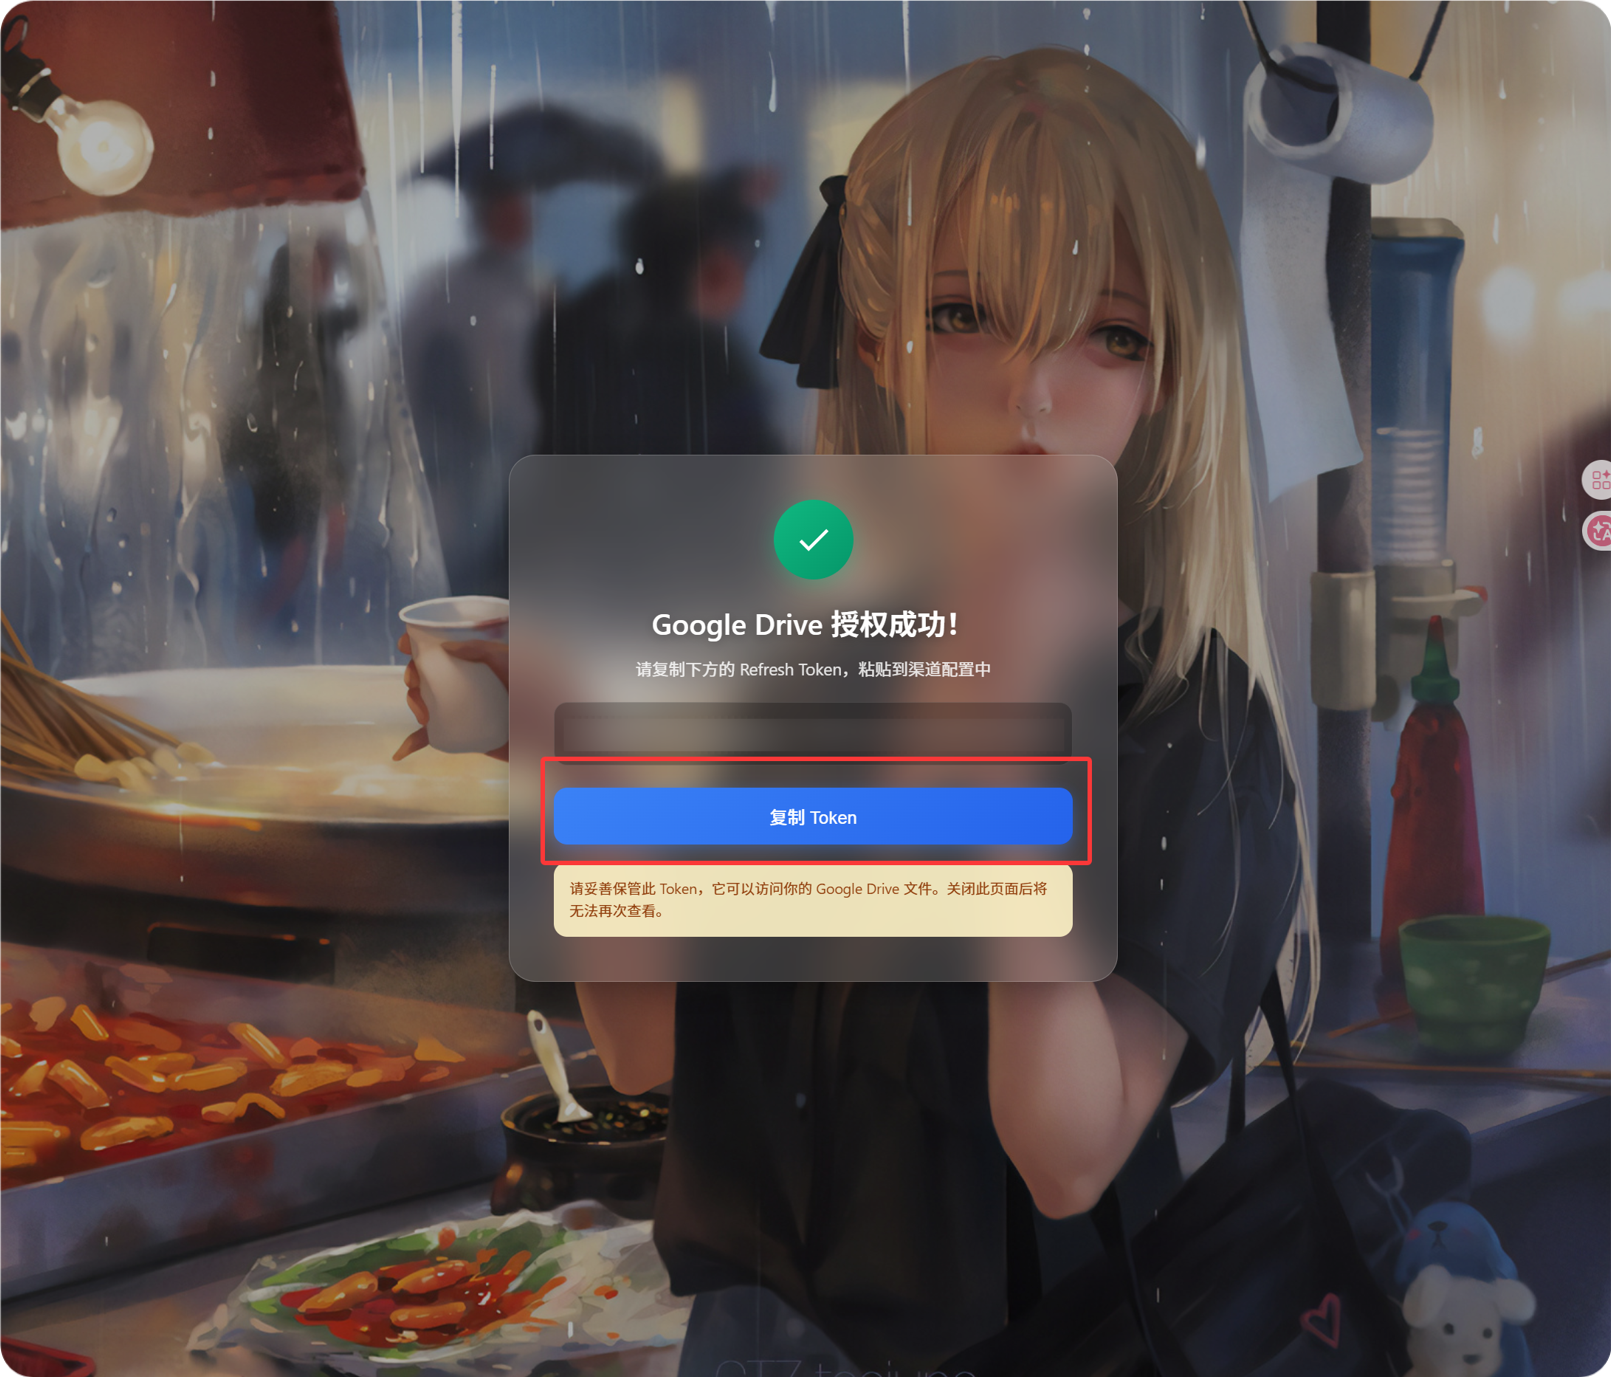
Step 5: Refresh Token حاصل کریں
Get Tokenپر کلک کریں۔- وہ Google account منتخب کریں جسے connect کرنا ہے۔
- authorization prompts مکمل کریں۔
- callback page ایک
Refresh Tokenدکھائے گا۔ - اسے copy کریں۔
- ImgBed پر واپس آ کر
Refresh Tokenfield میں paste کریں۔
اگر بعد میں Google account بدلیں، OAuth client بدلیں، یا پرانی authorization expire ہو جائے، تو channel delete کرنے کی ضرورت نہیں۔ edit page کھولیں اور Reauthorize پر کلک کریں۔
Step 6: Channel Save کریں
تمام fields بھرنے کے بعد channel save کریں۔
Quick Flow
text
Google Cloud کھولیں
-> project بنائیں یا منتخب کریں
-> Google Drive API enable کریں
-> Google Auth Platform configure کریں
-> Audience External ہو تو اپنا Google account Test users میں شامل کریں
-> Web application OAuth client بنائیں
-> redirect URI کے طور پر https://your-domain.com/api/oauth/google/callback استعمال کریں
-> Client ID اور Client Secret ImgBed میں بھریں
-> Get Token پر کلک کریں
-> Google سے sign in اور authorize کریں
-> callback page سے Refresh Token copy کریں
-> ImgBed میں paste کر کے save کریں
-> test image upload کریں
References
- Google OAuth Web Server Applications: https://developers.google.com/identity/protocols/oauth2/web-server
- Google Workspace OAuth Consent Configuration: https://developers.google.com/workspace/guides/configure-oauth-consent
- Google Drive API Auth Scopes: https://developers.google.com/workspace/drive/api/guides/api-specific-auth