Cloudflare R2 Channel شامل کریں
کب استعمال کریں
Cloudflare R2 اس وقت مناسب ہے جب:
- آپ کی ImgBed site پہلے ہی Cloudflare پر deployed ہے اور آپ اسی Cloudflare account کے R2 bucket میں files رکھنا چاہتے ہیں۔
- آپ الگ S3 endpoint، access key، اور secret key configure نہیں کرنا چاہتے۔
- آپ چاہتے ہیں کہ reads اور writes کم setup کے ساتھ Worker یا Pages R2 binding کے ذریعے چلیں۔
مختصر بات:
R2 channel ImgBed admin panel کے اندر manual طور پر نہیں بنایا جاتا۔ پہلے Cloudflare project کے ساتھ R2 bucket bind کریں، اور binding variable name لازماً img_r2 ہونا چاہیے۔
شروع کرنے سے پہلے کیا چاہیے
- Cloudflare account۔
- پہلے سے موجود R2 bucket۔
- اس Cloudflare project کو manage کرنے کی permission جہاں ImgBed deployed ہے۔
Cloudflare میں Configure کریں
1. R2 Bucket بنائیں
- Cloudflare Dashboard میں log in کریں۔
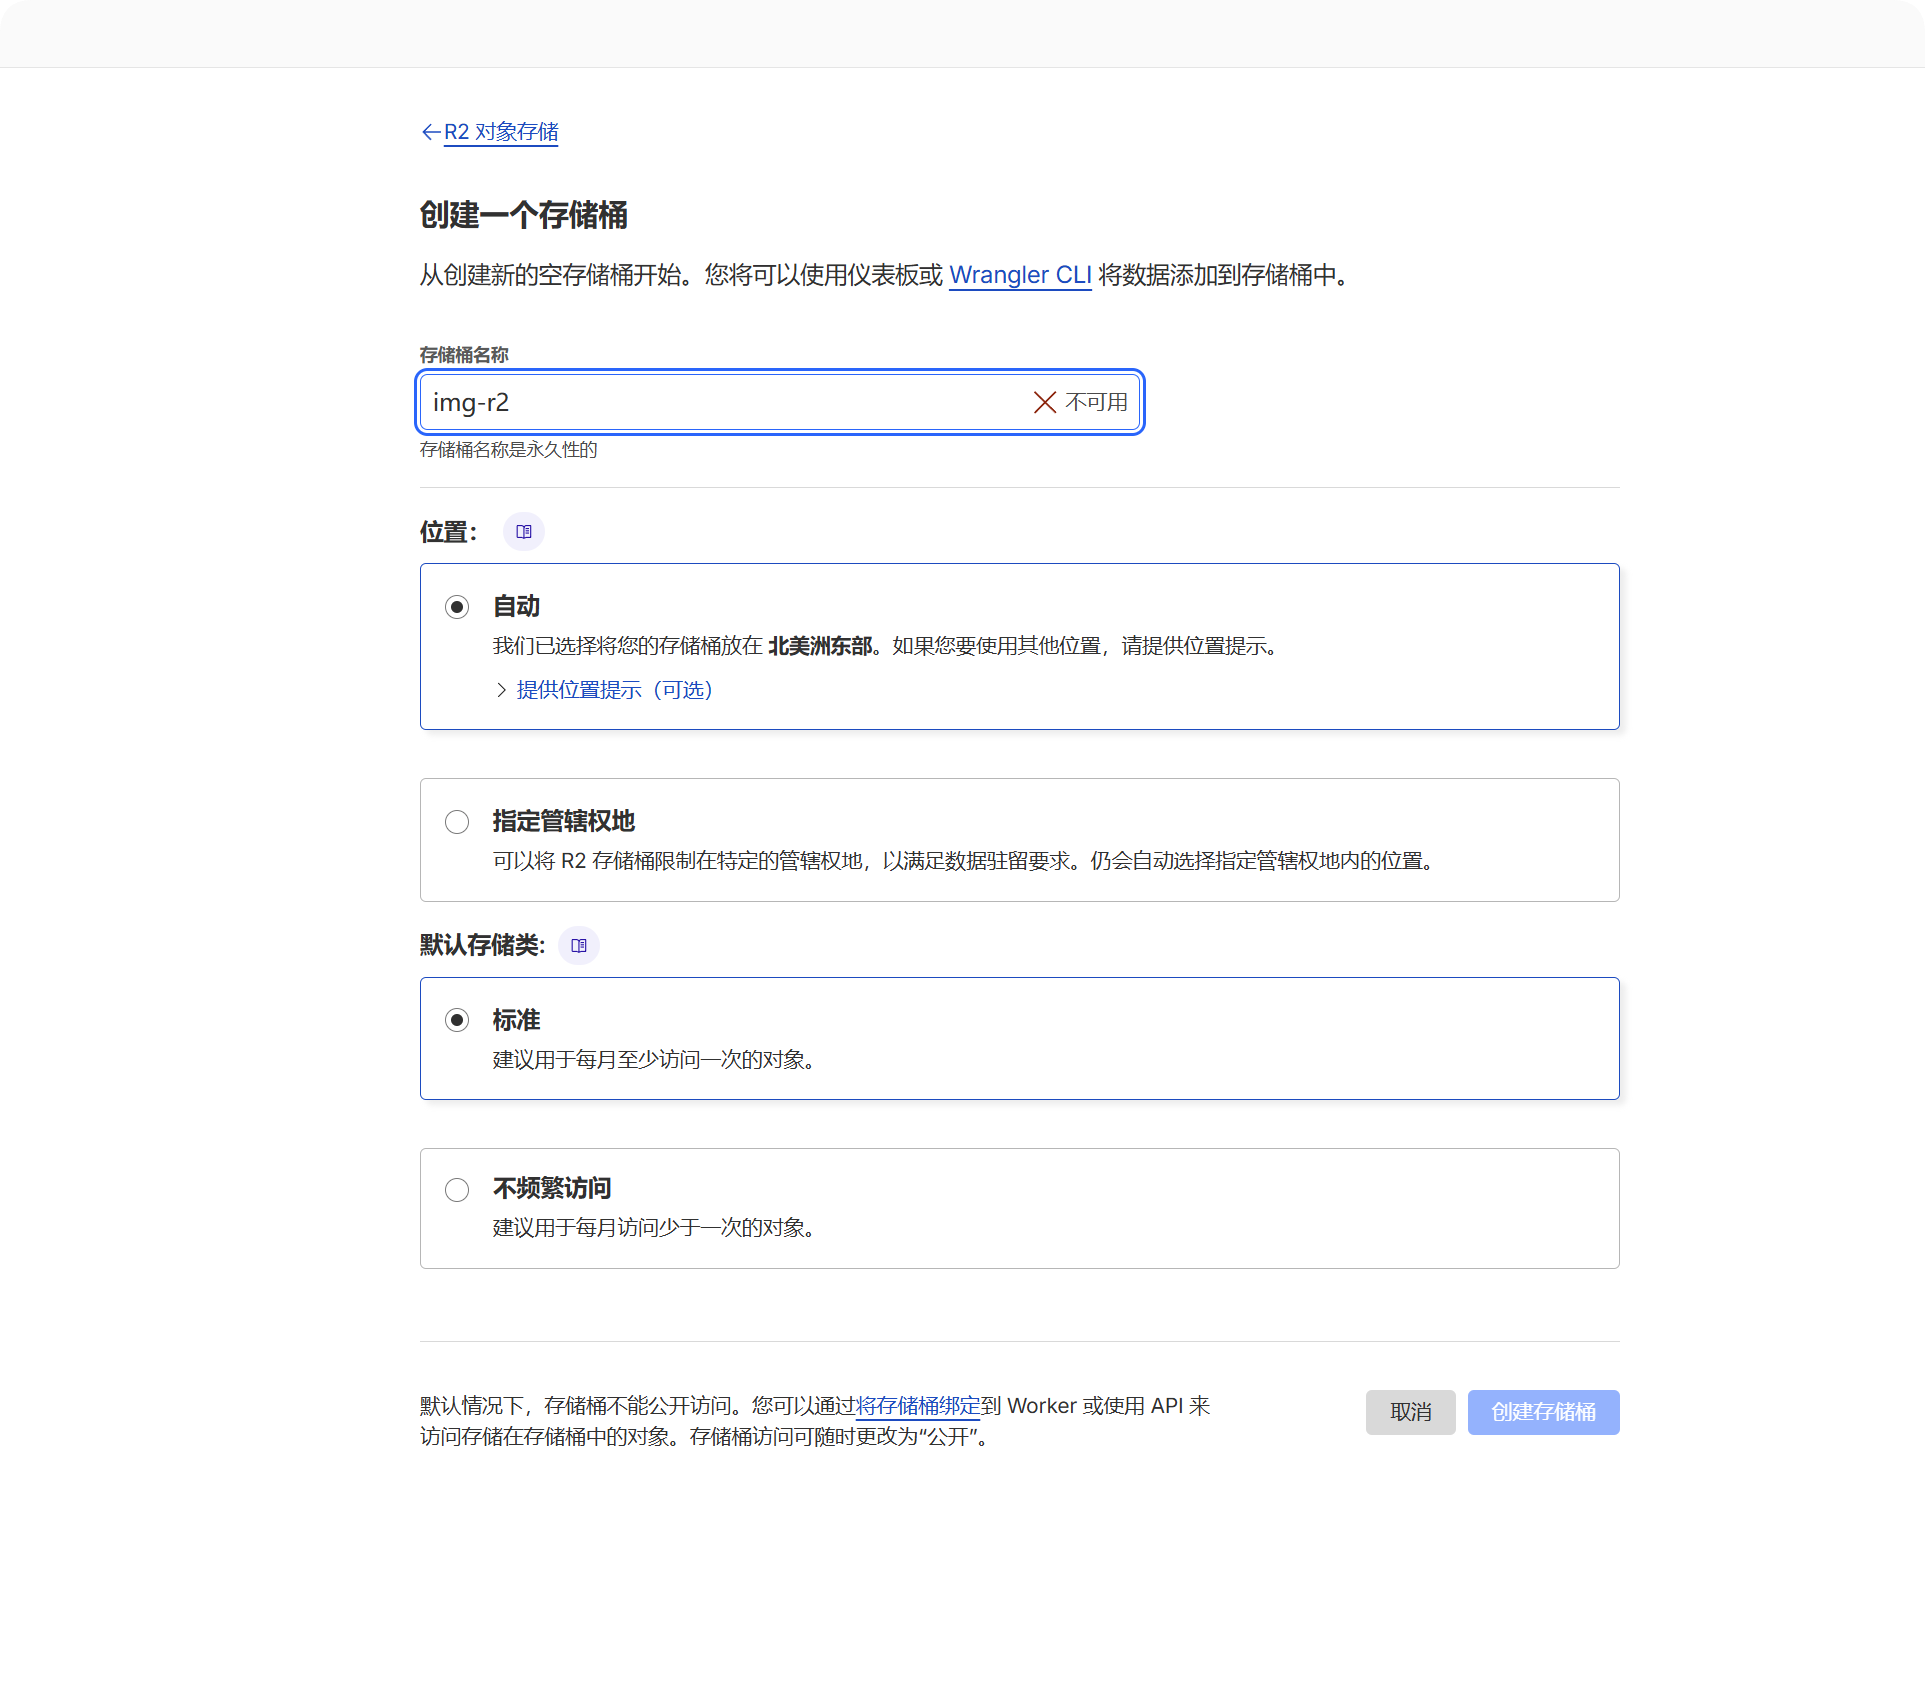
R2 Object Storageکھولیں۔- Create bucket پر کلک کریں۔
- bucket name منتخب کریں، مثلاً
imgbed۔
uploaded files اسی bucket میں محفوظ ہوں گی۔
2. Bucket کو ImgBed Project سے Bind کریں
اپنی deployment type کے مطابق binding location منتخب کریں:
| Deployment Type | Binding Location |
|---|---|
| Pages | Current Pages project -> Settings -> Functions -> R2 bucket bindings |
| Worker | Current Worker -> Settings -> Bindings -> R2 bucket bindings |
binding add کرتے وقت اہم fields یہ ہیں:
| Field | Value |
|---|---|
| Variable name | img_r2 |
| R2 bucket | جو bucket آپ نے بنایا ہے اسے منتخب کریں۔ |
Variable name بالکل img_r2 ہونا چاہیے۔ R2 files کا upload، read، اور delete سب اسی binding name پر depend کرتا ہے۔
3. Project دوبارہ Deploy کریں
binding save کرنے کے بعد ImgBed کو redeploy کریں تاکہ Worker یا Pages runtime img_r2 تک access حاصل کر سکے۔
ImgBed میں کیا نظر آئے گا
R2 binding دستیاب ہونے کے بعد کھولیں:
- System Settings۔
- Upload Settings۔
Cloudflare R2channel۔
system خود ایک fixed channel بناتا ہے:
| Field | Fixed Value |
|---|---|
| Channel name | Cloudflare R2 |
| Channel type | cfr2 |
| Storage mode | binding |
| Configuration source | Environment binding |
یہ fixed binding channel ہے۔ اسے بنانے کے لیے Add Channel پر کلک کرنے کی ضرورت نہیں، اور اسے عام channel کی طرح delete بھی نہیں کیا جا سکتا۔
Admin Panel میں Editable Fields
| Field | کام | Required |
|---|---|---|
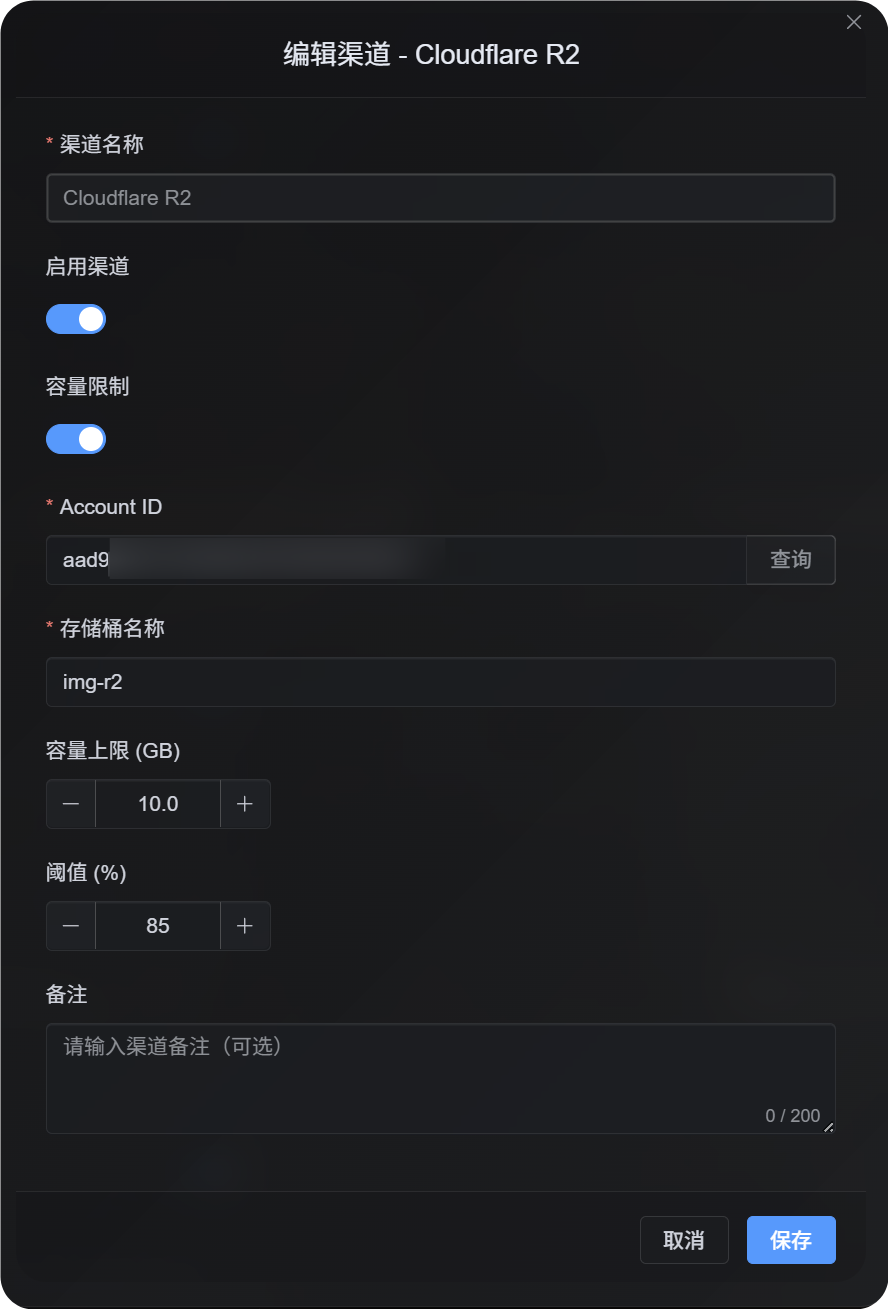
| Enable channel | یہ کنٹرول کرتا ہے کہ R2 upload selection میں شامل ہو یا نہیں۔ | Yes |
| Account ID | صرف اس وقت استعمال ہوتا ہے جب quota limits enabled ہوں اور official R2 usage query کرنا ہو۔ | Recommended when quota limits are enabled |
| Bucket name | صرف اس وقت استعمال ہوتا ہے جب quota limits enabled ہوں اور official R2 usage query کرنا ہو۔ | Recommended when quota limits are enabled |
| Quota limit | یہ کنٹرول کرتا ہے کہ capacity کی بنیاد پر R2 channel upload selection میں شامل ہو یا نہیں۔ | No |
| Threshold | usage مخصوص percentage تک پہنچنے کے بعد اس channel پر لکھنا روک دیتا ہے۔ | Required when quota limits are enabled |
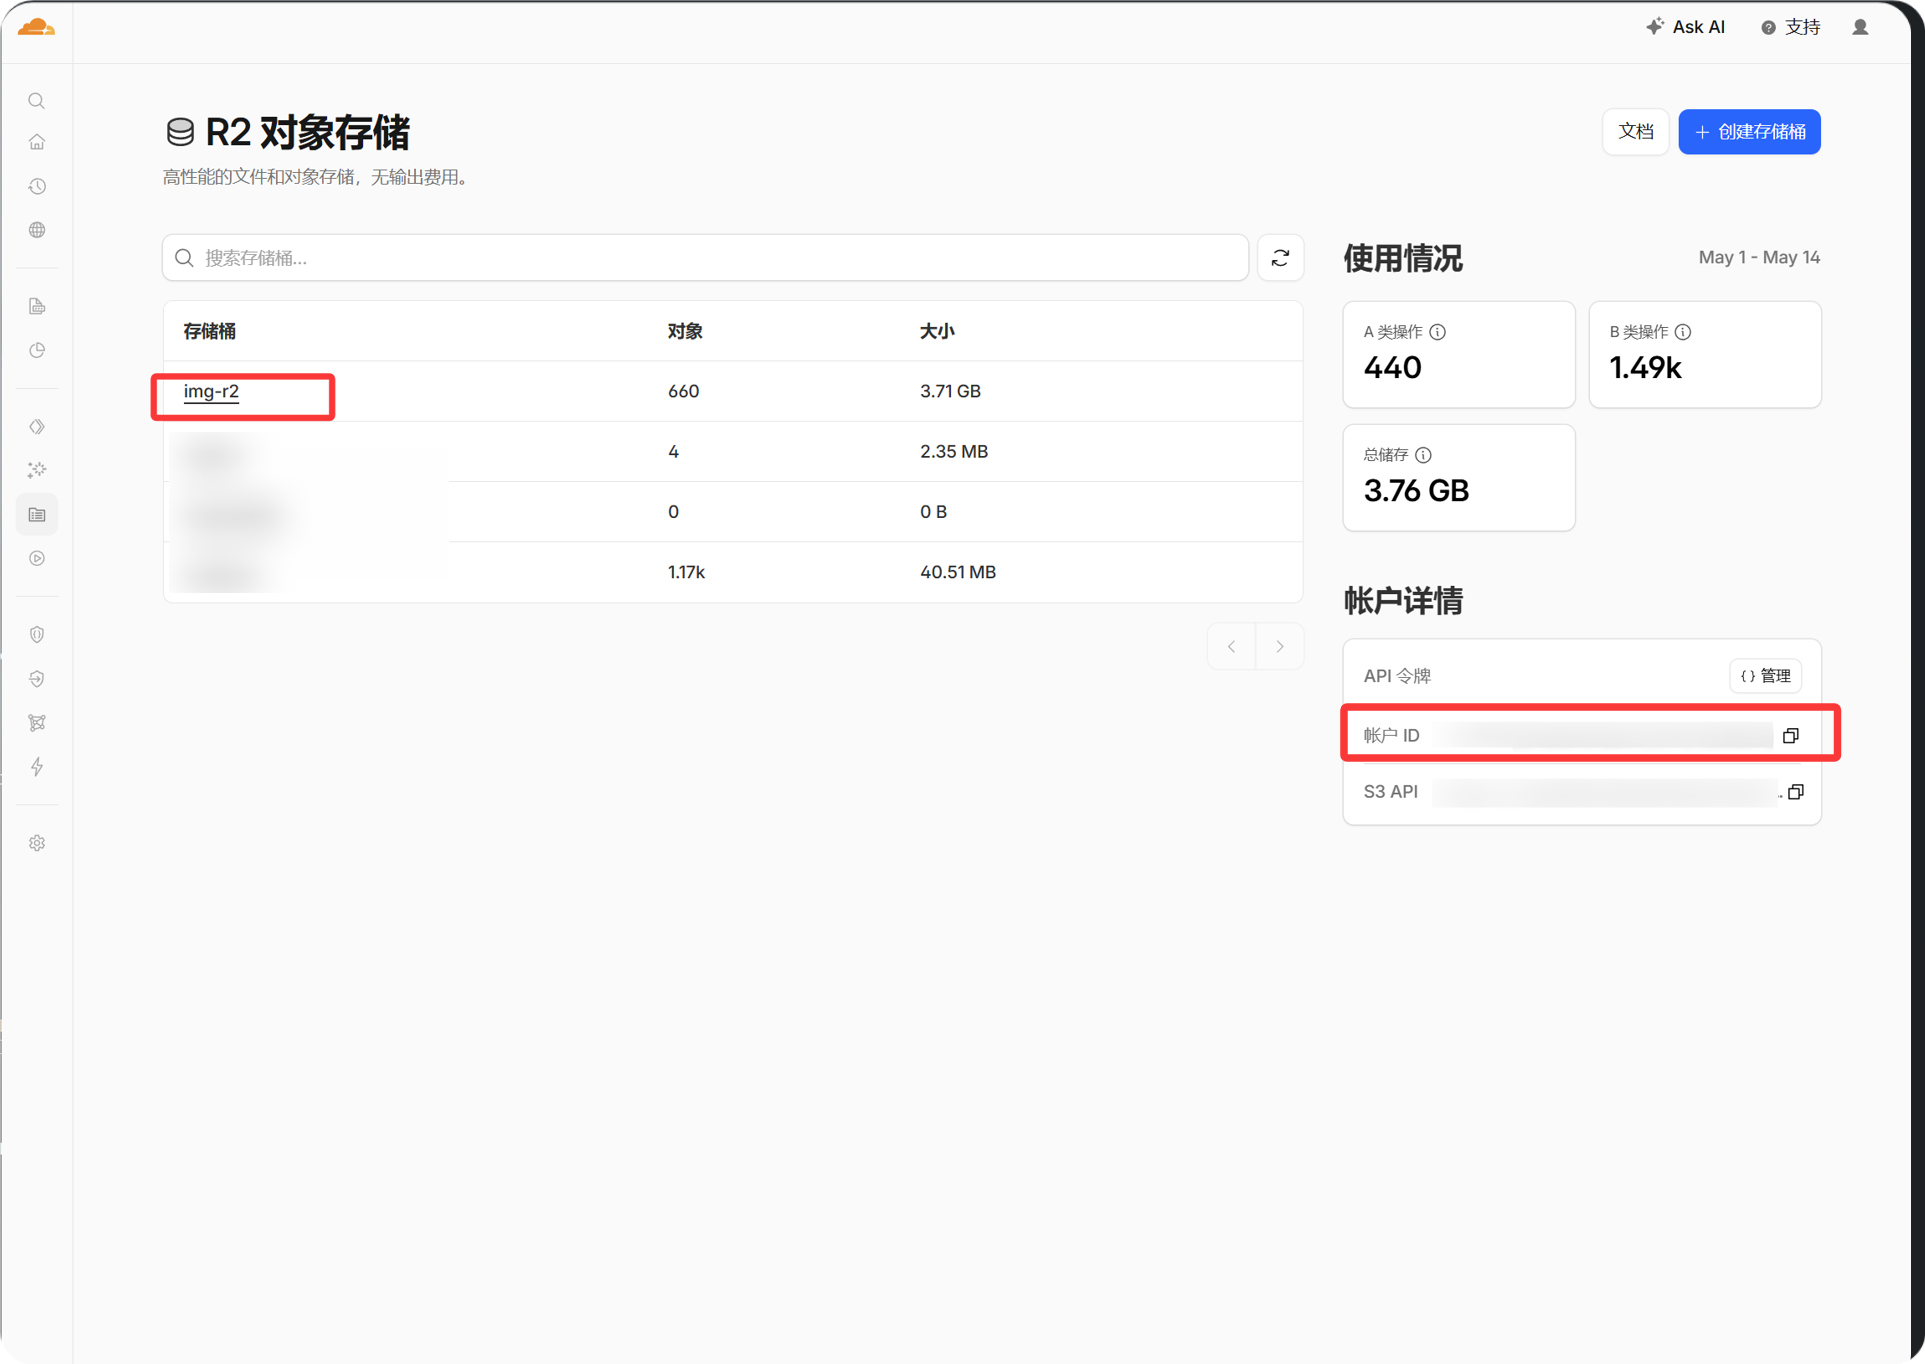
Account ID Cloudflare dashboard کے account information panel سے copy کیا جا سکتا ہے۔ اسے صرف اس وقت بھریں جب آپ چاہتے ہوں کہ ImgBed R2 quota usage query اور enforce کرے۔
Setup Steps
- Cloudflare میں R2 bucket بنائیں۔
- ImgBed project کی Cloudflare settings کھولیں۔
- R2 bucket binding add کریں۔
Variable nameکوimg_r2رکھیں۔- بنایا ہوا R2 bucket منتخب کریں۔
- binding save کریں اور ImgBed redeploy کریں۔
- واپس ImgBed -> System Settings -> Upload Settings میں جائیں۔
- confirm کریں کہ
Cloudflare R2channel نظر آ رہا ہے اور enabled ہے۔
اگر آپ چاہتے ہیں کہ R2 capacity کی بنیاد پر upload selection میں حصہ لے، quota limit enable کریں، پھر Account ID، bucket name، quota limit، اور threshold درج کر کے save کریں۔
Verify کیسے کریں
- fixed
Cloudflare R2channel Upload Settings میں دکھائی دے۔ - channel card پر enabled status دکھے۔
- چھوٹی test file کامیابی سے upload ہو اور returned link عام طور پر کھل جائے۔
- اگر file کھولنے پر
R2 database binding is not configuredآئے، runtime کوimg_r2binding نہیں ملی۔ Cloudflare میں binding name چیک کریں اور project redeploy کریں۔