เพิ่ม Cloudflare R2 Channel
เหมาะกับกรณีไหน
ใช้ Cloudflare R2 เมื่อ:
- ImgBed site ของคุณ deploy อยู่บน Cloudflare อยู่แล้ว และต้องการเก็บ files ใน R2 bucket ภายใต้ Cloudflare account เดียวกัน
- ไม่ต้องการตั้งค่า S3 endpoint, access key และ secret key แยกต่างหาก
- ต้องการให้การอ่านและเขียนผ่าน Worker หรือ Pages R2 binding โดยตั้งค่าน้อยที่สุด
สรุปสั้น ๆ:
R2 channel ไม่ได้สร้างด้วยตัวเองใน ImgBed admin panel ก่อนอื่นต้อง bind R2 bucket เข้ากับ Cloudflare project และ binding variable name ต้องเป็น img_r2
สิ่งที่ต้องเตรียมก่อนเริ่ม
- Cloudflare account
- R2 bucket ที่มีอยู่แล้ว
- สิทธิ์จัดการ Cloudflare project ที่ deploy ImgBed อยู่
Configure ใน Cloudflare
1. สร้าง R2 Bucket
- Log in เข้า Cloudflare Dashboard
- เปิด
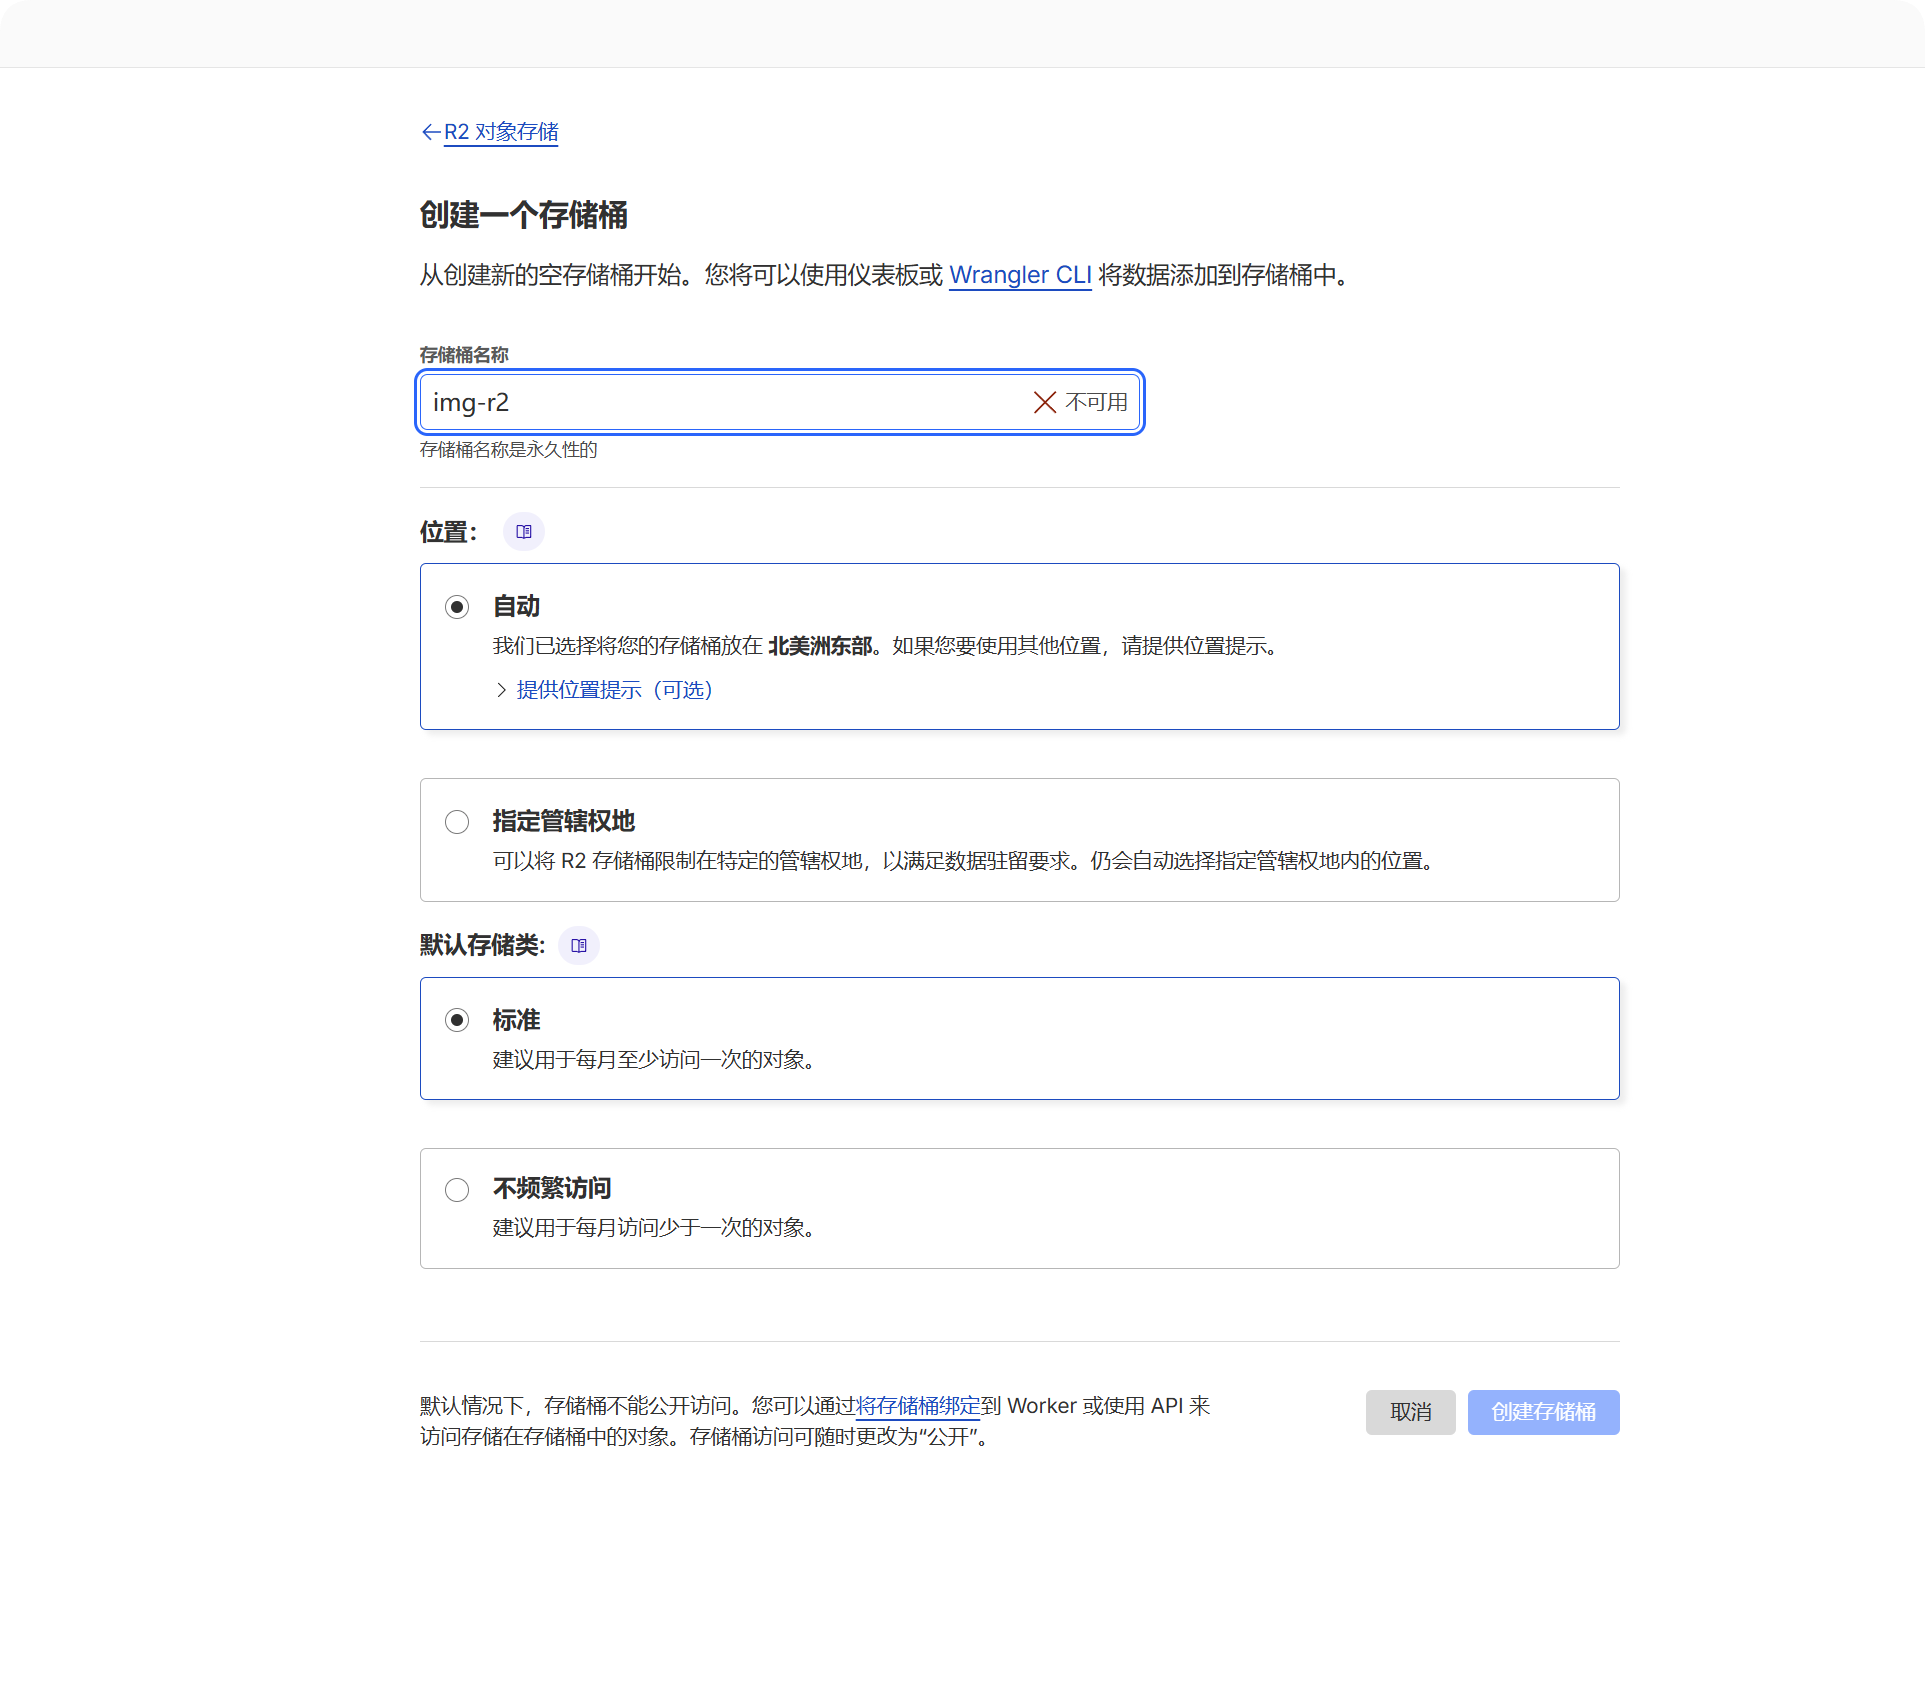
R2 Object Storage - คลิก Create bucket
- เลือก bucket name เช่น
imgbed
Bucket นี้คือที่เก็บ uploaded files
2. Bind Bucket เข้ากับ ImgBed Project
เลือกตำแหน่ง binding ตาม deployment type:
| Deployment Type | Binding Location |
|---|---|
| Pages | Current Pages project -> Settings -> Functions -> R2 bucket bindings |
| Worker | Current Worker -> Settings -> Bindings -> R2 bucket bindings |
ตอนเพิ่ม binding ให้ใส่ field สำคัญดังนี้:
| Field | Value |
|---|---|
| Variable name | img_r2 |
| R2 bucket | เลือก bucket ที่สร้างไว้ |
Variable name ต้องเป็น img_r2 แบบตรงตัว การ upload, read และ delete R2 files อาศัย binding name นี้ทั้งหมด
3. Redeploy Project
หลัง save binding แล้ว ให้ redeploy ImgBed เพื่อให้ Worker หรือ Pages runtime เข้าถึง img_r2 ได้
สิ่งที่จะเห็นใน ImgBed
เมื่อ R2 binding พร้อมใช้งานแล้ว ให้เปิด:
- System Settings
- Upload Settings
Cloudflare R2channel
System จะสร้าง fixed channel ให้อัตโนมัติ:
| Field | Fixed Value |
|---|---|
| Channel name | Cloudflare R2 |
| Channel type | cfr2 |
| Storage mode | binding |
| Configuration source | Environment binding |
นี่คือ fixed binding channel ไม่ต้องคลิก Add Channel เพื่อสร้าง และลบเหมือน regular channel ไม่ได้
Fields ที่แก้ไขได้ใน Admin Panel
| Field | ใช้ทำอะไร | Required |
|---|---|---|
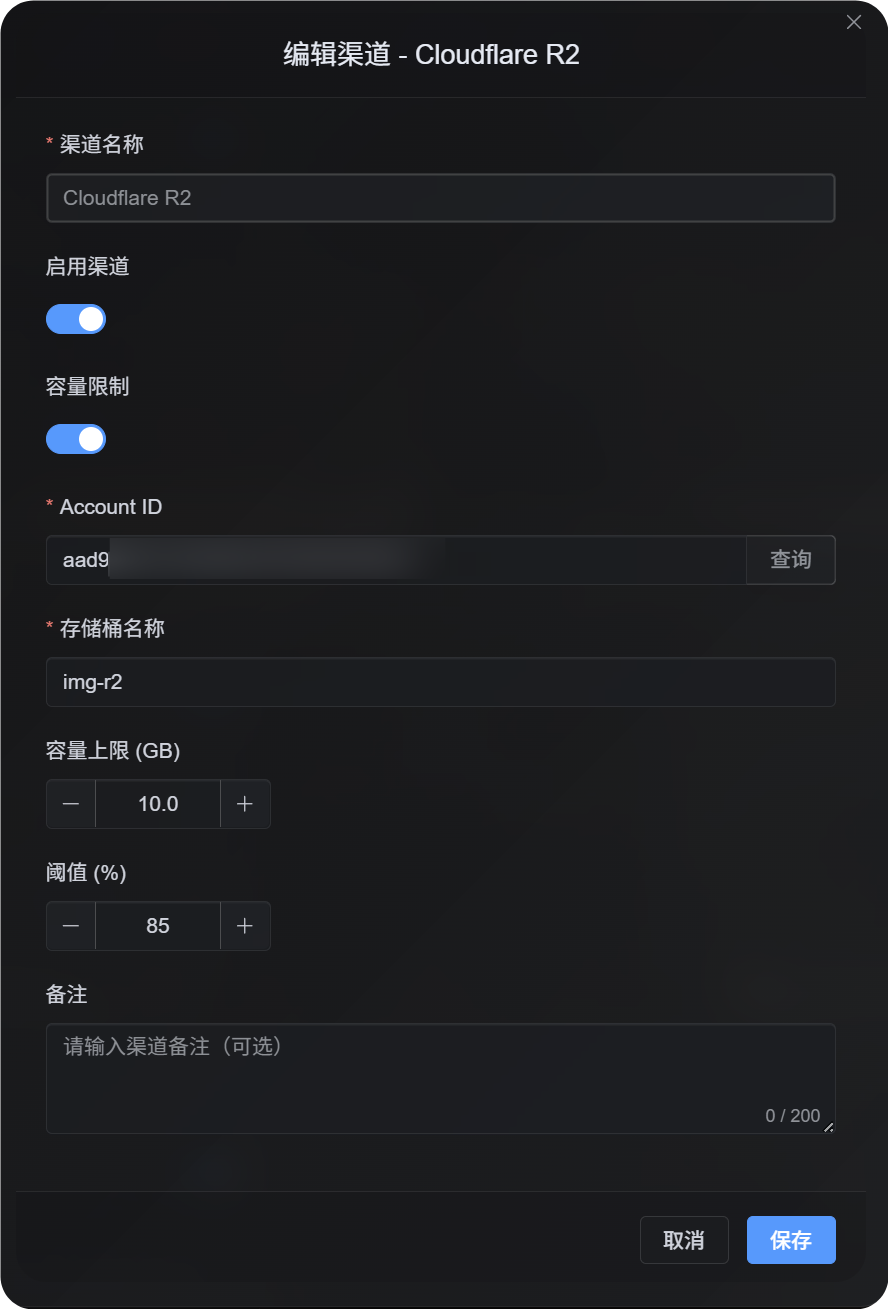
| Enable channel | ควบคุมว่า R2 จะเข้าร่วม upload selection หรือไม่ | Yes |
| Account ID | ใช้เมื่อเปิด quota limits และต้อง query official R2 usage | Recommended เมื่อเปิด quota limits |
| Bucket name | ใช้เมื่อเปิด quota limits และต้อง query official R2 usage | Recommended เมื่อเปิด quota limits |
| Quota limit | ควบคุมว่า R2 channel นี้จะเข้าร่วม upload selection ตาม capacity หรือไม่ | No |
| Threshold | หยุดเขียนเข้า channel นี้เมื่อ usage ถึง percentage ที่กำหนด | Required เมื่อเปิด quota limits |
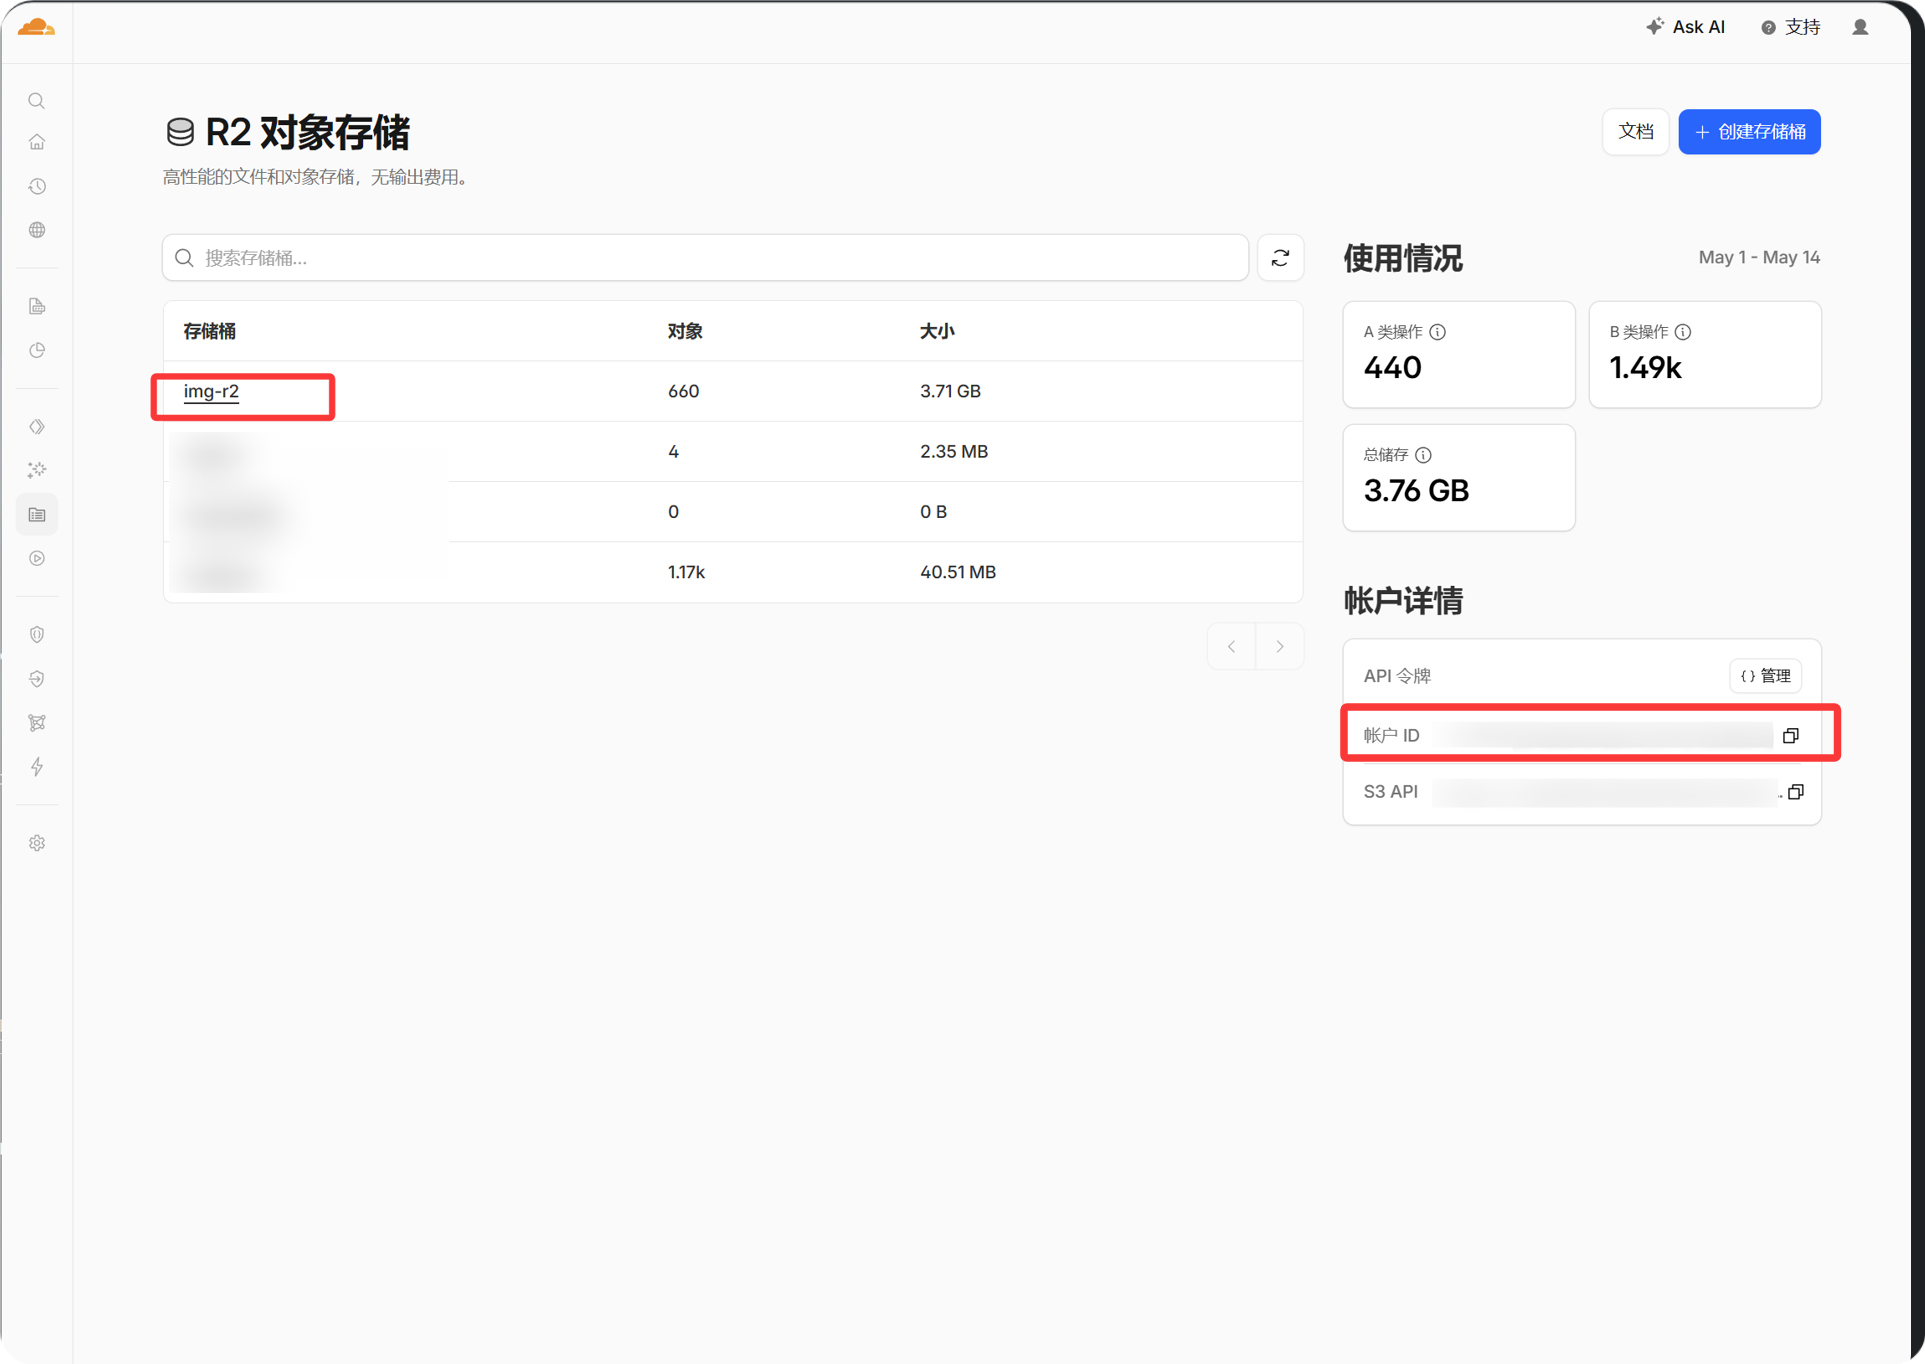
คุณ copy Account ID ได้จาก account information panel ใน Cloudflare dashboard ใส่เฉพาะเมื่ออยากให้ ImgBed query และ enforce R2 quota usage
ขั้นตอนตั้งค่า
- สร้าง R2 bucket ใน Cloudflare
- เปิด Cloudflare settings ของ ImgBed project
- เพิ่ม R2 bucket binding
- ตั้ง
Variable nameเป็นimg_r2 - เลือก R2 bucket ที่สร้างไว้
- Save binding แล้ว redeploy ImgBed
- กลับไปที่ ImgBed -> System Settings -> Upload Settings
- ตรวจสอบว่า
Cloudflare R2channel แสดงขึ้นและ enabled อยู่
ถ้าต้องการให้ R2 เข้าร่วม upload selection ตาม capacity ให้เปิด quota limit แล้วใส่ Account ID, bucket name, quota limit และ threshold ก่อน save
วิธีตรวจสอบ
- เห็น fixed
Cloudflare R2channel ใน Upload Settings - Channel card แสดงว่า enabled
- Upload small test file ได้สำเร็จ และ returned link เปิดได้ปกติ
- ถ้าเปิด file แล้วขึ้น
R2 database binding is not configuredแปลว่า runtime ยังไม่ได้รับimg_r2binding ให้ตรวจ binding name ใน Cloudflare แล้ว redeploy project