เพิ่ม Telegram Channel
สิ่งที่ต้องเตรียมก่อนเริ่ม
| Requirement | Purpose |
|---|---|
| Telegram account | ใช้สร้าง bot และ storage channel |
@BotFather | ใช้สร้าง Telegram bot |
| Telegram channel | ปลายทางสุดท้ายสำหรับเก็บ files |
@userinfobot | ใช้ดู Chat ID ของ channel |
เพิ่มได้จากที่ไหน
- เปิด System Settings
- ไปที่ Upload Settings
- คลิก Add Channel ที่มุมขวาบน
- เลือก
Telegram
Field Reference
| Field | ใช้ทำอะไร | Required |
|---|---|---|
| Channel name | ชื่อที่จำง่ายสำหรับ channel นี้ เช่น "Telegram Primary" | Required |
| Active | เปิดหรือปิด channel นี้ | Recommended |
| Bot Token | Token ของ Telegram bot | Required |
| Session ID (Chat ID) | ID ของ Telegram channel | Required |
| Relay Proxy URL (optional) | ใช้เฉพาะเมื่อเข้าถึง Telegram ไม่เสถียร ใส่ proxy URL แบบเต็มรวม https:// | Optional |
| Remark | หมายเหตุสำหรับดูแลในภายหลัง | Optional |
ขั้นตอนตั้งค่า
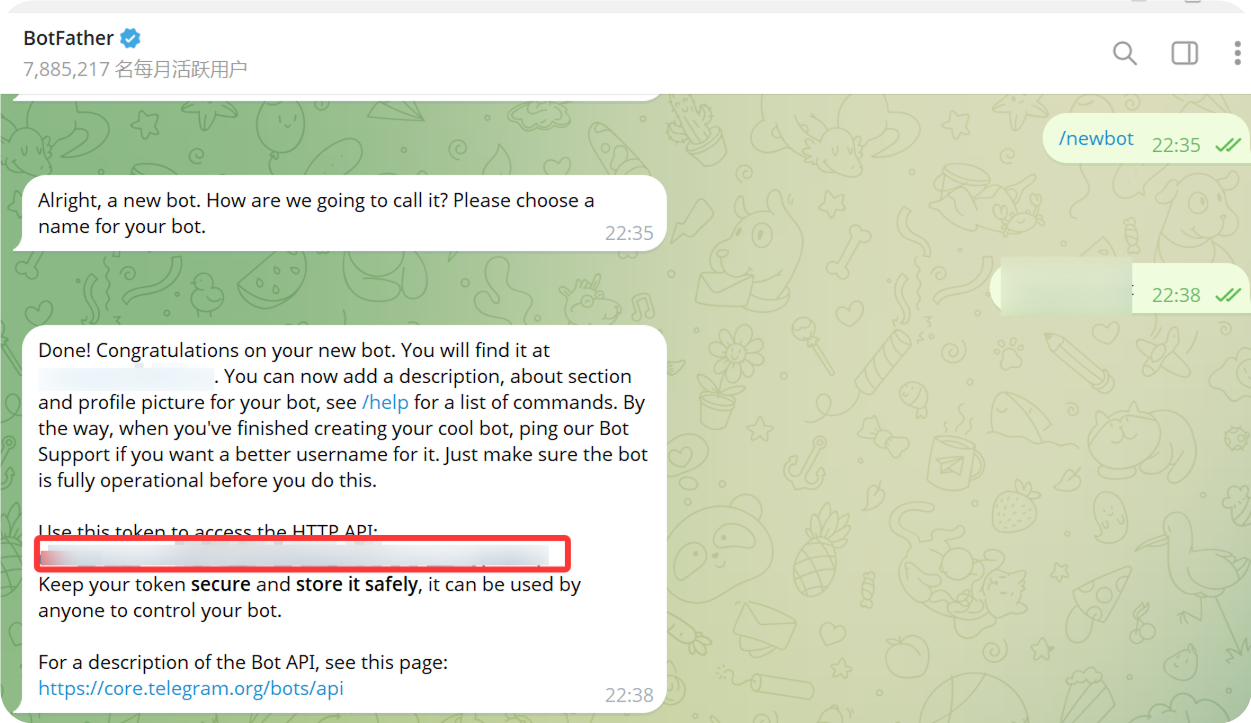
1. สร้าง Telegram Bot
- เปิด Telegram แล้วค้นหา
@BotFather - เปิด chat แล้วคลิก
Start - ส่ง
/newbot - ทำตาม prompt เพื่อใส่ bot display name
- ทำตาม prompt เพื่อใส่ bot username โดยปกติ username ต้องลงท้ายด้วย
bot - เมื่อสร้าง bot แล้ว
@BotFatherจะส่ง bot token กลับมา
Token นี้คือค่า Bot Token ที่ต้องใส่ใน ImgBed
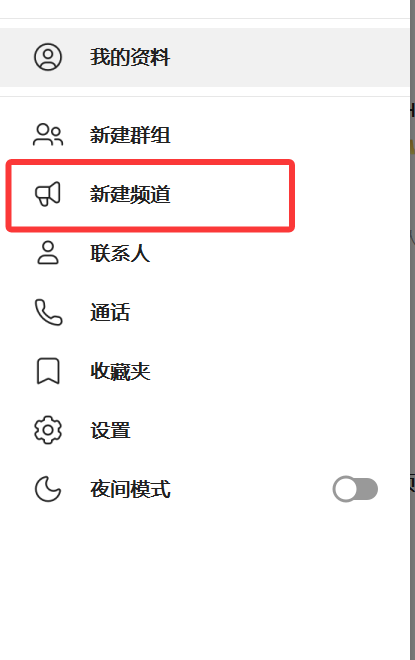
2. สร้าง Channel
- ใน Telegram ให้คลิก New Channel
- ใส่ channel name
- สร้าง channel ให้เสร็จ
ใช้ได้ทั้ง public และ private channel
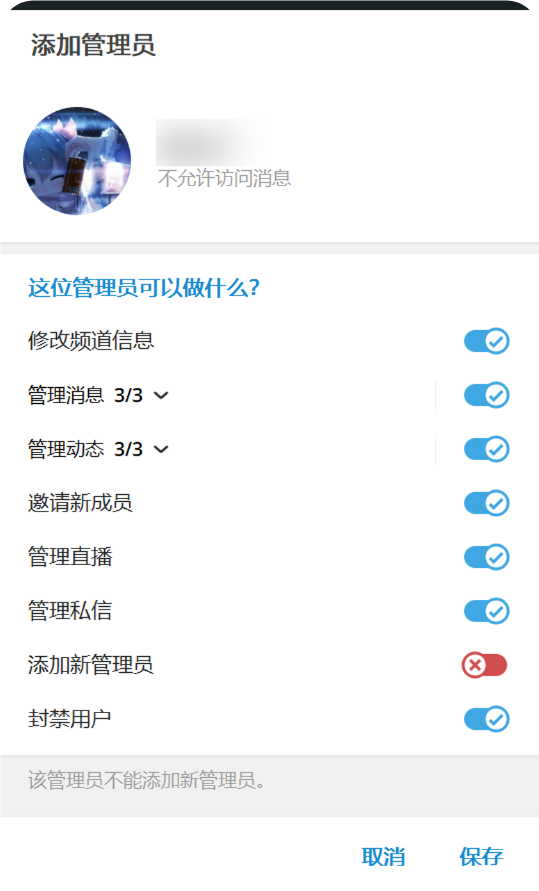
3. เพิ่ม Bot เข้า Channel
- เปิด channel ที่เพิ่งสร้าง
- เปิด channel settings
- เพิ่ม member หรือ administrator
- ค้นหา bot username ที่สร้างไว้
- เพิ่ม bot เข้า channel
เพื่อให้อัปโหลดได้เสถียรที่สุด แนะนำให้ให้สิทธิ์ bot เป็น administrator
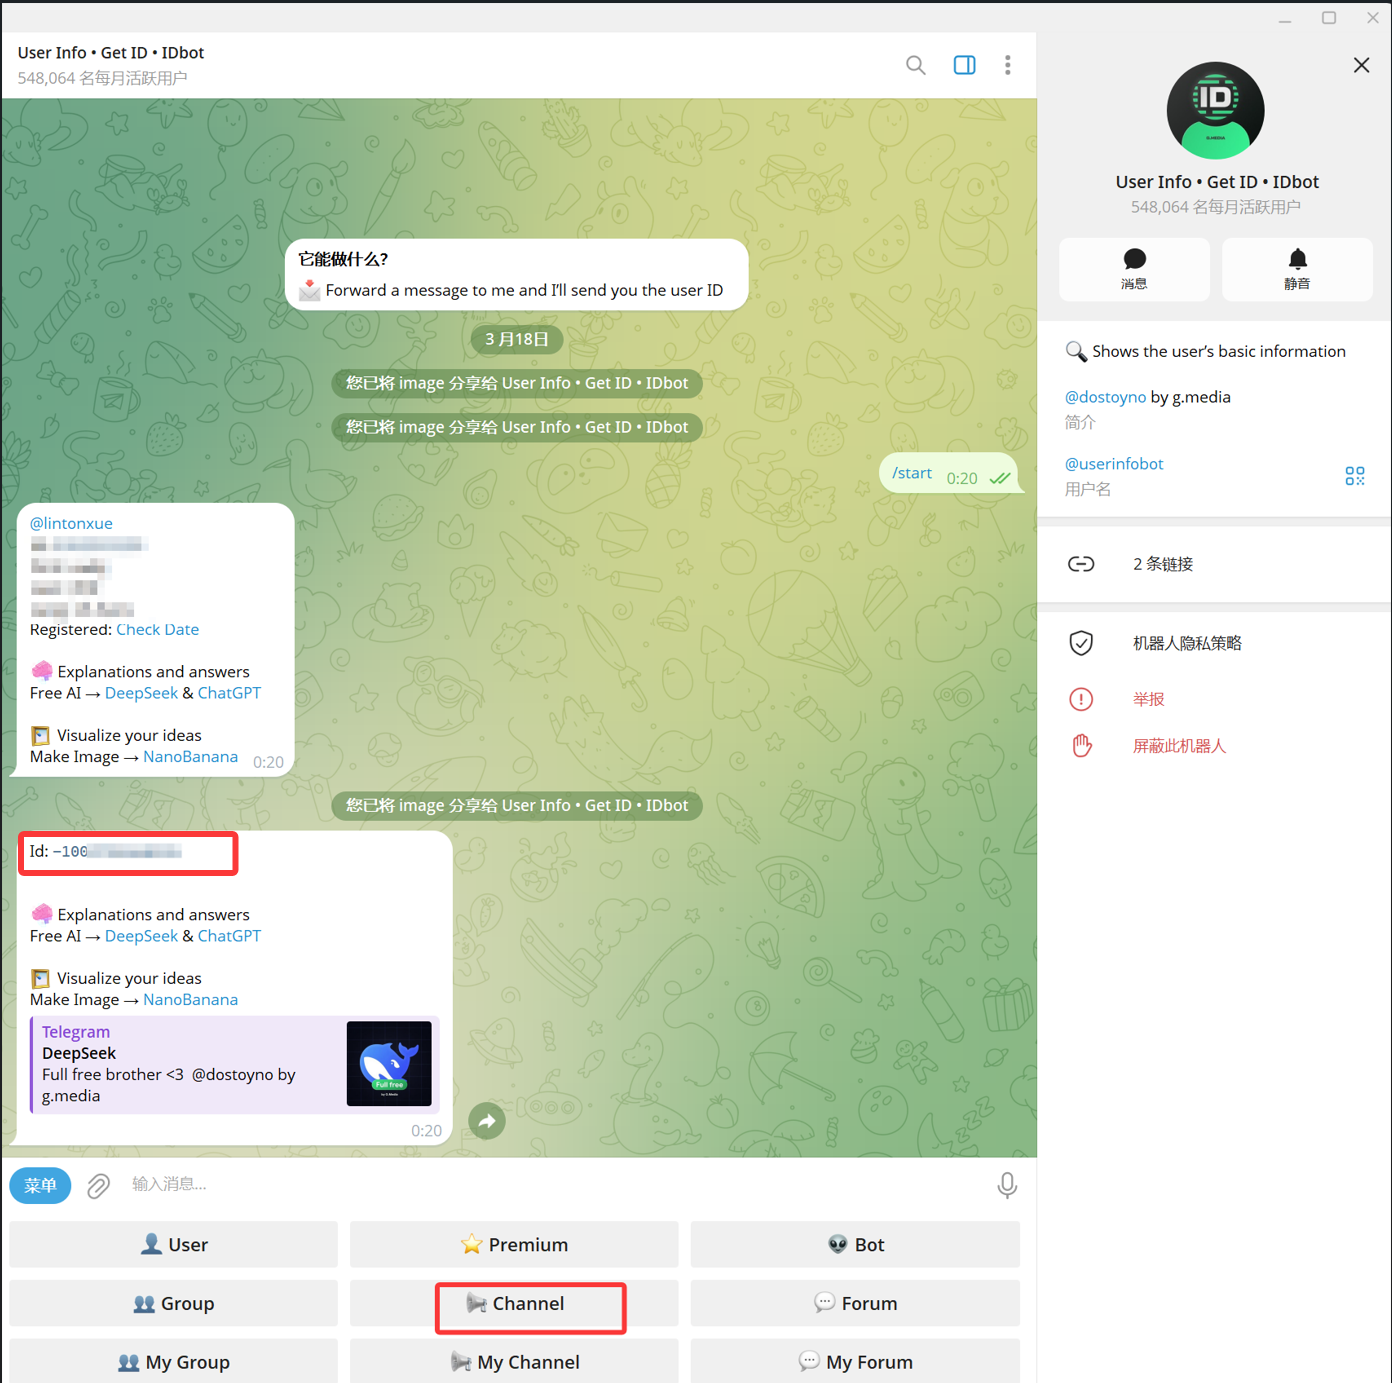
4. รับ Channel ID ด้วย User Info - Get ID - IDbot
- ค้นหา
@userinfobotใน Telegram ชื่อที่แสดงมักเป็นUser Info - Get ID - IDbot - เปิด chat แล้วคลิก
Start - เลือก
Channelจากตัวเลือกที่ bot ให้มา - ใน message picker ให้เลือก target channel แล้วส่งไปที่
@userinfobot - เมื่อ
@userinfobotส่งผลลัพธ์กลับมา ให้ copy เลขที่แสดงเป็นId: -100...
เลขที่ขึ้นต้นด้วย -100 คือ Session ID (Chat ID) ที่ ImgBed ต้องใช้
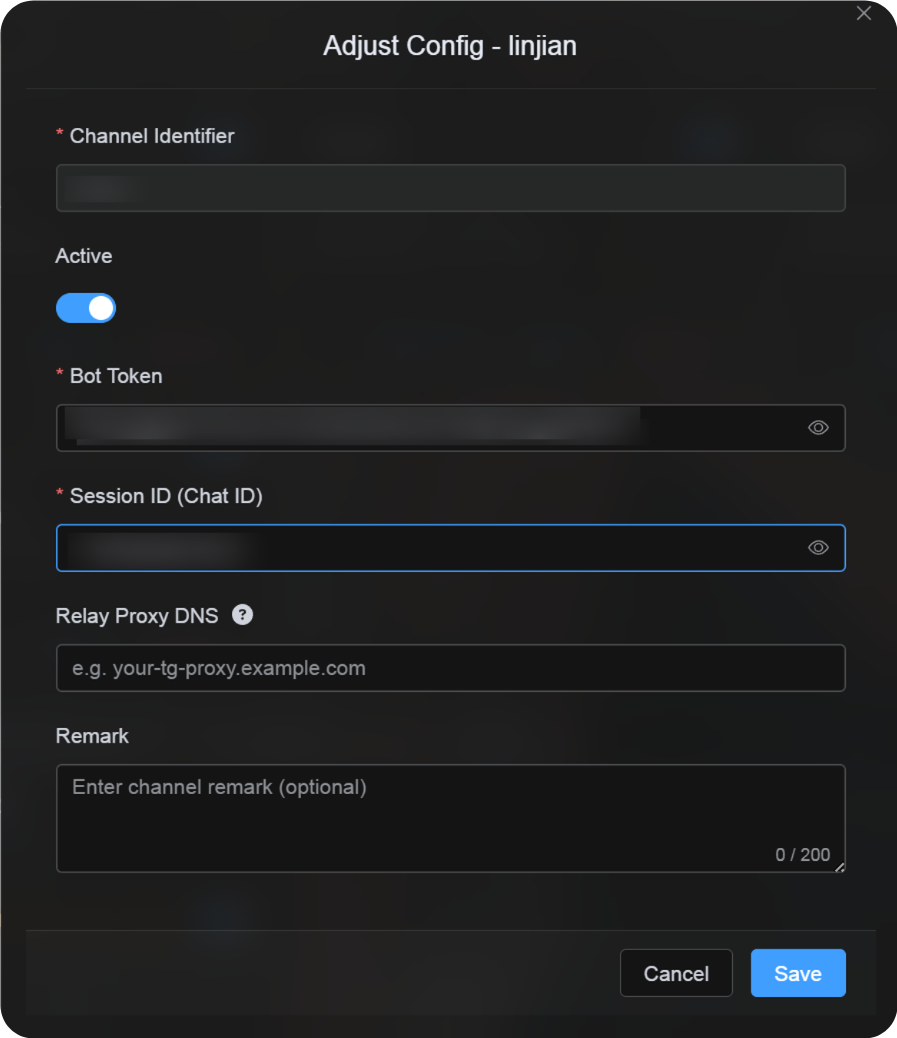
5. ใส่ Telegram Channel ใน ImgBed
กลับไปที่ channel configuration dialog แล้วกรอกดังนี้:
| UI Field | Value |
|---|---|
| Channel Identifier | ชื่อ channel ที่ตั้งเอง เช่น TelegramPrimary |
| Active | Recommended |
| Bot Token | Bot token จาก @BotFather |
| Session ID (Chat ID) | เลข -100... ที่ได้จาก @userinfobot |
| Relay Proxy URL (optional) | ใส่เฉพาะเมื่อจำเป็น เช่น https://your-tg-proxy.example.com |
| Remark | หมายเหตุเพิ่มเติม |
กรอกครบแล้วคลิก Save
วิธีตรวจสอบ
| Check | วิธีตรวจสอบ |
|---|---|
| เห็น channel card | หลัง save หน้า Upload Settings ควรแสดง Telegram channel card |
| Channel เปิดใช้งานได้ | Active switch ควรอยู่ในสถานะ on |
| Configuration ถูกบันทึก | Detail view ควรแสดงว่า Bot Token และ Chat ID ถูกบันทึกแล้ว |
| Upload ใช้งานได้ | อัปโหลด test image แล้วตรวจสอบว่าไปปรากฏใน Telegram channel เป้าหมาย |
Quick Checklist
text
สร้าง bot ด้วย @BotFather
-> บันทึก Bot Token
-> สร้าง Telegram channel
-> เพิ่ม bot เข้า channel และให้สิทธิ์ administrator
-> ค้นหา @userinfobot แล้วเลือก Channel
-> Forward message ใดก็ได้จาก channel ไปที่ @userinfobot
-> Copy ค่า Id: -100... ที่ได้กลับมา
-> ใส่ Bot Token และ Chat ID ใน ImgBed
-> Save แล้วอัปโหลด test image
References
- Telegram bots: https://core.telegram.org/bots
- Telegram Bot API: https://core.telegram.org/bots/api