Telegram चैनल जोड़ना
शुरू करने से पहले क्या चाहिए
| ज़रूरत | उपयोग |
|---|---|
| Telegram अकाउंट | bot और storage channel बनाने के लिए। |
@BotFather | Telegram bot बनाने के लिए। |
| Telegram channel | फ़ाइलों की अंतिम storage destination। |
@userinfobot | channel Chat ID पता करने के लिए। |
कहाँ जोड़ें
- System Settings खोलें।
- Upload Settings पर जाएँ।
- ऊपर दाएँ कोने में Add Channel पर क्लिक करें।
Telegramचुनें।
फ़ील्ड संदर्भ
| फ़ील्ड | क्या करता है | आवश्यक |
|---|---|---|
| Channel name | इस चैनल का आसान नाम, जैसे "Telegram Primary"। | हाँ |
| Active | इस चैनल को चालू या बंद करता है। | सुझाया गया |
| Bot Token | आपके Telegram bot का token। | हाँ |
| Session ID (Chat ID) | Telegram channel का ID। | हाँ |
| Relay Proxy URL (optional) | केवल तब उपयोग करें जब Telegram access अस्थिर हो। https:// सहित पूरा proxy URL डालें। | नहीं |
| Remark | आगे की maintenance के लिए notes। | नहीं |
सेटअप स्टेप्स
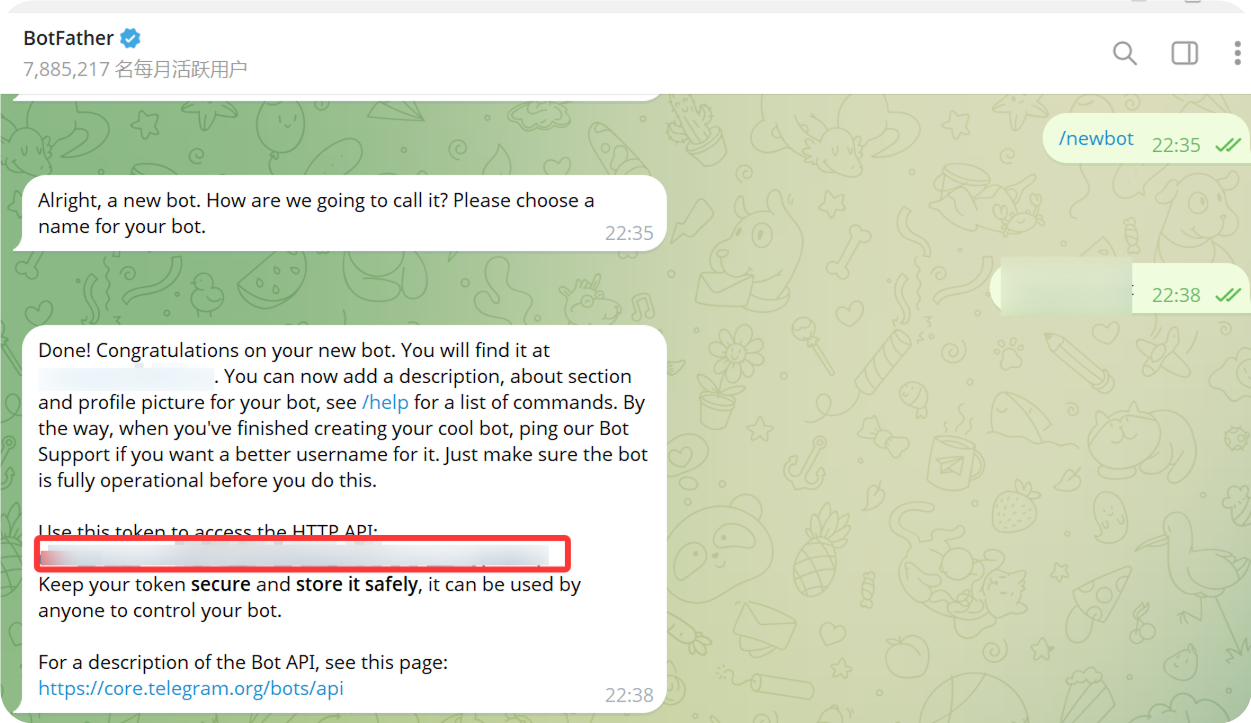
1. Telegram bot बनाएँ
- Telegram खोलें और
@BotFatherखोजें। - chat खोलकर
Startपर क्लिक करें। /newbotभेजें।- prompts के अनुसार bot display name दर्ज करें।
- prompts के अनुसार bot username दर्ज करें। आम तौर पर username का अंत
botसे होना चाहिए। - bot बन जाने के बाद
@BotFatherएक bot token लौटाएगा।
यही token ImgBed में Bot Token फ़ील्ड में डालना है।
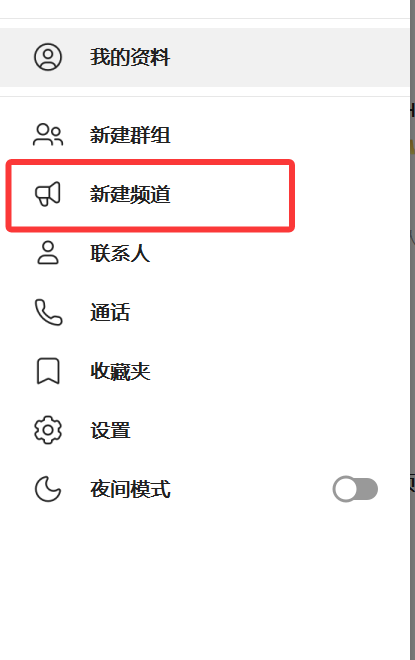
2. Channel बनाएँ
- Telegram में New Channel पर क्लिक करें।
- channel name दर्ज करें।
- channel बनाना पूरा करें।
Public और private, दोनों तरह के channels इस्तेमाल किए जा सकते हैं।
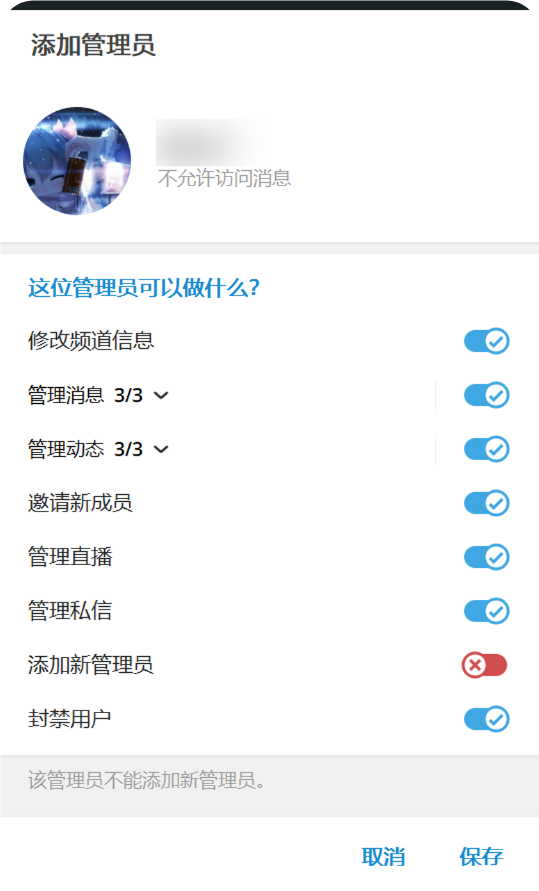
3. Bot को channel में जोड़ें
- अभी बनाया गया channel खोलें।
- channel settings खोलें।
- member या administrator जोड़ें।
- अपने बनाए हुए bot username को खोजें।
- bot को channel में जोड़ें।
सबसे भरोसेमंद uploads के लिए bot को administrator permissions देना बेहतर है।
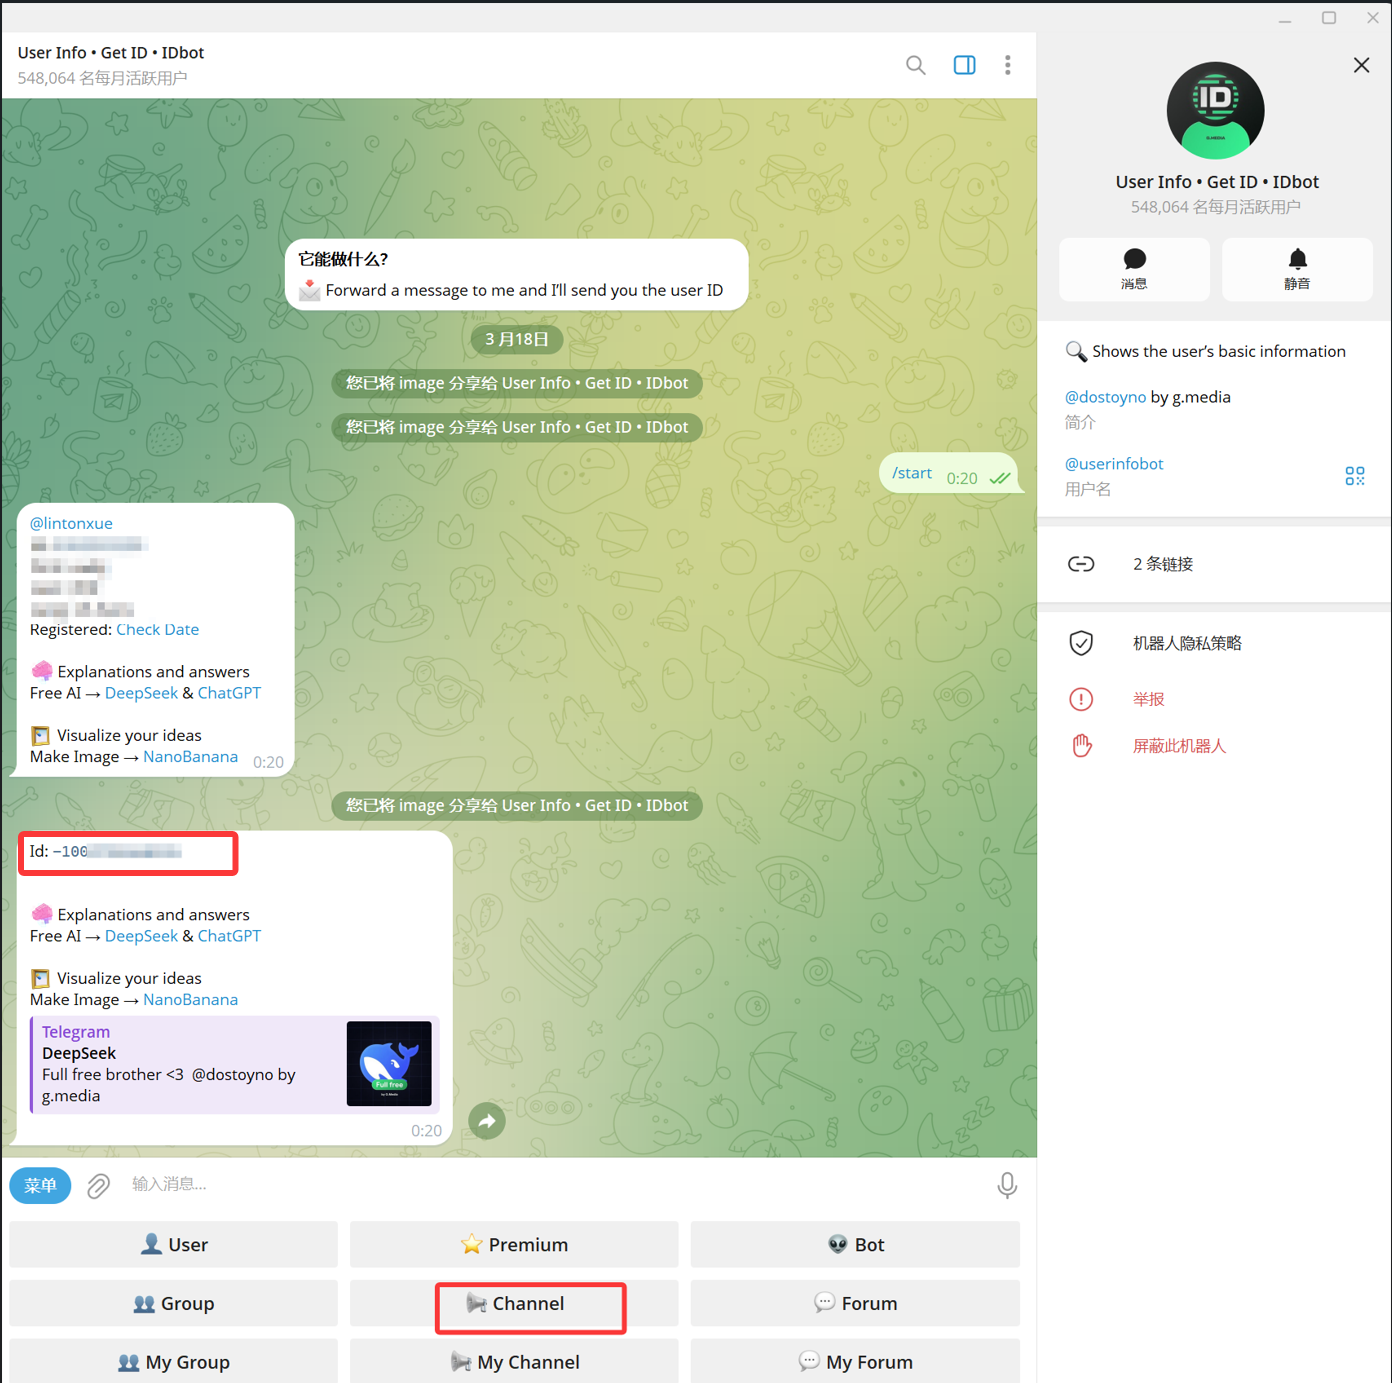
4. User Info - Get ID - IDbot से Channel ID लें
- Telegram में
@userinfobotखोजें। इसका display name आम तौर परUser Info - Get ID - IDbotहोता है। - chat खोलकर
Startपर क्लिक करें। - bot के विकल्पों में से
Channelचुनें। - message picker में target channel चुनकर
@userinfobotको भेजें। - जब
@userinfobotresult लौटाए, तोId: -100...में दिखा number copy करें।
-100 से शुरू होने वाला number ImgBed के लिए ज़रूरी Session ID (Chat ID) है।
5. ImgBed में Telegram channel भरें
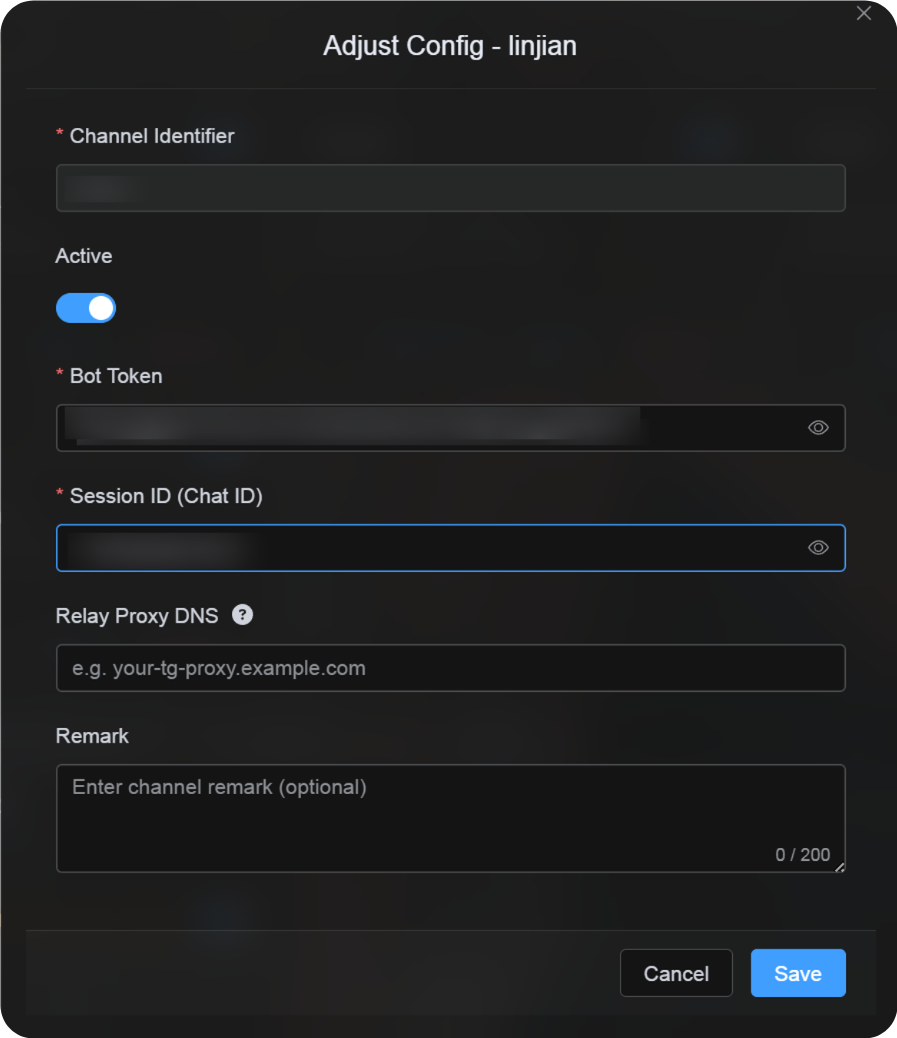
channel configuration dialog पर लौटें और fields ऐसे भरें:
| UI Field | Value |
|---|---|
| Channel Identifier | custom channel name, जैसे TelegramPrimary। |
| Active | चालू रखना सुझाया गया है। |
| Bot Token | @BotFather से मिला bot token। |
| Session ID (Chat ID) | @userinfobot से मिला -100... number। |
| Relay Proxy URL (optional) | केवल ज़रूरत होने पर, जैसे https://your-tg-proxy.example.com। |
| Remark | वैकल्पिक notes। |
सब भरने के बाद Save पर क्लिक करें।
कैसे जाँचें
| जाँच | कैसे verify करें |
|---|---|
| Channel card दिखता है | save करने के बाद Upload Settings page में Telegram channel card दिखना चाहिए। |
| Channel enable रह सकता है | Active switch चालू रहना चाहिए। |
| Configuration save हुई | detail view में Bot Token और Chat ID saved दिखने चाहिए। |
| Upload काम करता है | test image upload करें और target Telegram channel में उसके आने की पुष्टि करें। |
Quick Checklist
text
@BotFather से bot बनाएँ
-> Bot Token save करें
-> Telegram channel बनाएँ
-> bot को channel में जोड़ें और administrator permissions दें
-> @userinfobot खोजें और Channel चुनें
-> channel से कोई message @userinfobot को forward करें
-> लौटाया गया Id: -100... copy करें
-> ImgBed में Bot Token और Chat ID डालें
-> save करें और test image upload करें
References
- Telegram bots: https://core.telegram.org/bots
- Telegram Bot API: https://core.telegram.org/bots/api