Cloudflare R2 चैनल जोड़ना
कब सबसे सही है
Cloudflare R2 का उपयोग तब करें जब:
- आपका ImgBed site पहले से Cloudflare पर deployed है और आप उसी Cloudflare account के R2 bucket में files रखना चाहते हैं।
- आप अलग S3 endpoint, access key और secret key configure नहीं करना चाहते।
- आप चाहते हैं कि पढ़ना और लिखना Worker या Pages R2 binding से कम setup में हो जाए।
संक्षेप में:
R2 channel ImgBed admin panel में manually create नहीं होता। पहले आपको Cloudflare project से R2 bucket bind करना होता है, और binding variable name बिल्कुल img_r2 होना चाहिए।
शुरू करने से पहले क्या चाहिए
- Cloudflare account।
- पहले से मौजूद R2 bucket।
- उस Cloudflare project को manage करने की permission जहाँ ImgBed deployed है।
Cloudflare में configure करें
1. R2 Bucket बनाएँ
- Cloudflare Dashboard में login करें।
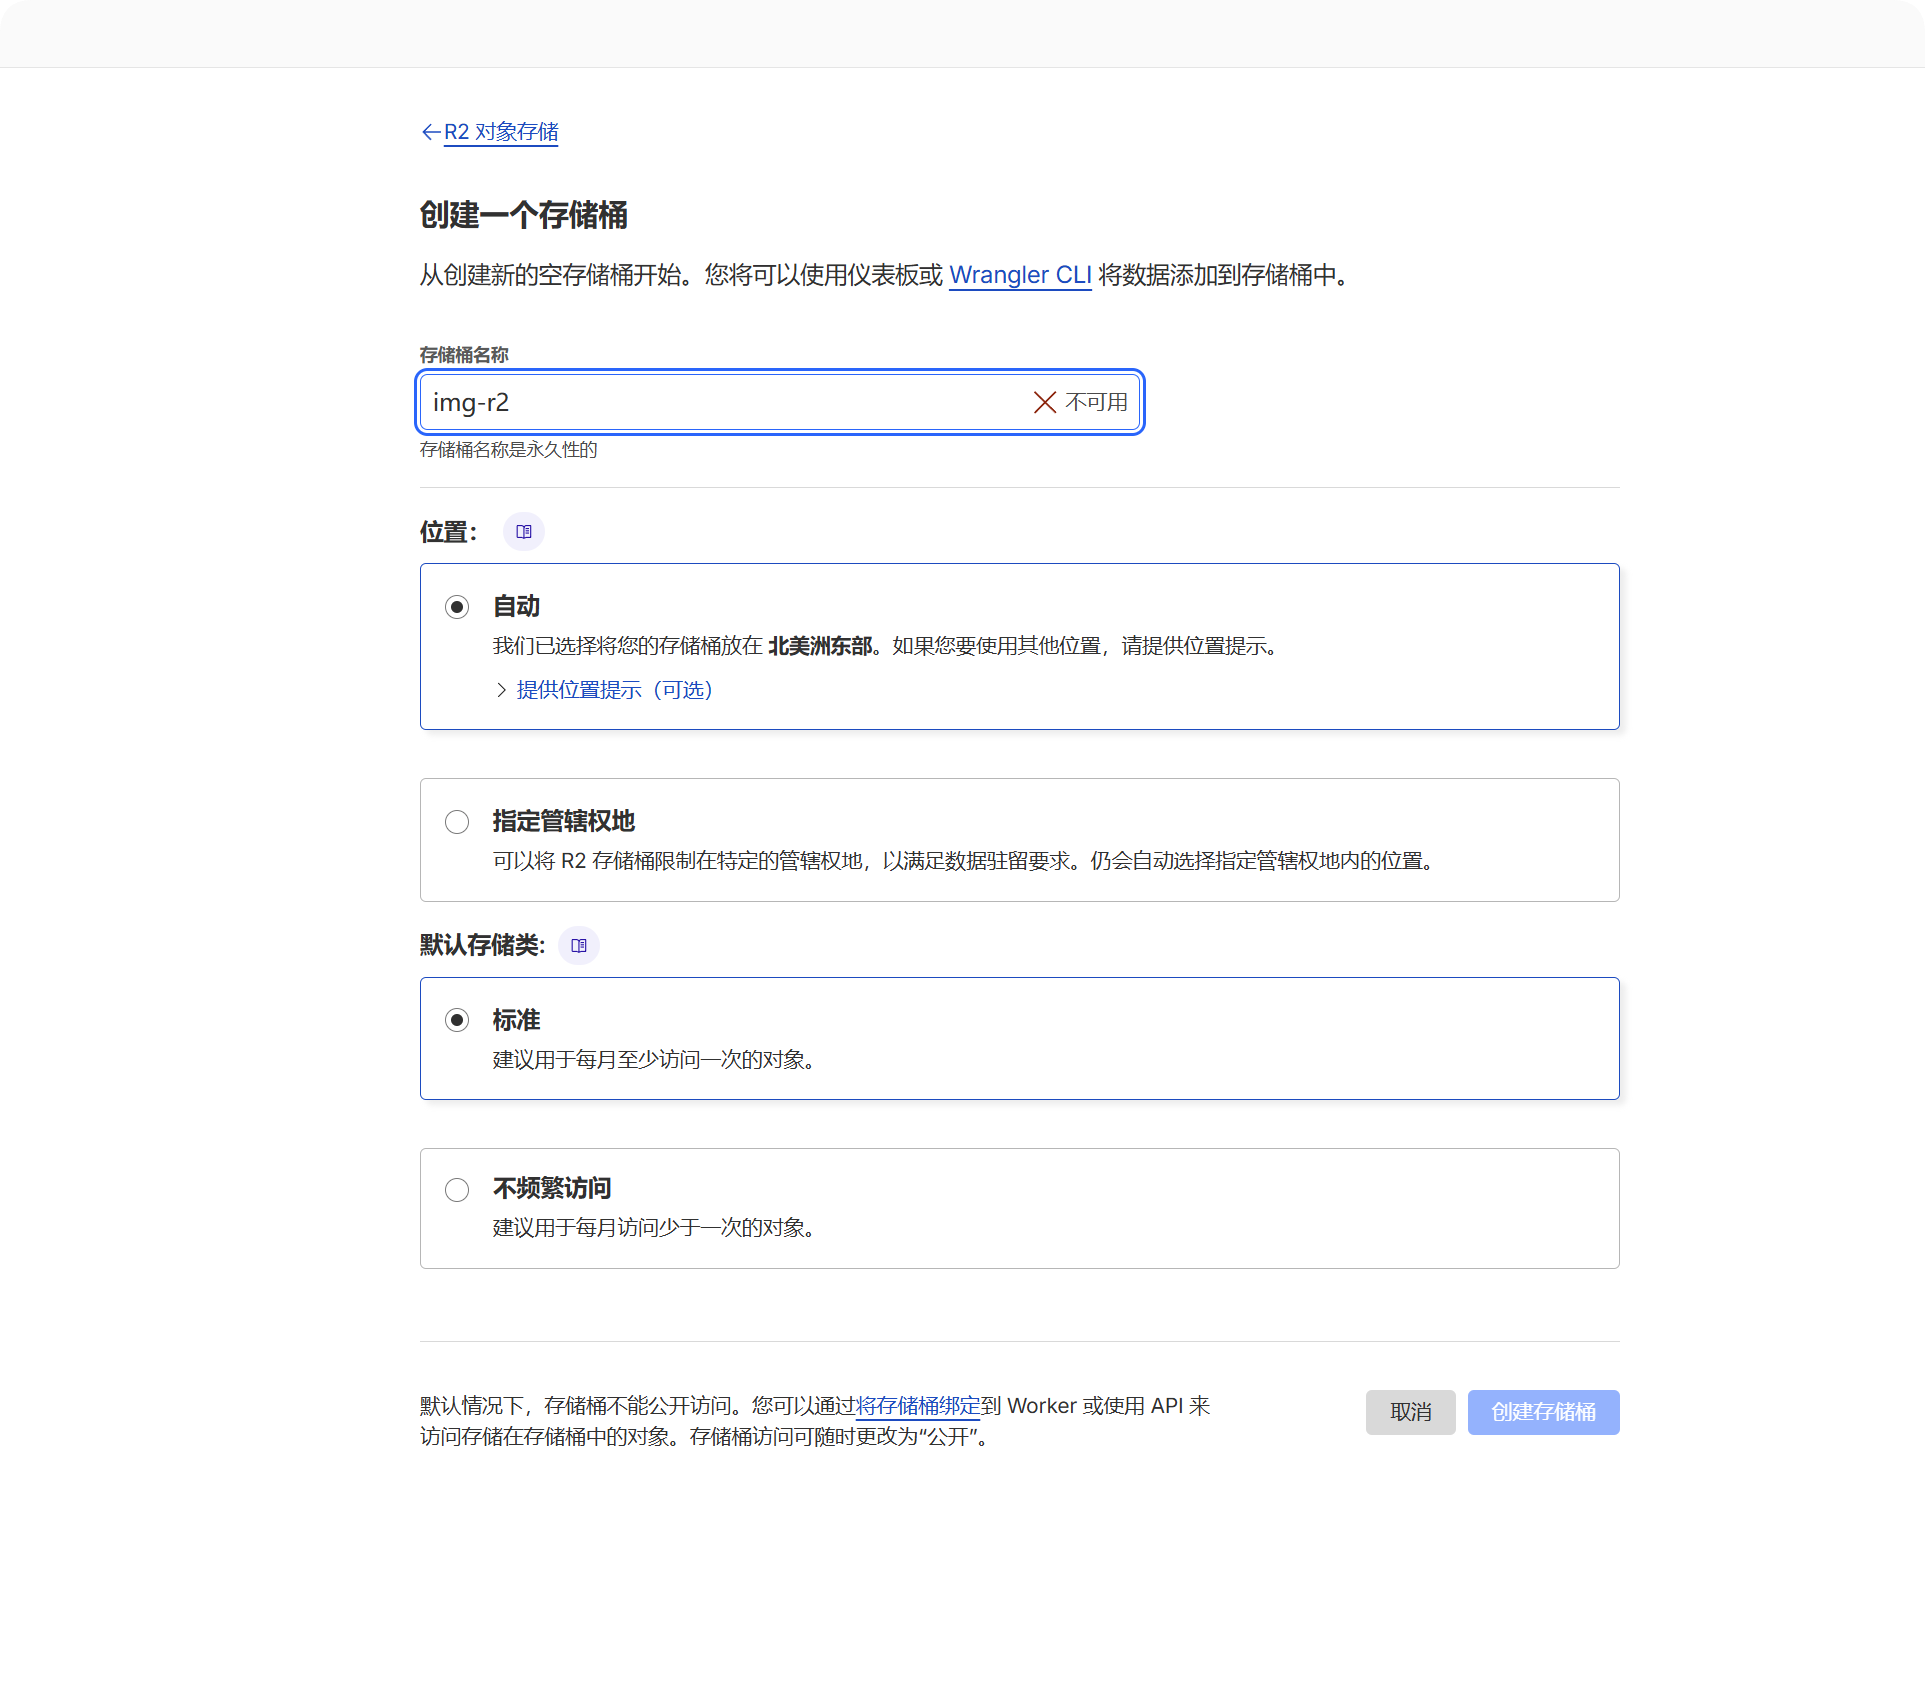
R2 Object Storageखोलें।- Create bucket पर क्लिक करें।
- bucket name चुनें, जैसे
imgbed।
Uploaded files इसी bucket में रखी जाएँगी।
2. Bucket को ImgBed project से bind करें
Binding location आपके deployment type पर निर्भर है:
| Deployment Type | Binding Location |
|---|---|
| Pages | Current Pages project -> Settings -> Functions -> R2 bucket bindings |
| Worker | Current Worker -> Settings -> Bindings -> R2 bucket bindings |
binding जोड़ते समय ये fields महत्वपूर्ण हैं:
| Field | Value |
|---|---|
| Variable name | img_r2 |
| R2 bucket | बनाया हुआ bucket चुनें। |
Variable name बिल्कुल img_r2 होना चाहिए। R2 files upload, read और delete करने की सभी क्रियाएँ इसी binding name पर निर्भर हैं।
3. Project redeploy करें
binding save करने के बाद ImgBed redeploy करें, ताकि Worker या Pages runtime img_r2 access कर सके।
ImgBed में क्या दिखेगा
R2 binding उपलब्ध होने के बाद खोलें:
- System Settings।
- Upload Settings।
Cloudflare R2channel।
System अपने आप एक fixed channel बनाता है:
| Field | Fixed Value |
|---|---|
| Channel name | Cloudflare R2 |
| Channel type | cfr2 |
| Storage mode | binding |
| Configuration source | Environment binding |
यह fixed binding channel है। इसे create करने के लिए Add Channel पर क्लिक करने की ज़रूरत नहीं है, और इसे normal channel की तरह delete नहीं किया जा सकता।
Admin panel में editable fields
| Field | क्या करता है | आवश्यक |
|---|---|---|
| Enable channel | R2 upload selection में शामिल होगा या नहीं। | हाँ |
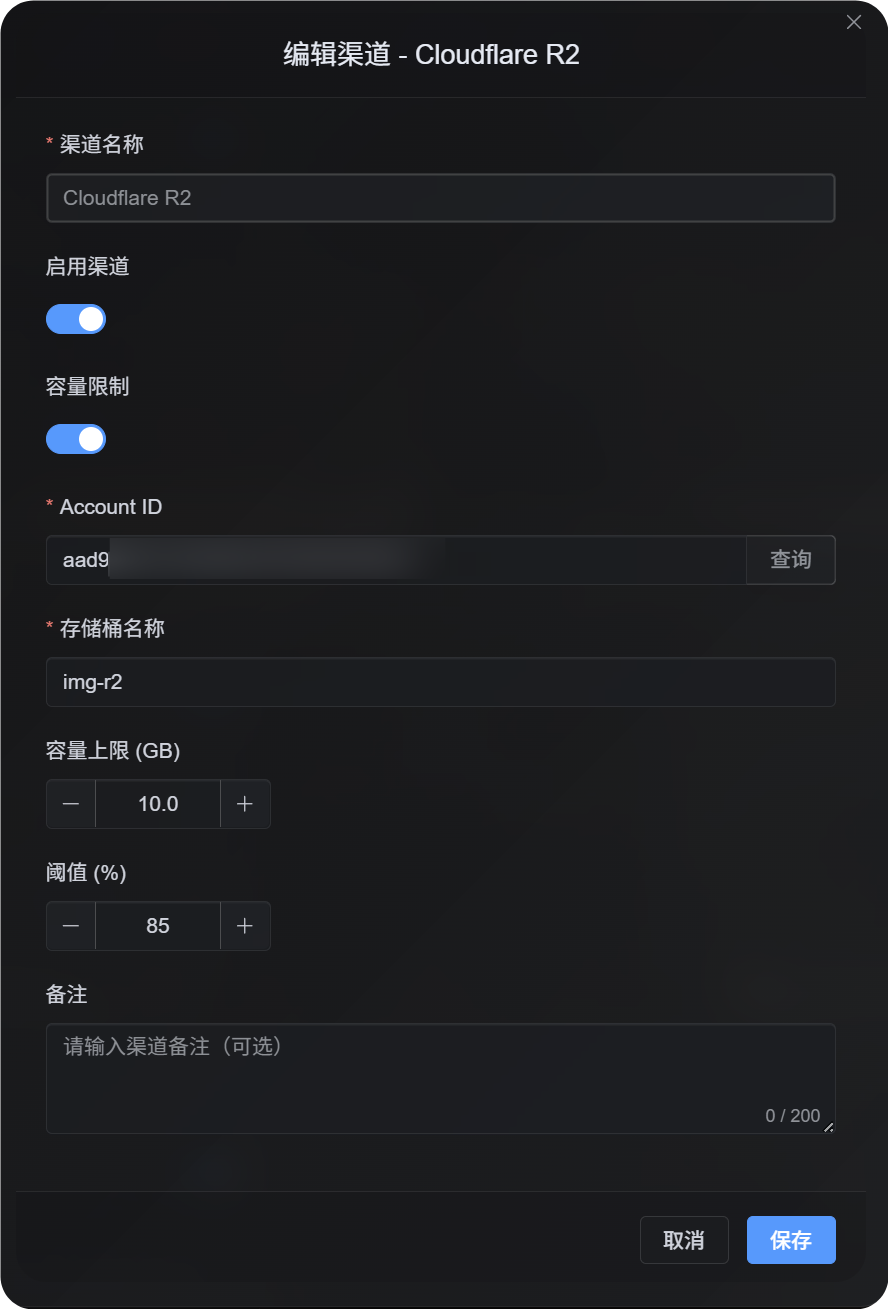
| Account ID | केवल तब जब quota limits चालू हों और official R2 usage query करना हो। | quota limits चालू हों तो सुझाया गया |
| Bucket name | केवल तब जब quota limits चालू हों और official R2 usage query करना हो। | quota limits चालू हों तो सुझाया गया |
| Quota limit | capacity के आधार पर यह R2 channel upload selection में शामिल होगा या नहीं। | नहीं |
| Threshold | usage specified percentage तक पहुँचने पर इस channel में लिखना बंद करता है। | quota limits चालू हों तो आवश्यक |
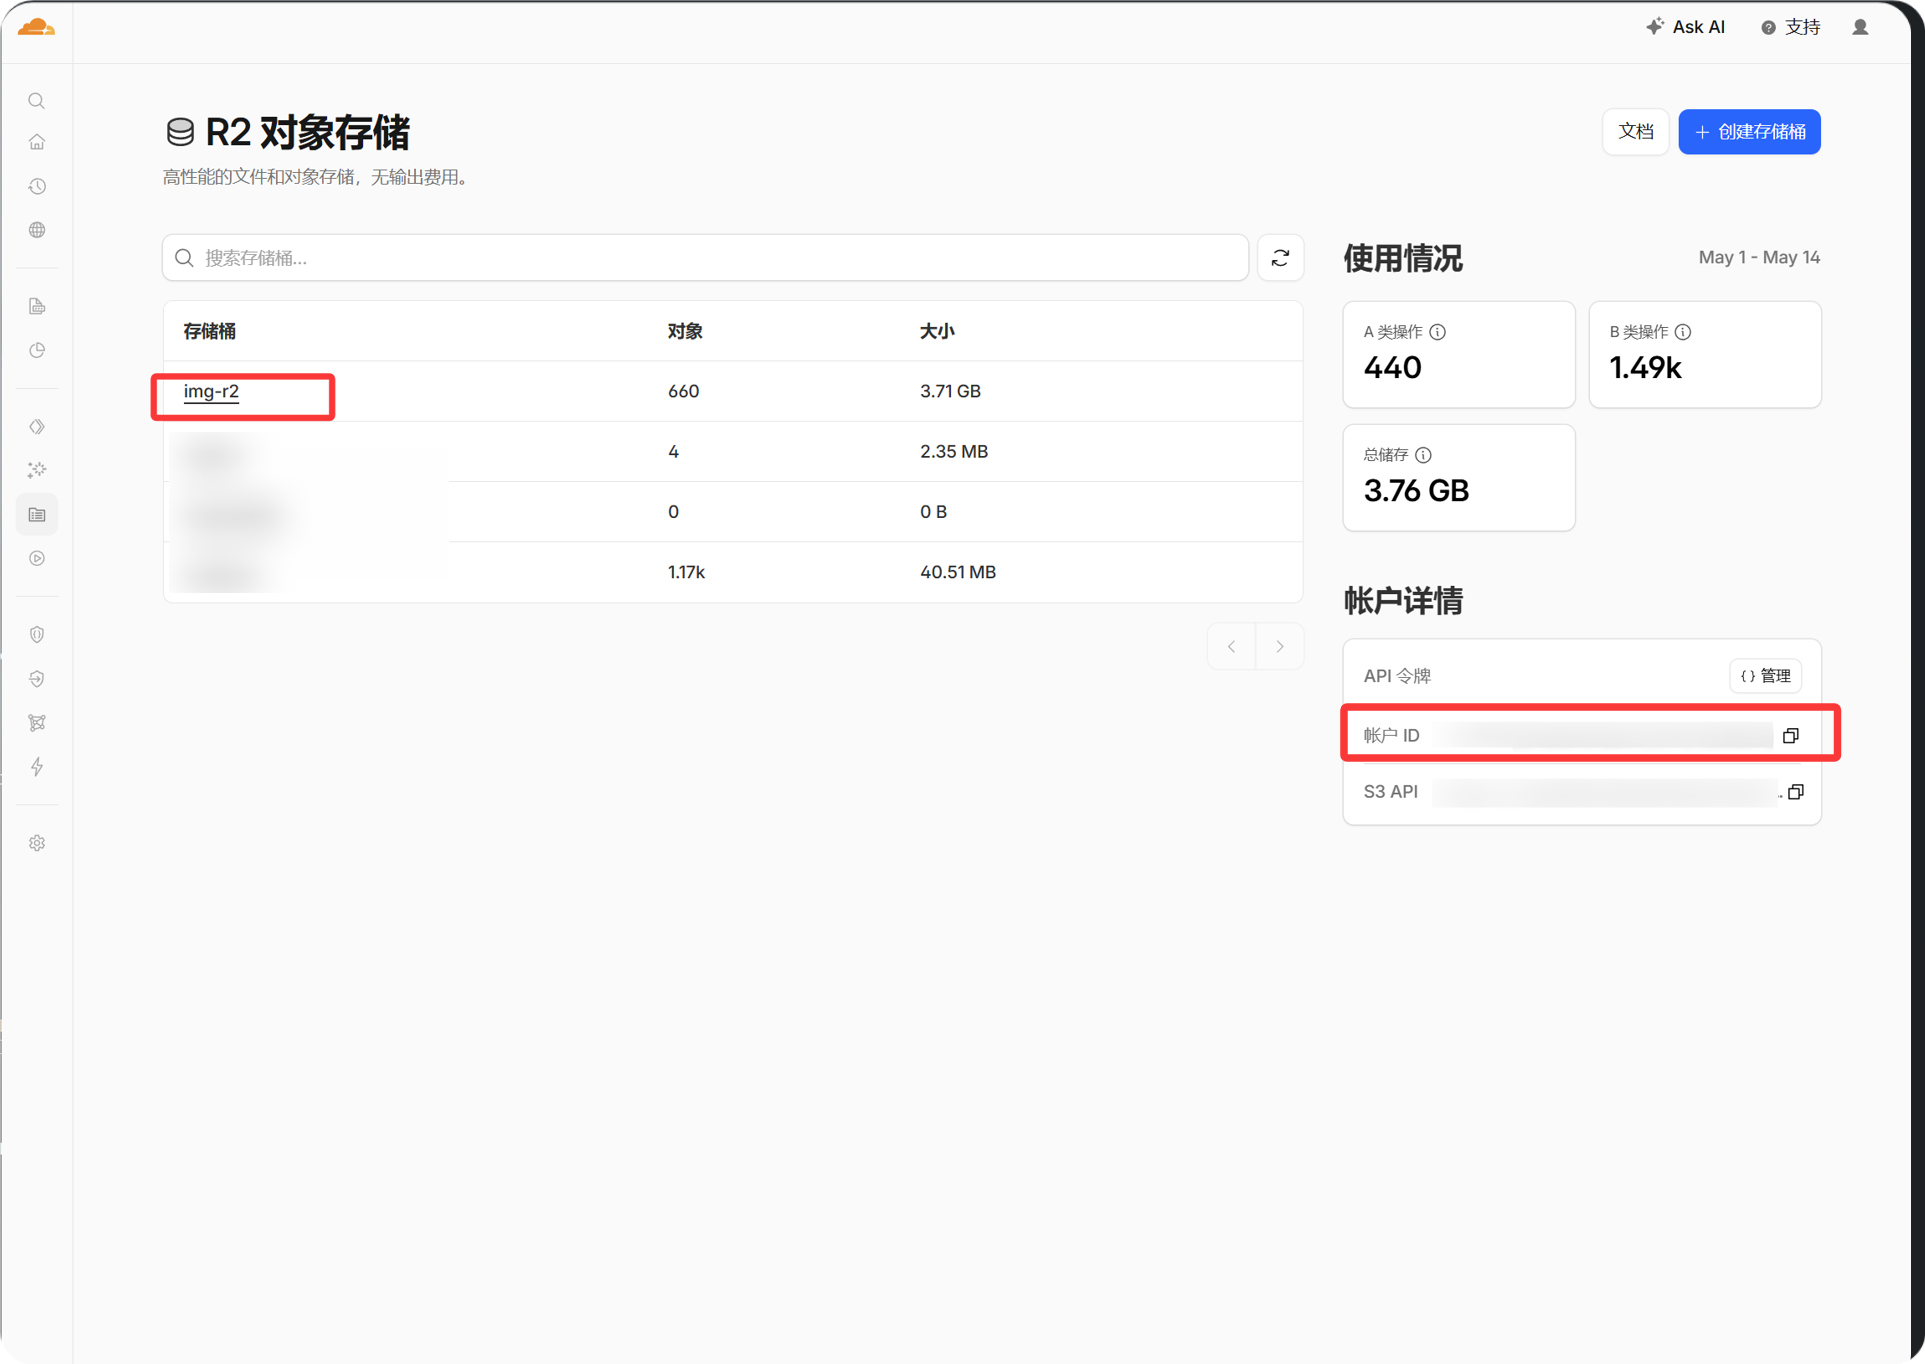
Account ID Cloudflare dashboard के account information panel से copy किया जा सकता है। इसे केवल तब भरें जब आप चाहते हैं कि ImgBed R2 quota usage query और enforce करे।
Setup Steps
- Cloudflare में R2 bucket बनाएँ।
- ImgBed project की Cloudflare settings खोलें।
- R2 bucket binding जोड़ें।
Variable nameकोimg_r2करें।- बनाया हुआ R2 bucket चुनें।
- binding save करें और ImgBed redeploy करें।
- ImgBed -> System Settings -> Upload Settings पर लौटें।
- पुष्टि करें कि
Cloudflare R2channel दिख रहा है और enabled है।
अगर आप चाहते हैं कि R2 capacity के आधार पर upload selection में हिस्सा ले, तो quota limit enable करें, फिर save करने से पहले Account ID, bucket name, quota limit और threshold भरें।
कैसे जाँचें
- fixed
Cloudflare R2channel Upload Settings में दिखाई देता है। - channel card दिखाता है कि यह enabled है।
- छोटी test file सफलतापूर्वक upload होती है, और लौटाया गया link normally खुलता है।
- अगर file खोलने पर
R2 database binding is not configuredदिखता है, तो runtime कोimg_r2binding नहीं मिला। Cloudflare में binding name जाँचें और project redeploy करें।