Auto Tagging
Auto tagging यहाँ configure किया जाता है:
text
System Settings -> Other Settings -> Auto Taggingयह images के लिए tags automatically generate करता है। ये tags search, random image filtering, public gallery filtering और age-rating access control में काम आते हैं।
Auto Tagging क्या कर सकता है
| Feature | Description |
|---|---|
| Content tags generate करना | People, scenes, objects, art style और मिलते-जुलते visual content के tags जोड़ता है। |
| Character tags generate करना | Anime images और illustrations के लिए उपयोगी। |
| Orientation tags जोड़ना | landscape, portrait या square जोड़ता है। |
| Image rating जोड़ना | General, sensitive, questionable या explicit content के लिए G/S/Q/E rating results save करता है। |
| Upload पर auto-tag | Newly uploaded images automatically tagging flow में चली जाती हैं। |
| Batch tagging | सभी folders या selected folders की पुरानी images में tags जोड़ता है। |
पहले क्या चाहिए
कम से कम एक accessible Hugging Face Space URL तैयार रखें।
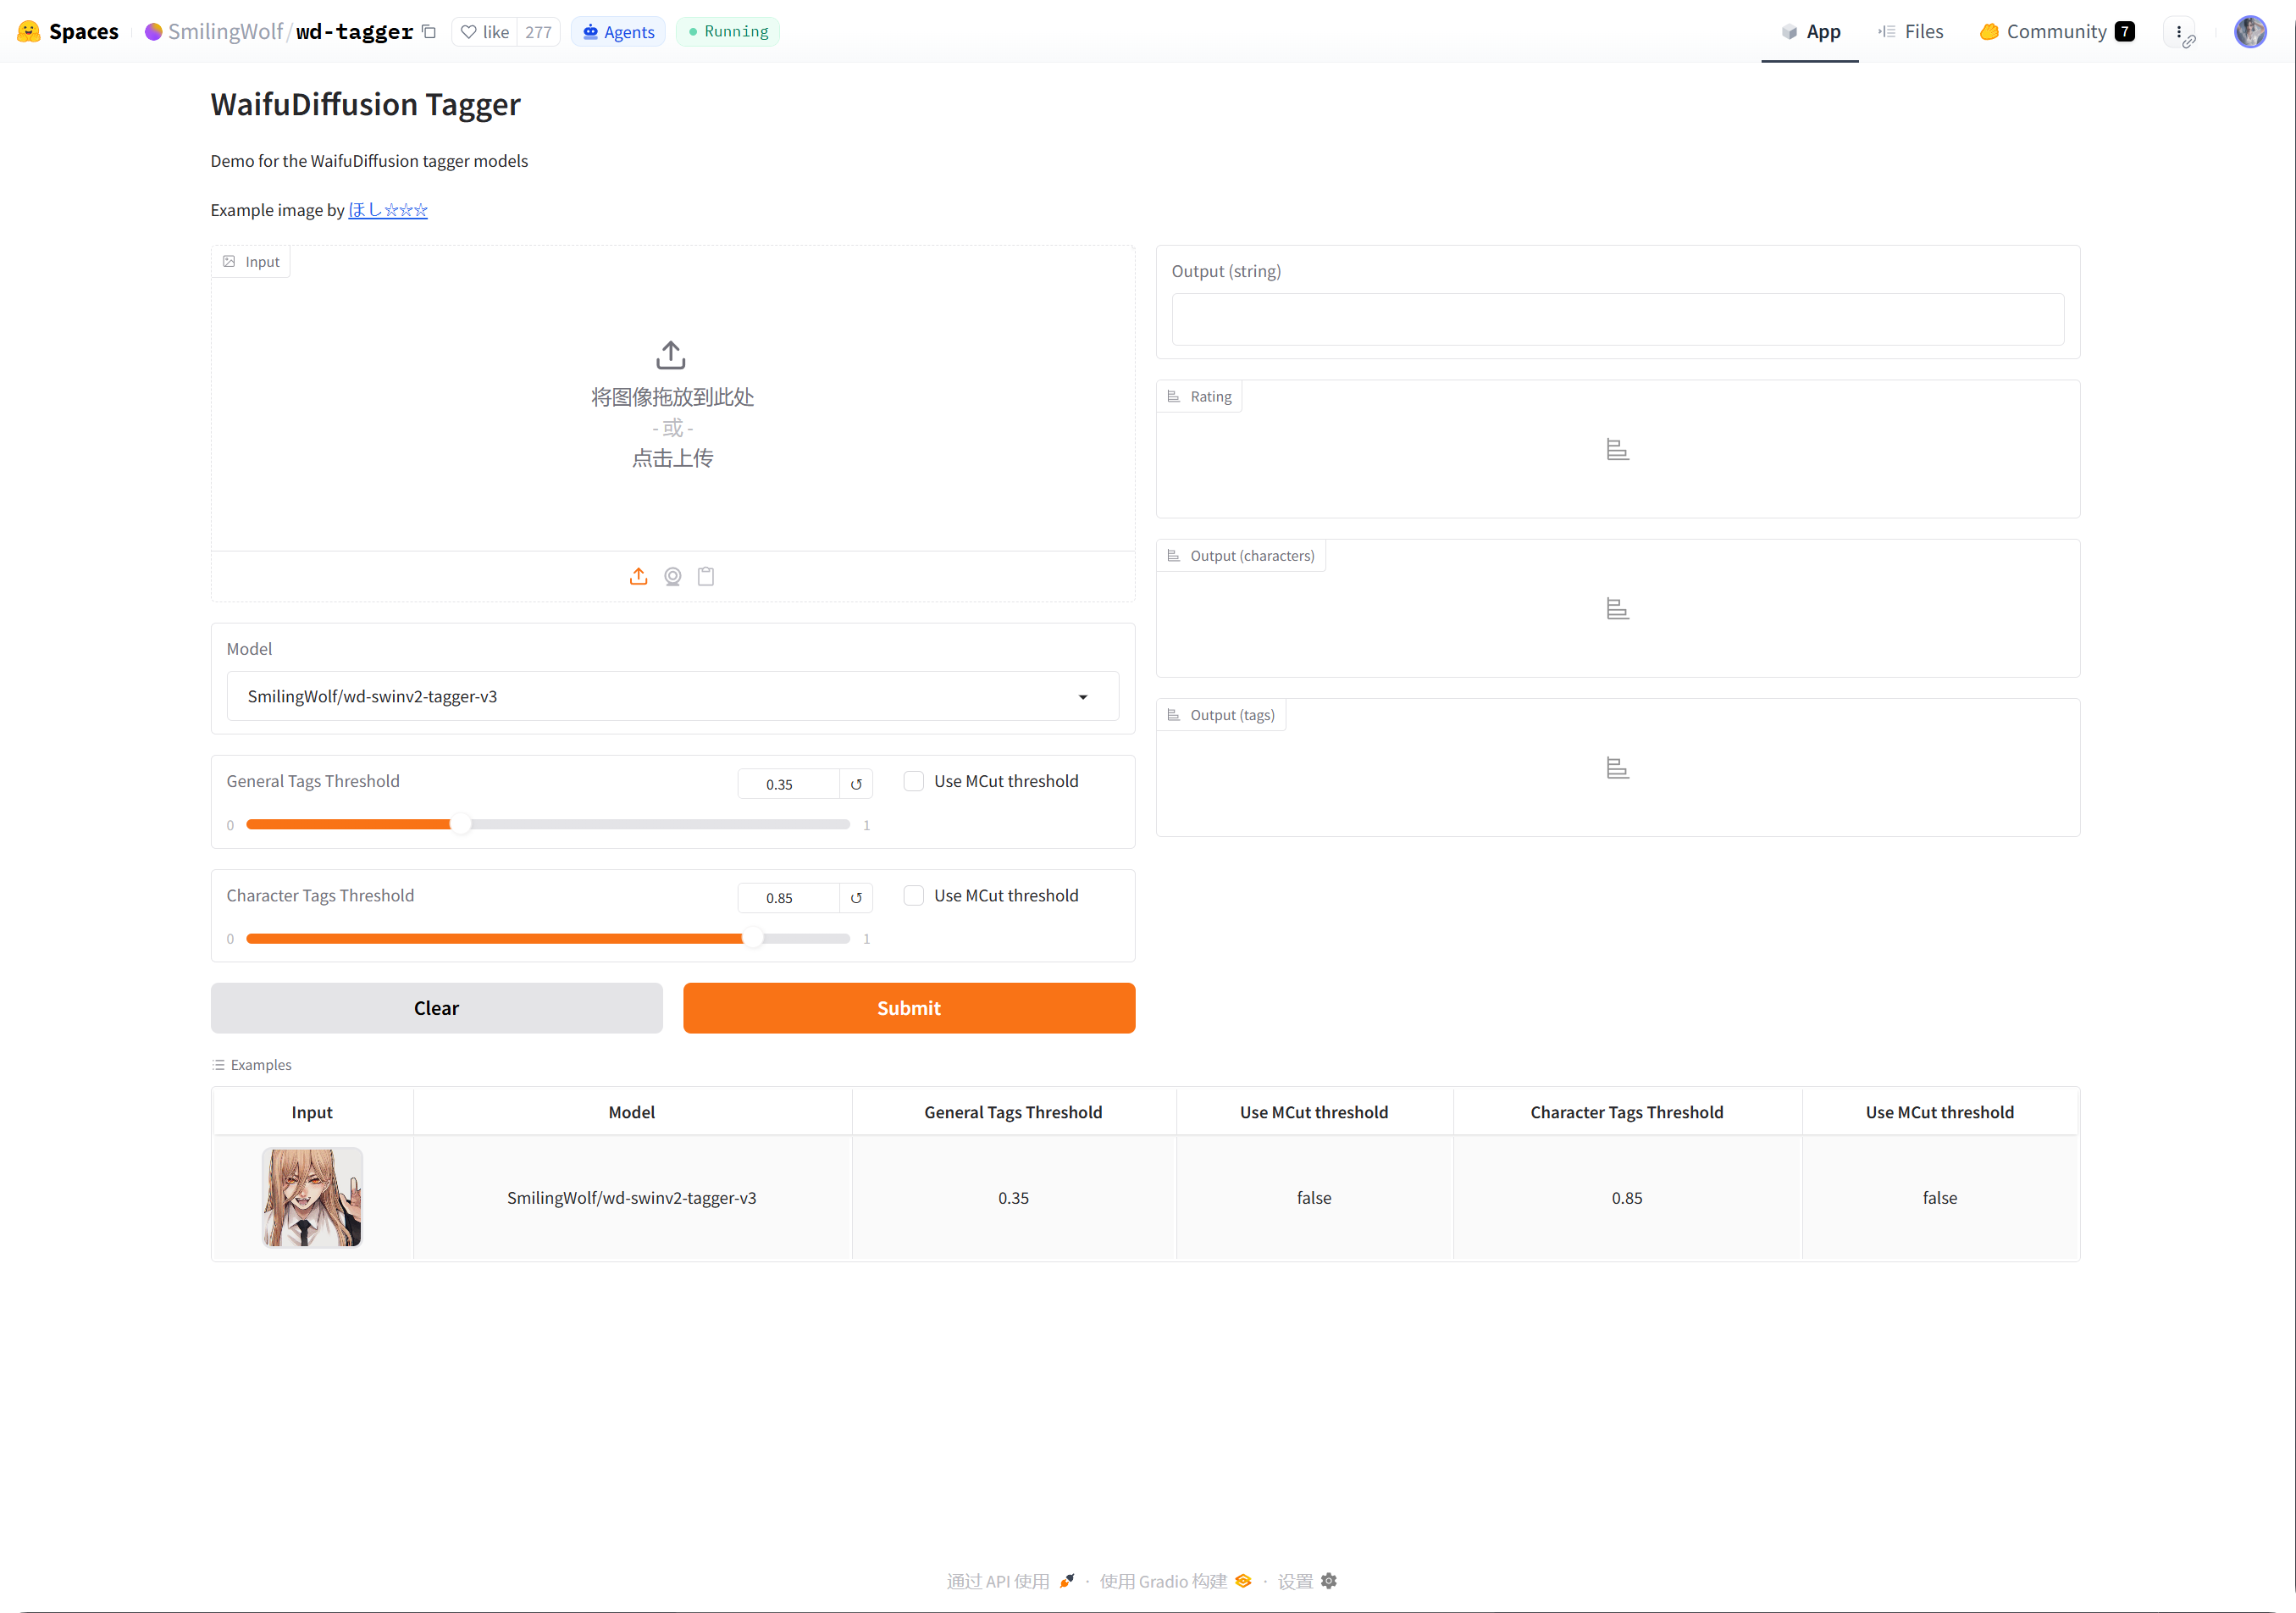
Recommended तरीका है SmilingWolf के wd-tagger Space को अपने Hugging Face account में duplicate करना:
text
https://huggingface.co/spaces/SmilingWolf/wd-taggerTemporary testing के लिए public Space इस्तेमाल कर सकते हैं, लेकिन public Spaces कई users के बीच share होते हैं। Queue लग सकती है, speed slow हो सकती है या Space unavailable भी हो सकता है। अपने account में duplicated Space long-term auto tagging के लिए ज़्यादा stable रहता है।
SmilingWolf का Space Duplicate करना
- Hugging Face में sign in करें।
https://huggingface.co/spaces/SmilingWolf/wd-taggerखोलें।
- Upper-right corner में three-dot menu पर click करें।
Duplicate this Spaceचुनें।- Default Space name रखें या अपना नाम चुनें, जैसे
wd-tagger। - Visibility को
Publicरखें। Public Spaces को ImgBed से call करना आसान होता है। - शुरुआत में default free hardware रखें। Queueing ज़्यादा दिखे तभी बाद में upgrade करें।
- Space create करें और build finish होने तक इंतज़ार करें।
Build finish होने के बाद अपना Space page खोलें। URL आम तौर पर ऐसा दिखेगा:
text
https://huggingface.co/spaces/your-name/wd-taggerBrowser URL copy करें और ImgBed के Space URLs में paste करें।
Multiple Space URLs भरना
हर line में एक Space URL डालें।
Examples:
| Value | Description |
|---|---|
https://huggingface.co/spaces/SmilingWolf/wd-tagger | SmilingWolf public Space। Temporary testing के लिए ठीक। |
https://huggingface.co/spaces/lintonxue00/wd-tagger | Copied Space page URL। |
https://huggingface.co/spaces/your-name/wd-tagger | आपका duplicated Space page URL। |
आप multiple URLs डाल सकते हैं। ImgBed कई Spaces को साथ में इस्तेमाल करता है, जिससे speed बेहतर हो सकती है।
अगर एक Space temporarily unavailable है, तो दूसरे Spaces processing जारी रख सकते हैं।
Settings
| Option | Recommendation |
|---|---|
Space URLs | तैयार किए गए Space URLs डालें। कम से कम एक URL ज़रूर दें। |
| Target folder | सभी folders के लिए empty छोड़ें। Specific directory process करनी हो तभी folder select करें। |
| Recognition model | Default में wd-swinv2-tagger-v3 रखें। |
| General tag threshold | Default ज़्यादातर images के लिए ठीक है। Lower value से ज़्यादा tags मिलते हैं; higher value से कम tags। |
| Character tag threshold | Default conservative है और गलत character tags से बचने में मदद करता है। |
MCut automatic threshold | शुरुआत में off रखें। जब model से tag count automatically तय करवाना हो तब on करें। |
| Auto-tag on upload | Newly uploaded images को automatically tags देने हों तो on करें। |
| Start tagging | पुरानी images को manually batch-tag करता है। |
Recommended Starting Values
| Option | Recommended Value |
|---|---|
| Recognition model | wd-swinv2-tagger-v3 |
| General tag threshold | 0.35 |
| Character tag threshold | 0.85 |
MCut | शुरुआत में Off |
| Auto-tag on upload | ज़रूरत हो तो Enable |
अगर tags बहुत ज़्यादा आ रहे हैं, तो general threshold थोड़ा बढ़ाएँ।
अगर tags बहुत कम आ रहे हैं, तो general threshold थोड़ा घटाएँ।
Batch Tagging
Space URLsभरें।- Target folder select करें।
- Start tagging पर click करें।
- Progress finish होने तक इंतज़ार करें।
अगर target folder empty है, तो ImgBed सभी folders process करता है।
Batch tagging पुरानी images के लिए बेहतर है। New images के लिए auto-tag on upload enable करें, ताकि हर बार manually run न करना पड़े।
Auto-Tag on Upload
Auto-tag on upload enabled होने के बाद newly uploaded images automatically configured Space URLs को call करती हैं।
यह long-term use के लिए suitable है।
अगर आपका Space queue में है, तो upload पहले finish हो सकता है और tagging बाद में continue होती है।
कौन सी Images Process होती हैं
Auto tagging मुख्य रूप से image files process करता है।
जिन images में complete tags, orientation, rating, width और height पहले से मौजूद हैं, उन्हें unnecessary Space calls से बचाने के लिए skip किया जाता है।
ImgBed जहाँ संभव हो केवल missing information भरता है। उदाहरण के लिए, अगर सिर्फ orientation missing है, तो full content tag flow call किए बिना orientation जोड़ने की कोशिश करता है।
FAQ
अपना Space Duplicate क्यों करें?
Public Spaces कई users के बीच shared होते हैं। आपका duplicated Space मुख्य रूप से आपकी ImgBed site इस्तेमाल करती है, इसलिए वह आम तौर पर तेज़ और reliable रहता है।
Space बार-बार Starting Up दिखा रहा है
पहली बार creation के बाद, या लंबे idle period के बाद, Space को start होने में समय लग सकता है।
पहले अपना Space page खोलें। जब वह normal image recognize कर सके, तब ImgBed पर लौटकर tagging start करें।
Space URL कैसे Copy करें?
अपना Hugging Face Space page खोलें और browser address copy करें।
Examples:
text
https://huggingface.co/spaces/lintonxue00/wd-tagger
https://huggingface.co/spaces/SmilingWolf/wd-tagger
क्या Multiple Spaces जोड़ सकते हैं?
हाँ। हर line में एक Space URL डालें।
Multiple Spaces images को साथ में process करते हैं और तब useful होते हैं जब images बहुत ज़्यादा हों।
Tags English में क्यों हैं?
SmilingWolf models English tags output करते हैं। यह expected है।
Tags मुख्य रूप से search, filtering, random image API और public gallery filters के लिए इस्तेमाल होते हैं।
Rating Tags किस काम आते हैं?
Rating results Security Settings के access mode के साथ काम करते हैं।
उदाहरण के लिए, जब visitor access age rating से limited हो, तो public browsing और random image features उन्हीं rules के हिसाब से images filter करते हैं।
Quick Flow
text
Hugging Face में sign in करें
-> SmilingWolf/wd-tagger खोलें
-> Duplicate this Space करें
-> Space build होने तक इंतज़ार करें
-> अपना Space URL copy करें
-> ImgBed में Space URLs भरें
-> Model और thresholds चुनें
-> Start tagging करें या auto-tag on upload enable करें