Auto Tagging
Auto tagging ကို ဒီနေရာမှာ configure လုပ်နိုင်ပါတယ်:
text
System Settings -> Other Settings -> Auto Taggingဒီ feature က image tags တွေကိုအလိုအလျောက်ဖန်တီးပေးပါတယ်။ အဲဒီ tags တွေက search, random image filtering, public gallery filtering, age-rating access control တို့အတွက်အသုံးဝင်ပါတယ်။
Auto Tagging က ဘာတွေလုပ်နိုင်လဲ
| Feature | Description |
|---|---|
| content tags ဖန်တီးခြင်း | people, scenes, objects, art style နဲ့ အလားတူ visual content အတွက် tags ထည့်ပေးသည်။ |
| character tags ဖန်တီးခြင်း | anime images နဲ့ illustrations အတွက်အသုံးဝင်သည်။ |
| orientation tags ထည့်ခြင်း | landscape, portrait, square ကိုထည့်ပေးသည်။ |
| image rating ထည့်ခြင်း | general, sensitive, questionable, explicit content အတွက် G/S/Q/E rating results သိမ်းသည်။ |
| upload မှာ auto-tag | newly uploaded images တွေက tagging flow ထဲအလိုအလျောက်ဝင်သည်။ |
| Batch tagging | folders အားလုံး သို့မဟုတ် selected folders ထဲက images အဟောင်းတွေကို tags ထည့်သည်။ |
အရင်ပြင်ဆင်ရမယ့်အရာ
အနည်းဆုံး accessible Hugging Face Space URL တစ်ခုပြင်ဆင်ပါ။
အကြံပြုတဲ့နည်းက SmilingWolf ရဲ့ wd-tagger Space ကို ကိုယ့် Hugging Face account ထဲ duplicate လုပ်ခြင်းဖြစ်ပါတယ်:
text
https://huggingface.co/spaces/SmilingWolf/wd-taggerpublic Space ကို temporary testing အတွက်သုံးနိုင်ပေမယ့် public Spaces တွေကို users အများကြီး share သုံးပါတယ်။ queue ရှိနိုင်၊ နှေးနိုင်၊ မရနိုင်တဲ့အချိန်ရှိနိုင်ပါတယ်။ ကိုယ်ပိုင် account ထဲ duplicated Space က long-term auto tagging အတွက်ပိုတည်ငြိမ်ပါတယ်။
SmilingWolf Space Duplicate လုပ်ပါ
- Hugging Face ထဲ sign in ဝင်ပါ။
https://huggingface.co/spaces/SmilingWolf/wd-taggerကိုဖွင့်ပါ။
- ညာဘက်အပေါ်ထောင့်က three-dot menu ကိုနှိပ်ပါ။
Duplicate this Spaceကိုရွေးပါ။- default Space name ကိုထားနိုင်သလို
wd-taggerစတဲ့အမည်လည်းပေးနိုင်ပါတယ်။ - visibility ကို
Publicထားပါ။ Public Spaces တွေကို ImgBed က call လုပ်ရပိုလွယ်ပါတယ်။ - စစချင်း default free hardware ကိုထားပါ။ queue ကပြဿနာဖြစ်လာမှ upgrade လုပ်ပါ။
- Space ကို create လုပ်ပြီး build ပြီးအောင်စောင့်ပါ။
build ပြီးရင် သင့် Space page ကိုဖွင့်ပါ။ URL က များသောအားဖြင့်ဒီလိုဖြစ်ပါတယ်:
text
https://huggingface.co/spaces/your-name/wd-taggerbrowser URL ကို copy လုပ်ပြီး ImgBed ထဲက Space URLs မှာ paste လုပ်ပါ။
Space URL အများကြီးထည့်ခြင်း
line တစ်ကြောင်းမှာ Space URL တစ်ခုစီထည့်ပါ။
| Value | Description |
|---|---|
https://huggingface.co/spaces/SmilingWolf/wd-tagger | SmilingWolf public Space။ temporary testing အတွက်သင့်တော်သည်။ |
https://huggingface.co/spaces/lintonxue00/wd-tagger | copy လုပ်ထားတဲ့ Space page URL။ |
https://huggingface.co/spaces/your-name/wd-tagger | သင့်ကိုယ်ပိုင် duplicated Space page URL။ |
URLs အများကြီးထည့်နိုင်ပါတယ်။ ImgBed က Spaces အများကြီးကိုအတူသုံးပြီး speed ပိုကောင်းနိုင်ပါတယ်။
Space တစ်ခု temporary unavailable ဖြစ်လည်း အခြား Spaces တွေက processing ဆက်လုပ်နိုင်ပါတယ်။
Settings
| Option | Recommendation |
|---|---|
Space URLs | ပြင်ဆင်ထားတဲ့ Space URLs ထည့်ပါ။ အနည်းဆုံးတစ်ခုလိုပါတယ်။ |
| Target folder | folders အားလုံးအတွက် ဗလာထားပါ။ specific directory ကို process လုပ်ချင်မှသာ folder ရွေးပါ။ |
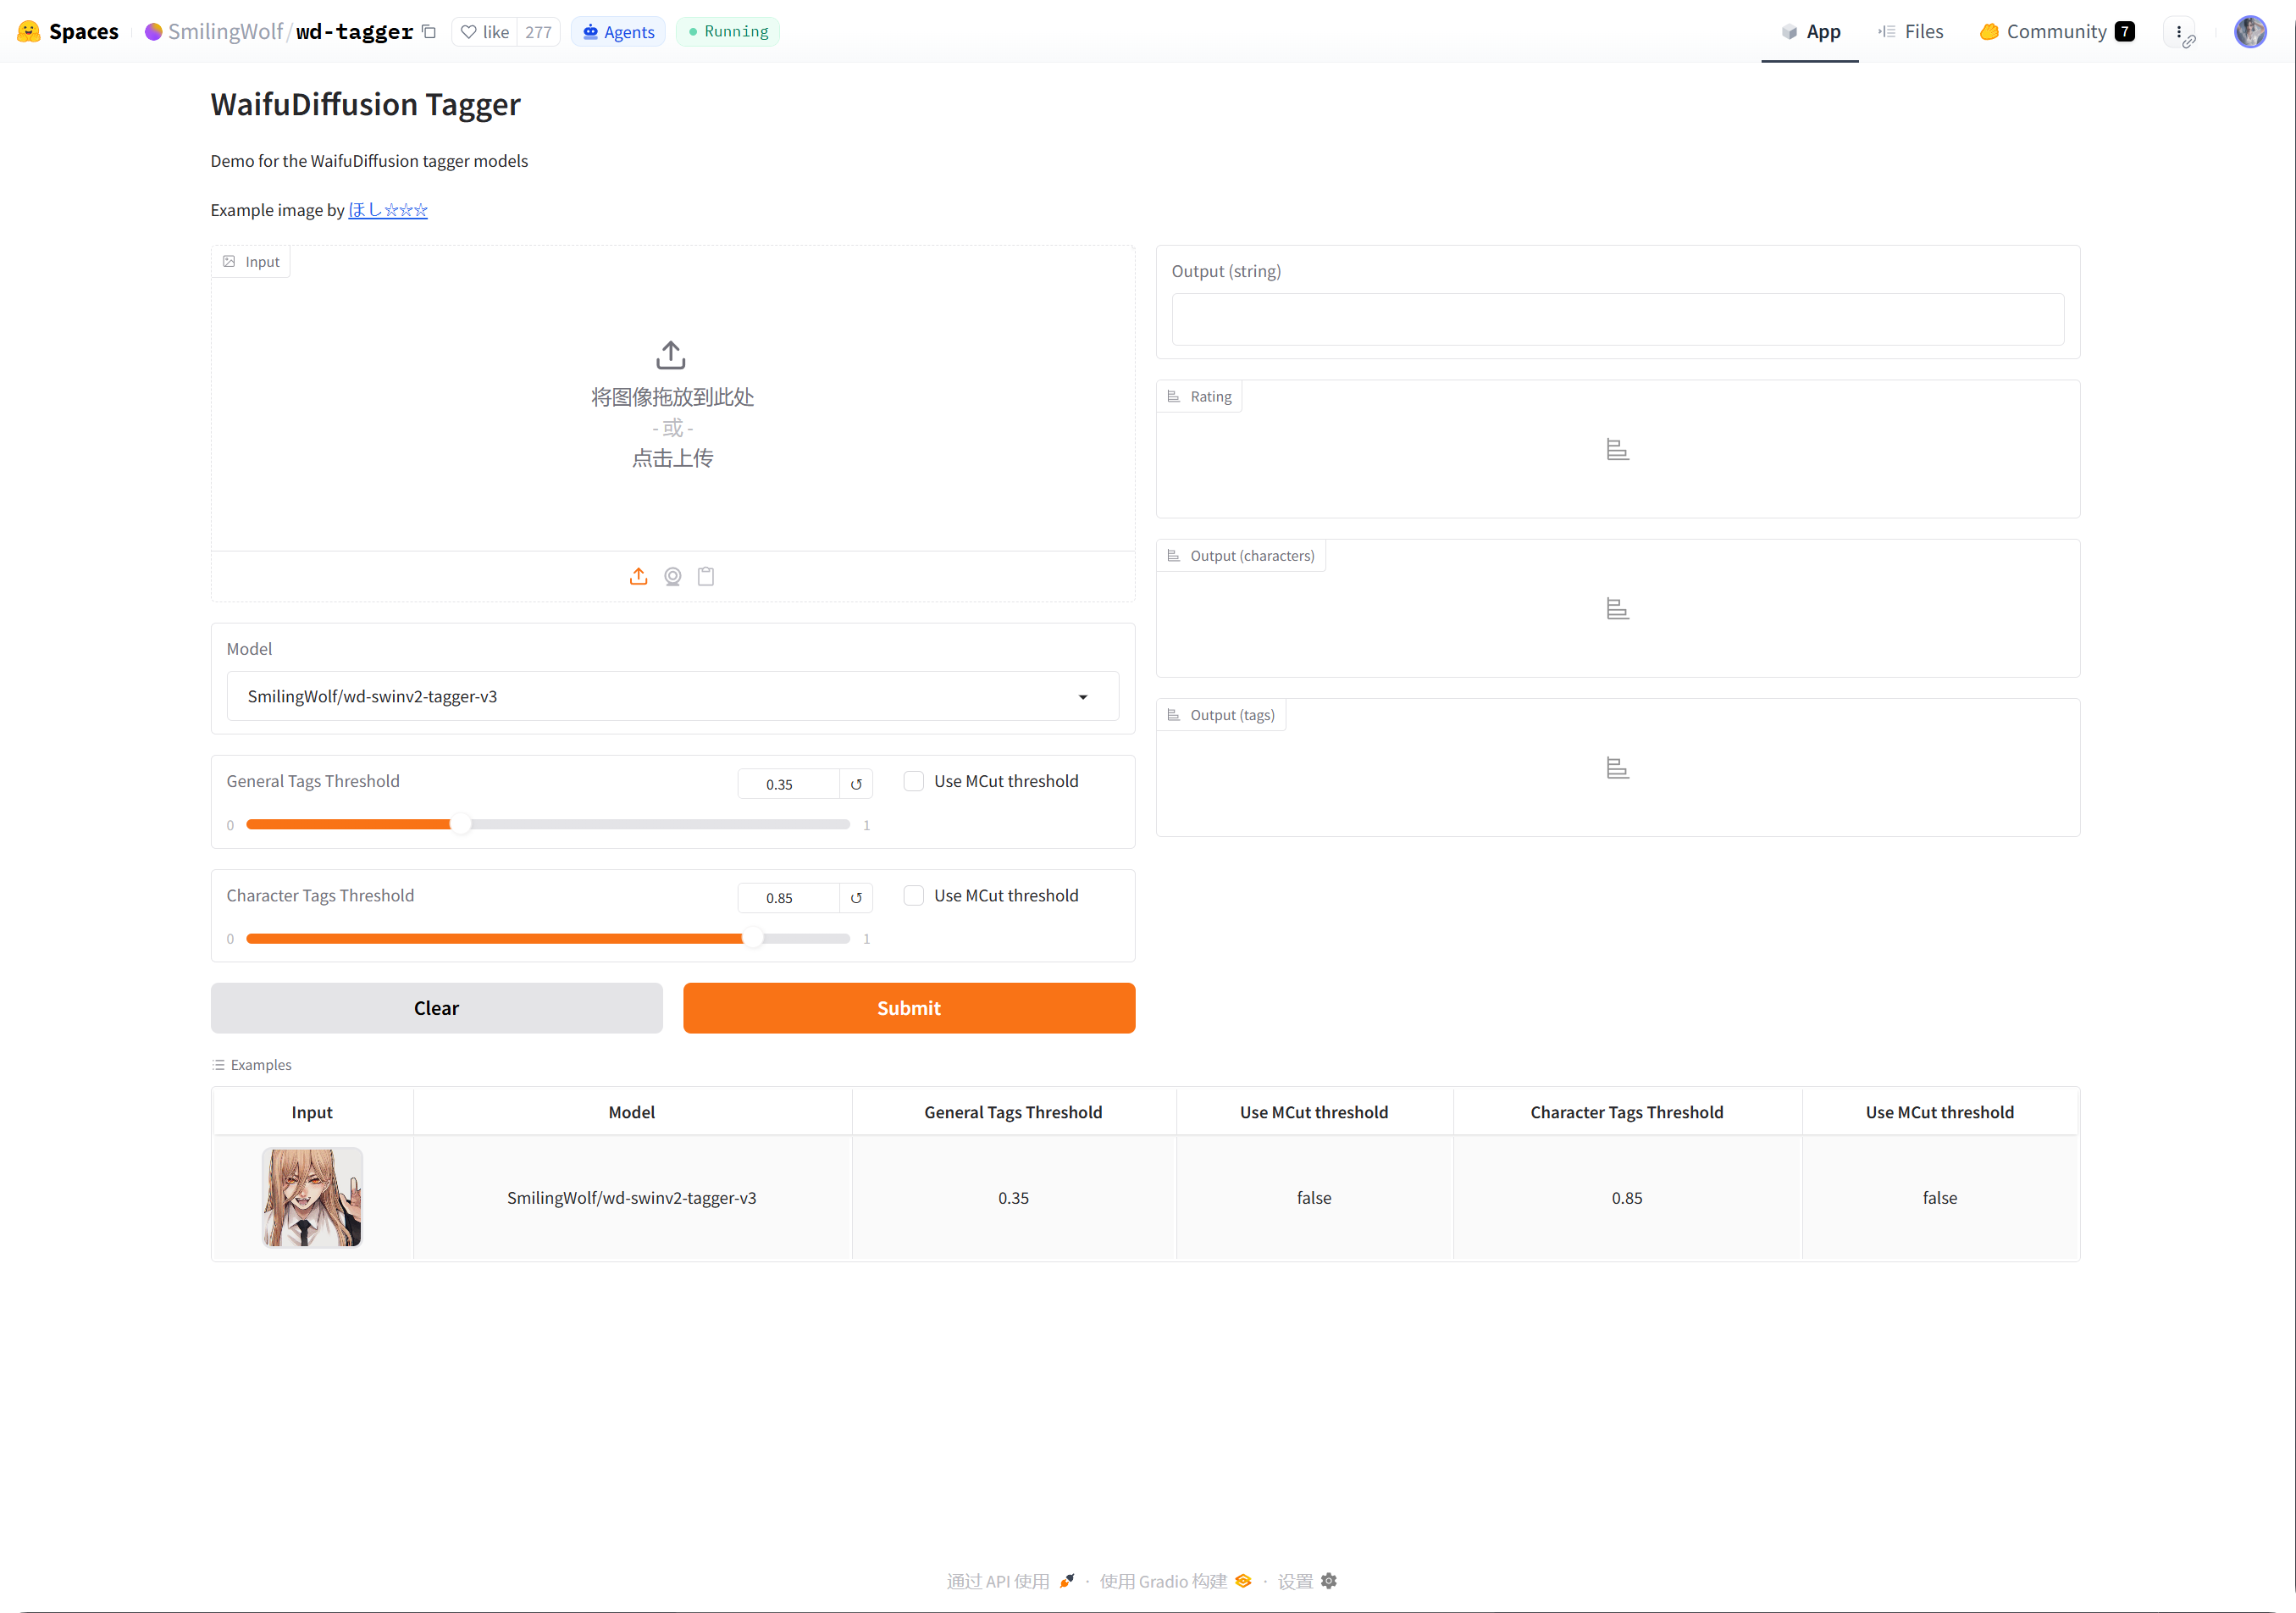
| Recognition model | default wd-swinv2-tagger-v3 ကိုထားပါ။ |
| General tag threshold | default က images အများစုအတွက်သင့်တော်ပါတယ်။ တန်ဖိုးနည်းလျှင် tags ပိုများ၊ တန်ဖိုးမြင့်လျှင် tags ပိုနည်းသည်။ |
| Character tag threshold | default က conservative ဖြစ်ပြီးမှားယွင်းတဲ့ character tags လျော့စေသည်။ |
MCut automatic threshold | စစချင်း off ထားပါ။ model က tag count ကိုအလိုအလျောက်ဆုံးဖြတ်စေချင်ရင် on လုပ်ပါ။ |
| Auto-tag on upload | newly uploaded images တွေကို auto tag ပေးချင်လျှင် on လုပ်ပါ။ |
| Start tagging | images အဟောင်းတွေအတွက် manual batch-tagging စတင်သည်။ |
အကြံပြု Starting Values
| Option | Recommended Value |
|---|---|
| Recognition model | wd-swinv2-tagger-v3 |
| General tag threshold | 0.35 |
| Character tag threshold | 0.85 |
MCut | စစချင်း Off |
| Auto-tag on upload | လိုအပ်လျှင် Enable |
tags များလွန်းရင် general threshold ကိုအနည်းငယ်မြှင့်ပါ။
tags နည်းလွန်းရင် general threshold ကိုအနည်းငယ်လျှော့ပါ။
Batch Tagging
Space URLsဖြည့်ပါ။- target folder ရွေးပါ။
- start tagging ကိုနှိပ်ပါ။
- progress ပြီးအောင်စောင့်ပါ။
target folder ဗလာဖြစ်လျှင် ImgBed က folders အားလုံးကို process လုပ်ပါမယ်။
Batch tagging က images အဟောင်းတွေအတွက်အကောင်းဆုံးပါ။ images အသစ်တွေအတွက် auto-tag on upload ကို enable လုပ်ထားရင် တစ်ခါတစ်ခါ manual run မလိုတော့ပါ။
Upload အချိန် Auto-Tag
auto-tag on upload enabled ဖြစ်ပြီးနောက် newly uploaded images တွေက configured Space URLs ကိုအလိုအလျောက် call လုပ်ပါမယ်။
ဒီဟာက long-term use အတွက်သင့်တော်ပါတယ်။
Space queue ရှိနေရင် upload ကိုအရင် finish လုပ်နိုင်ပြီး tagging ကနောက်မှာဆက်လုပ်ပါမယ်။
ဘယ် Images တွေ Process လုပ်လဲ
Auto tagging က image files တွေကိုအဓိက process လုပ်ပါတယ်။
tags, orientation, rating, width, height ပြည့်စုံပြီးသား images တွေကို skip လုပ်ပါတယ်။ unnecessary Space calls မဖြစ်စေဖို့ပါ။
ဖြစ်နိုင်ရင် ImgBed က missing information ကိုပဲဖြည့်ပါတယ်။ ဥပမာ orientation ပဲမရှိလျှင် full content tag flow မခေါ်ဘဲ orientation ထည့်ဖို့ကြိုးစားပါတယ်။
FAQ
ကိုယ်ပိုင် Space ကိုဘာကြောင့် Duplicate လုပ်သင့်လဲ?
Public Spaces တွေကို users အများကြီး share သုံးပါတယ်။ ကိုယ်ပိုင် duplicated Space က အဓိကအားဖြင့် သင့် ImgBed site ပဲသုံးတာကြောင့် ပိုမြန်ပြီးပိုယုံကြည်စိတ်ချရပါတယ်။
Space က Starting Up အဖြစ်ဆက်ပြနေတယ်
ပထမဆုံးဖန်တီးပြီးနောက် သို့မဟုတ် idle ကြာပြီးနောက် Space start ဖြစ်ဖို့အချိန်ယူနိုင်ပါတယ်။
အရင်ဆုံး Space page ကိုဖွင့်ပါ။ image ကိုပုံမှန် recognize လုပ်နိုင်ပြီဆိုရင် ImgBed ကိုပြန်သွားပြီး tagging စပါ။
Space URL ဘယ်လို Copy လုပ်မလဲ?
သင့် Hugging Face Space page ကိုဖွင့်ပြီး browser address ကို copy လုပ်ပါ။
text
https://huggingface.co/spaces/lintonxue00/wd-tagger
https://huggingface.co/spaces/SmilingWolf/wd-tagger
Spaces အများကြီးထည့်လို့ရလား?
ရပါတယ်။ line တစ်ကြောင်းမှာ Space URL တစ်ခုစီထည့်ပါ။
Spaces အများကြီးက images တွေကိုအတူ process လုပ်ပြီး images များတဲ့အခါအသုံးဝင်ပါတယ်။
Tags တွေ English ဖြစ်တာဘာကြောင့်လဲ?
SmilingWolf models တွေက English tags output ပေးတာဖြစ်ပါတယ်။ ဒါက expected ဖြစ်ပါတယ်။
tags တွေကို search, filtering, random image API, public gallery filters အတွက်အဓိကသုံးပါတယ်။
Rating Tags ကိုဘာအတွက်သုံးလဲ?
rating results တွေက Security Settings ထဲက access mode နဲ့အတူအလုပ်လုပ်ပါတယ်။
ဥပမာ visitor access ကို age rating အလိုက်ကန့်သတ်ထားရင် public browsing နဲ့ random image features တွေက အဲဒီ rules အတိုင်း images တွေကို filter လုပ်ပါတယ်။
Quick Flow
text
Hugging Face ထဲ sign in ဝင်ပါ
-> SmilingWolf/wd-tagger ဖွင့်ပါ
-> Duplicate this Space
-> Space build ပြီးအောင်စောင့်ပါ
-> သင့် Space URL copy လုပ်ပါ
-> ImgBed ထဲ Space URLs ဖြည့်ပါ
-> model နဲ့ thresholds ရွေးပါ
-> Start tagging သို့မဟုတ် auto-tag on upload enable လုပ်ပါ