WebDAV Channel ထည့်သွင်းခြင်း
ဘယ်အချိန်မှာ သုံးသင့်လဲ
WebDAV channel ကို ဒီလိုအခြေအနေတွေမှာသုံးပါ:
- WebDAV endpoint ပေးတဲ့ NAS, cloud drive, object storage service ရှိလျှင်။
- uploaded images တွေကို ကိုယ်ပိုင် WebDAV directory ထဲသိမ်းချင်လျှင်။
- credentials တွေကို frontend မှာကြာရှည်မဖော်ပြဘဲ D1
upload_channelstable ထဲသိမ်းချင်လျှင်။
စမလုပ်ခင် လိုအပ်တာတွေ
| လိုအပ်ချက် | အသုံးပြုပုံ |
|---|---|
| WebDAV Endpoint | server-side WebDAV URL၊ ဥပမာ https://nas.example.com/dav။ |
| Username | WebDAV service ကို sign in ဝင်ရန်။ |
| Password | WebDAV service ကို sign in ဝင်ရန်။ |
| Authentication mode | default က Basic ဖြစ်သည်။ server ကလိုအပ်မှသာ Digest သို့မဟုတ် auto negotiation သုံးပါ။ |
| Storage directory | files သိမ်းမယ့် directory။ default က imgbed။ |
ဘယ်နေရာမှာ ထည့်မလဲ
- System Settings ကိုဖွင့်ပါ။
- Upload Settings ကိုသွားပါ။
- ညာဘက်အပေါ်ထောင့်က Add Channel ကိုနှိပ်ပါ။
WebDAVကိုရွေးပါ။
Field Reference
| Field | အသုံးပြုပုံ | Required |
|---|---|---|
| Channel name | ဒီ WebDAV channel အတွက် မှတ်မိလွယ်တဲ့အမည်၊ ဥပမာ koofr သို့မဟုတ် nas။ | Yes |
| Endpoint | https:// ပါတဲ့ WebDAV endpoint အပြည့်အစုံ။ | Yes |
| Username | WebDAV login username။ | Yes |
| Password | WebDAV login password။ | Yes |
| Authentication mode | များသောအားဖြင့် Basic။ server က digest authentication လိုလျှင် Digest သုံးပါ။ | Yes |
| Storage directory | files သိမ်းမယ့် directory။ default က imgbed။ | No |
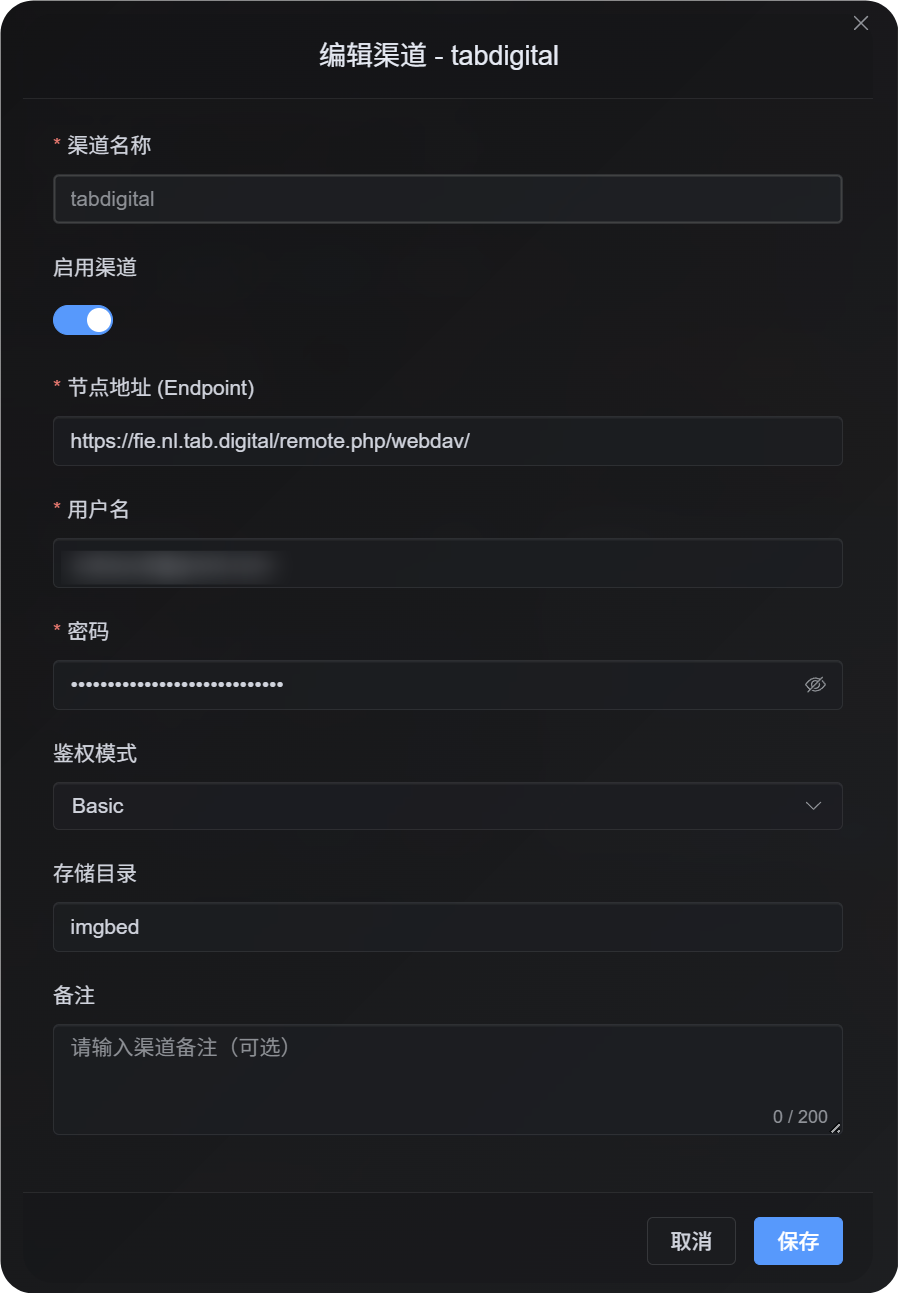
ဥပမာ: fie.nl.tab.digital
1. App Password ဖန်တီးပါ
account security settings ကိုဖွင့်ပြီး application passwords ကိုရှာကာ app password အသစ်ဖန်တီးပါ။
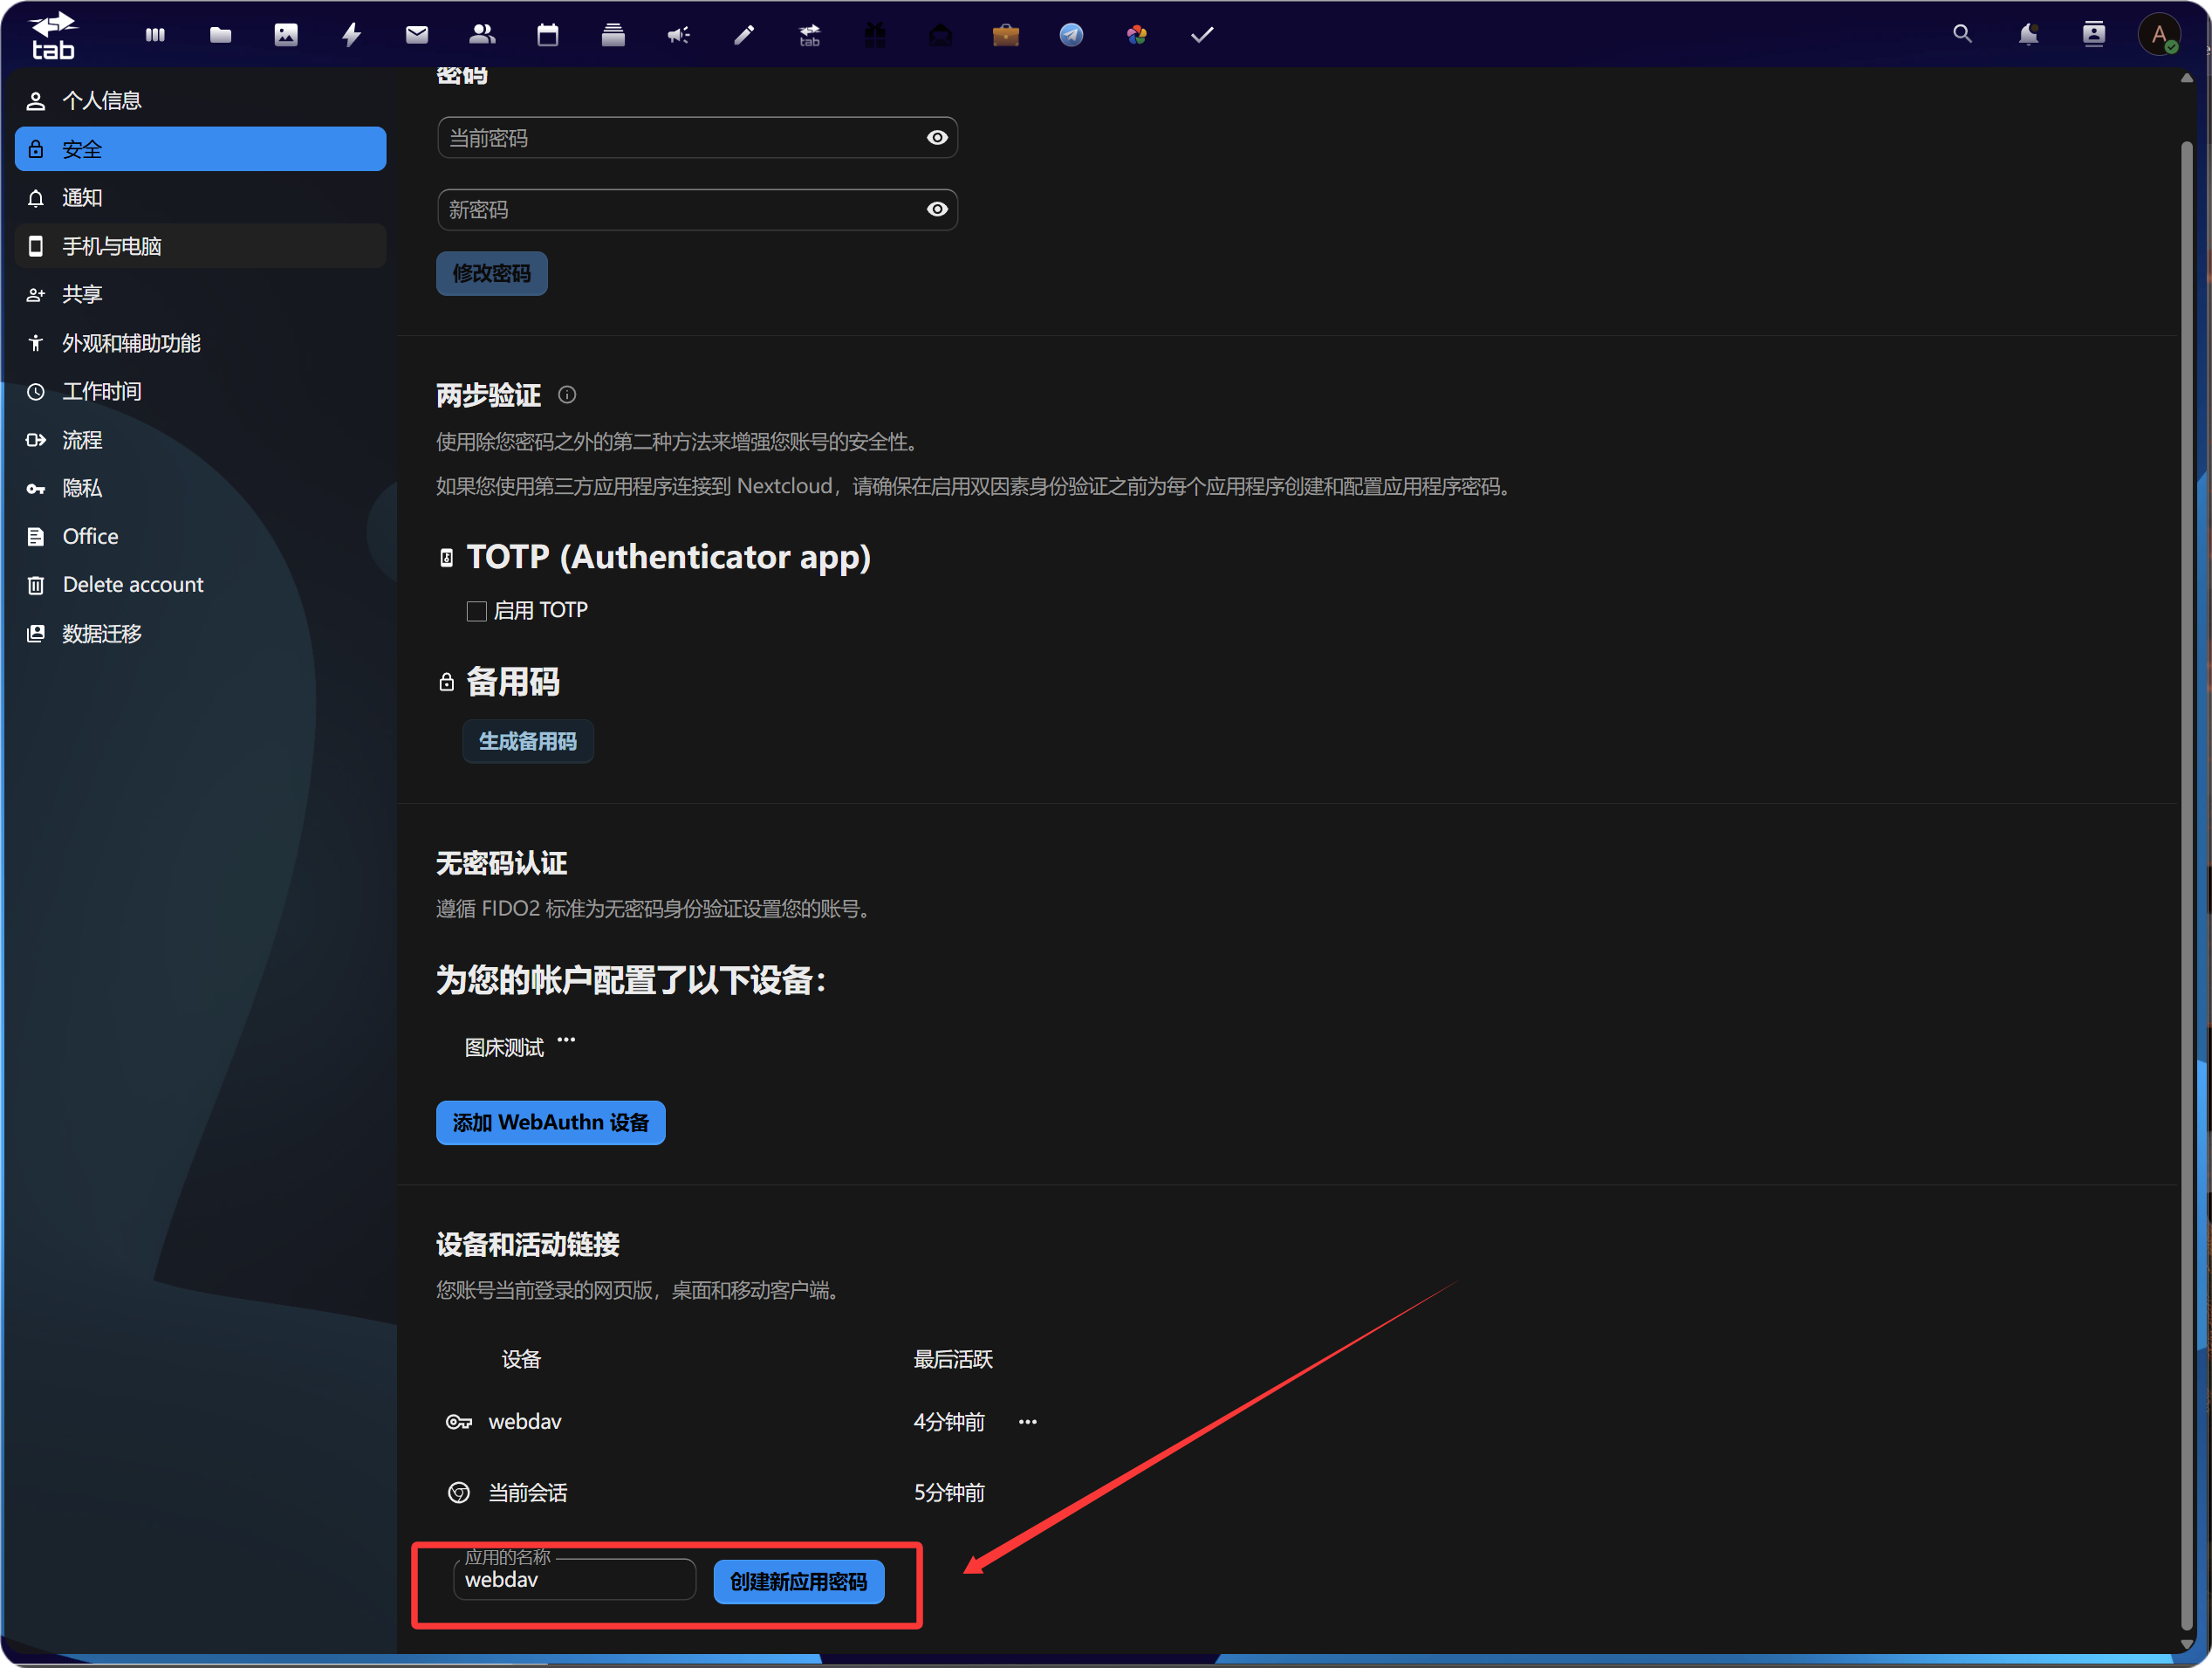
ဖန်တီးပြီးရင် app password အသစ်ကို copy လုပ်ပြီးသိမ်းပါ။ များသောအားဖြင့် တစ်ကြိမ်ပဲပြပါမယ်။

2. ImgBed မှာ WebDAV Configuration ဖြည့်ပါ
ImgBed ကိုပြန်သွားပြီး WebDAV channel ထည့်ပါ:
| UI Field | Value |
|---|---|
| Endpoint | https://fie.nl.tab.digital/ ကပေးတဲ့ WebDAV URL။ |
| Username | သင့် WebDAV username။ |
| Password | မကြာသေးခင်ဖန်တီးထားတဲ့ app password။ |
| Authentication mode | အများစုမှာ Basic နဲ့စပါ။ |
| Storage directory | default က imgbed; custom directory လည်းသုံးနိုင်သည်။ |
File ကြီး Upload လုပ်ပုံ
WebDAV channel က အခု real session-based chunked upload ကိုသုံးပါတယ်။
file သေးတွေကို complete file တစ်ခုအဖြစ် upload လုပ်ပါတယ်။ 64 MiB ထက်ကြီးတဲ့ files တွေကို 10 MiB ဝန်းကျင် chunks တွေအဖြစ် ခွဲပြီး remote chunk directory ထဲ upload လုပ်ပါမယ်။
WebDAV service က partial update သို့မဟုတ် offset-based writes ကို support လုပ်ဖို့မလိုပါ။ ImgBed က remote server ပေါ်မှာ chunks တွေကို file ကြီးတစ်ခုအဖြစ် merge မလုပ်ပါ။ chunk manifest သိမ်းပြီး file request လာတဲ့အခါ chunks တွေကိုအစဉ်လိုက်ဖတ်ပါမယ်။
| File Size | Upload Method | Remote Storage Layout |
|---|---|---|
| 64 MiB သို့မဟုတ် ပိုသေး | Normal upload | complete file တစ်ခု |
| 64 MiB ထက်ကြီး | Real session chunked upload | chunk files အများကြီးပါသော chunk directory |
chunk directory က remote storage layout ကိုပဲသက်ရောက်ပါတယ်။ ImgBed ထဲက file URL မပြောင်းပါ။ users တွေက မူလ /file/... link ကနေ file ကိုဆက်လက် access လုပ်နိုင်ပါတယ်။
Setup Steps
- Upload Settings ကိုဖွင့်ပါ။
- Add Channel ကိုနှိပ်ပါ။
WebDAVကိုရွေးပါ။- မှတ်မိလွယ်တဲ့ channel name ထည့်ပါ၊ ဥပမာ
koofr။ - WebDAV endpoint ထည့်ပါ၊ ဥပမာ
https://app.koofr.net/dav/Koofr။ - username နဲ့ password ထည့်ပါ။
- authentication mode ကို default
Basicအတိုင်းထားပါ။ - storage directory ကို
imgbedအတိုင်းထားနိုင်ပြီး ကိုယ်ပိုင် directory လည်းထည့်နိုင်ပါတယ်။ - Save ကိုနှိပ်ပါ။
- Save ပြီးနောက် channel card စစ်ပါ၊ capacity query ရနိုင်လျှင် query လုပ်ပါ၊ test file တစ်ခု upload လုပ်ပါ။
စစ်ဆေးနည်း
| Check | စစ်ဆေးပုံ |
|---|---|
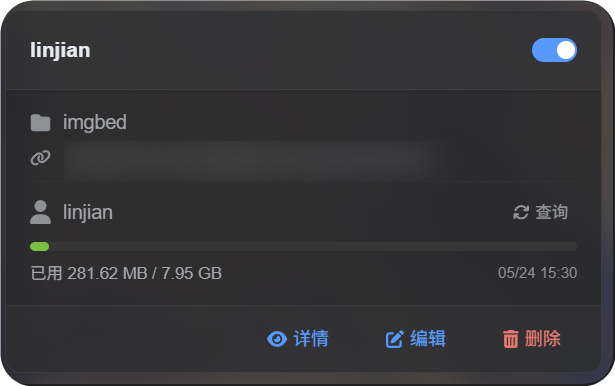
| Channel card appears | Save ပြီးနောက် Upload Settings မှာ WebDAV channel card ပေါ်လာရပါမယ်။ |
| Channel is enabled | card ရဲ့ ညာဘက်အပေါ် switch က on ဖြစ်ရပါမယ်။ |
| Credentials are saved | detail view မှာ Endpoint, username, authentication mode, storage directory တွေမြင်ရပါမယ်။ |
| Small file upload works | test image upload လုပ်ပြီး WebDAV directory ထဲ file ပေါ်လာလားစစ်ပါ။ |
| Large file rule works | 64 MiB ထက်ကြီးတဲ့ files တွေက chunked upload သုံးပြီး remote chunk directory ဖန်တီးရပါမယ်။ |
| Capacity query works | server က capacity information support လုပ်ရင် used နဲ့ total capacity ပြပါမယ်။ |
FAQ
WebDAV file ကြီးတွေက chunk directory ဘာကြောင့်ဖန်တီးလဲ?
ဒါက file ကြီးတွေအတွက် လက်ရှိ storage method ဖြစ်ပါတယ်။
64 MiB ထက်ကြီးတဲ့ files တွေကို remote side မှာ file ကြီးတစ်ခုအဖြစ် merge မလုပ်ပါ။ chunk directory အဖြစ်သိမ်းပြီး ImgBed က chunk manifest ကို record လုပ်ကာ complete content ကို chunks အစဉ်လိုက်ဖတ်ပြီးပြန်ပေးပါတယ်။
large file upload fail ဖြစ်ရင် အရင်ဆုံးဘာစစ်ရမလဲ?
Endpoint, username, password, storage directory ကိုအရင်စစ်ပါ။ ပြီးရင် WebDAV service က directory creation, file writing, file reading ကို allow လုပ်လား confirm လုပ်ပါ။
capacity query fail ဖြစ်ပေမယ့် small file upload အလုပ်လုပ်ရင် server က capacity reporting ကိုမထောက်ပံ့တာ သို့မဟုတ် ကန့်သတ်ထားတာဖြစ်နိုင်ပါတယ်။ upload မရဘူးလို့ တန်းမဆိုလိုပါ။
ဘယ် authentication mode သုံးရမလဲ?
Basic နဲ့စပါ။
server က digest authentication လိုတယ်လို့တိတိကျကျပြထားရင် Digest သုံးပါ။
မသေချာရင် automatic negotiation ကိုသုံးပါ။
Quick Checklist
text
WebDAV endpoint, username, password ပြင်ဆင်ပါ
-> Upload Settings ဖွင့်ပါ
-> Add Channel
-> WebDAV ရွေးပါ
-> Endpoint / username / password ထည့်ပါ
-> authentication mode ကို default Basic ထားပါ
-> storage directory ကို default imgbed ထားပါ
-> Save
-> capacity query
-> test file upload