د Cloudflare R2 Channel اضافه کول
کله مناسب دی
Cloudflare R2 هغه وخت وکاروئ چې:
- ستاسې ImgBed site لا مخکې په Cloudflare کې deployed وي او files د هماغه Cloudflare account په R2 bucket کې ساتل غواړئ.
- نه غواړئ جلا S3 endpoint، access key او secret key configure کړئ.
- غواړئ reads او writes د Worker یا Pages R2 binding له لارې په لږ setup سره ترسره شي.
لنډه خبره:
R2 channel د ImgBed admin panel دننه manual نه جوړېږي. لومړی باید R2 bucket د Cloudflare project سره bind کړئ، او binding variable name باید دقیقاً img_r2 وي.
د پیل مخکې اړتیاوې
- Cloudflare account.
- یو موجود R2 bucket.
- د هغه Cloudflare project د مدیریت permission چې ImgBed پکې deployed دی.
په Cloudflare کې Configure کول
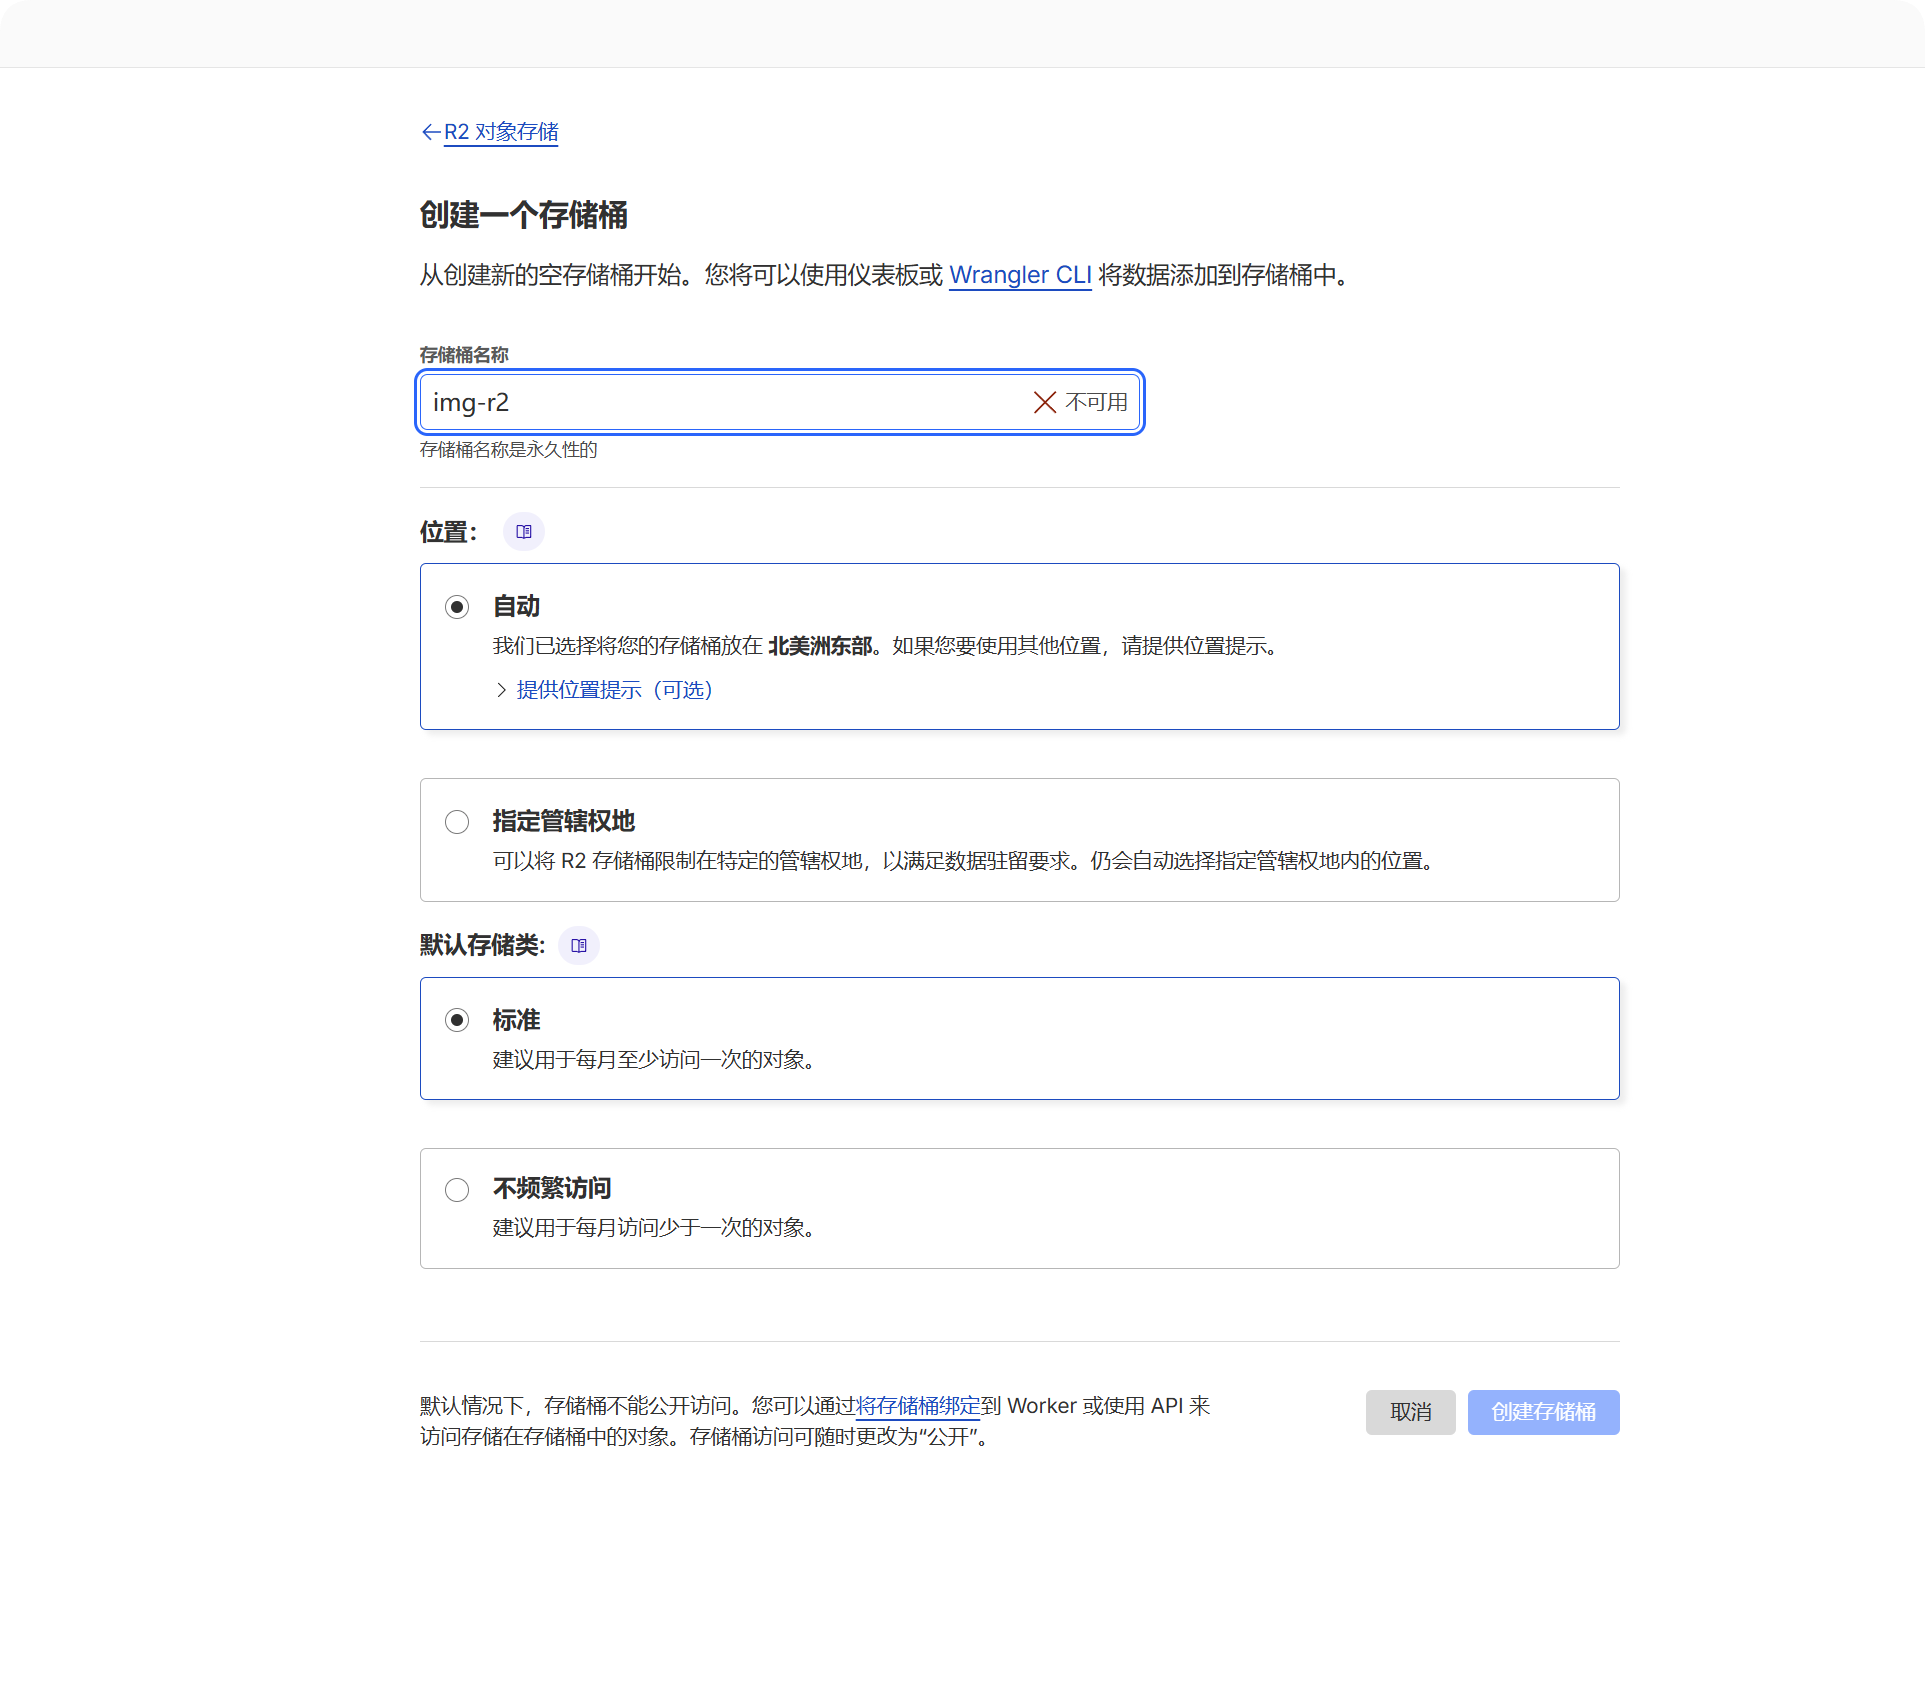
1. R2 Bucket جوړ کړئ
- Cloudflare Dashboard ته log in شئ.
R2 Object Storageپرانیزئ.- Create bucket کلیک کړئ.
- bucket name وټاکئ، لکه
imgbed.
uploaded files به په همدې bucket کې ساتل کېږي.
2. Bucket د ImgBed Project سره Bind کړئ
د deployment type له مخې binding location وټاکئ:
| Deployment Type | Binding Location |
|---|---|
| Pages | Current Pages project -> Settings -> Functions -> R2 bucket bindings |
| Worker | Current Worker -> Settings -> Bindings -> R2 bucket bindings |
د binding اضافه کولو پر وخت مهم fields:
| Field | Value |
|---|---|
| Variable name | img_r2 |
| R2 bucket | هغه bucket وټاکئ چې جوړ کړی مو دی. |
Variable name باید دقیقاً img_r2 وي. د R2 files upload، read او delete ټول په همدې binding name پورې تړلي دي.
3. Project بیا Deploy کړئ
د binding له save وروسته ImgBed redeploy کړئ، څو Worker یا Pages runtime img_r2 ته access ولري.
په ImgBed کې به څه ووینئ
کله چې R2 binding available شي، دا پرانیزئ:
- System Settings.
- Upload Settings.
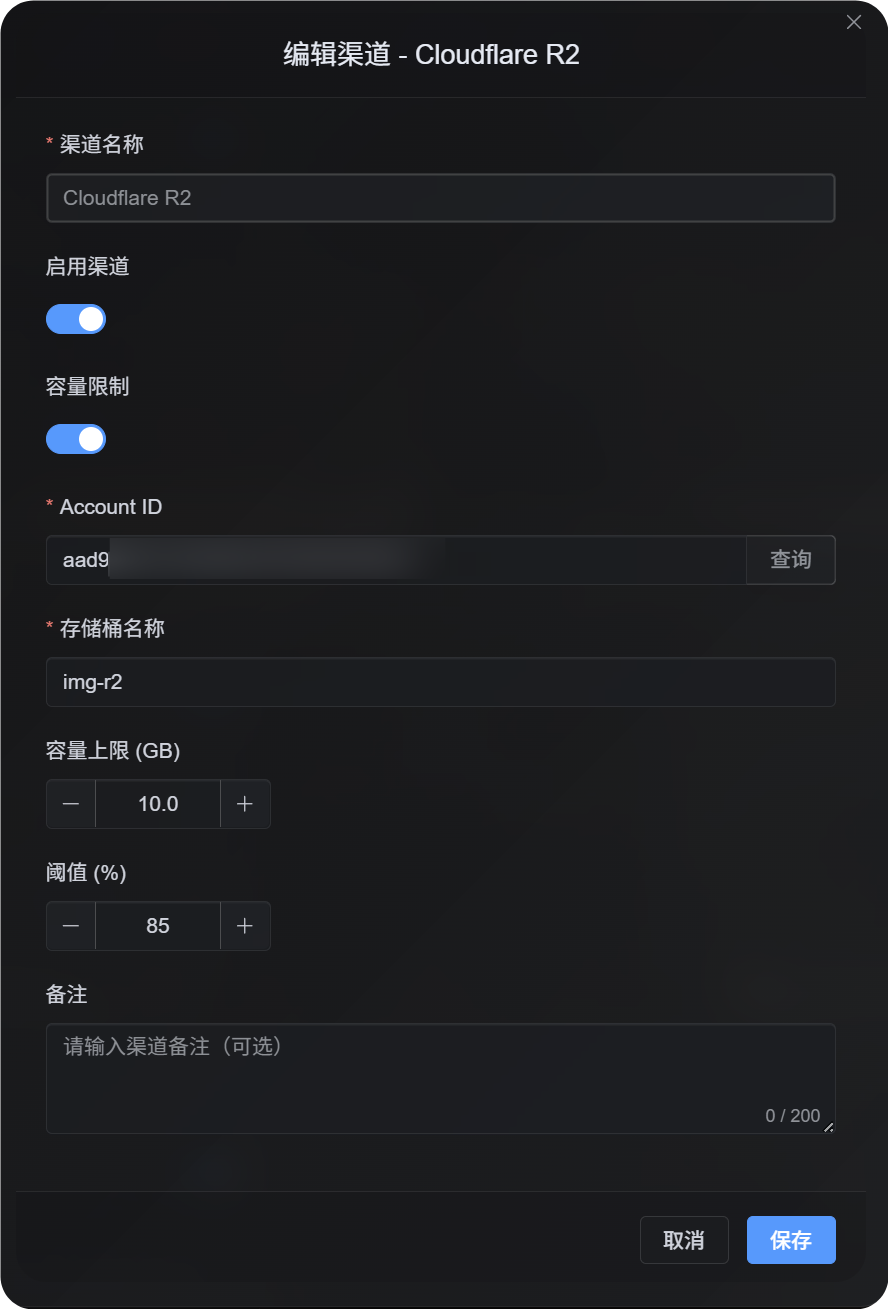
Cloudflare R2channel.
system په اتومات ډول یو fixed channel جوړوي:
| Field | Fixed Value |
|---|---|
| Channel name | Cloudflare R2 |
| Channel type | cfr2 |
| Storage mode | binding |
| Configuration source | Environment binding |
دا fixed binding channel دی. د جوړولو لپاره Add Channel ته اړتیا نشته، او د regular channel په څېر delete کېدای نه شي.
په Admin Panel کې Editable Fields
| Field | څه کوي | Required |
|---|---|---|
| Enable channel | کنټرولوي چې R2 په upload selection کې ګډون وکړي که نه. | Yes |
| Account ID | یوازې هغه وخت کارېږي چې quota limits enabled وي او official R2 usage query پکار وي. | Recommended when quota limits are enabled |
| Bucket name | یوازې هغه وخت کارېږي چې quota limits enabled وي او official R2 usage query پکار وي. | Recommended when quota limits are enabled |
| Quota limit | کنټرولوي چې دا R2 channel د capacity له مخې په upload selection کې ګډون وکړي که نه. | No |
| Threshold | کله چې usage ټاکلي percentage ته ورسېږي، په دې channel کې write بندوي. | Required when quota limits are enabled |
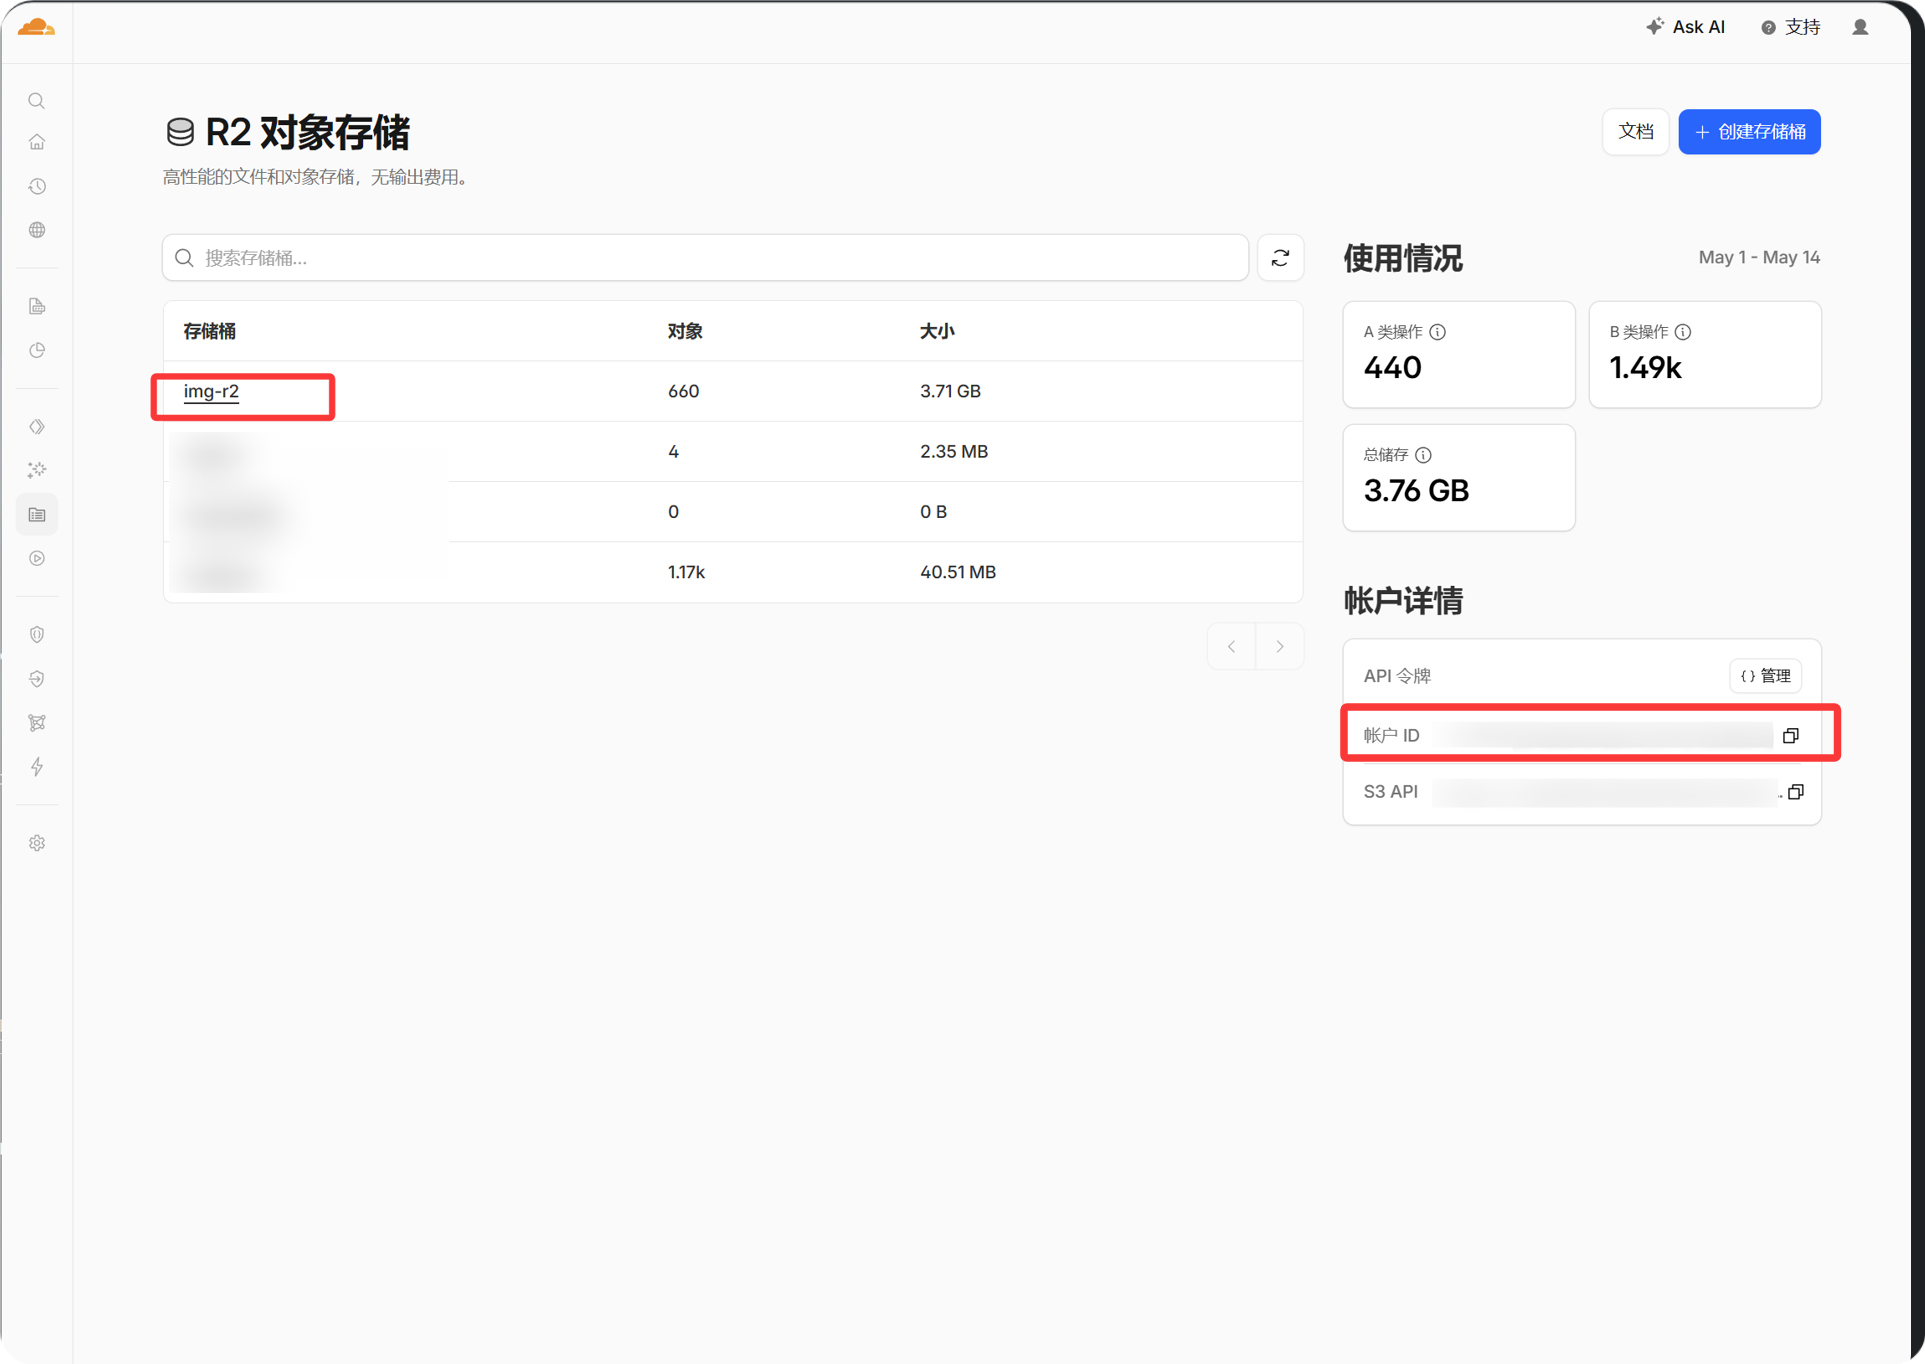
Account ID د Cloudflare dashboard د account information panel څخه copy کولی شئ. یوازې هغه وخت یې ډک کړئ چې غواړئ ImgBed R2 quota usage query او enforce کړي.
Setup Steps
- په Cloudflare کې R2 bucket جوړ کړئ.
- د ImgBed project لپاره Cloudflare settings پرانیزئ.
- R2 bucket binding اضافه کړئ.
Variable nameتهimg_r2ورکړئ.- هغه R2 bucket وټاکئ چې جوړ کړی مو دی.
- binding save کړئ او ImgBed redeploy کړئ.
- ImgBed -> System Settings -> Upload Settings ته بېرته ولاړ شئ.
- وګورئ چې
Cloudflare R2channel ښکاري او enabled دی.
که غواړئ R2 د capacity له مخې upload selection کې ګډون وکړي، quota limit enable کړئ، بیا Account ID، bucket name، quota limit او threshold ولیکئ او save یې کړئ.
څنګه یې Verify کړو
- fixed
Cloudflare R2channel په Upload Settings کې ښکاري. - channel card ښيي چې enabled دی.
- یو کوچنی test file upload شي او returned link عادي پرانستل شي.
- که د file پرانیستلو پر وخت
R2 database binding is not configuredراشي، runtime تهimg_r2binding نه دی رسېدلی. په Cloudflare کې binding name وګورئ او project redeploy کړئ.