د Google Drive Channel اضافه کول
مخکې څه ته اړتیا لرئ
له پیل مخکې دا شیان برابر کړئ:
| اړتیا | ولې ورته اړتیا ده |
|---|---|
| Google account | Google Cloud ته د لاسرسي او Google Drive د authorize کولو لپاره |
| Google Cloud project | د Drive API فعالولو او OAuth credentials جوړولو لپاره |
| OAuth 2.0 client | ImgBed یې د Client ID، Client Secret او Refresh Token اخیستلو لپاره کاروي |
| ستاسو ImgBed domain | د OAuth redirect URI لپاره کارېږي. دا باید له هغه domain سره برابر وي چې تاسې یې رښتیا کاروئ. |
د تنظیم پړاوونه
1 ګام: Google Drive API فعال کړئ
- Google Cloud Console پرانیزئ.
- نوی project جوړ کړئ یا موجود project وټاکئ.
APIs & Servicesته لاړ شئ.Enable APIs and Servicesکلیک کړئ.Google Drive APIولټوئ.- پاڼه یې پرانیزئ او enable کلیک کړئ.
2 ګام: د OAuth Consent Screen تنظیم کړئ
- په Google Cloud کې
Google Auth Platformپرانیزئ. - د
Brandingبنسټیز معلومات بشپړ کړئ، لکه app name، support email او developer contact email. Audienceپرانیزئ.- د ډېرو self-hosted شخصي نصبونو لپاره
Externalمناسب دی. - که
Externalمو وټاکه، هغه Google account چې authorize کوئ دTest usersلاندې اضافه کړئ. Data Accessپرانیزئ.- د Google Drive اړین permissions اضافه کړئ.
3 ګام: OAuth 2.0 Client جوړ کړئ
- په
Google Auth PlatformکېClientsپرانیزئ. - نوی client جوړ کړئ.
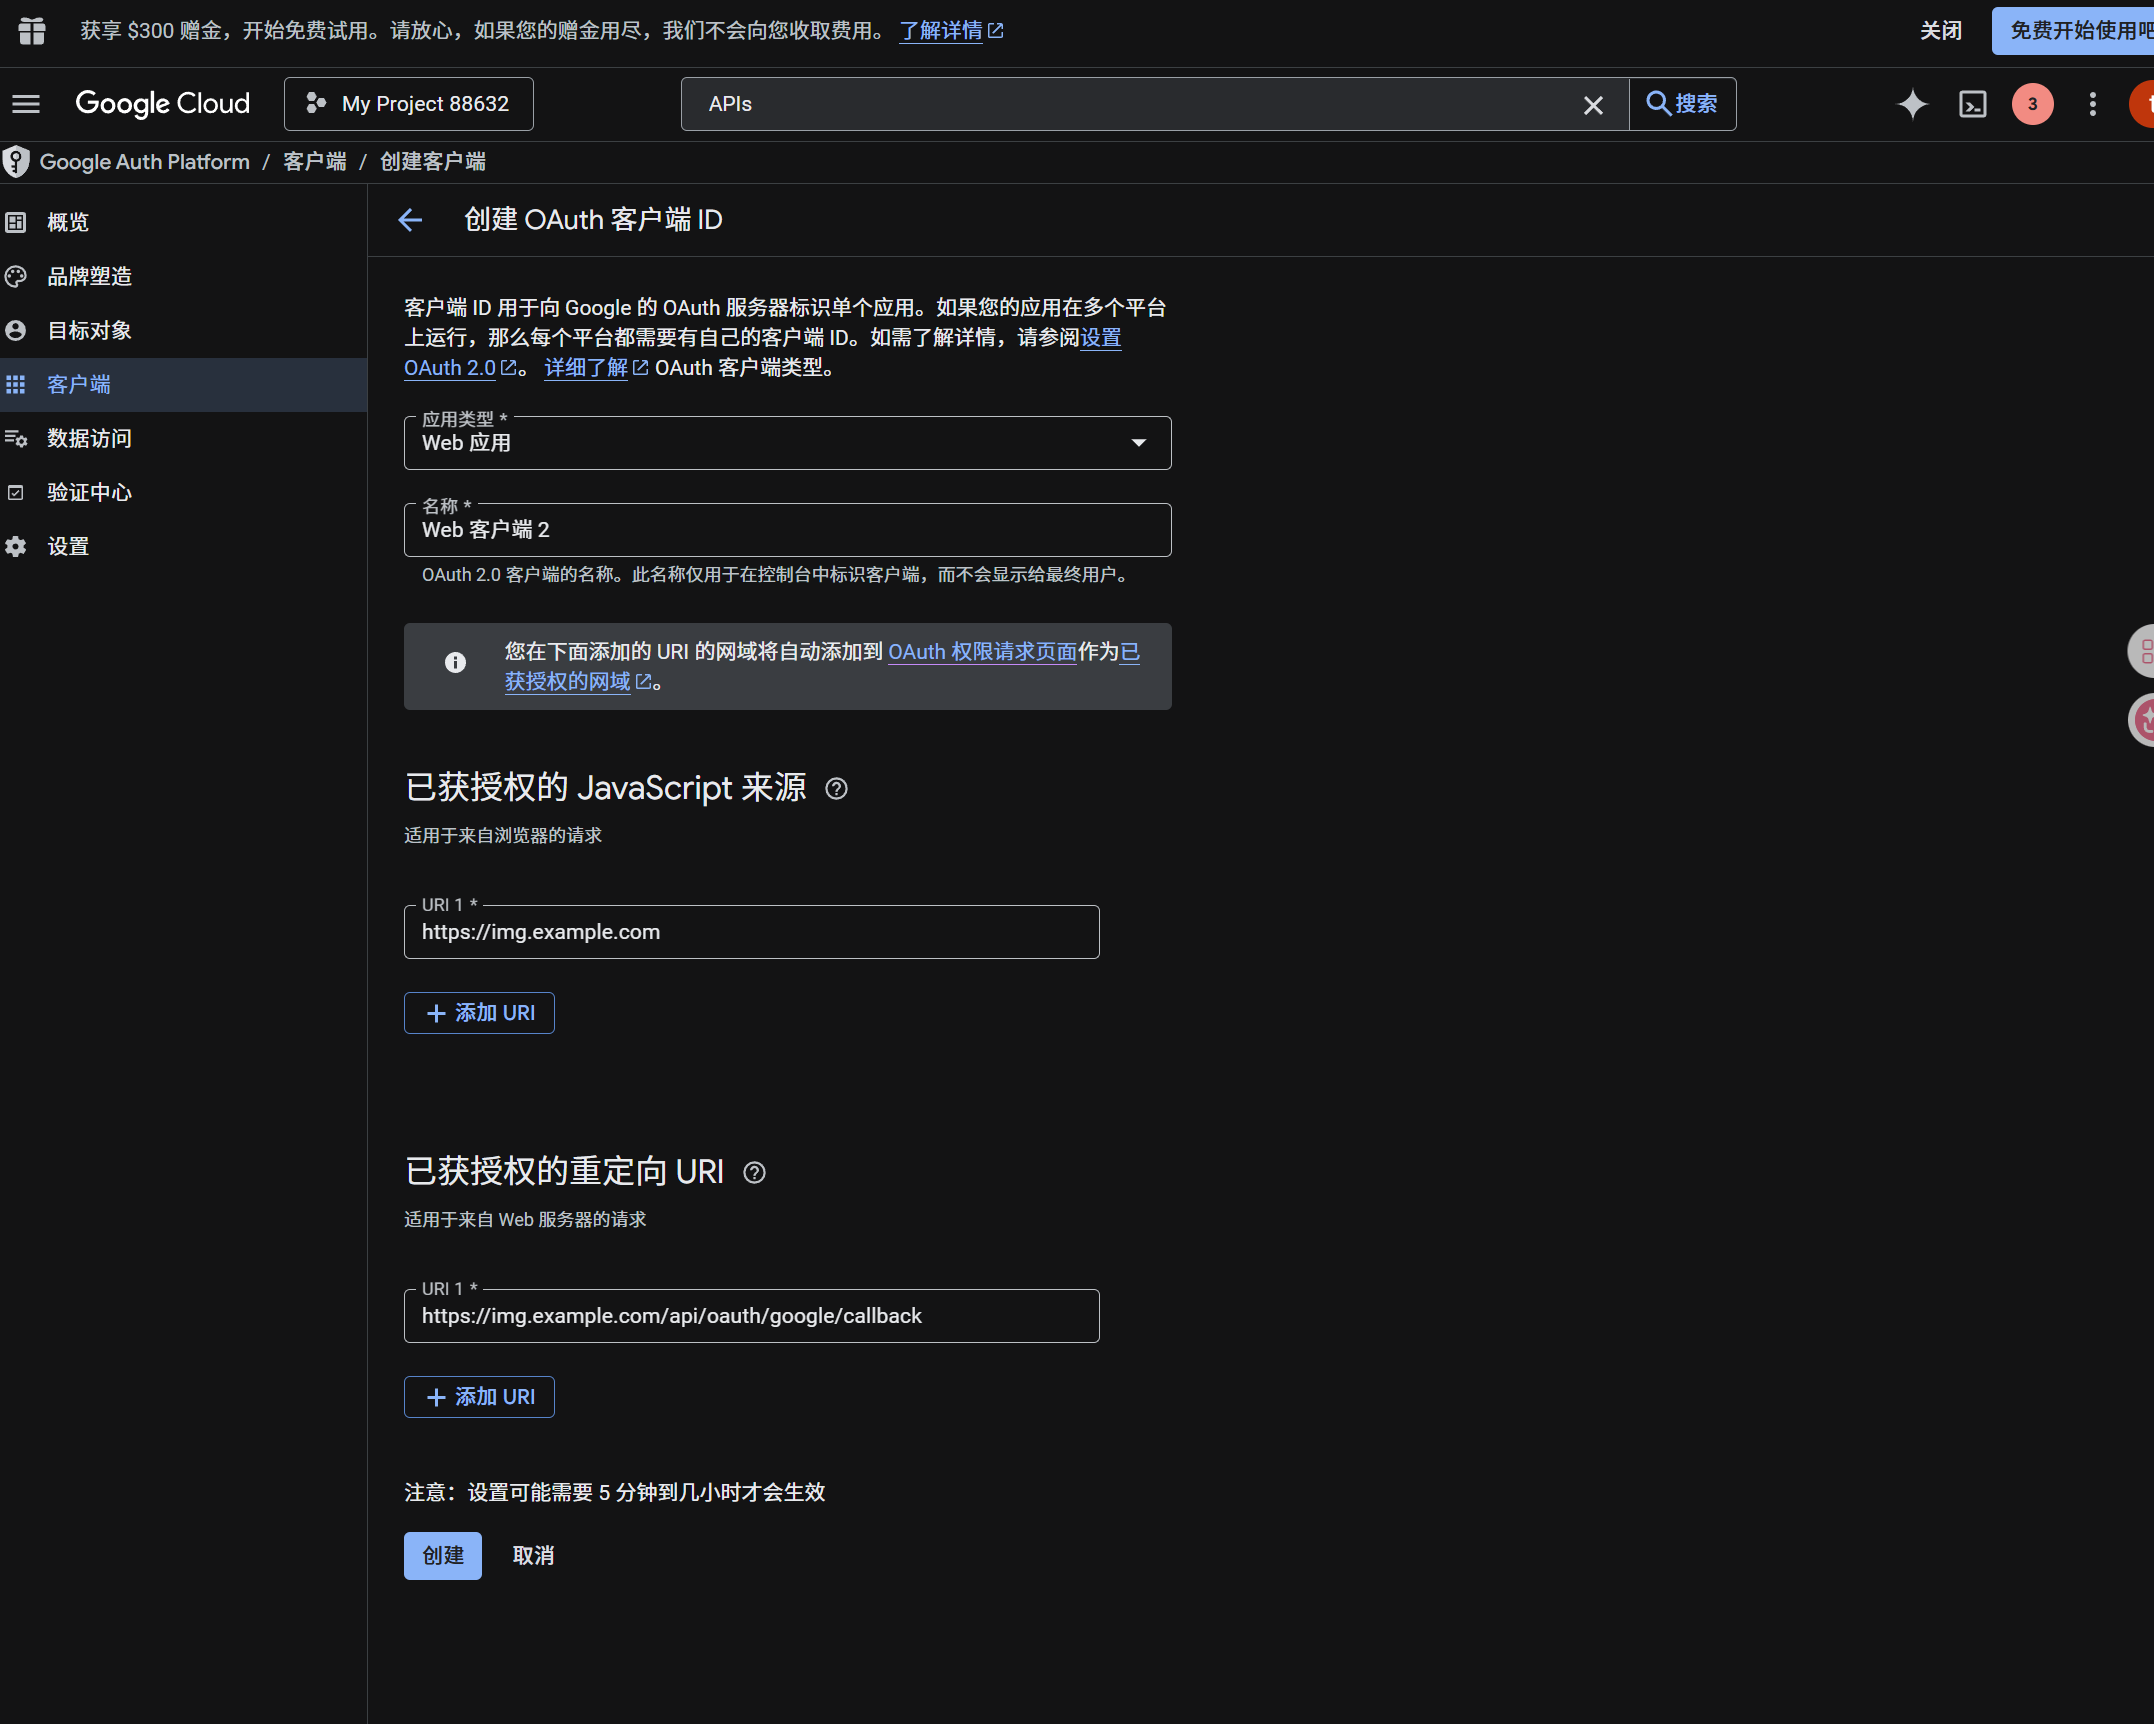
- د application type په توګه
Web applicationوټاکئ. - داسې نوم ورکړئ چې وروسته یې وپېژنئ.
- د authorized JavaScript origins لپاره خپل ImgBed URL ولیکئ، د بېلګې په توګه:
text
https://img.example.com- د authorized redirect URIs لپاره ولیکئ:
text
https://img.example.com/api/oauth/google/callback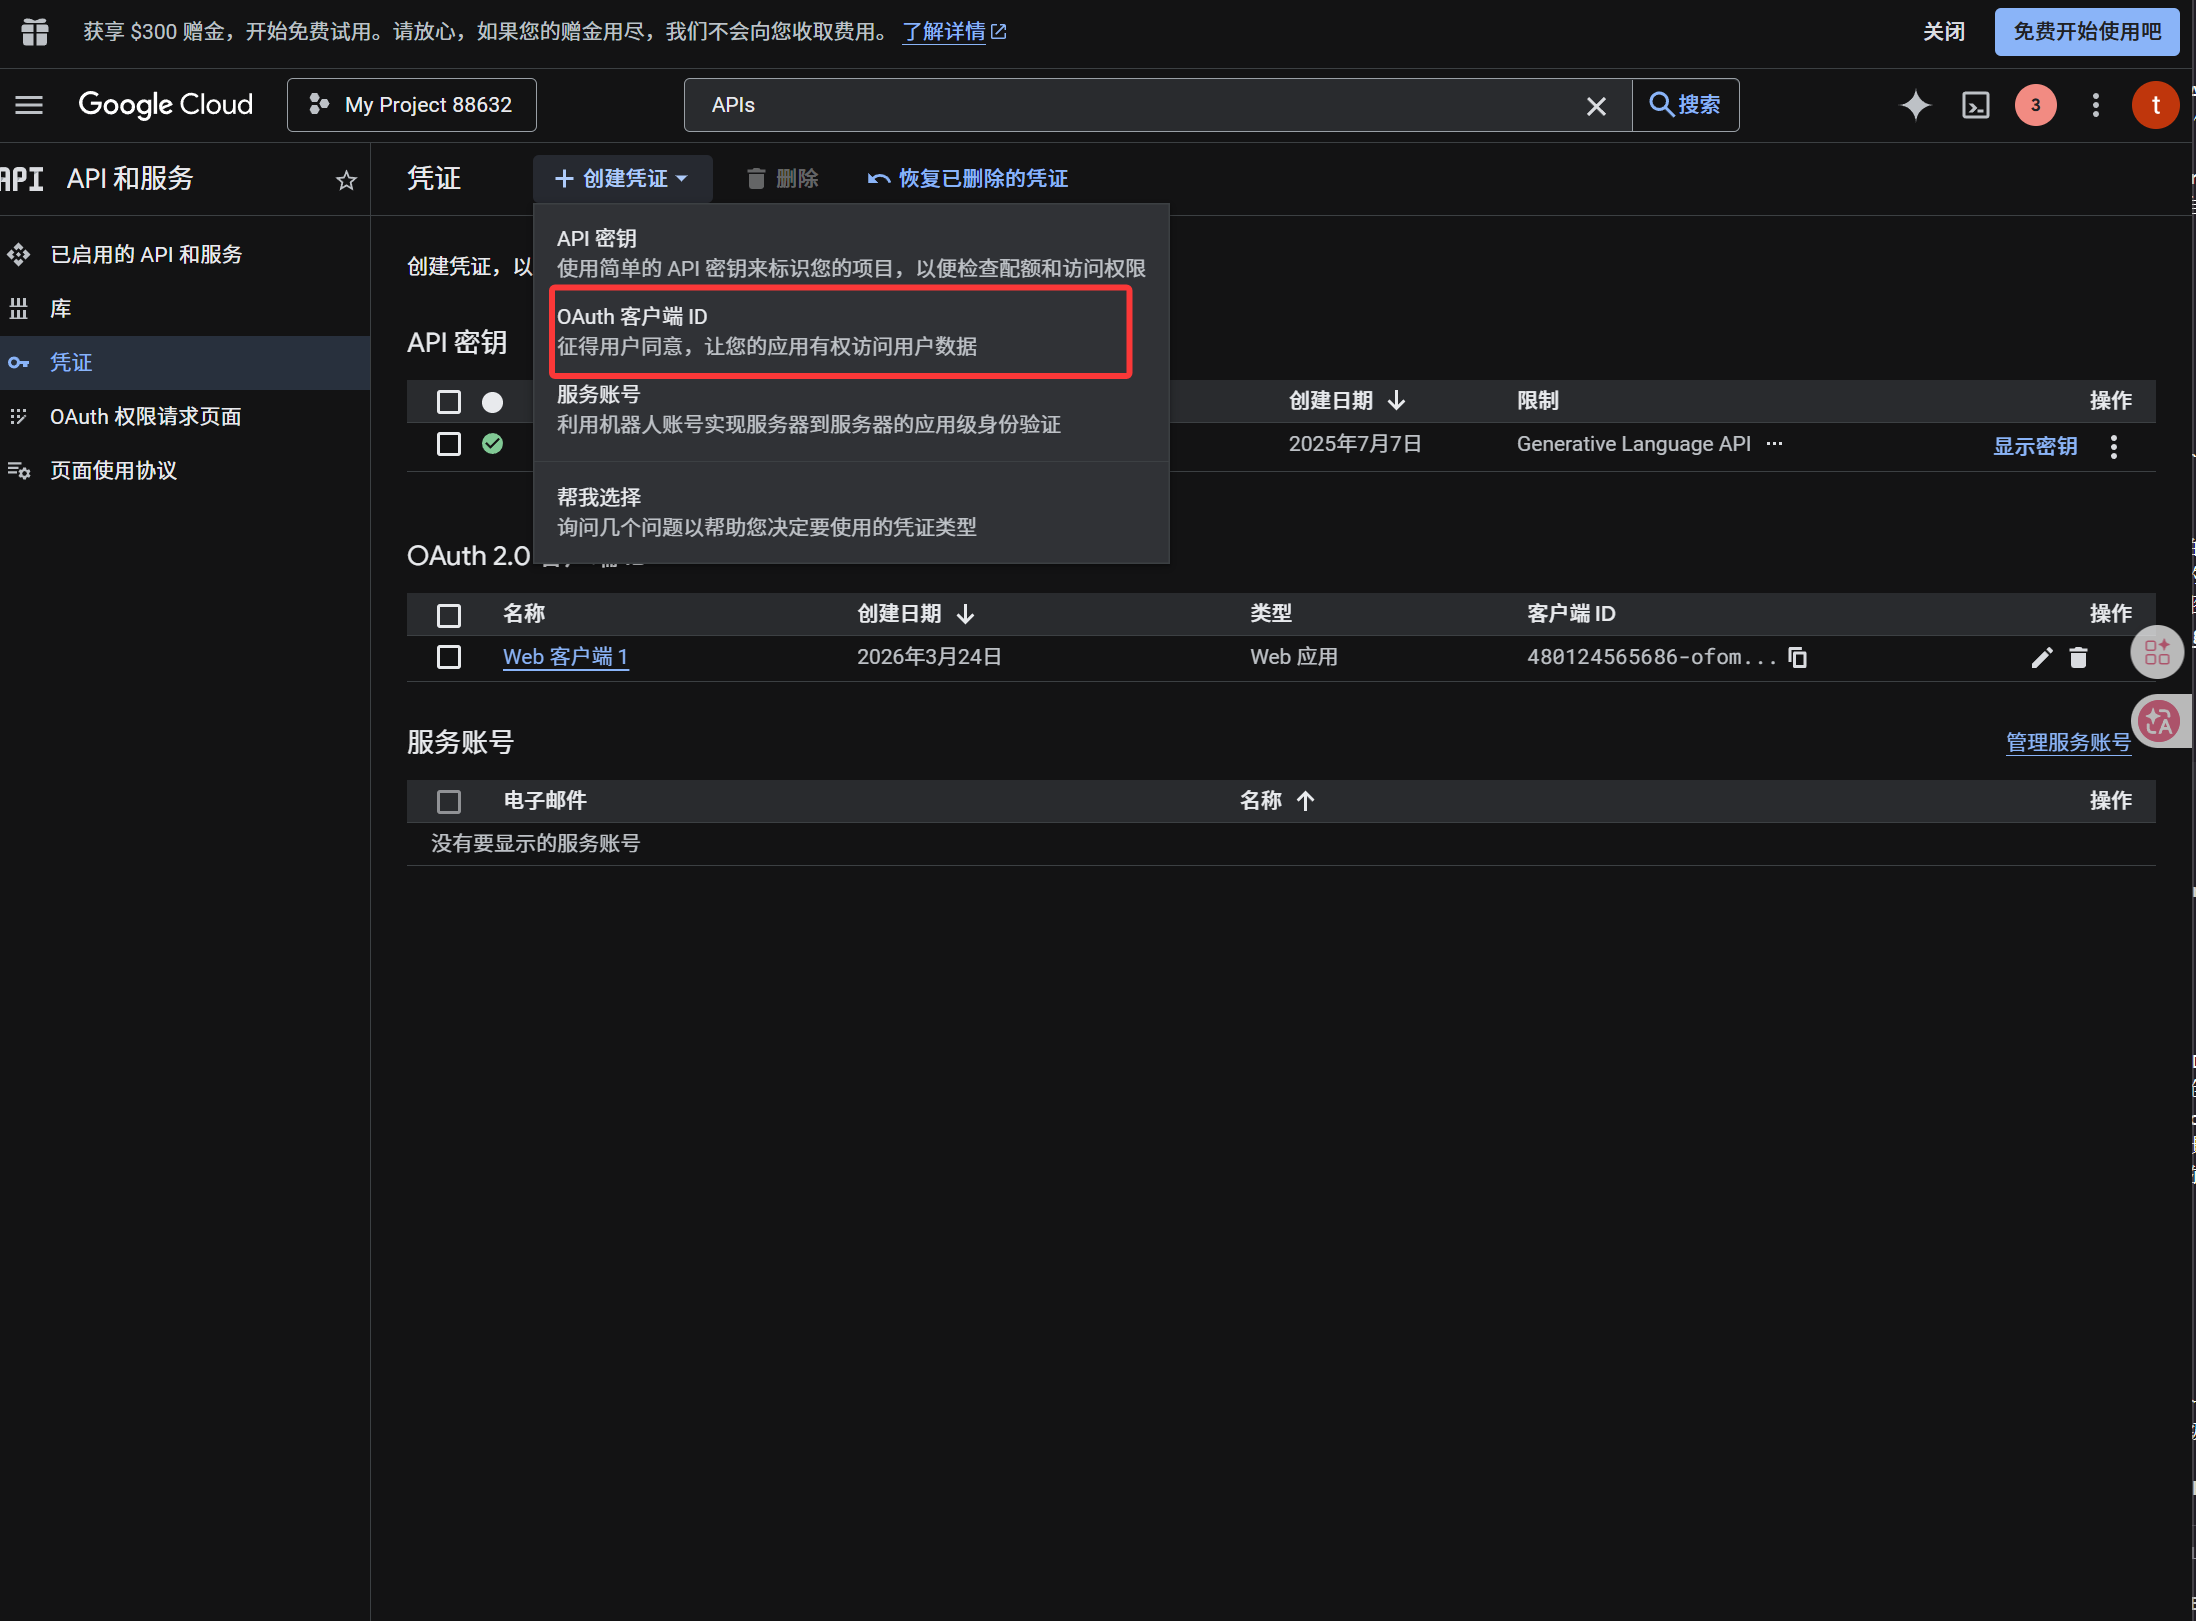
کله چې client جوړ شو، دا ارزښتونه copy کړئ:
| Generated Value | ImgBed Field |
|---|---|
| Client ID | Client ID |
| Client Secret | Client Secret |
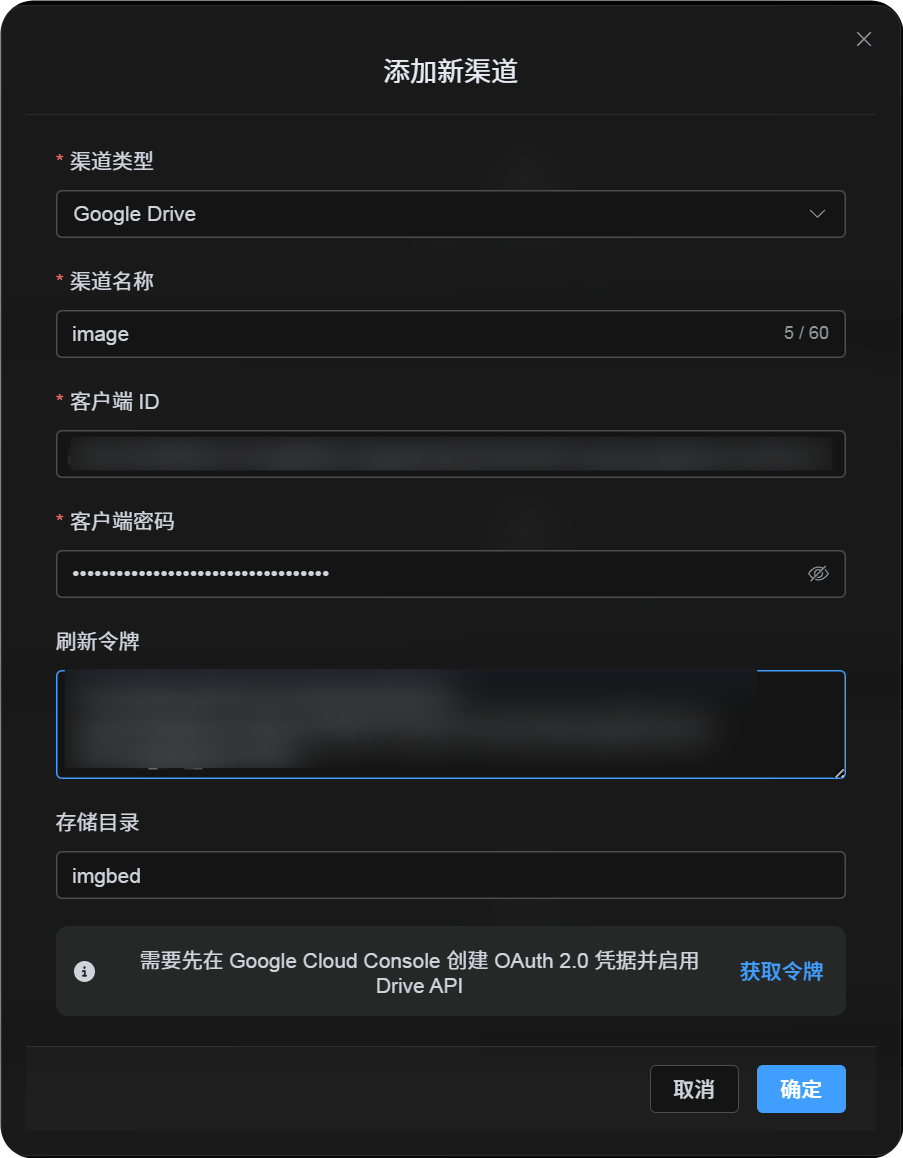
4 ګام: د Google Drive Channel ډک کړئ
په Upload Settings کې Google Drive وټاکئ او دا fields ډک کړئ:
| ImgBed Field | څه ولیکئ |
|---|---|
| Channel name | داسې نوم چې وپېژندل شي، لکه Main Google Drive |
| Client ID | له Google Cloud څخه اخیستل شوی Client ID |
| Client Secret | له Google Cloud څخه اخیستل شوی Client Secret |
| Refresh Token | اوس یې تش پرېږدئ. په بل ګام کې یې اخلئ. |
| Root directory | اختیاري. Default یې imgbed دی. |
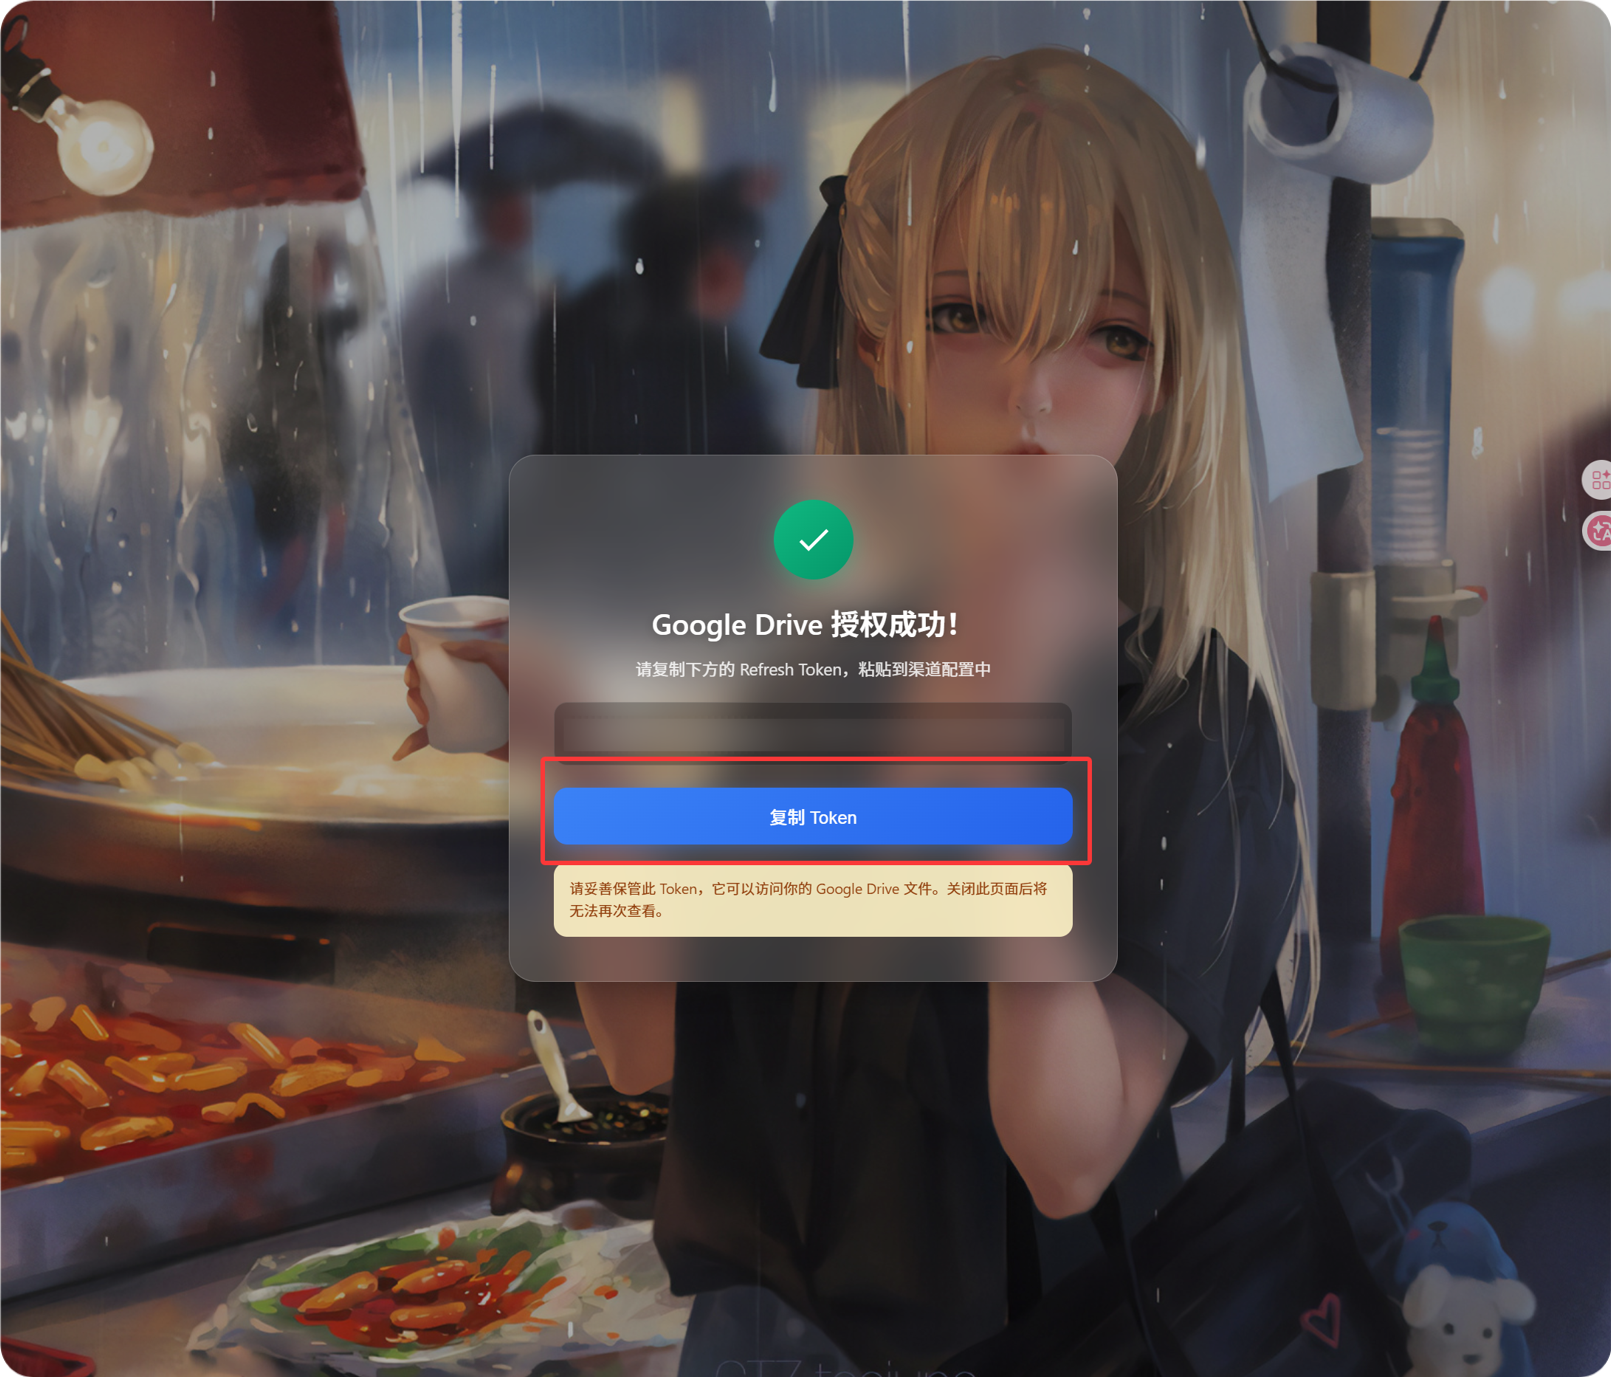
5 ګام: Refresh Token واخلئ
Get Tokenکلیک کړئ.- هغه Google account وټاکئ چې نښلول یې غواړئ.
- د authorization پیغامونه بشپړ کړئ.
- callback page به
Refresh Tokenښکاره کړي. - هغه copy کړئ.
- بېرته ImgBed ته راشئ او د
Refresh Tokenfield کې یې paste کړئ.
که وروسته Google account بدل کړئ، OAuth client بدل کړئ، یا پخوانی authorization expire شي، channel ړنګولو ته اړتیا نشته. د edit پاڼه پرانیزئ او Reauthorize کلیک کړئ.
6 ګام: Channel خوندي کړئ
کله چې ټول fields ډک شول، channel save کړئ.
چټک بهیر
text
Open Google Cloud
-> Create or select a project
-> Enable Google Drive API
-> Configure Google Auth Platform
-> If Audience is External, add your Google account to Test users
-> Create a Web application OAuth client
-> Use https://your-domain.com/api/oauth/google/callback as the redirect URI
-> Fill Client ID and Client Secret into ImgBed
-> Click Get Token
-> Sign in with Google and authorize
-> Copy the Refresh Token from the callback page
-> Paste it back into ImgBed and save
-> Upload a test image
ماخذونه
- Google OAuth Web Server Applications: https://developers.google.com/identity/protocols/oauth2/web-server
- Google Workspace OAuth Consent Configuration: https://developers.google.com/workspace/guides/configure-oauth-consent
- Google Drive API Auth Scopes: https://developers.google.com/workspace/drive/api/guides/api-specific-auth