Google Drive Channel சேர்க்கவும்
முதலில் தேவையானவை
| தேவை | ஏன் தேவை |
|---|---|
| Google account | Google Cloud அணுகவும் Google Drive authorize செய்யவும் |
| Google Cloud project | Drive API enable செய்து OAuth credentials உருவாக்க |
| OAuth 2.0 client | ImgBed Client ID, Client Secret, Refresh Token பெற |
| உங்கள் ImgBed domain | OAuth redirect URI-க்கு. நீங்கள் பயன்படுத்தும் domain-க்கு சரியாக match ஆக வேண்டும். |
Setup Steps
Step 1: Google Drive API Enable செய்யவும்
- Google Cloud Console திறக்கவும்.
- புதிய project உருவாக்கவும் அல்லது existing project தேர்வு செய்யவும்.
APIs & Servicesசெல்லவும்.Enable APIs and Servicesகிளிக் செய்யவும்.Google Drive APIதேடவும்.- அதைத் திறந்து enable கிளிக் செய்யவும்.
Step 2: OAuth Consent Screen Configure செய்யவும்
- Google Cloud-ல்
Google Auth Platformதிறக்கவும். - app name, support email, developer contact email போன்ற basic
Brandingதகவலை முடிக்கவும். Audienceதிறக்கவும்.- பெரும்பாலான self-hosted personal deployments-க்கு
Externalதேர்வு செய்யவும். Externalதேர்வு செய்தால் authorize செய்ய வேண்டிய Google account-ஐTest users-ல் சேர்க்கவும்.Data Accessதிறக்கவும்.- தேவையான Google Drive permissions சேர்க்கவும்.
Step 3: OAuth 2.0 Client உருவாக்கவும்
Google Auth Platform-ல்Clientsதிறக்கவும்.- புதிய client உருவாக்கவும்.
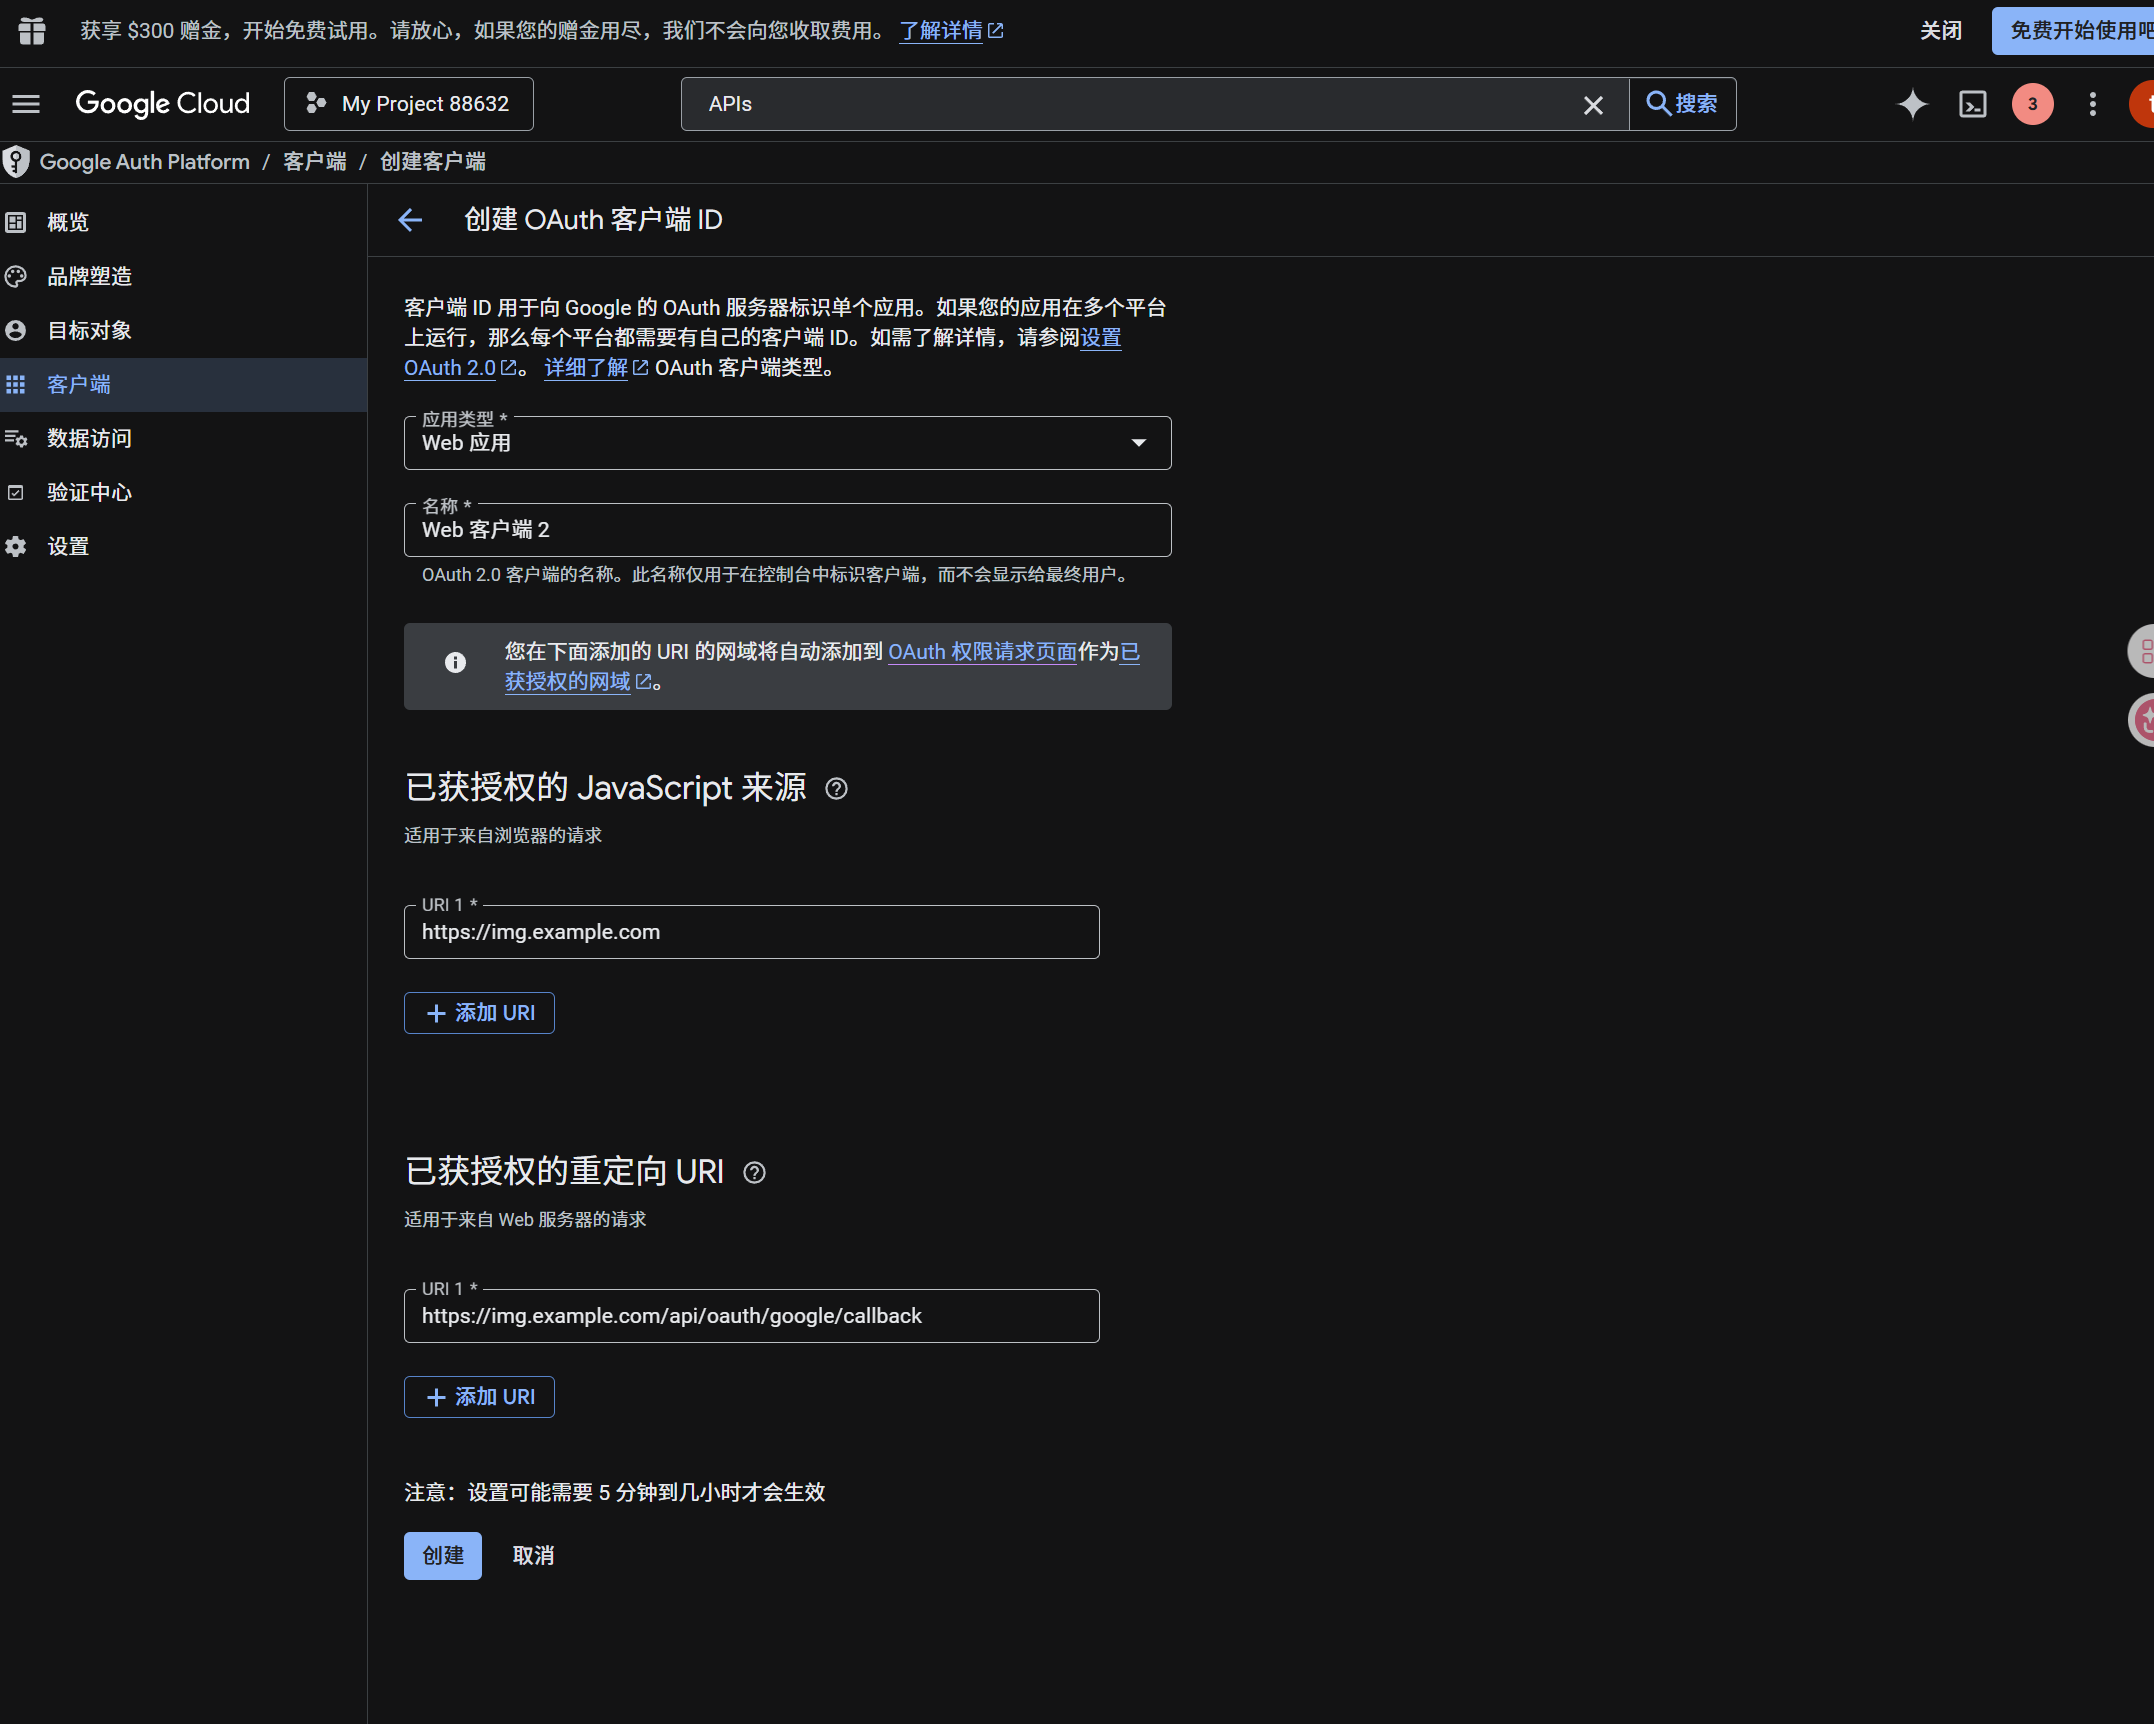
- application type-ஐ
Web applicationஆக அமைக்கவும். - அறியக்கூடிய client name கொடுக்கவும்.
- authorized JavaScript origins-ல் உங்கள் ImgBed URL கொடுக்கவும், உதா:
text
https://img.example.com- authorized redirect URIs-ல்:
text
https://img.example.com/api/oauth/google/callback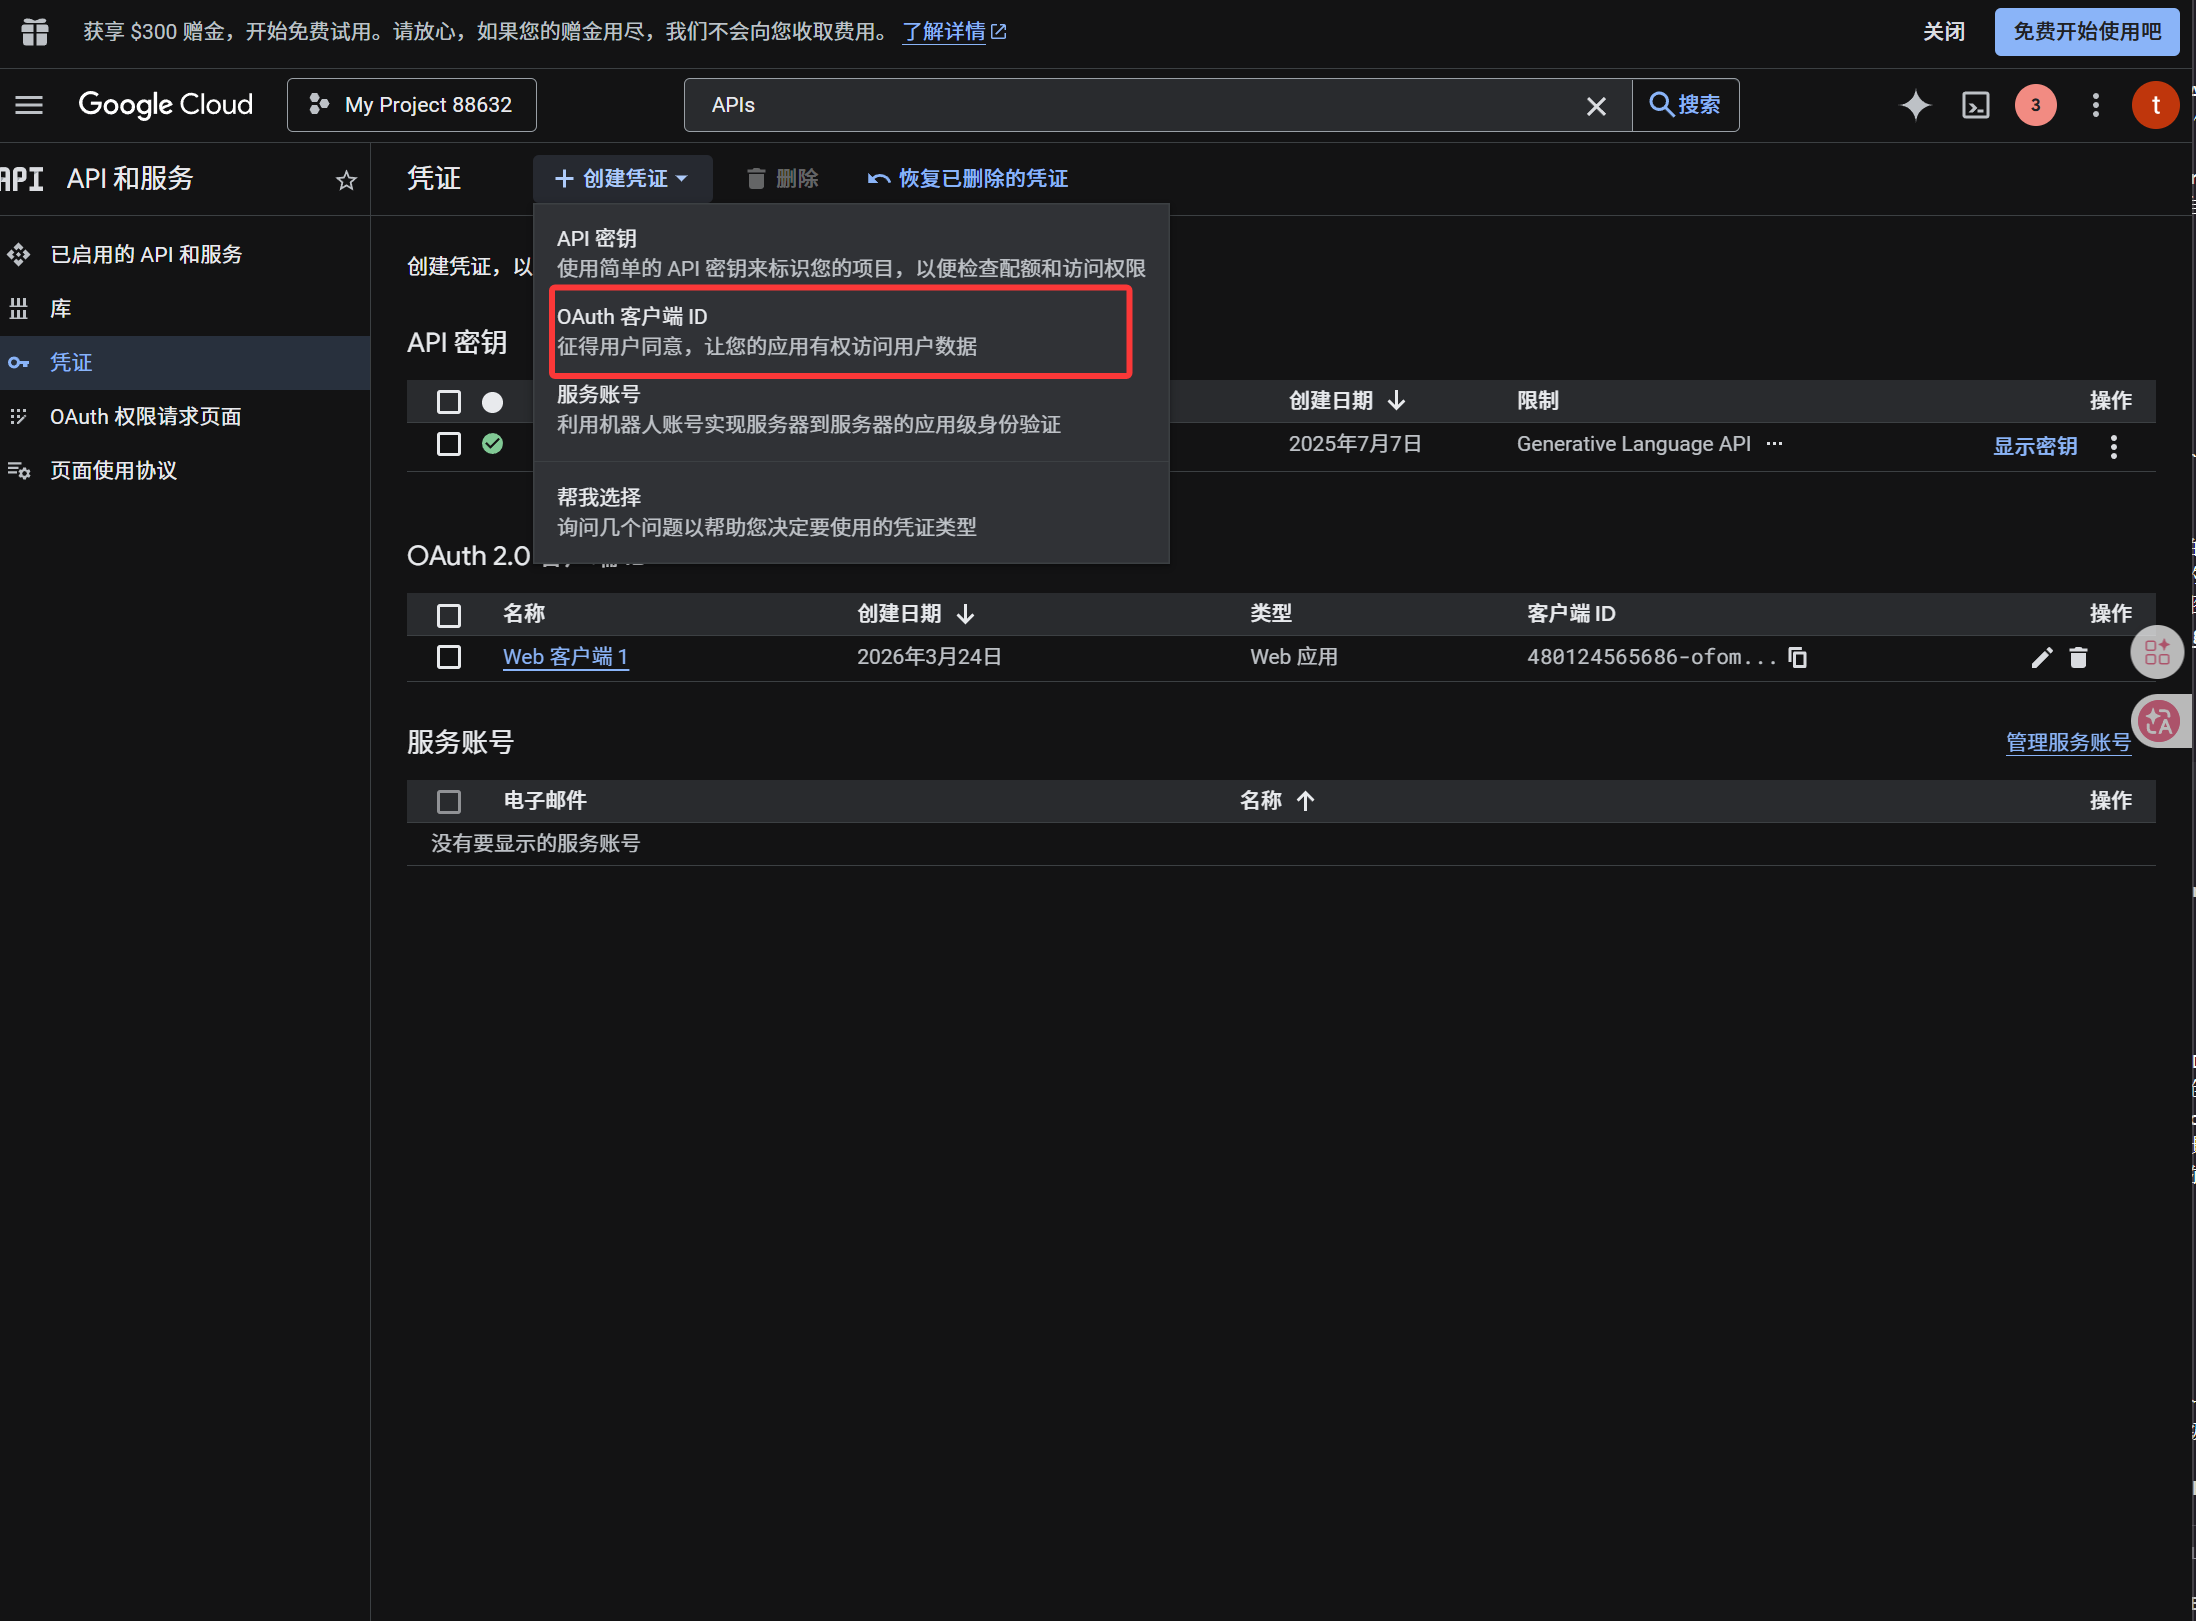
client உருவான பிறகு:
| Generated Value | ImgBed Field |
|---|---|
| Client ID | Client ID |
| Client Secret | Client Secret |
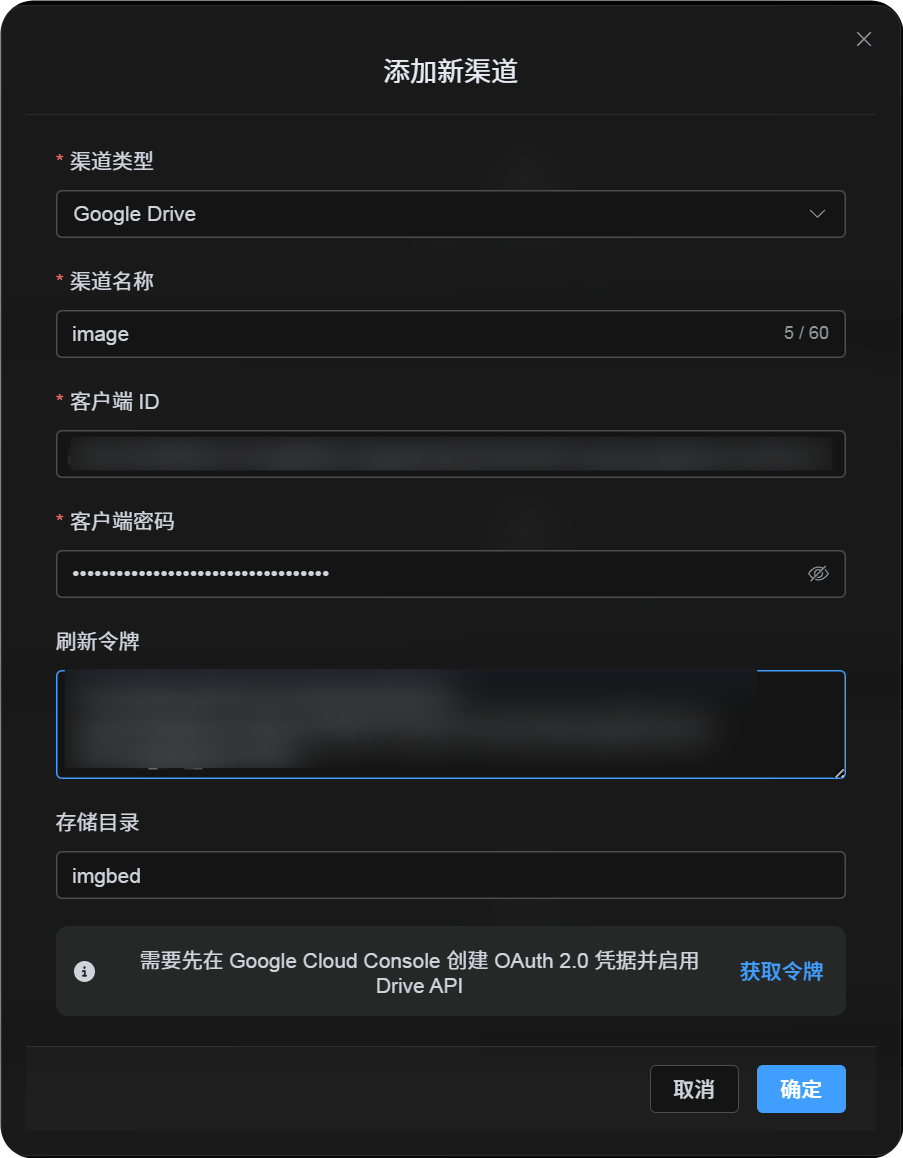
Step 4: ImgBed-ல் Google Drive Channel நிரப்பவும்
Upload Settings-ல் Google Drive தேர்வு செய்து:
| ImgBed Field | What To Enter |
|---|---|
| Channel name | அறியக்கூடிய பெயர், உதா. Main Google Drive |
| Client ID | Google Cloud Client ID |
| Client Secret | Google Cloud Client Secret |
| Refresh Token | இப்போது காலியாக விடவும். அடுத்த step-ல் பெறவும். |
| Root directory | Optional. default imgbed. |
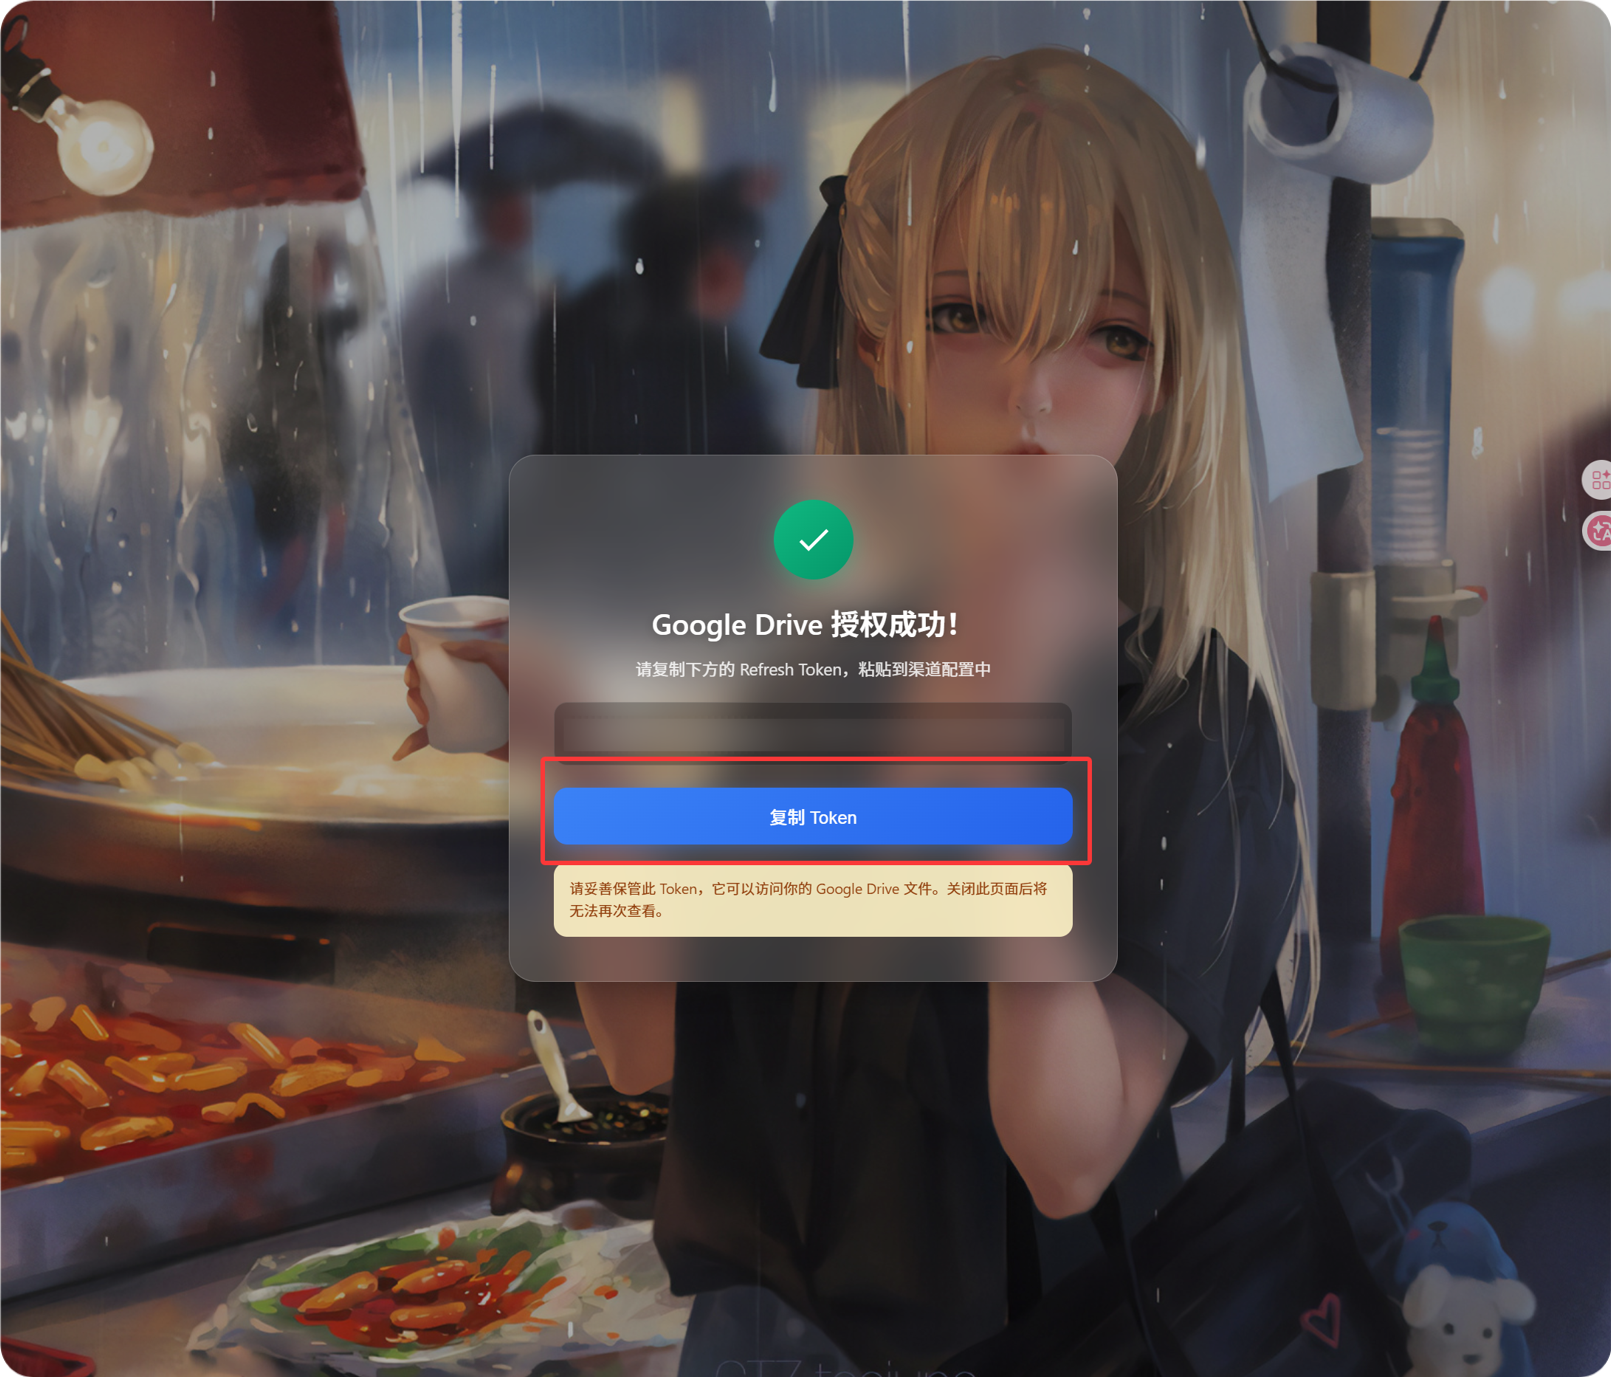
Step 5: Refresh Token பெறவும்
Get Tokenகிளிக் செய்யவும்.- connect செய்ய வேண்டிய Google account தேர்வு செய்யவும்.
- authorization prompts முடிக்கவும்.
- callback page
Refresh Tokenகாட்டும். - அதை copy செய்யவும்.
- ImgBed-க்கு திரும்பி
Refresh Tokenfield-ல் paste செய்யவும்.
பின்னர் Google account மாற்றினாலும், OAuth client மாற்றினாலும், பழைய authorization expire ஆனாலும் channel delete செய்ய வேண்டியதில்லை. edit page திறந்து Reauthorize கிளிக் செய்யவும்.
Step 6: Channel Save செய்யவும்
அனைத்து fields நிரப்பிய பிறகு channel save செய்யவும்.
Quick Flow
text
Google Cloud திறக்கவும்
-> project உருவாக்கவும் அல்லது தேர்வு செய்யவும்
-> Google Drive API enable செய்யவும்
-> Google Auth Platform configure செய்யவும்
-> Audience External என்றால் Google account-ஐ Test users-ல் சேர்க்கவும்
-> Web application OAuth client உருவாக்கவும்
-> redirect URI ஆக https://your-domain.com/api/oauth/google/callback பயன்படுத்தவும்
-> Client ID மற்றும் Client Secret ImgBed-ல் நிரப்பவும்
-> Get Token கிளிக் செய்யவும்
-> Google-ல் sign in செய்து authorize செய்யவும்
-> callback page-ல் இருந்து Refresh Token copy செய்யவும்
-> ImgBed-ல் paste செய்து save செய்யவும்
-> test image upload செய்யவும்
References
- Google OAuth Web Server Applications: https://developers.google.com/identity/protocols/oauth2/web-server
- Google Workspace OAuth Consent Configuration: https://developers.google.com/workspace/guides/configure-oauth-consent
- Google Drive API Auth Scopes: https://developers.google.com/workspace/drive/api/guides/api-specific-auth