Telegram Channel சேர்க்கவும்
தொடங்குவதற்கு முன் தேவையானவை
| தேவை | பயன்பாடு |
|---|---|
| Telegram account | bot மற்றும் storage channel உருவாக்க |
@BotFather | Telegram bot உருவாக்க |
| Telegram channel | files சேமிக்கப்படும் இறுதி இடம் |
@userinfobot | channel Chat ID அறிய |
எங்கு சேர்ப்பது
- System Settings திறக்கவும்.
- Upload Settings-க்கு செல்லவும்.
- மேல் வலது மூலையில் Add Channel கிளிக் செய்யவும்.
Telegramதேர்வு செய்யவும்.
Field Reference
| Field | பயன்பாடு | Required |
|---|---|---|
| Channel name | இந்த channel-க்கு எளிதாக அறியக்கூடிய பெயர், உதா. Telegram Primary. | Required |
| Active | channel-ஐ enable அல்லது disable செய்கிறது. | Recommended |
| Bot Token | Telegram bot token. | Required |
| Session ID (Chat ID) | Telegram channel ID. | Required |
| Relay Proxy URL (optional) | Telegram access நிலையாக இல்லாதபோது மட்டும் பயன்படுத்தவும். https:// உடன் முழு proxy URL கொடுக்கவும். | Optional |
| Remark | பின்னர் maintenance-க்கு குறிப்புகள். | Optional |
Setup Steps
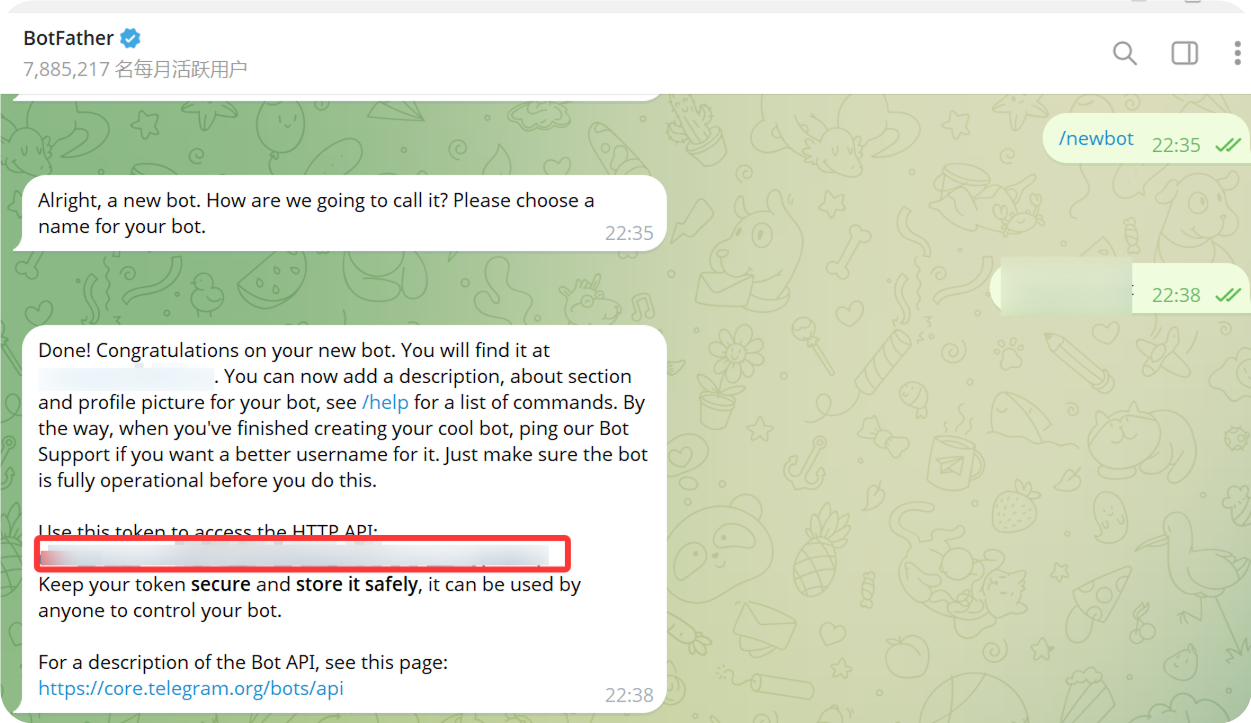
1. Telegram Bot உருவாக்கவும்
- Telegram திறந்து
@BotFatherதேடவும். - chat திறந்து
Startகிளிக் செய்யவும். /newbotஅனுப்பவும்.- bot display name கேட்கும்போது உள்ளிடவும்.
- bot username உள்ளிடவும். பொதுவாக username
botஎன முடிவது வேண்டும். - bot உருவானதும்
@BotFatherbot token தரும்.
அந்த token-ஐ ImgBed-ல் Bot Token ஆக நிரப்ப வேண்டும்.
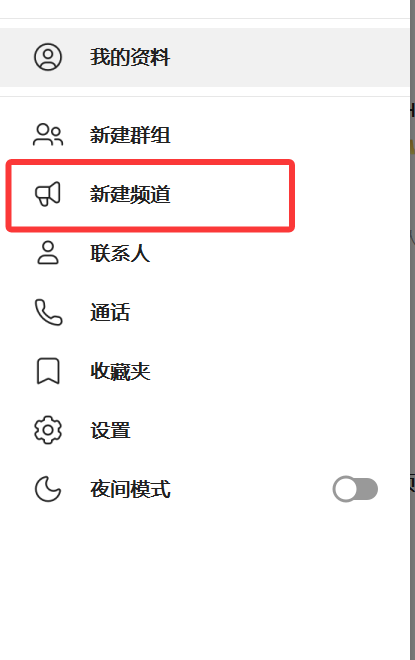
2. Channel உருவாக்கவும்
- Telegram-ல் New Channel கிளிக் செய்யவும்.
- channel name உள்ளிடவும்.
- channel creation முடிக்கவும்.
Public மற்றும் private channels இரண்டும் பயன்படுத்தலாம்.
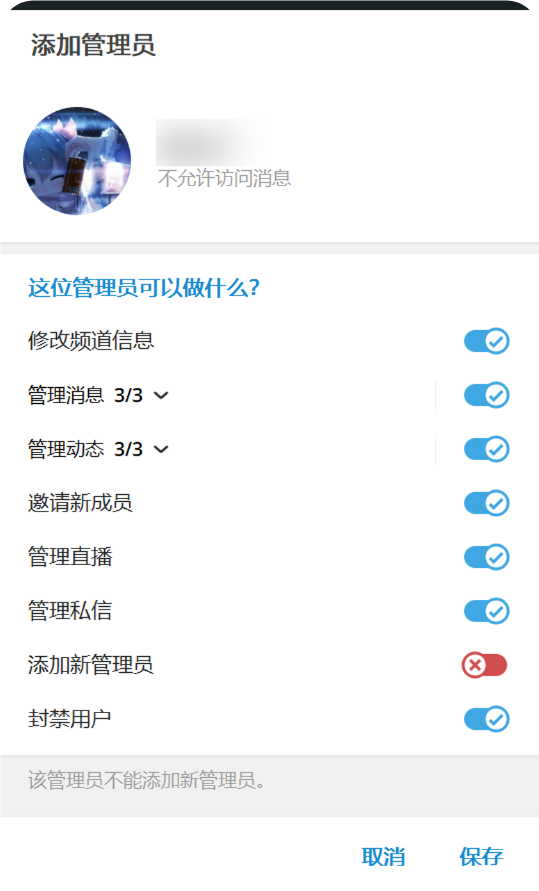
3. Bot-ஐ Channel-ல் சேர்க்கவும்
- உருவாக்கிய channel திறக்கவும்.
- channel settings திறக்கவும்.
- member அல்லது administrator சேர்க்கும் இடத்தைத் திறக்கவும்.
- உருவாக்கிய bot username தேடவும்.
- bot-ஐ channel-ல் சேர்க்கவும்.
upload நம்பகமாக இயங்க bot-க்கு administrator permissions கொடுப்பது நல்லது.
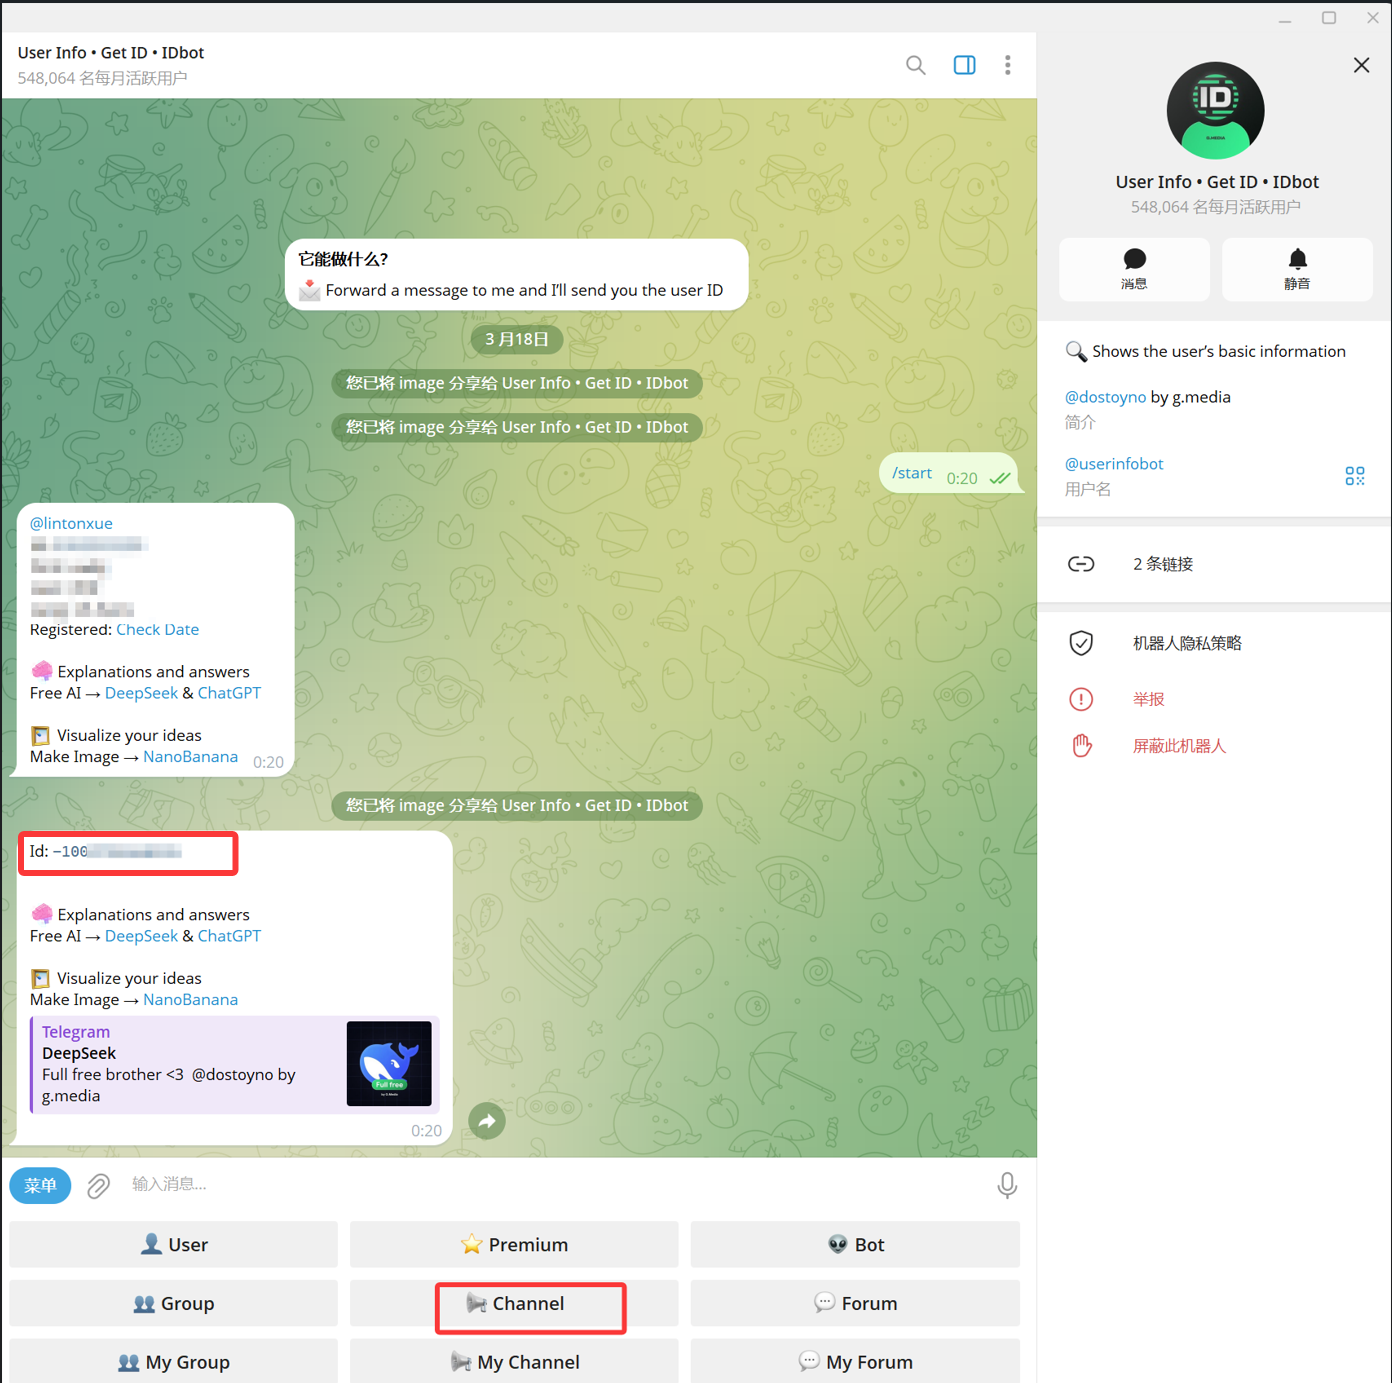
4. Channel ID பெறவும்
- Telegram-ல்
@userinfobotதேடவும். display name பொதுவாகUser Info - Get ID - IDbot. - chat திறந்து
Startகிளிக் செய்யவும். - bot options-ல்
Channelதேர்வு செய்யவும். - message picker-ல் target channel தேர்வு செய்து
@userinfobot-க்கு அனுப்பவும். - result வந்ததும்
Id: -100...என தொடங்கும் number-ஐ copy செய்யவும்.
-100 என தொடங்கும் number தான் ImgBed-க்கு தேவையான Session ID (Chat ID).
5. ImgBed-ல் Telegram Channel நிரப்பவும்
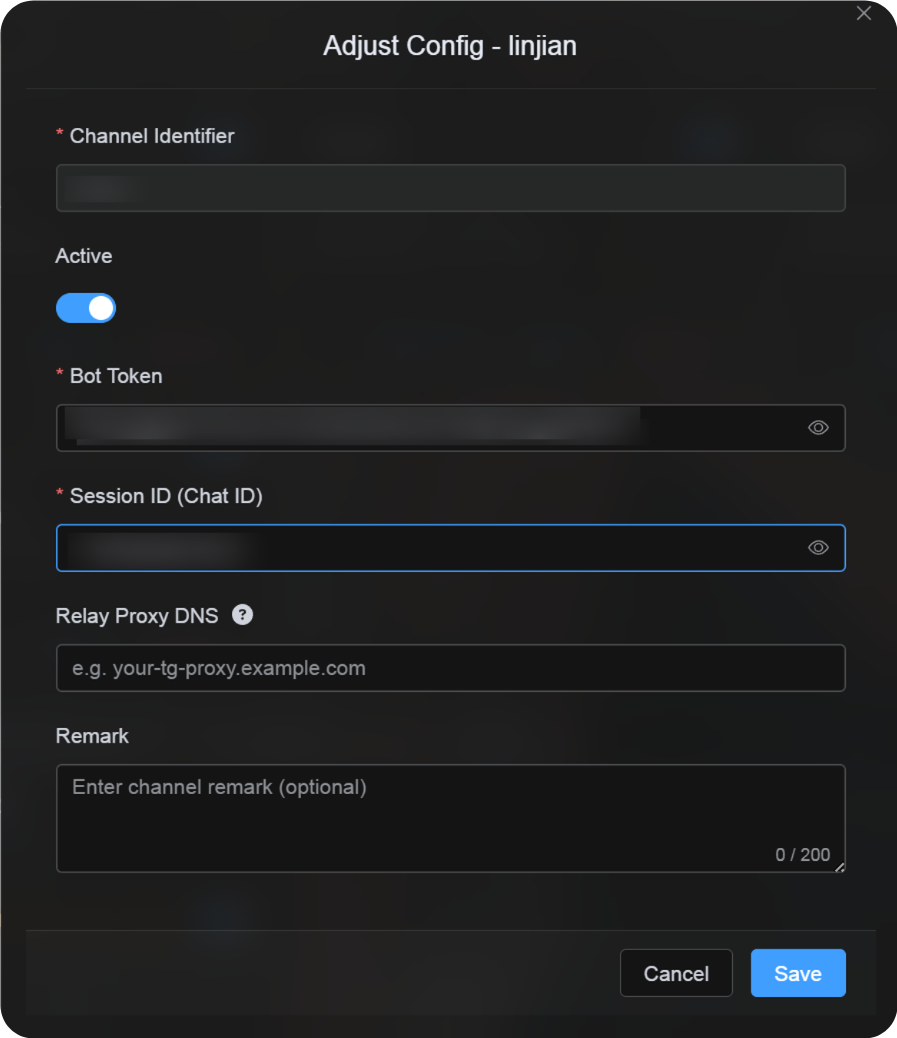
configuration dialog-க்கு திரும்பி fields-ஐ இவ்வாறு நிரப்பவும்:
| UI Field | Value |
|---|---|
| Channel Identifier | custom channel name, உதா. TelegramPrimary. |
| Active | Recommended. |
| Bot Token | @BotFather கொடுத்த bot token. |
| Session ID (Chat ID) | @userinfobot கொடுத்த -100... number. |
| Relay Proxy URL (optional) | தேவைப்பட்டால் மட்டும், உதா. https://your-tg-proxy.example.com. |
| Remark | optional notes. |
முடிந்ததும் Save கிளிக் செய்யவும்.
எப்படி Verify செய்வது
| Check | சரிபார்ப்பு |
|---|---|
| Channel card appears | Save செய்த பிறகு Upload Settings-ல் Telegram channel card காணப்பட வேண்டும். |
| Channel can be enabled | Active switch on ஆகவே இருக்க வேண்டும். |
| Configuration is saved | detail view-ல் Bot Token மற்றும் Chat ID saved என காண வேண்டும். |
| Upload works | test image upload செய்து target Telegram channel-ல் வந்ததா பார்க்கவும். |
Quick Checklist
text
@BotFather மூலம் bot உருவாக்கவும்
-> Bot Token சேமிக்கவும்
-> Telegram channel உருவாக்கவும்
-> bot-ஐ channel-ல் சேர்த்து administrator permissions கொடுக்கவும்
-> @userinfobot தேடி Channel தேர்வு செய்யவும்
-> channel message ஒன்றை @userinfobot-க்கு forward செய்யவும்
-> திரும்ப வரும் Id: -100... copy செய்யவும்
-> ImgBed-ல் Bot Token மற்றும் Chat ID நிரப்பவும்
-> Save செய்து test image upload செய்யவும்
References
- Telegram bots: https://core.telegram.org/bots
- Telegram Bot API: https://core.telegram.org/bots/api