Tambah Google Drive Channel
Perkara Yang Perlu Disediakan Dahulu
Sebelum bermula, sediakan item ini:
| Requirement | Mengapa Diperlukan |
|---|---|
| Google account | Digunakan untuk akses Google Cloud dan authorize Google Drive |
| Google Cloud project | Digunakan untuk enable Drive API dan cipta OAuth credentials |
| OAuth 2.0 client | Digunakan oleh ImgBed untuk mendapatkan Client ID, Client Secret dan Refresh Token |
| ImgBed domain anda | Digunakan untuk OAuth redirect URI. Ia mesti sepadan dengan domain sebenar yang anda gunakan. |
Langkah Setup
Step 1: Enable Google Drive API
- Buka Google Cloud Console.
- Cipta project baharu atau pilih project sedia ada.
- Pergi ke
APIs & Services. - Klik
Enable APIs and Services. - Cari
Google Drive API. - Buka dan klik enable.
Step 2: Configure OAuth Consent Screen
- Dalam Google Cloud, buka
Google Auth Platform. - Lengkapkan maklumat asas
Branding, seperti app name, support email dan developer contact email. - Buka
Audience. - Untuk kebanyakan self-hosted personal deployments, pilih
External. - Jika memilih
External, tambah Google account yang mahu diauthorize di bawahTest users. - Buka
Data Access. - Tambah Google Drive permissions yang diperlukan.
Step 3: Cipta OAuth 2.0 Client
- Dalam
Google Auth Platform, bukaClients. - Cipta client baharu.
- Tetapkan application type kepada
Web application. - Beri nama client yang mudah dikenali.
- Untuk authorized JavaScript origins, masukkan ImgBed URL, contohnya:
text
https://img.example.com- Untuk authorized redirect URIs, masukkan:
text
https://img.example.com/api/oauth/google/callback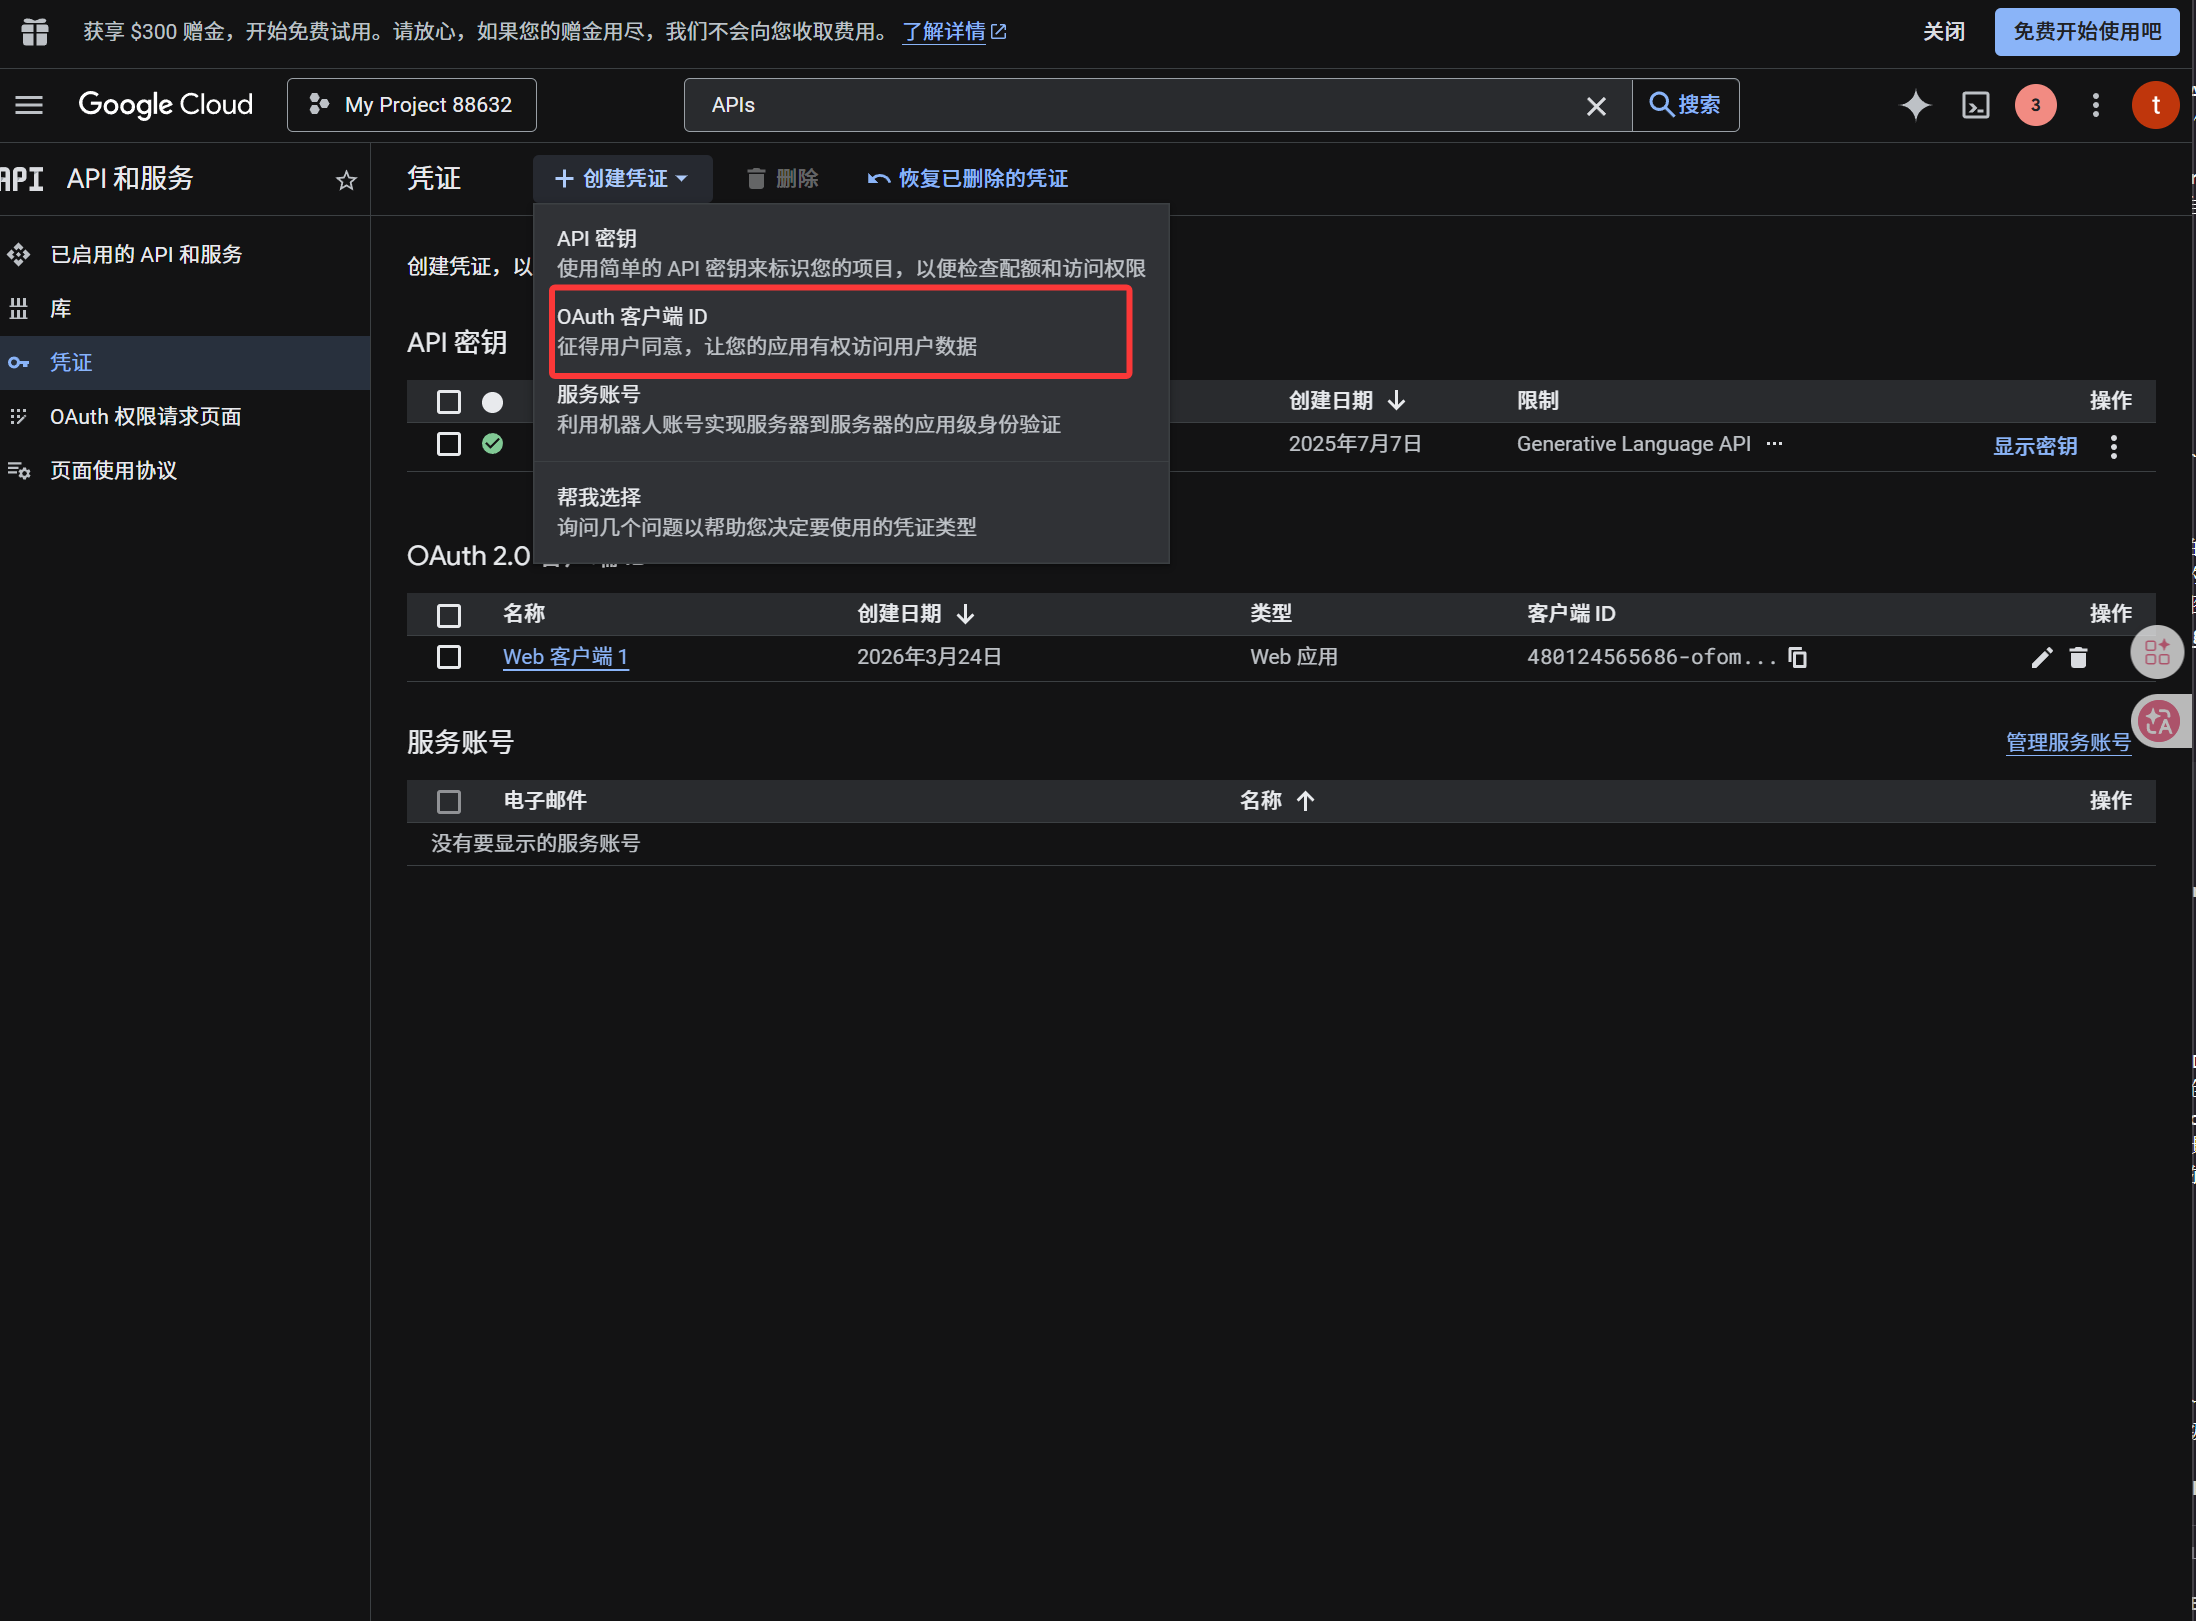
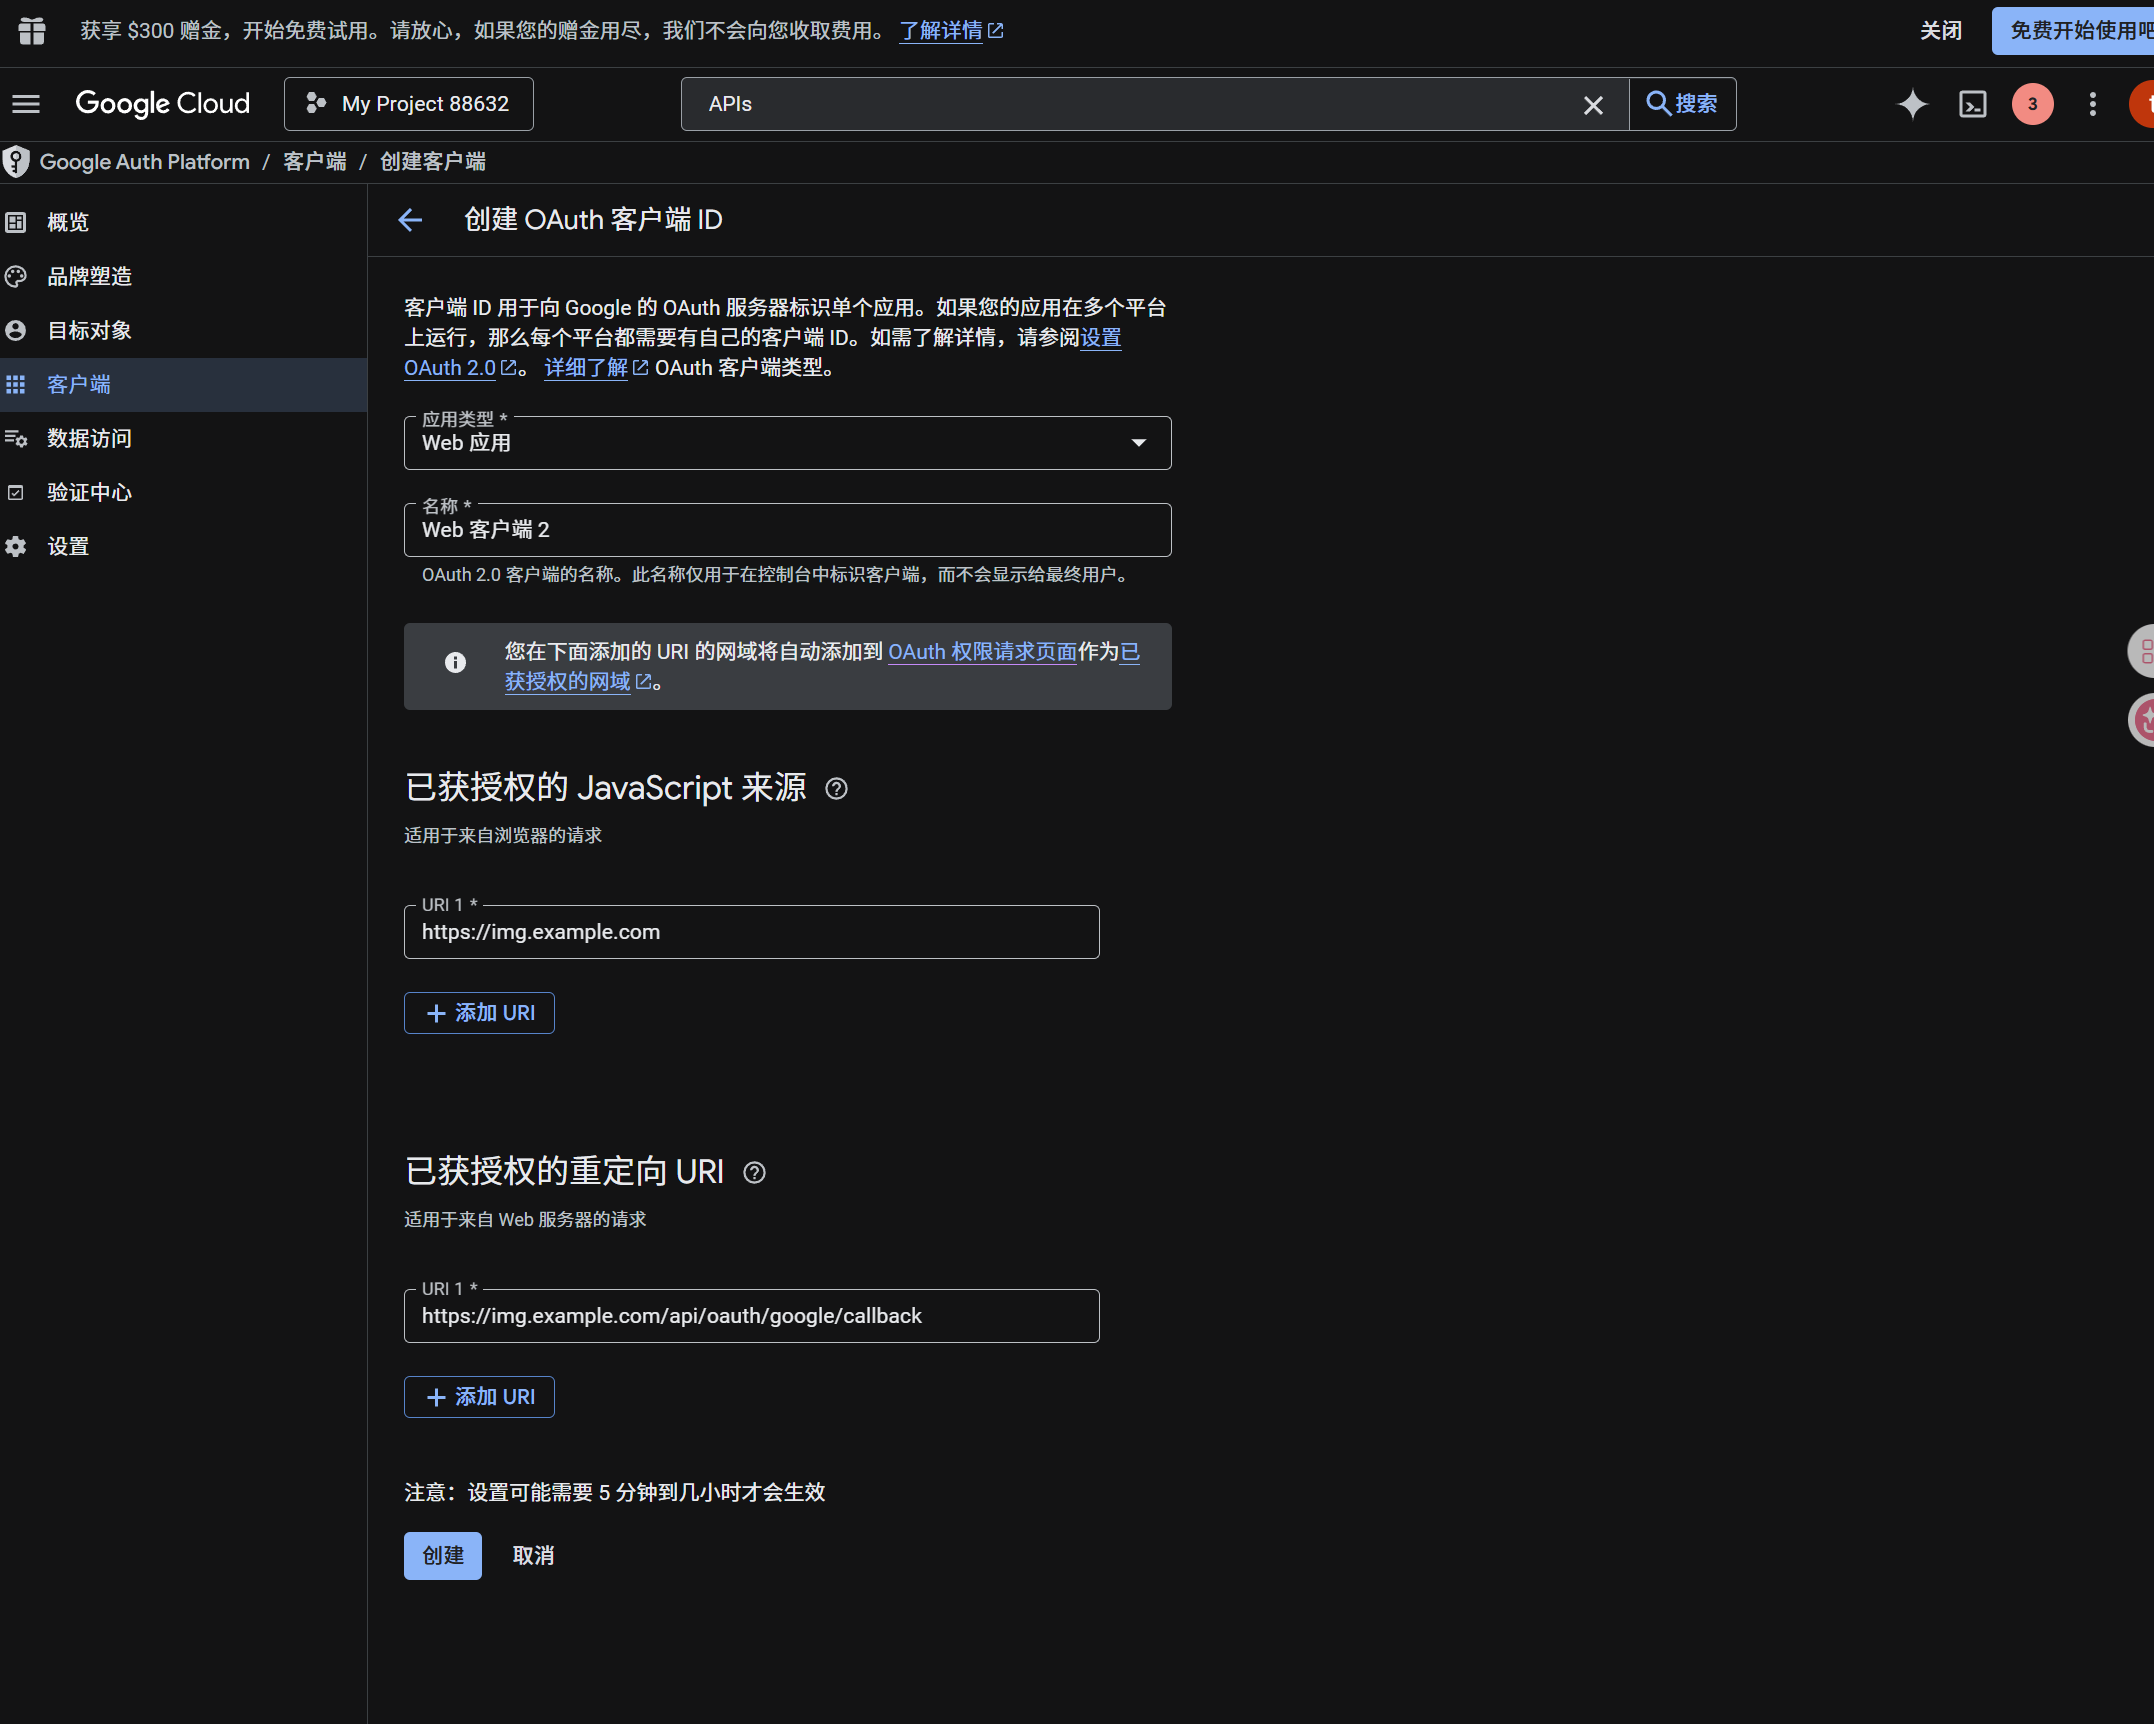
Selepas client dicipta, copy nilai ini:
| Generated Value | ImgBed Field |
|---|---|
| Client ID | Client ID |
| Client Secret | Client Secret |
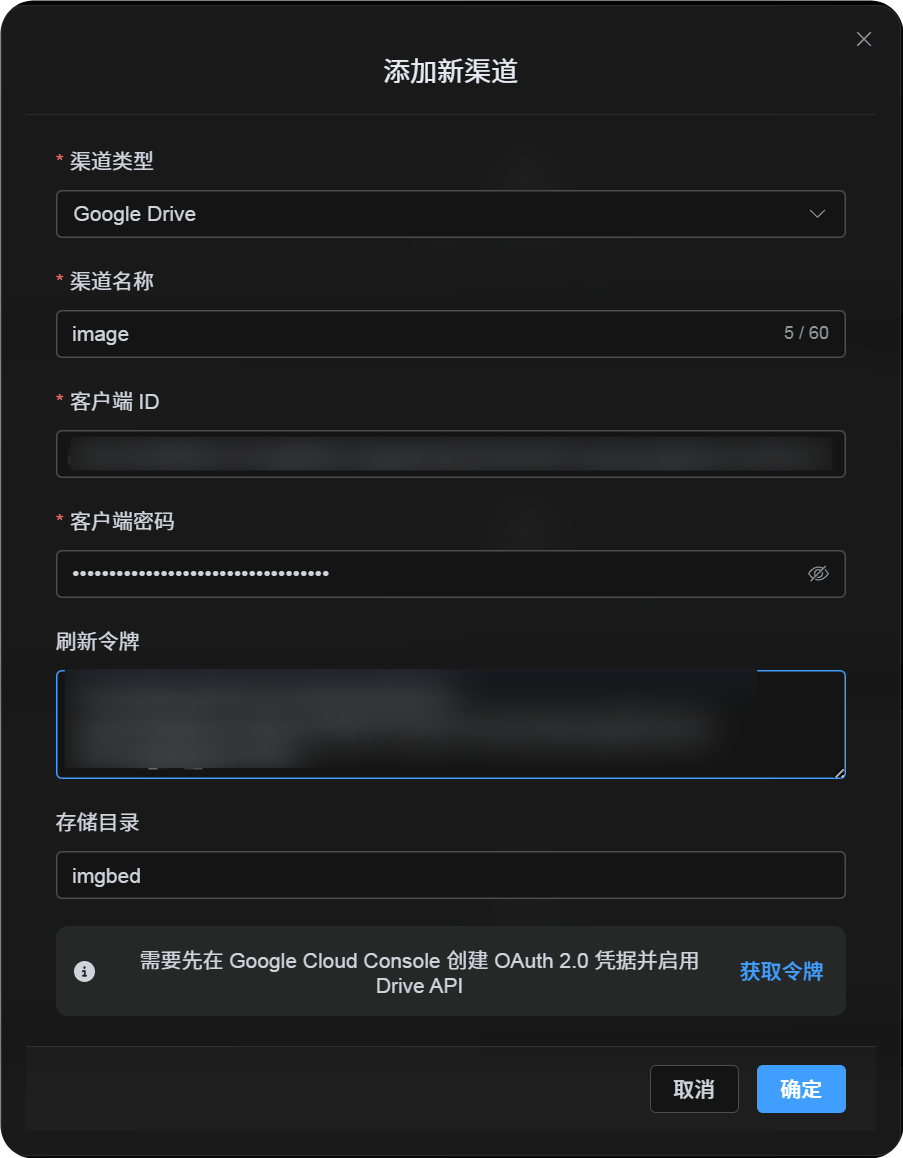
Step 4: Isi Google Drive Channel
Dalam Upload Settings, pilih Google Drive dan isi:
| ImgBed Field | Apa Yang Perlu Diisi |
|---|---|
| Channel name | Nama mudah dikenali, contohnya Main Google Drive |
| Client ID | Client ID dari Google Cloud |
| Client Secret | Client Secret dari Google Cloud |
| Refresh Token | Biarkan kosong buat masa ini. Dapatkan pada step seterusnya. |
| Root directory | Optional. Default ialah imgbed. |
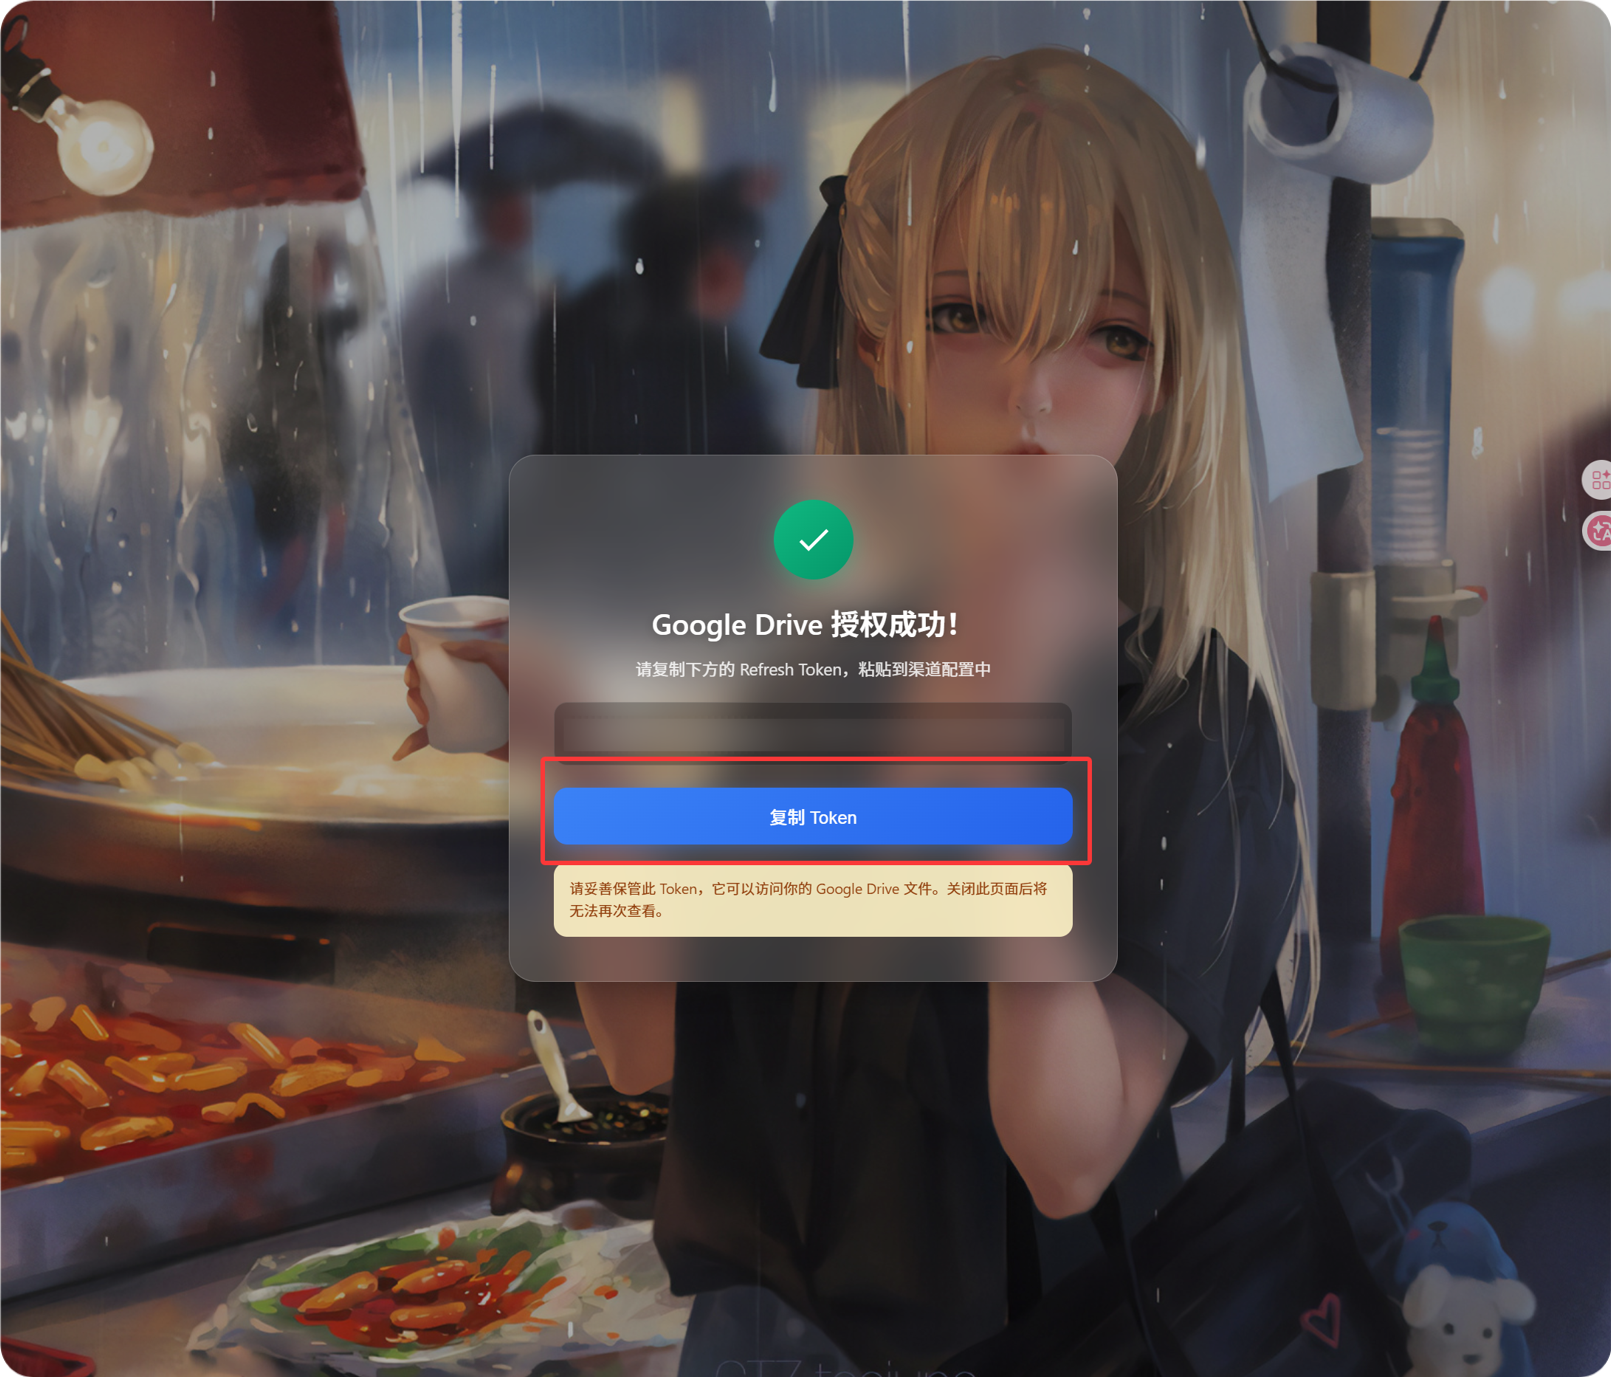
Step 5: Dapatkan Refresh Token
- Klik
Get Token. - Pilih Google account yang mahu disambungkan.
- Lengkapkan authorization prompts.
- Callback page akan menunjukkan
Refresh Token. - Copy token tersebut.
- Kembali ke ImgBed dan paste dalam field
Refresh Token.
Jika kemudian anda menukar Google account, menukar OAuth client, atau authorization lama tamat tempoh, anda tidak perlu delete channel. Buka edit page dan klik Reauthorize.
Step 6: Save Channel
Selepas semua field diisi, save channel.
Quick Flow
text
Buka Google Cloud
-> Cipta atau pilih project
-> Enable Google Drive API
-> Configure Google Auth Platform
-> Jika Audience ialah External, tambah Google account anda ke Test users
-> Cipta Web application OAuth client
-> Gunakan https://your-domain.com/api/oauth/google/callback sebagai redirect URI
-> Isi Client ID dan Client Secret dalam ImgBed
-> Klik Get Token
-> Sign in dengan Google dan authorize
-> Copy Refresh Token dari callback page
-> Paste kembali ke ImgBed dan save
-> Upload test image
References
- Google OAuth Web Server Applications: https://developers.google.com/identity/protocols/oauth2/web-server
- Google Workspace OAuth Consent Configuration: https://developers.google.com/workspace/guides/configure-oauth-consent
- Google Drive API Auth Scopes: https://developers.google.com/workspace/drive/api/guides/api-specific-auth