เพิ่มช่องทาง Yandex
สิ่งที่ต้องเตรียมก่อน
| ข้อกำหนด | ทำไมต้องใช้ |
|---|---|
| Yandex account | ใช้เข้าสู่ระบบและ authorize Yandex Disk |
| Yandex OAuth app | ใช้สร้าง Client ID และ Client Secret |
| ImgHost domain ของคุณ | ใช้เป็น OAuth redirect URI |
| พื้นที่ Yandex Disk ที่พร้อมใช้งาน | ใช้เป็นพื้นที่เก็บไฟล์จริง |
ขั้นตอนตั้งค่า
ขั้นตอนที่ 1: สร้าง Yandex OAuth App
- เปิดหน้าสร้าง Yandex OAuth app:
text
https://oauth.yandex.com/client/new- ถ้าถูก redirect ไปหน้า sign in ให้เข้าสู่ระบบด้วย Yandex account ก่อน
- สร้าง app ใหม่
- ตั้งชื่อ app ให้จำง่าย เช่น
imgbed-yandex - หา callback หรือ redirect URL settings
- ใส่:
text
https://your-domain.com/api/oauth/yandex/callbackขั้นตอนที่ 2: ยืนยัน Permissions
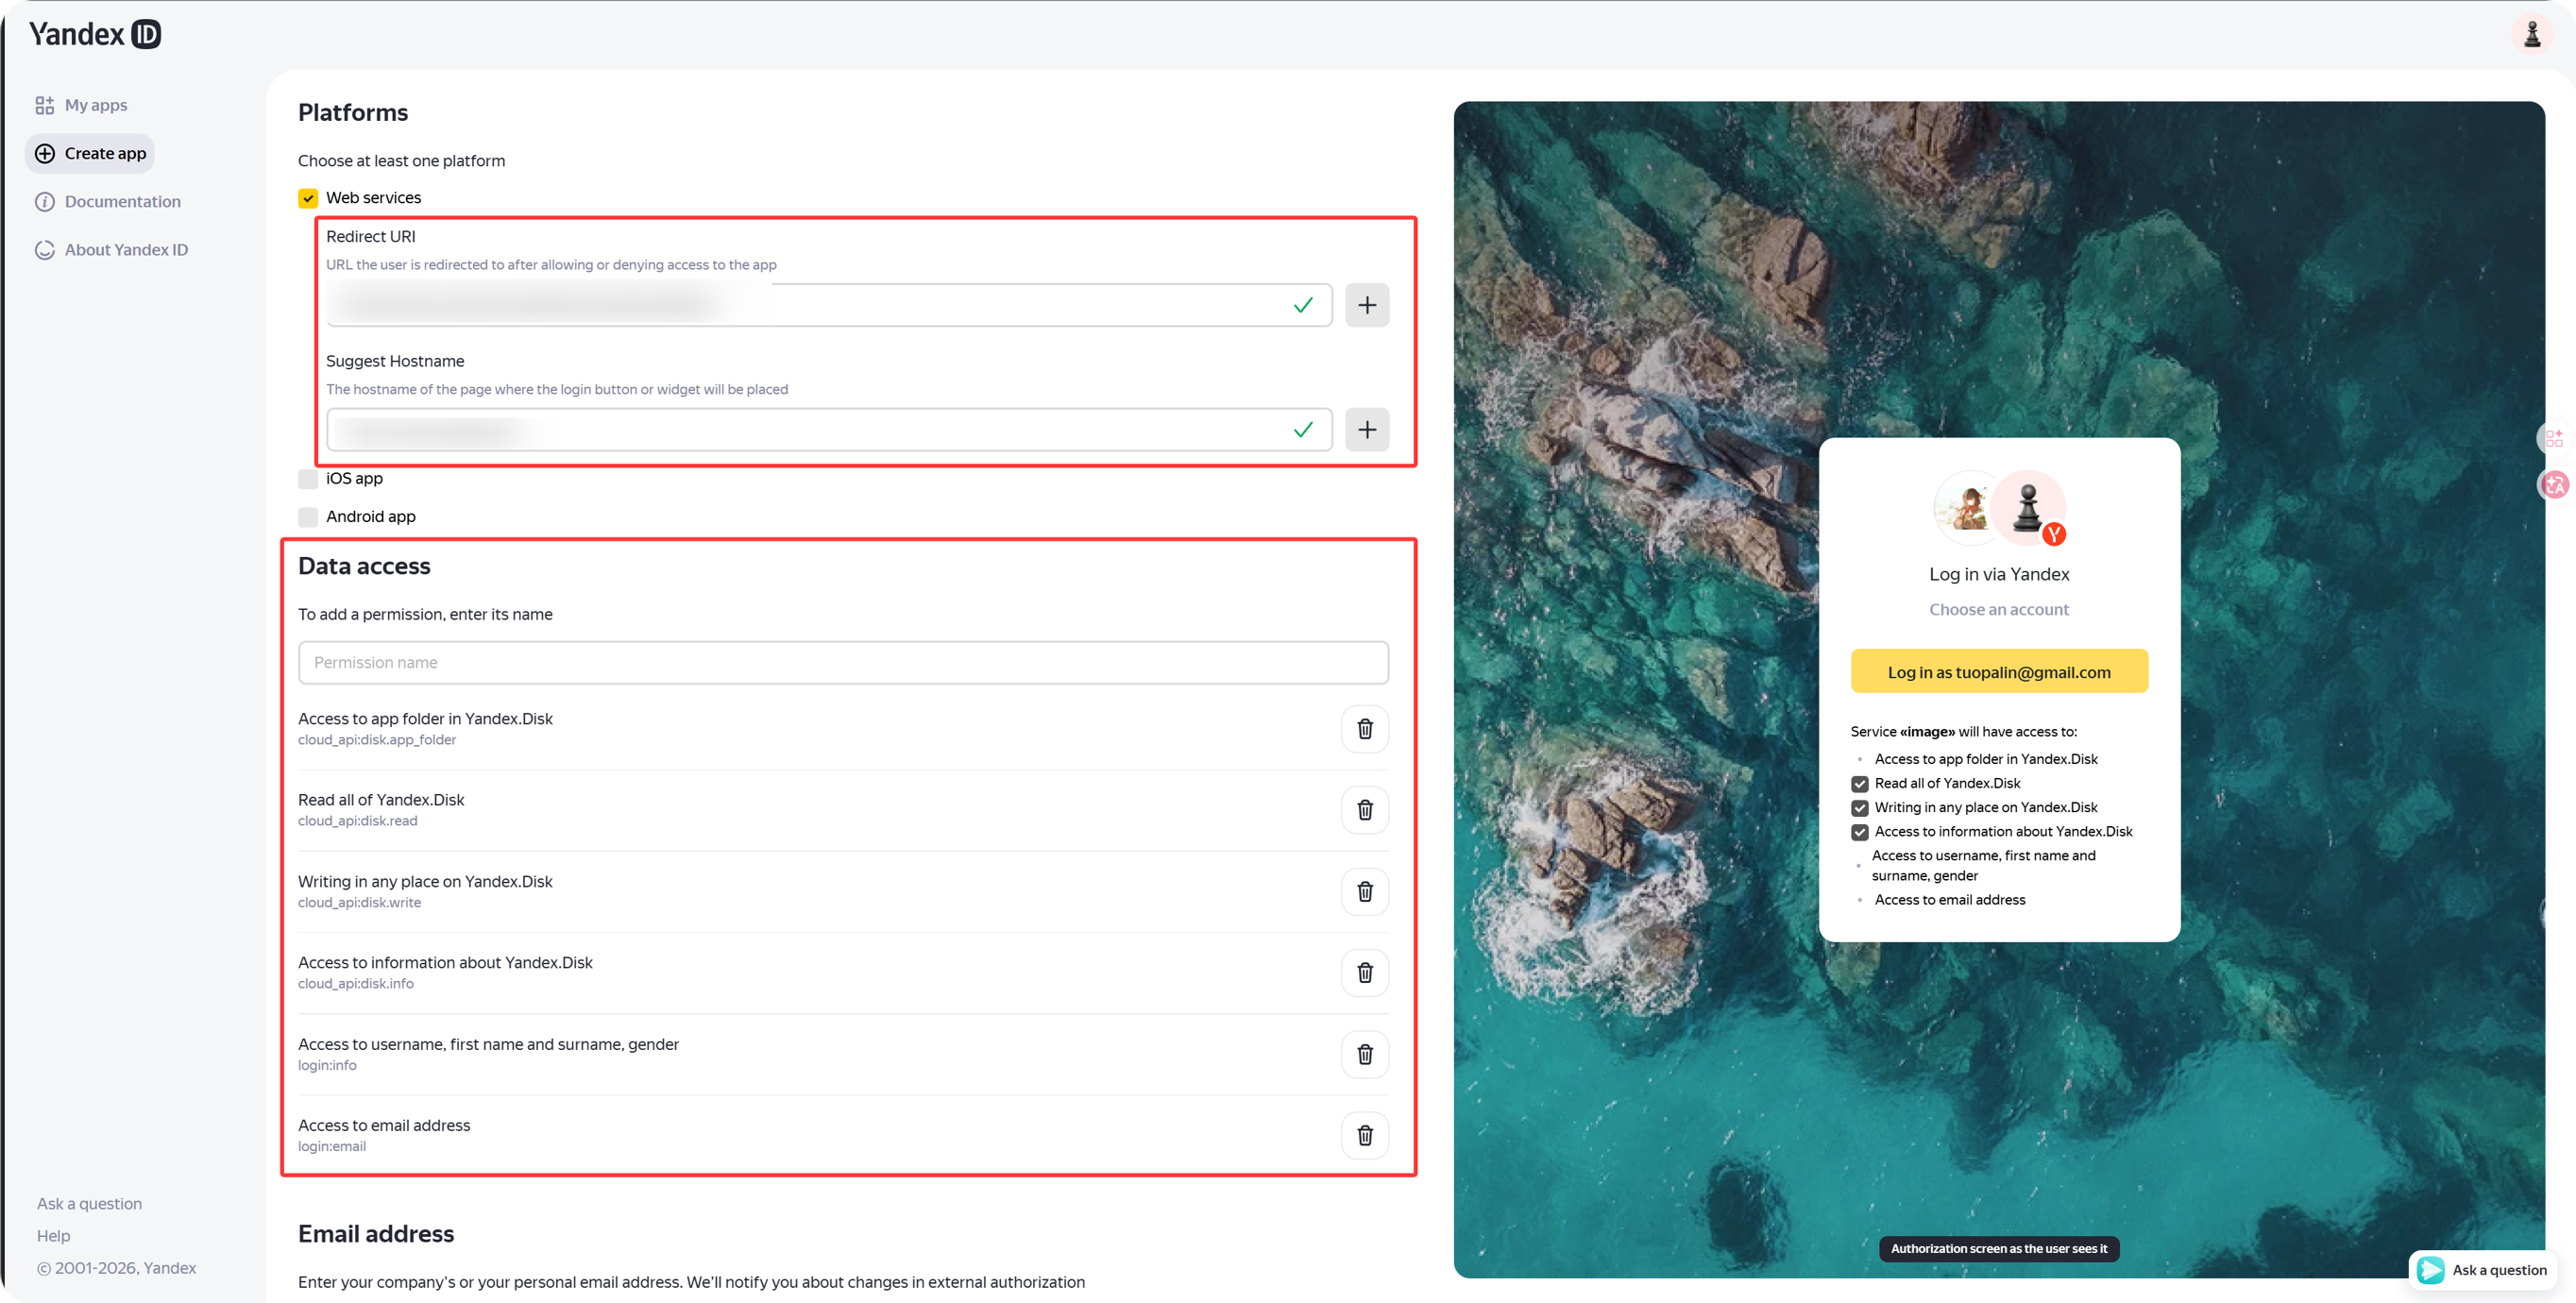
สำหรับ ImgHost Yandex integration ปัจจุบัน ให้คง permissions สี่ตัวนี้ไว้ใน Yandex.Disk REST API:
| Permission | วัตถุประสงค์ |
|---|---|
cloud_api:disk.app_folder | ให้ ImgHost จัดเก็บไฟล์ใน app folder |
cloud_api:disk.read | อ่านไฟล์และ download links |
cloud_api:disk.write | อัปโหลดไฟล์ สร้างโฟลเดอร์ และลบไฟล์ |
Access to information about Yandex.Disk | อ่าน disk quota และ used space |
ถ้าเห็น permissions เหล่านี้ใน Yandex ID API จะเป็นแบบไม่บังคับ:
| ข้อความ Permission | คำแนะนำ |
|---|---|
Access to username, first name and surname, gender | ไม่บังคับ |
Access to email address | ไม่บังคับ |
ฟีเจอร์หลักด้านการอัปโหลด ดาวน์โหลด ลบ และ quota พึ่งพา permissions สี่ตัวใน Yandex.Disk REST API เป็นหลัก
ขั้นตอนที่ 3: คัดลอก App Credentials
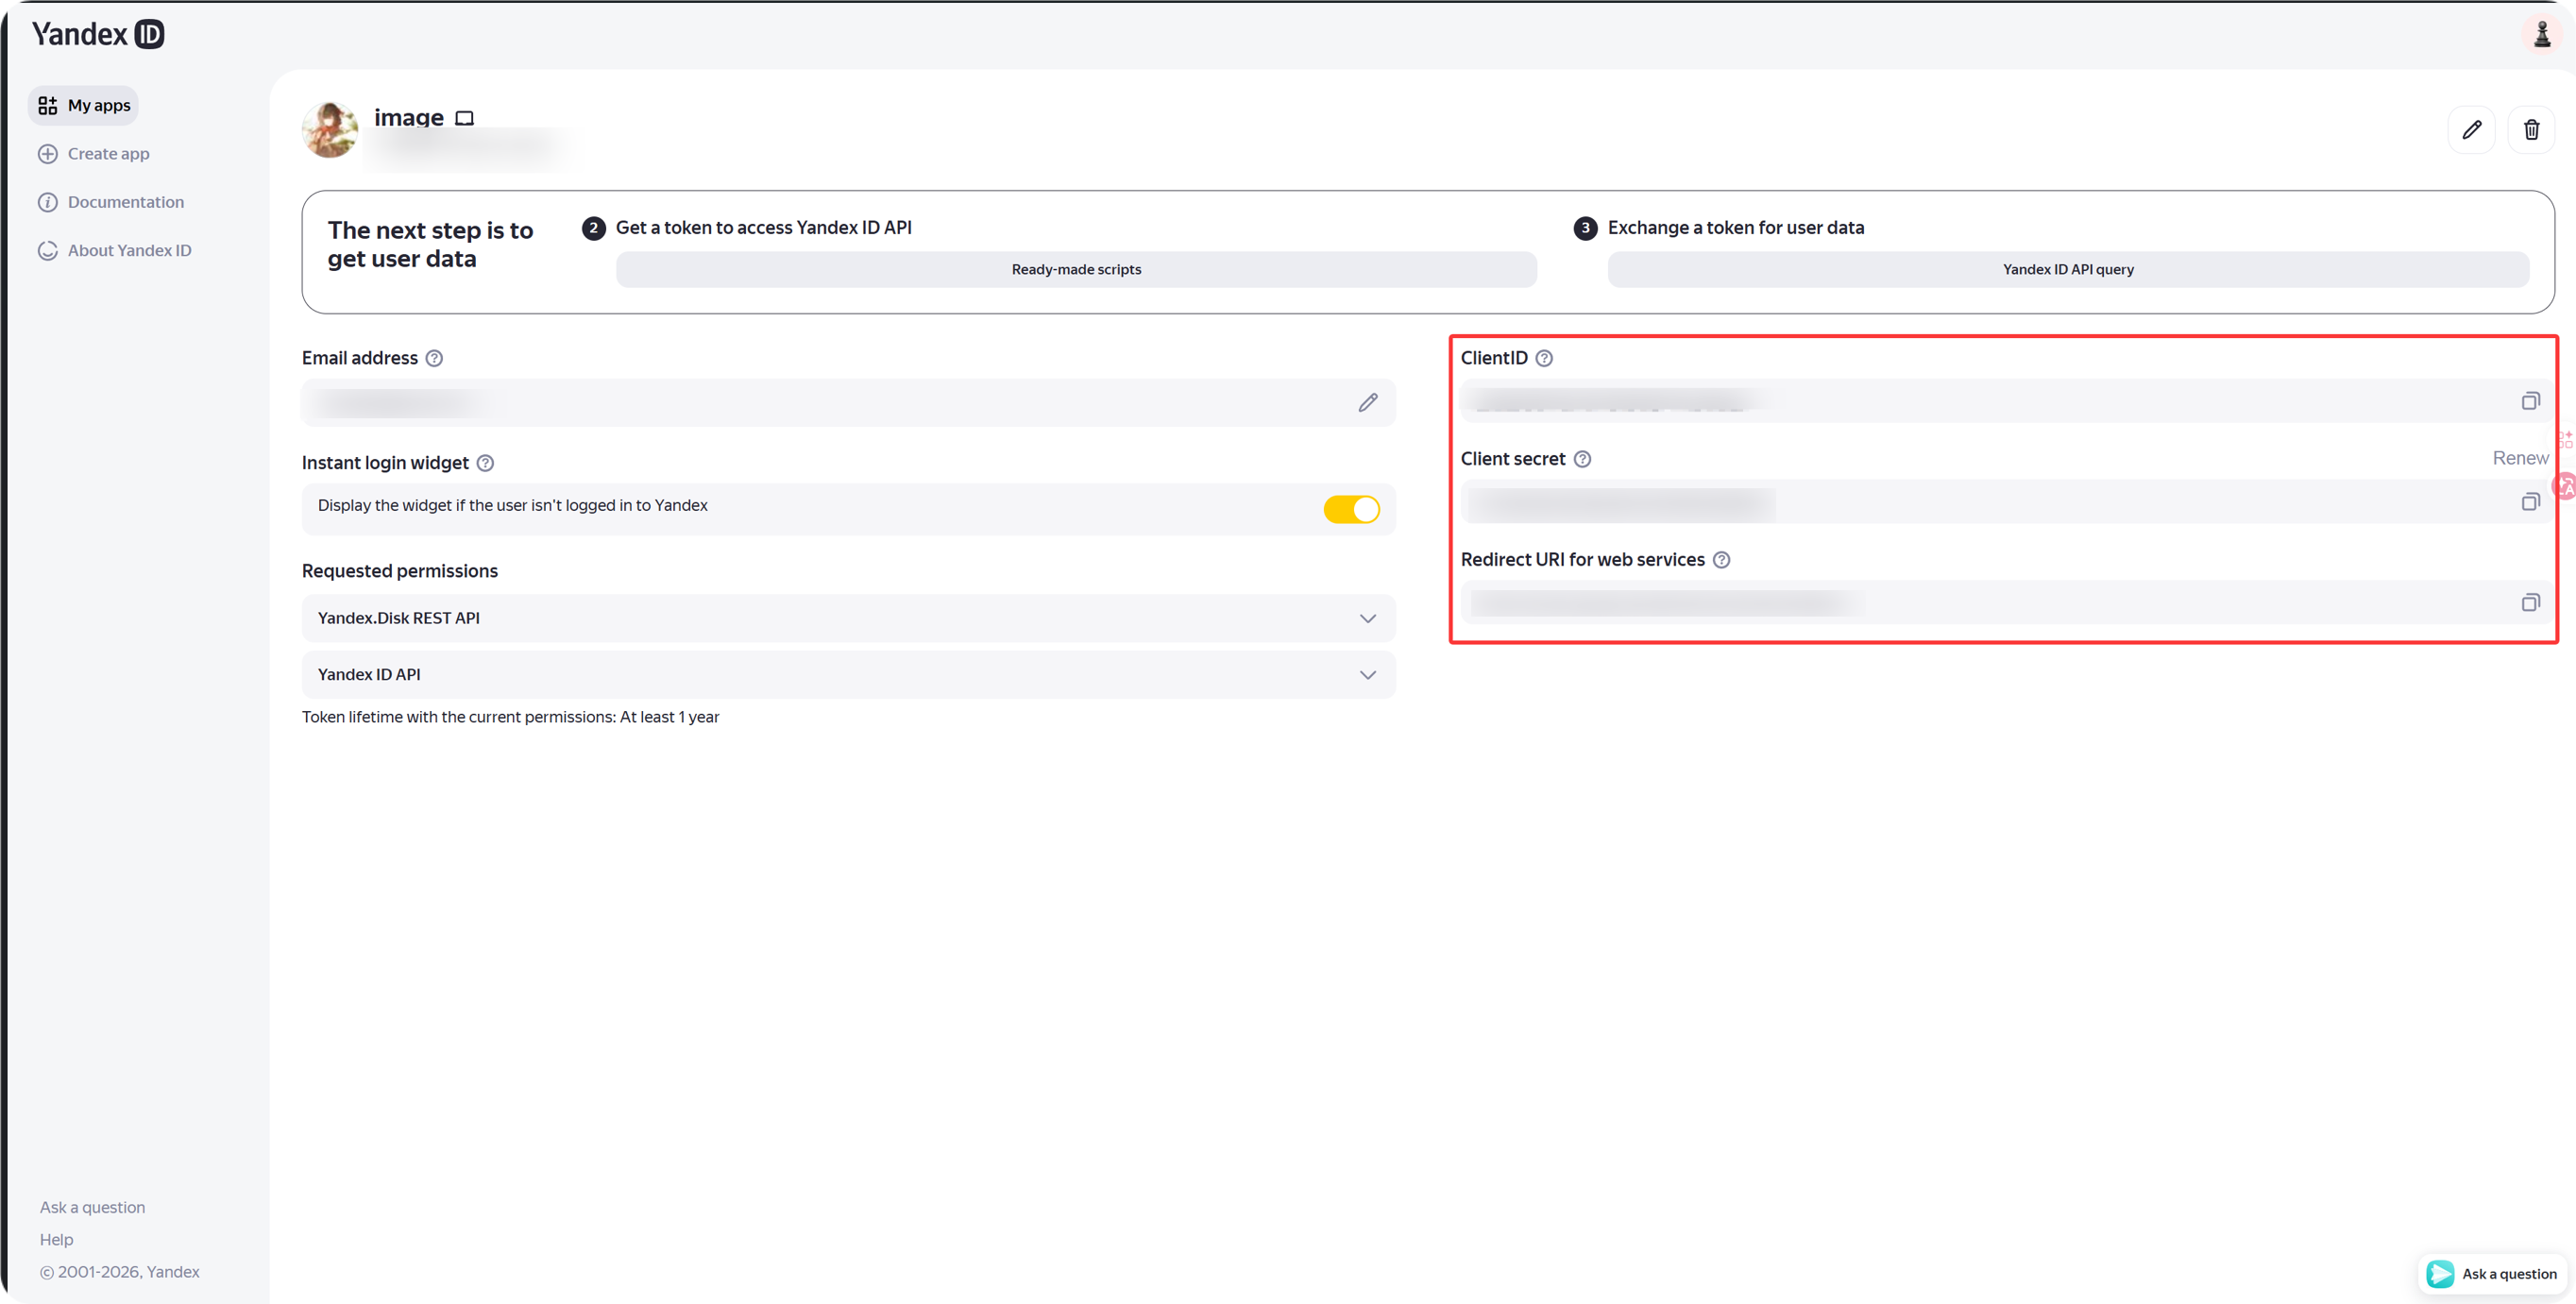
หลังสร้าง app แล้วคัดลอก:
| ฟิลด์ Yandex | ฟิลด์ ImgHost |
|---|---|
Client ID | Client ID |
Client Secret | Client Secret |
ขั้นตอนที่ 4: ใส่ช่องทาง Yandex
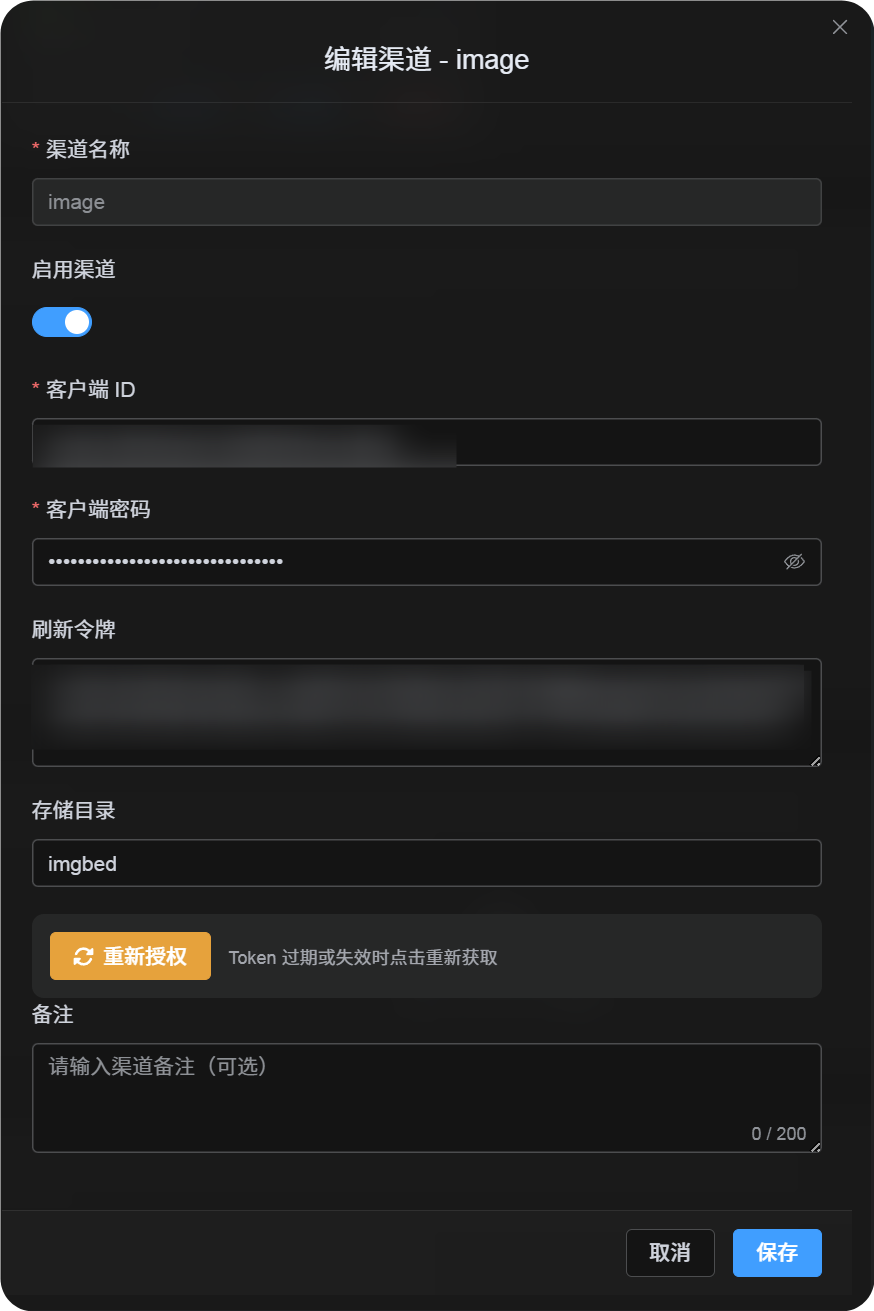
ใน Upload Settings เลือก Yandex แล้วกรอก:
| ฟิลด์ ImgHost | ใส่อะไร |
|---|---|
| Channel name | ชื่อที่จำง่าย เช่น Main Yandex |
| Client ID | Yandex app Client ID |
| Client Secret | Yandex app Client Secret |
| Refresh Token | เว้นว่างไว้ก่อน |
| Root directory | ไม่บังคับ ค่าเริ่มต้นคือ imgbed |
ขั้นตอนที่ 5: รับ Refresh Token
- ใน ImgHost คลิก
Get Token - เข้าสู่ระบบ Yandex account ที่ต้องการเชื่อมต่อ
- อนุมัติ authorization prompt
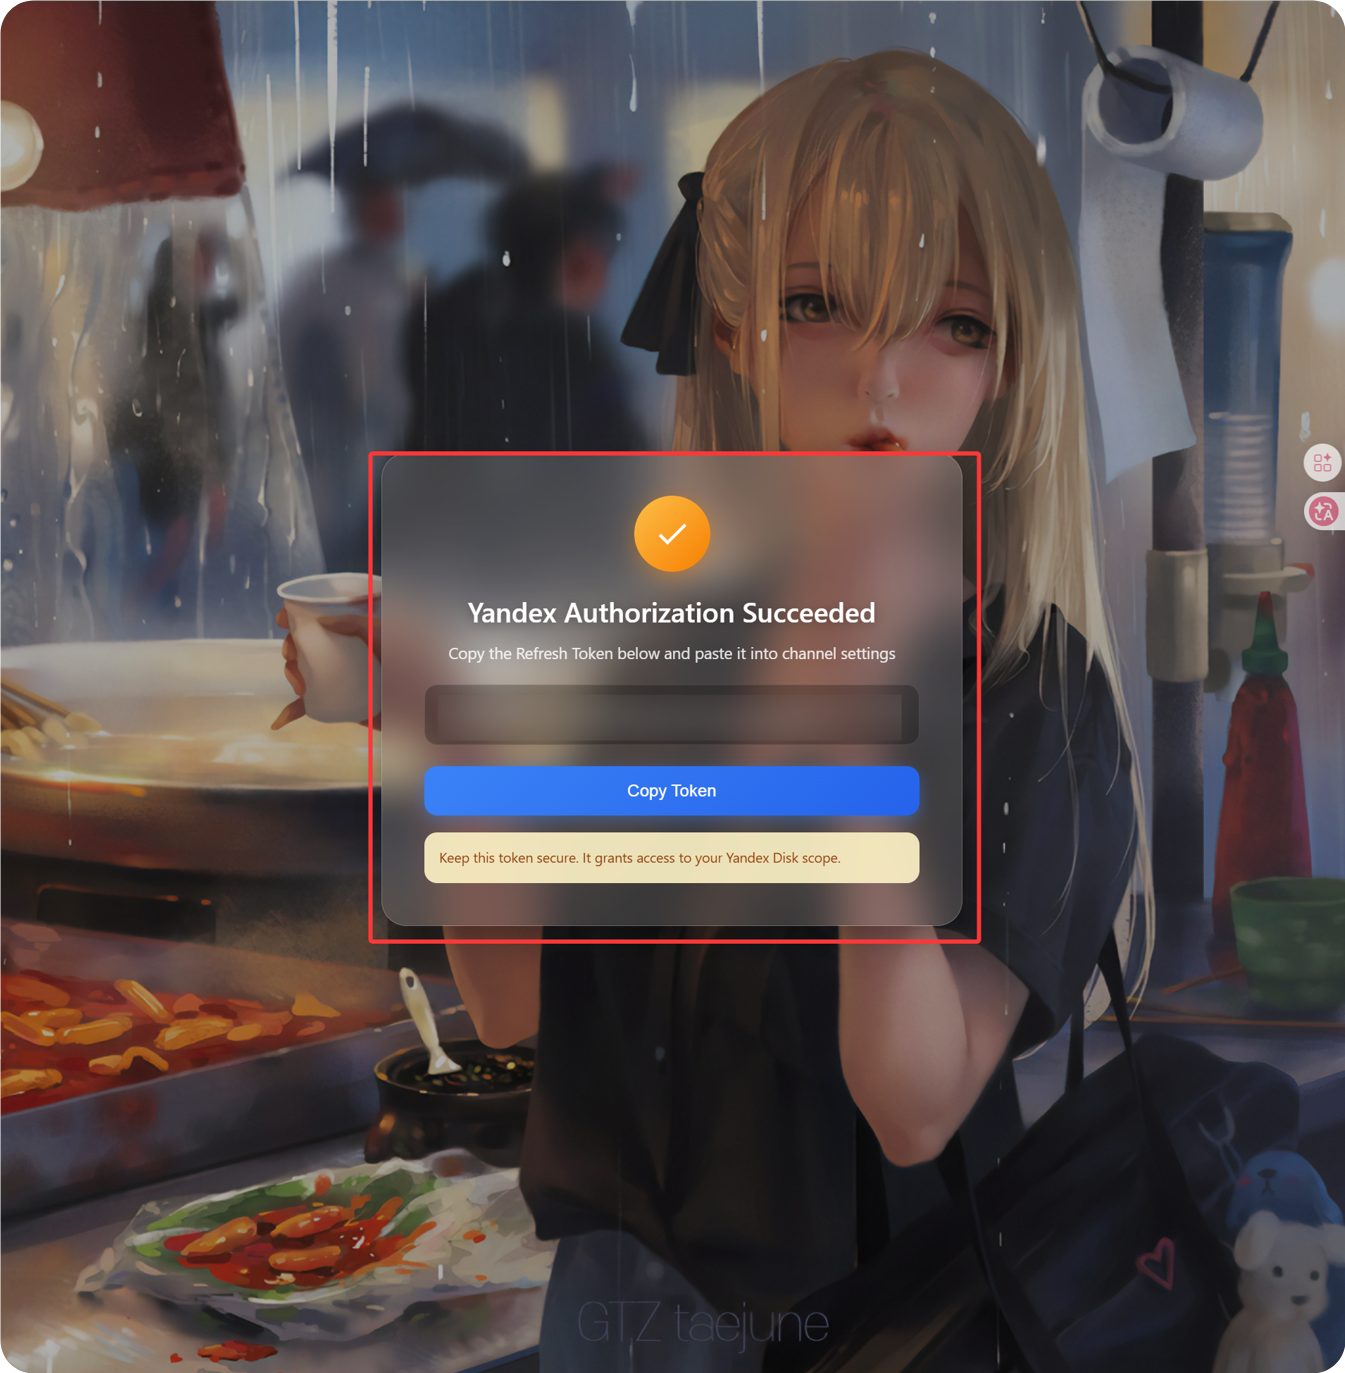
- หน้า callback จะแสดง
Refresh Token - คัดลอก token นั้น
- กลับไปที่ ImgHost แล้ววางในฟิลด์
Refresh Token
ขั้นตอนที่ 6: บันทึกช่องทาง
เมื่อกรอกครบทุกฟิลด์แล้วให้บันทึกช่องทาง
ลำดับขั้นตอนด่วน
text
Open Yandex OAuth Console
-> Create an app
-> Add https://your-domain.com/api/oauth/yandex/callback
-> Confirm Yandex Disk permissions
-> Copy Client ID and Client Secret
-> Fill Client ID / Client Secret into ImgHost
-> Click Get Token
-> Copy the Refresh Token from the callback page
-> Paste it back into ImgHost and save
เอกสารอ้างอิง
- ลงทะเบียน Yandex app: https://yandex.com/dev/id/doc/en/register-client
- รับ authorization code ผ่าน URL: https://yandex.com/dev/id/doc/en/codes/code-url
- Yandex OAuth token endpoint: https://yandex.com/dev/id/doc/en/tokens/token