เพิ่ม GitHub Releases Channel
สิ่งที่ต้องเตรียมก่อนเริ่ม
ต้องใช้เพียงสามอย่าง:
| Requirement | Purpose |
|---|---|
| GitHub account | ใช้ generate access token และเป็น owner ของ repository |
| GitHub Access Token | ImgBed ใช้ access GitHub API, create releases และ upload files |
| Repository name | ใส่เฉพาะ repository name ก็ได้ เช่น image |
ขั้นตอนตั้งค่า
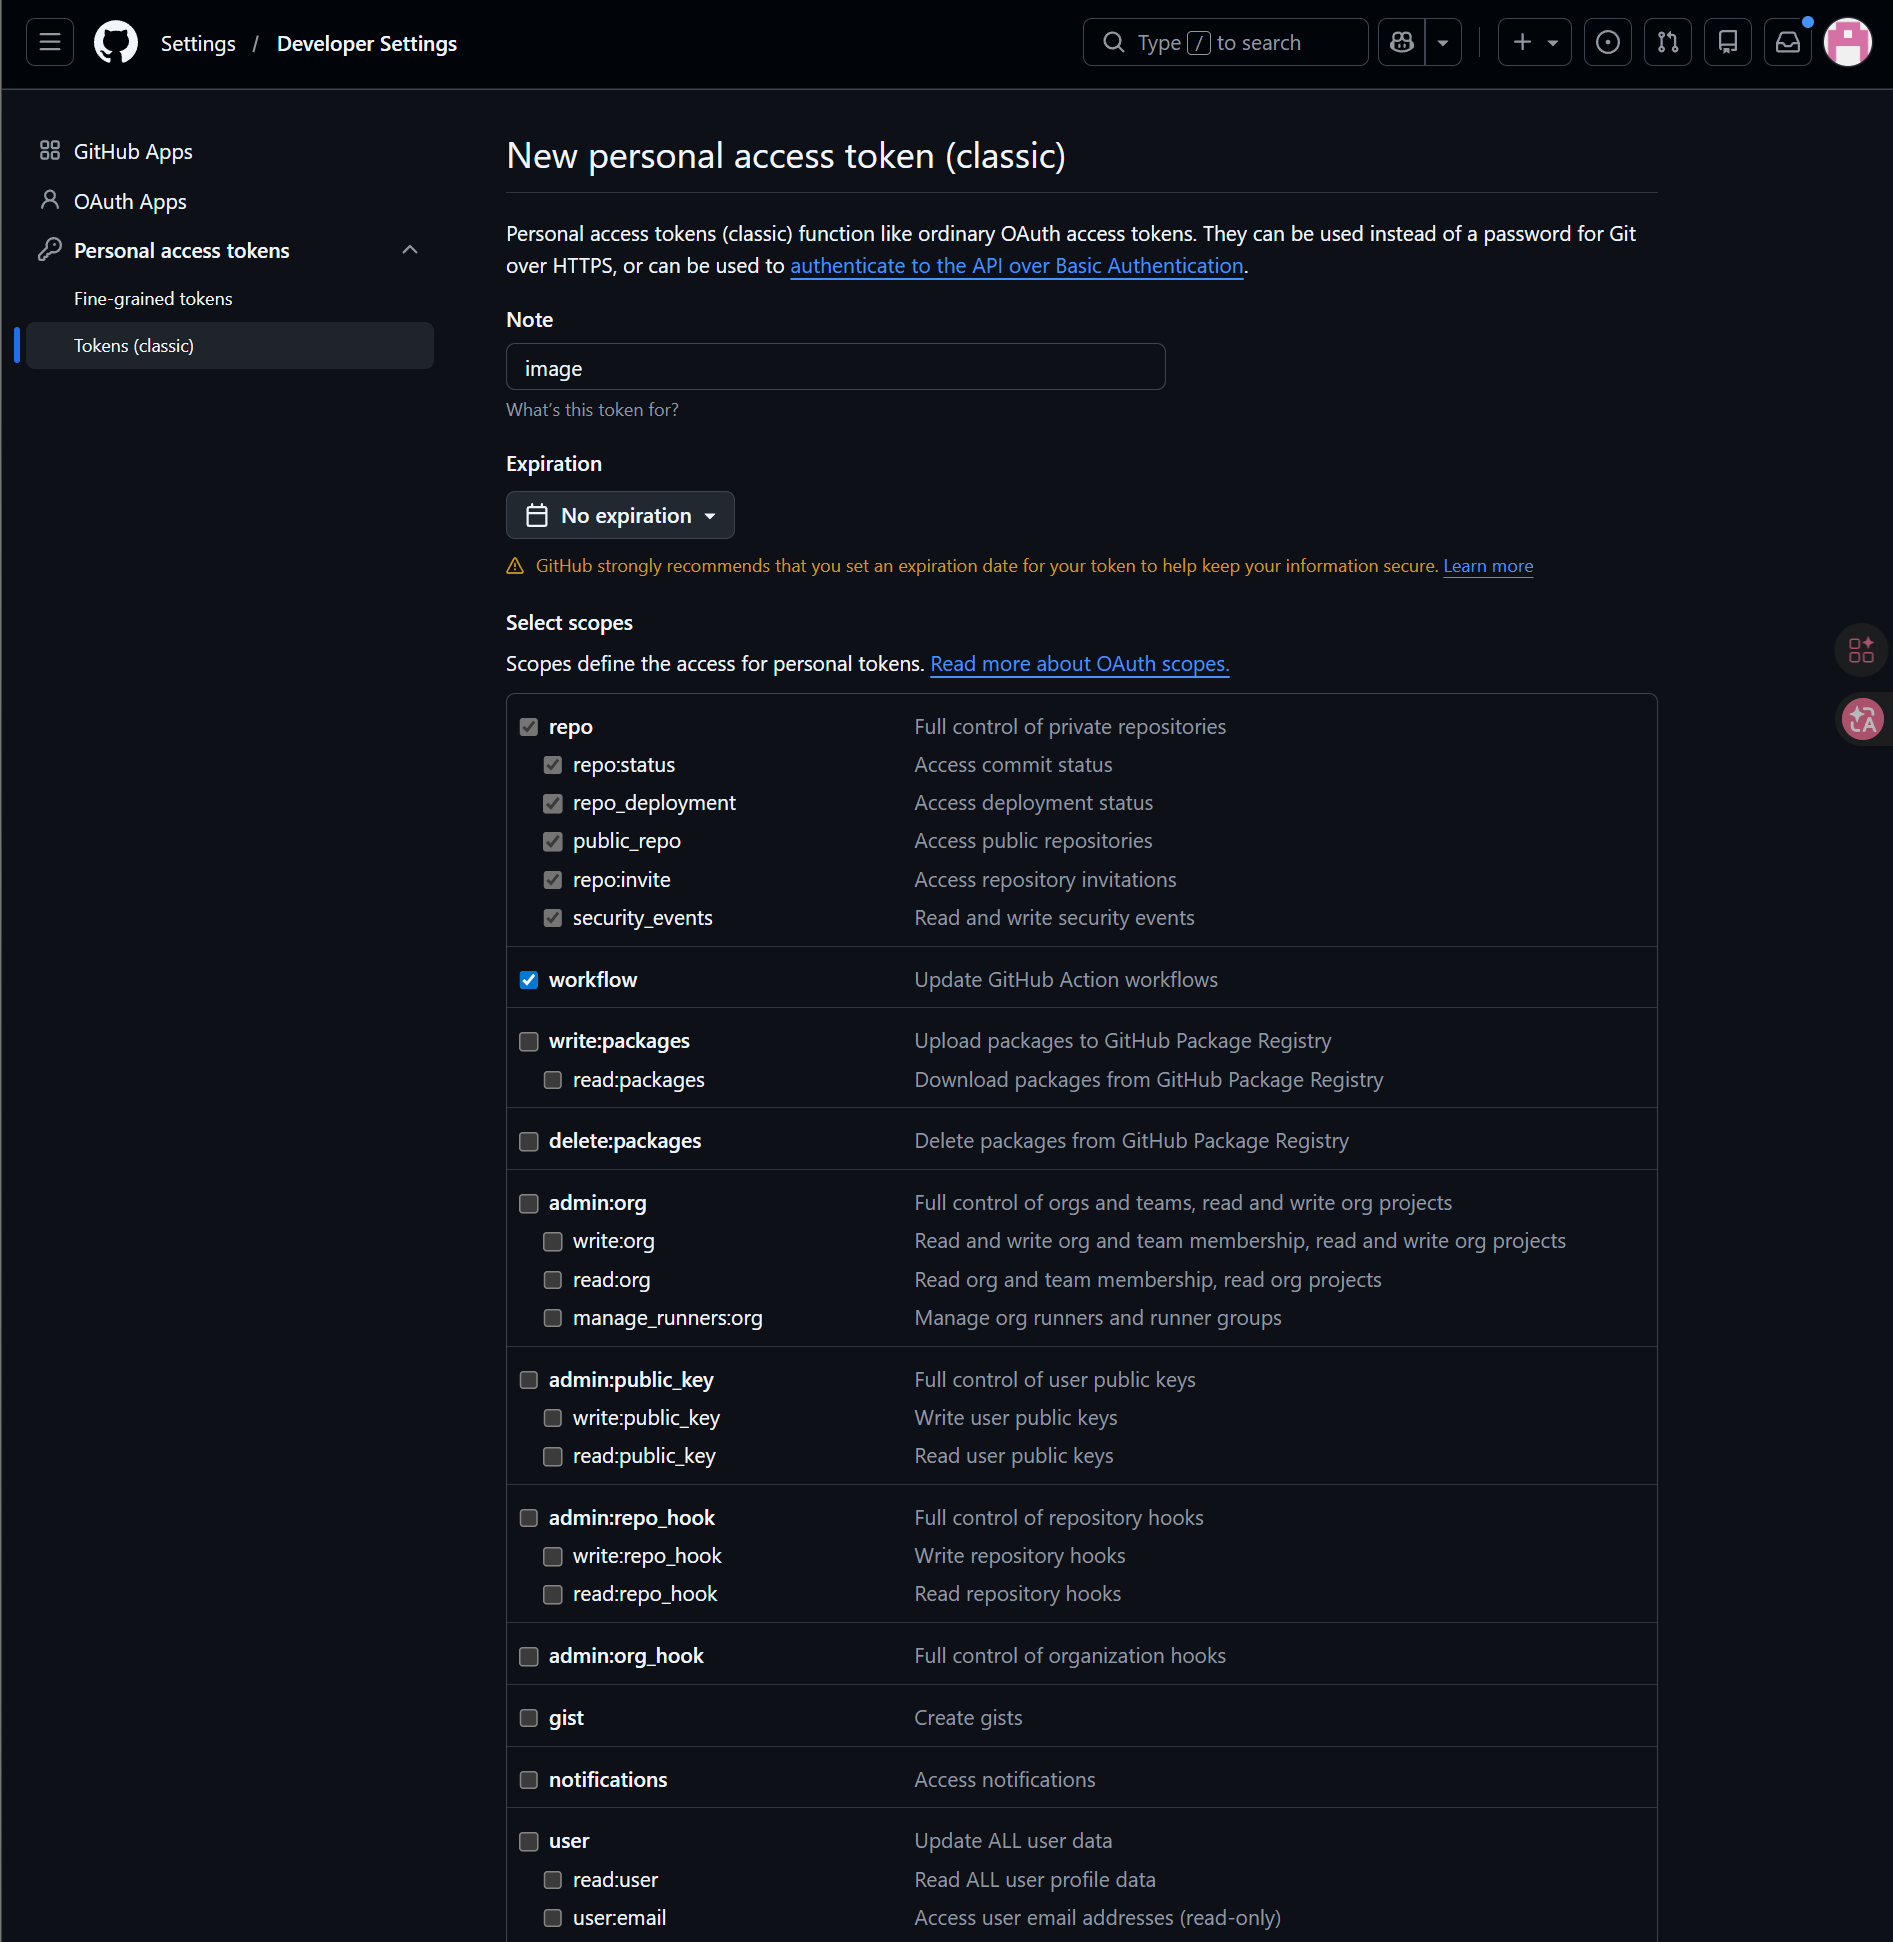
Step 1: Sign in เข้า GitHub และสร้าง Access Token
- Sign in เข้า GitHub
- คลิก avatar มุมขวาบนแล้วเปิด
Settings - เปิด
Developer settingsจาก left sidebar - เปิด
Personal access tokens - เปิด
Tokens (classic) - คลิก
Generate new token (classic) - ตั้งชื่อ token ให้จำง่าย
- เลือก expiration date ตามแนวทาง maintenance ของคุณ
- เลือก scopes
repoและworkflow - Copy และ save token ทันทีหลังสร้างเสร็จ
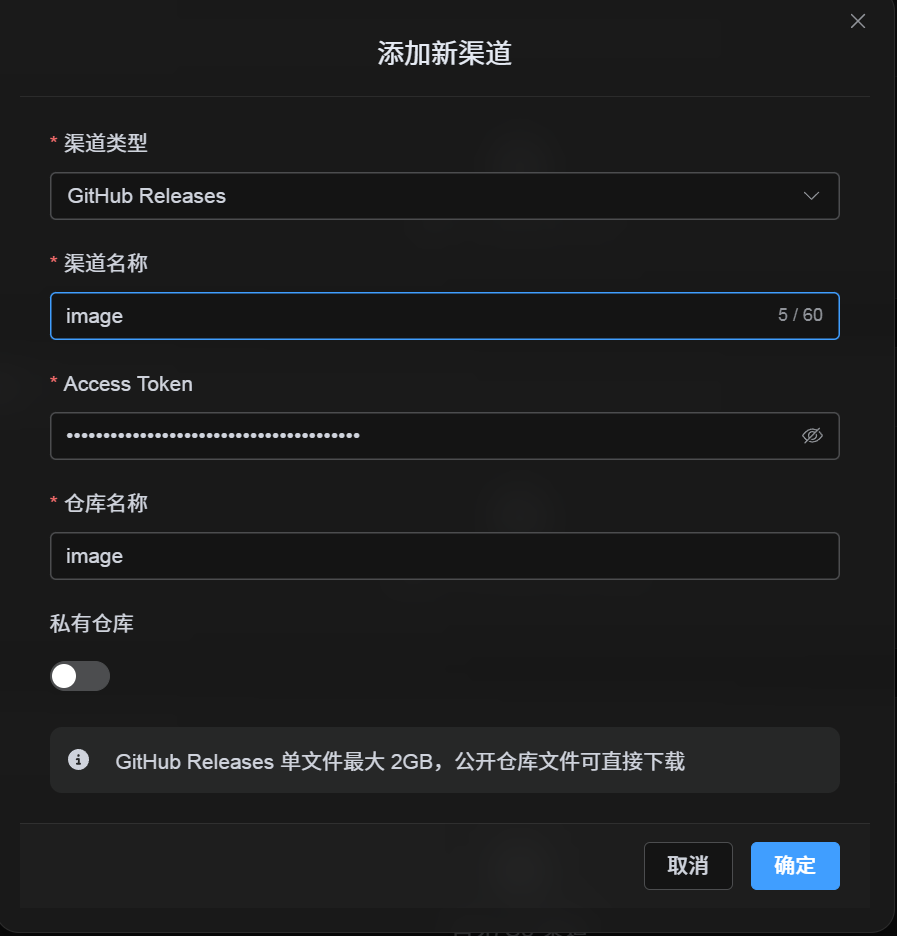
Step 2: ใส่ GitHub Releases Channel ใน ImgBed
หลังเลือก GitHub Releases ใน Upload Settings ให้กรอก fields ดังนี้:
| UI Field | ใส่อะไร |
|---|---|
| Channel name | ชื่อที่คุณตั้งเอง เช่น GitHubPrimary |
| Access Token | GitHub Personal Access Token ที่เพิ่งสร้าง |
| Repository name | Repo name สั้น ๆ เช่น image หรือ full path เช่น username/image |
| Private repository | เปิดหรือปิดตามความต้องการ |
| Remark | Optional เช่น Primary upload channel |
Step 3: Save Channel
กรอกครบแล้วคลิก Save
System จะจัดการรายละเอียดเหล่านี้:
| System Behavior | Description |
|---|---|
| Short repository name | ImgBed ระบุ current GitHub account แล้วขยายค่าเป็น full repository path |
| Full repository path | ImgBed ใช้ path username/repository ตามที่ใส่มาแบบตรงตัว |
| Repository check | ถ้าใช้ current personal account path ImgBed จะสร้าง repository อัตโนมัติเมื่อยังไม่มี ถ้าใส่ full path เอง ImgBed จะใช้ path นั้นโดยตรง |
| Public/private state | Repository visibility จะ sync ตาม switch ปัจจุบัน |
Quick Checklist
GitHub Releases ทำงานตาม flow นี้:
text
Sign in เข้า GitHub
-> สร้าง Access Token
-> กลับไป ImgBed แล้วใส่ token และ repository name
-> Save
-> ถ้าใส่แค่ repo name ImgBed จะเติม current username ให้อัตโนมัติ
-> ถ้าใส่ username/repo ImgBed จะใช้ตามนั้น
-> Upload test image