Hugging Face チャネルを追加する
始める前に必要なもの
必要なものは 3 つだけです。
| 必要なもの | 目的 |
|---|---|
| Hugging Face アカウント | アクセストークンを生成し、リポジトリを所有するために使用します。 |
| Hugging Face User Access Token | ImgHost が Hugging Face API にアクセスし、リポジトリを作成し、ファイルをアップロードするために使用します。 |
| Repository name | リポジトリ名だけを入力できます。例: image。 |
設定手順
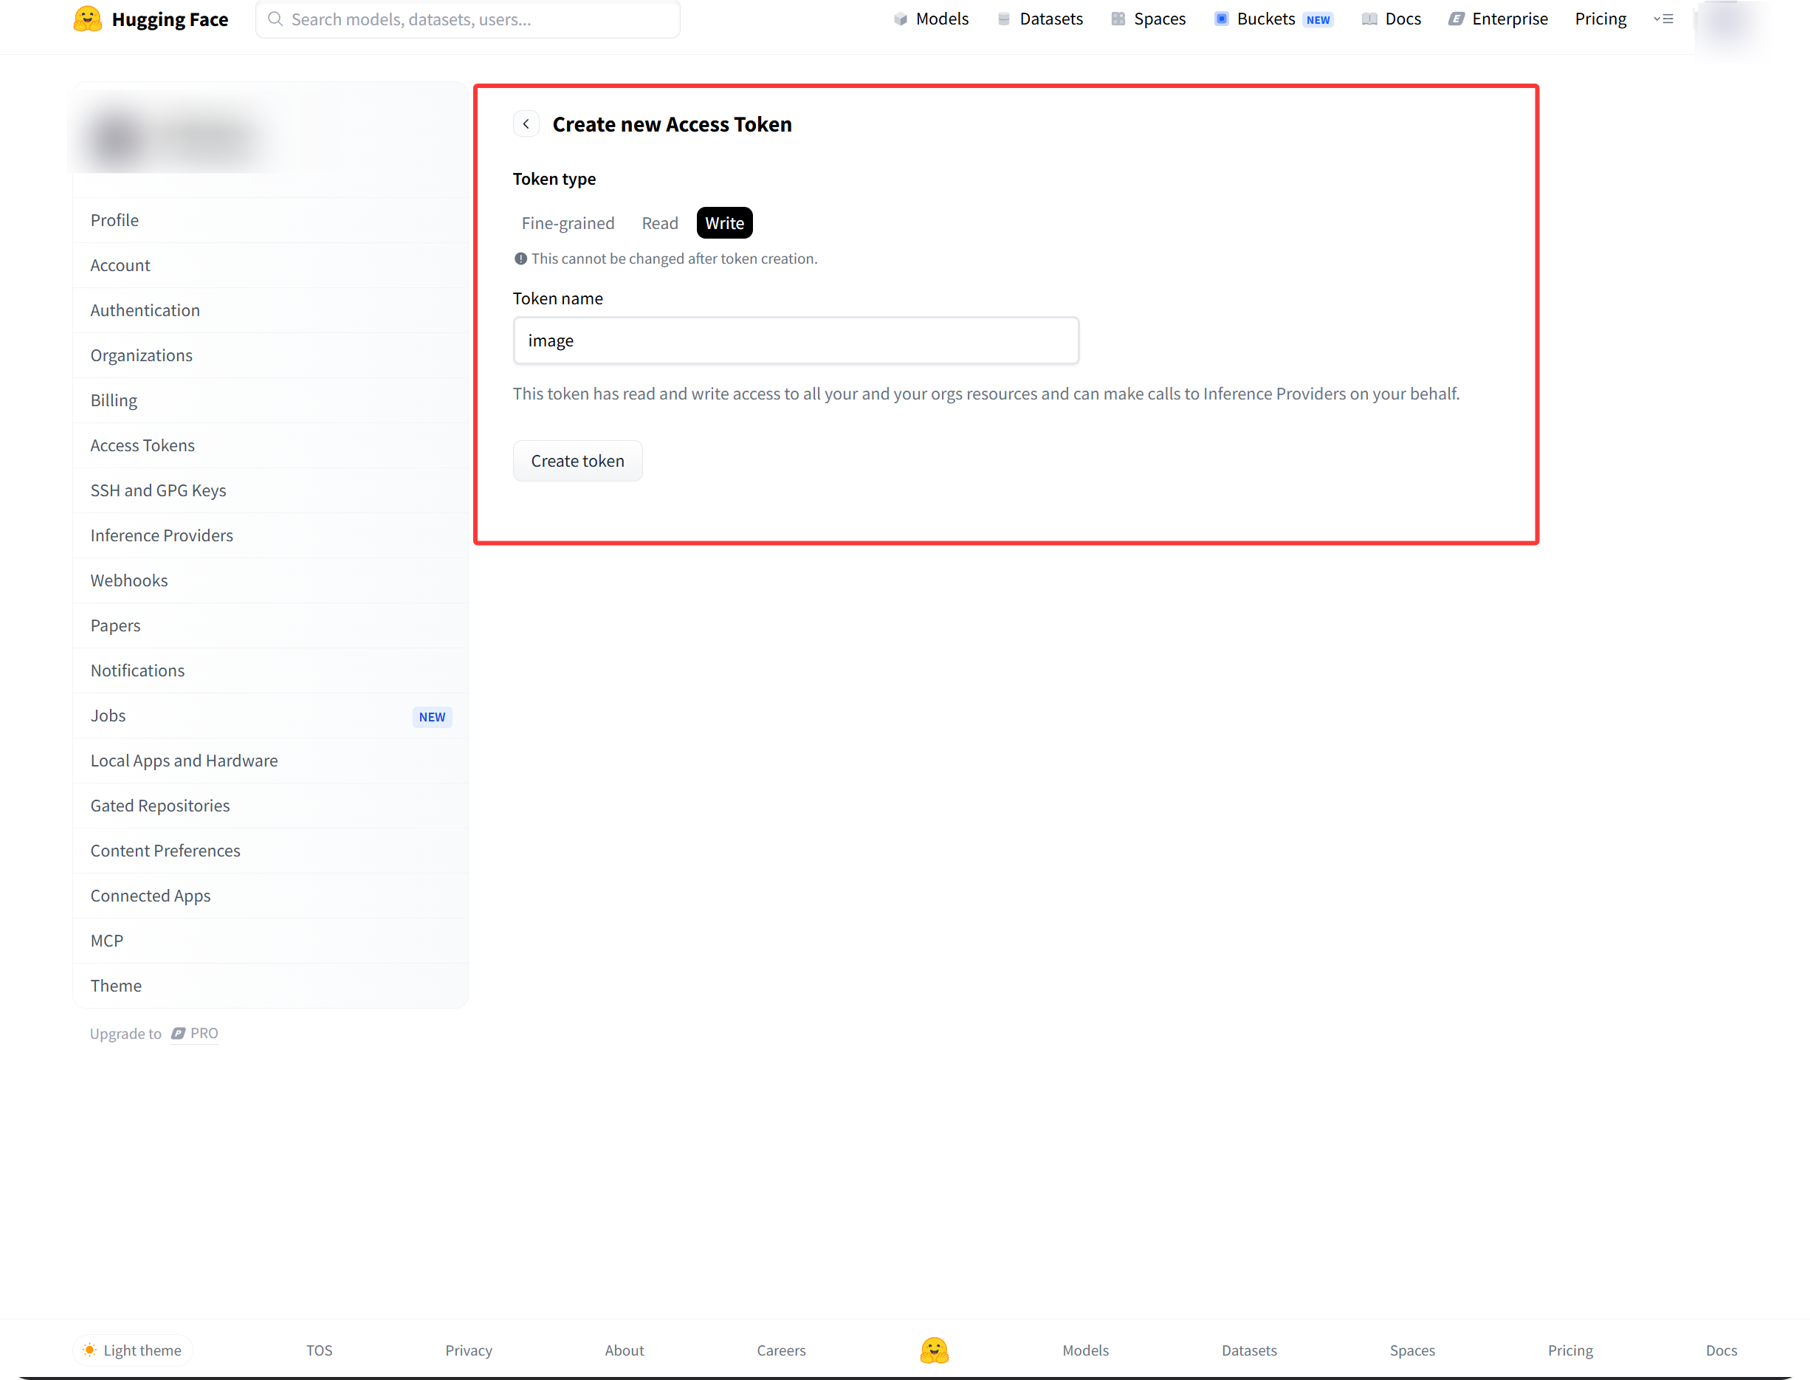
手順 1: Hugging Face にサインインして Access Token を作成する
- Hugging Face にサインインします。
- 右上のアバターをクリックし、
Settingsを開きます。 - 左サイドバーから
Access Tokensを開きます。 - 新しい token を作成します。
- token に識別しやすい名前を付けます。
write権限を選択します。- 作成後すぐに token をコピーして保存します。
手順 2: ImgHost に Hugging Face チャネルを入力する
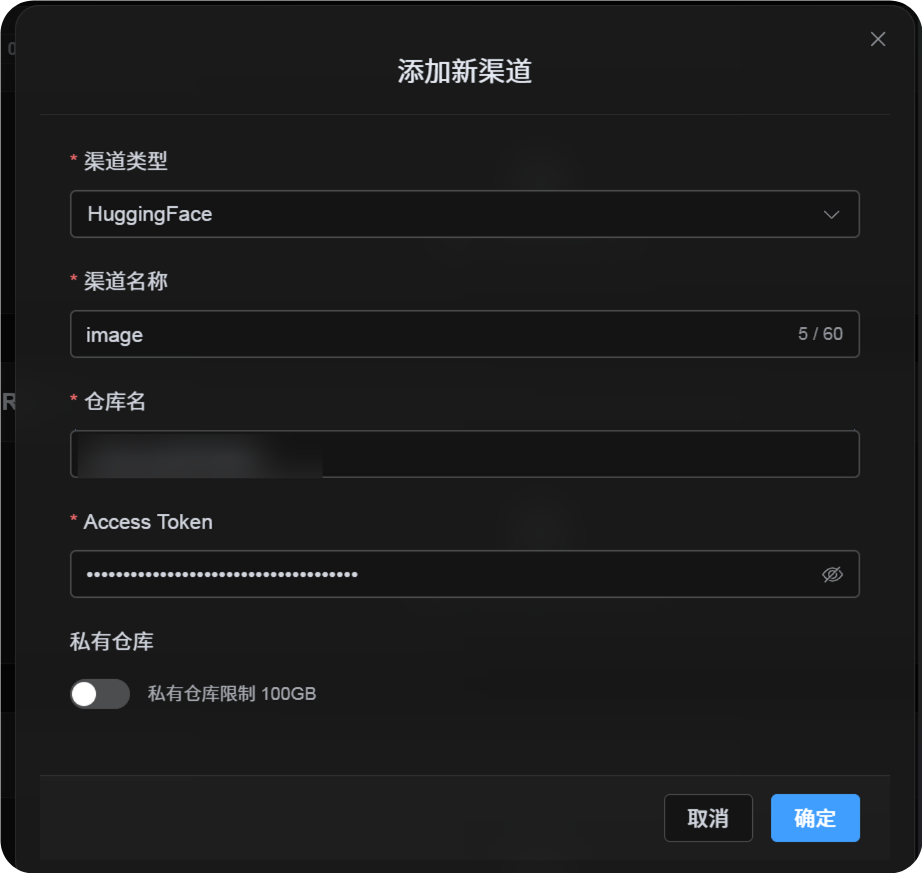
アップロード設定で Hugging Face を選択したら、次のように入力します。
| UI 項目 | 入力内容 |
|---|---|
| チャネル名 | 任意の名前。例: hf-primary。 |
| Repository name | image のような短い repo 名、または username/image のような完全なパス。 |
| Access Token | 先ほど作成した Hugging Face User Access Token。 |
| Private repository | 必要に応じてオンまたはオフにします。 |
| Remark | 任意。例: メインアップロードチャネル。 |
手順 3: チャネルを保存する
項目を入力したら、保存をクリックします。
その後、システムは次の詳細を処理します。
| システム動作 | 説明 |
|---|---|
| 短い repository name | ImgHost は現在の Hugging Face アカウントを識別し、値を完全なリポジトリパスに展開します。 |
| 完全な repository path | ImgHost は username/repository path を入力どおりに使用します。 |
| repository 確認 | 現在の個人アカウントパスを使用する場合、存在しなければ ImgHost はリポジトリの作成を試みます。完全なパスを手動入力した場合、ImgHost はそのパスを直接使用します。 |
| Repository type | このチャネルは dataset repository を使用します。 |
| 公開/非公開状態 | リポジトリの可視性は現在のスイッチに従って同期されます。 |
クイックチェックリスト
text
Sign in to Hugging Face
-> Create an Access Token
-> Select write permission
-> Return to ImgHost and enter the token and repository name
-> Save
-> If only a repo name is entered, ImgHost adds the current username automatically
-> If username/repo is entered, ImgHost uses it as-is
-> ImgHost checks or creates the dataset repository
-> Upload a test image