Adding a Google Drive Channel
What You Need First
Before you start, prepare these items:
| Requirement | Why You Need It |
|---|---|
| A Google account | Used to access Google Cloud and authorize Google Drive |
| A Google Cloud project | Used to enable the Drive API and create OAuth credentials |
| An OAuth 2.0 client | Used by ImgBed to obtain the Client ID, Client Secret, and Refresh Token |
| Your ImgBed domain | Used for the OAuth redirect URI. It must match the domain you actually use. |
Setup Steps
Step 1: Enable the Google Drive API
- Open Google Cloud Console.
- Create a new project or select an existing one.
- Go to
APIs & Services. - Click
Enable APIs and Services. - Search for
Google Drive API. - Open it and click enable.
Step 2: Configure the OAuth Consent Screen
- In Google Cloud, open
Google Auth Platform. - Complete the basic
Brandinginformation, such as app name, support email, and developer contact email. - Open
Audience. - For most self-hosted personal deployments, choose
External. - If you choose
External, add the Google account you want to authorize underTest users. - Open
Data Access. - Add the required Google Drive permissions.
Step 3: Create an OAuth 2.0 Client
- In
Google Auth Platform, openClients. - Create a new client.
- Set the application type to
Web application. - Give the client a recognizable name.
- For authorized JavaScript origins, enter your ImgBed URL, for example:
text
https://img.example.com- For authorized redirect URIs, enter:
text
https://img.example.com/api/oauth/google/callback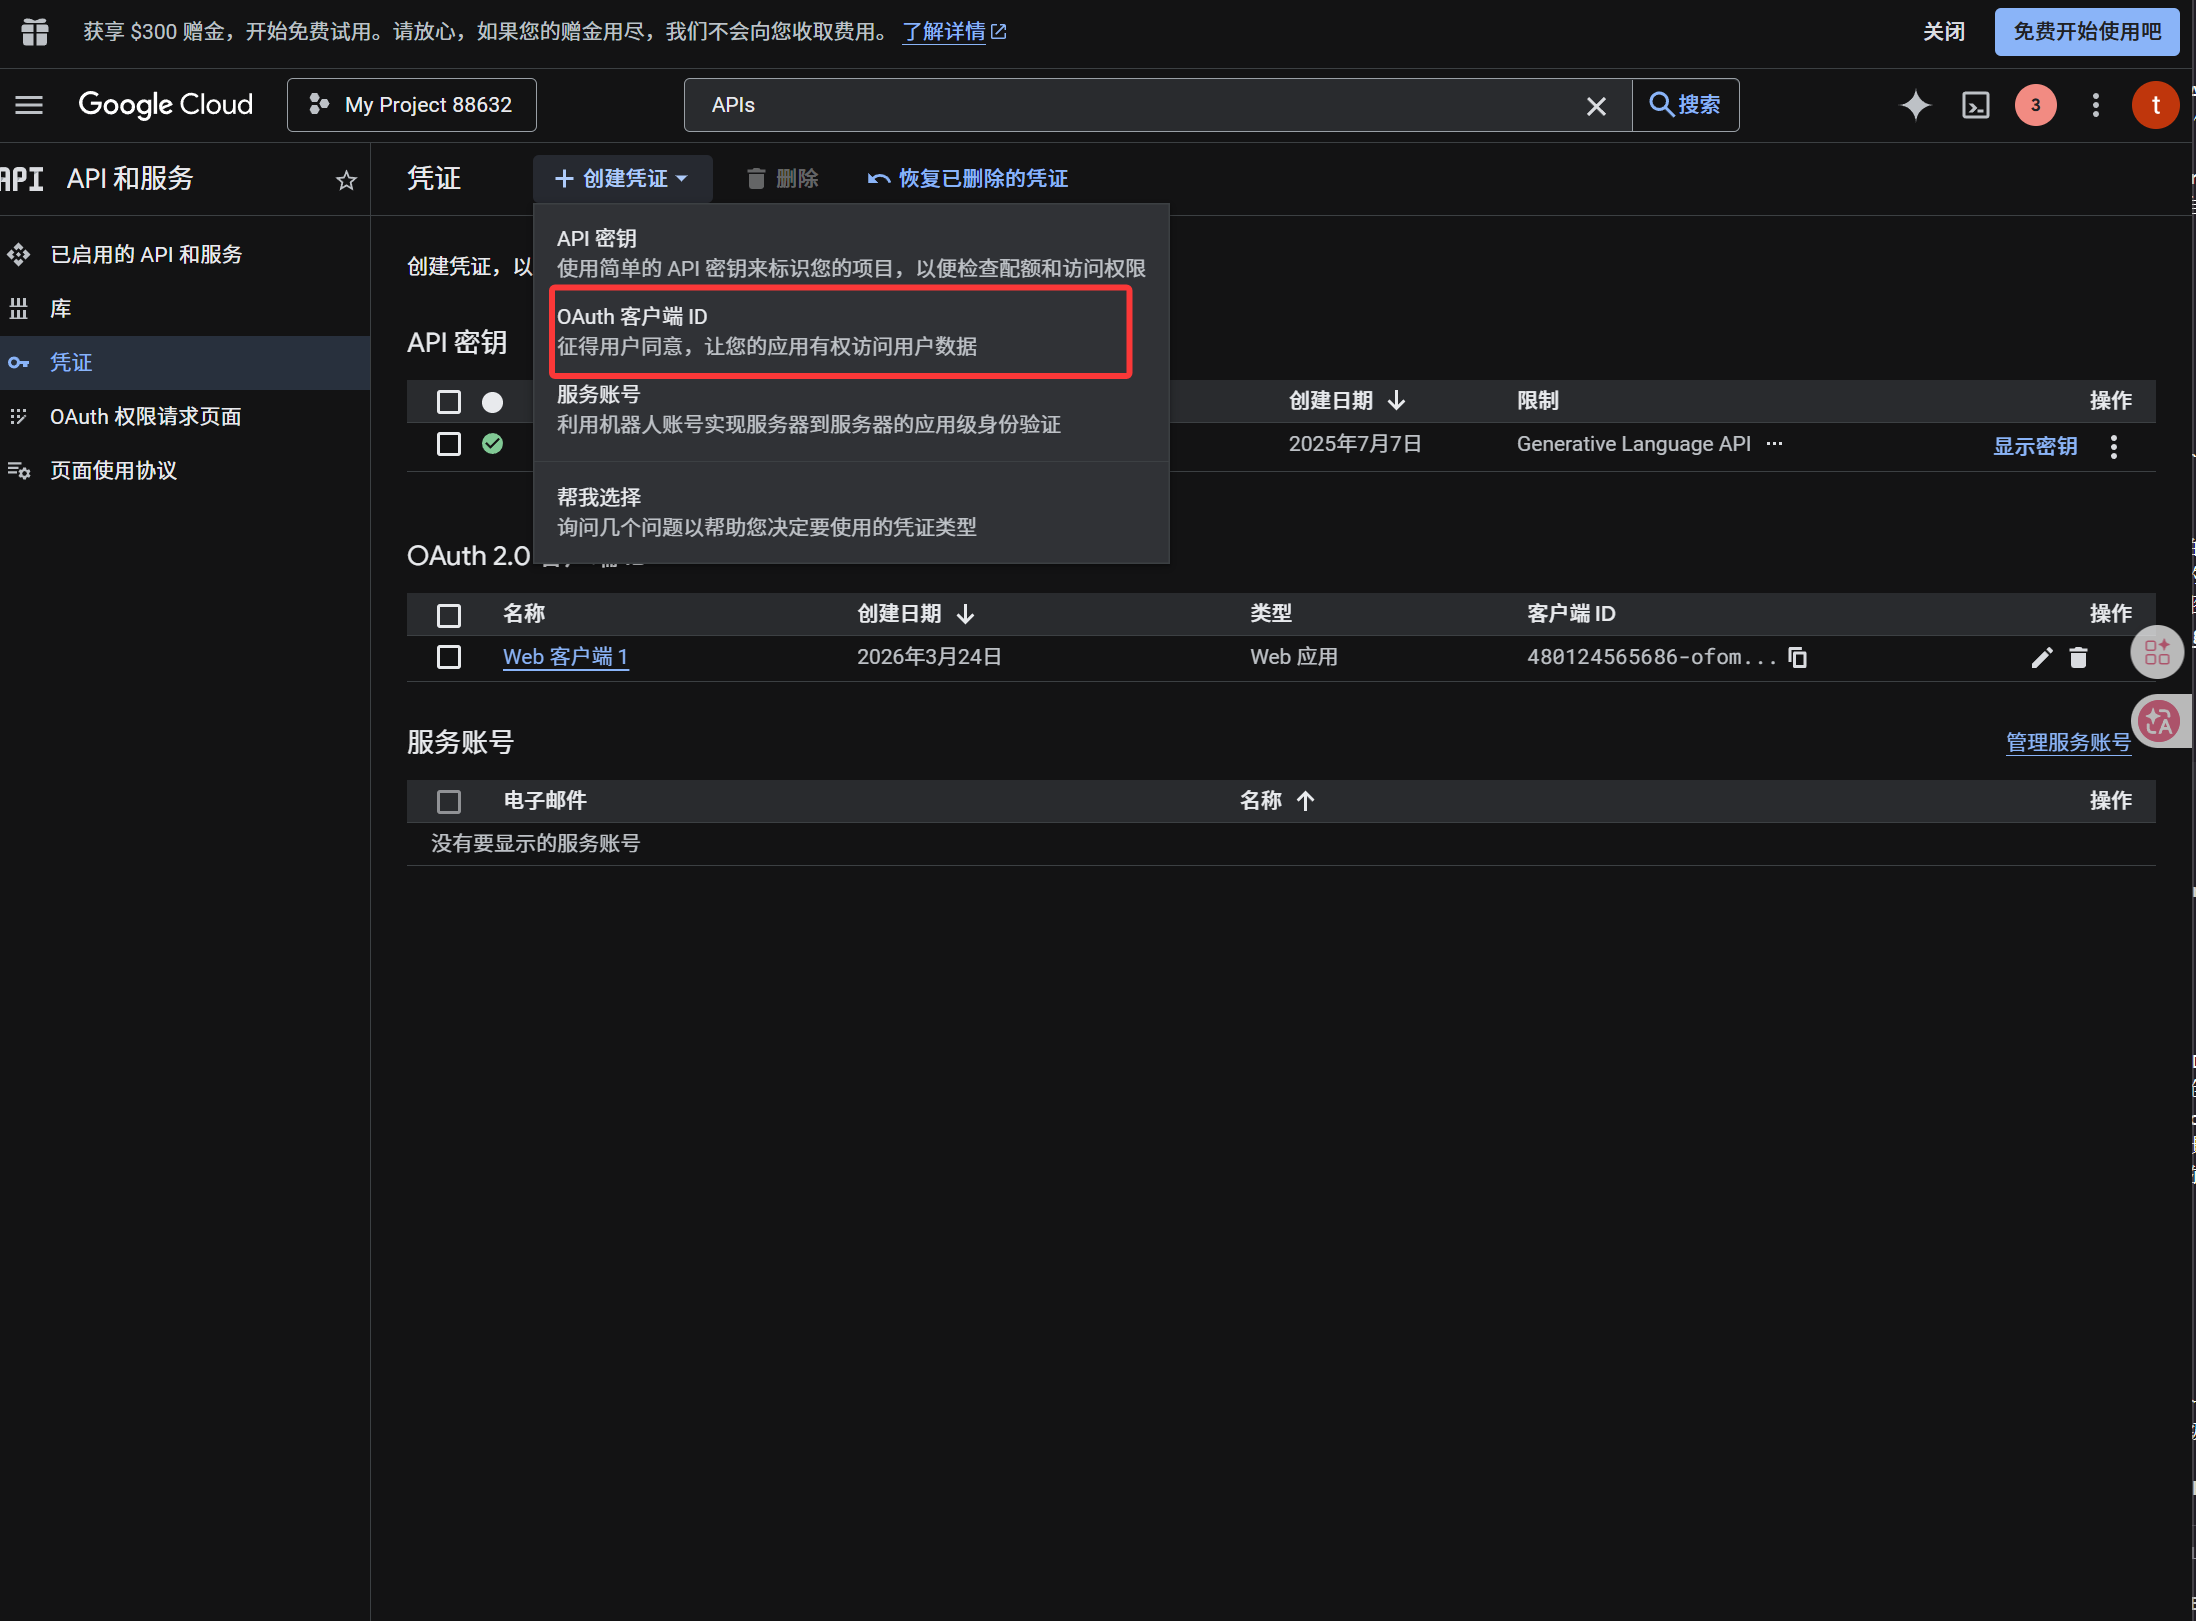
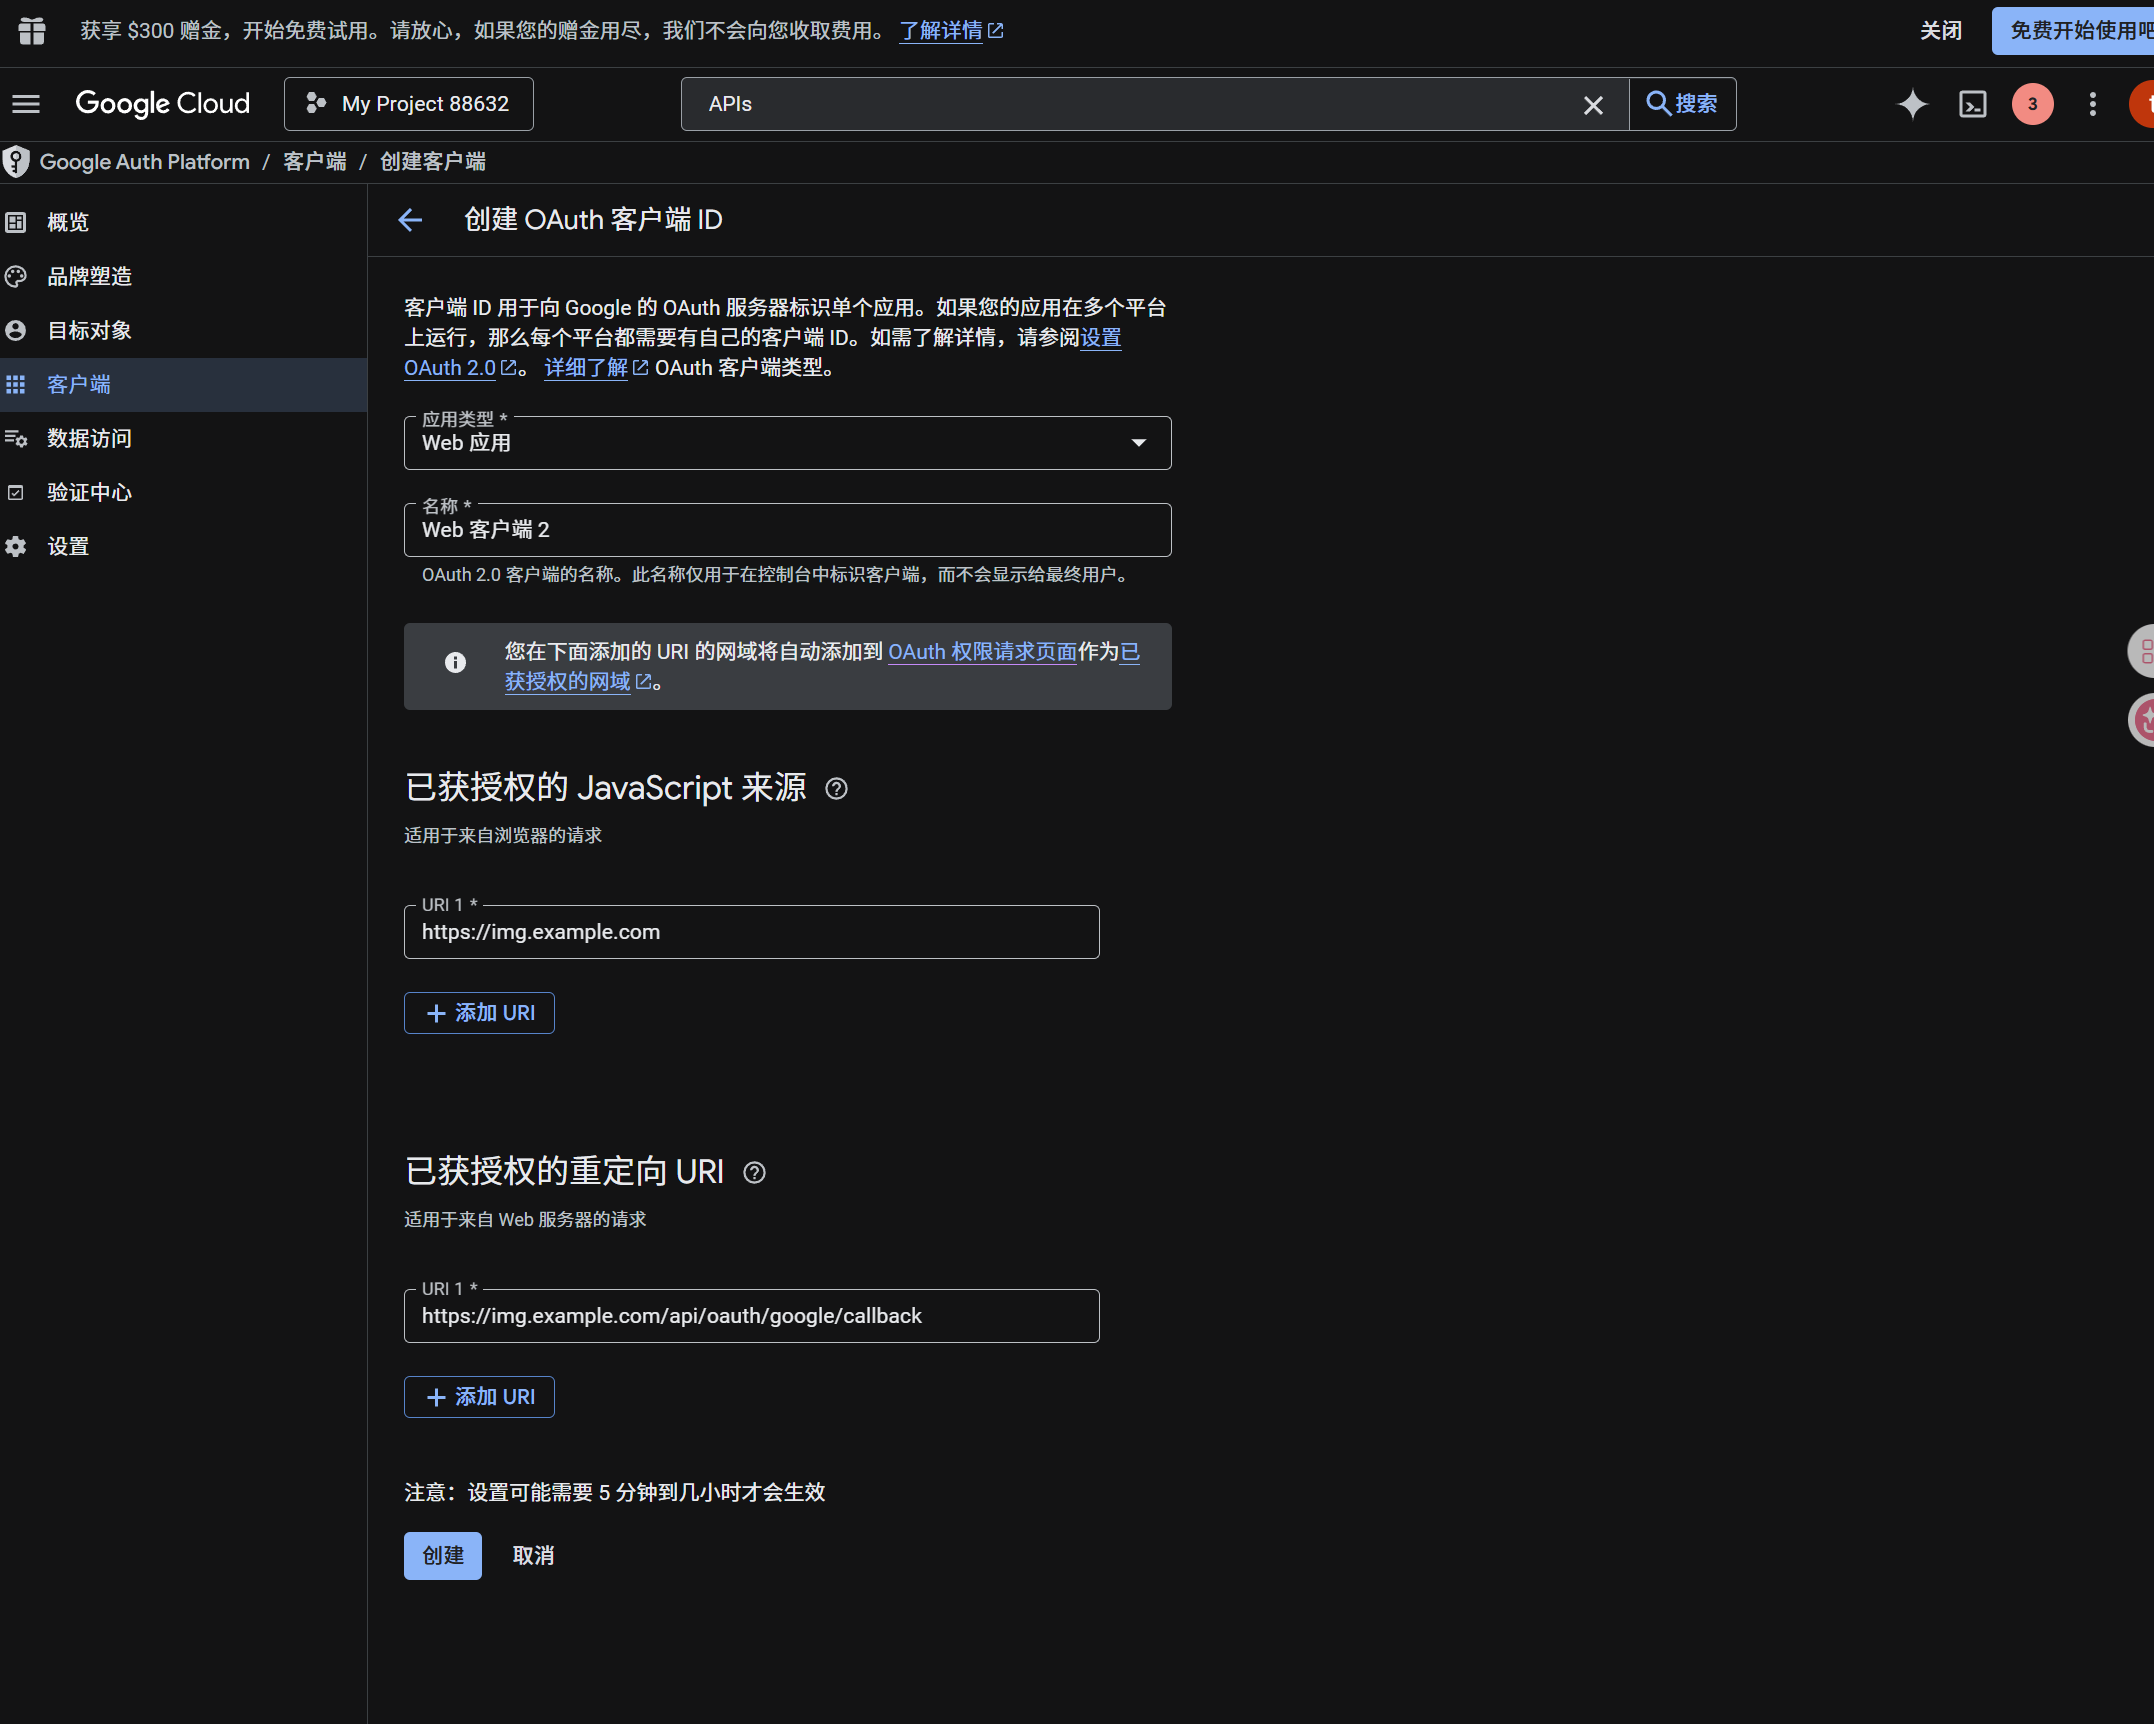
After the client is created, copy these values:
| Generated Value | ImgBed Field |
|---|---|
| Client ID | Client ID |
| Client Secret | Client Secret |
Step 4: Fill in the Google Drive Channel
In Upload Settings, choose Google Drive and fill in:
| ImgBed Field | What To Enter |
|---|---|
| Channel name | A name you can recognize, such as Main Google Drive |
| Client ID | The Client ID from Google Cloud |
| Client Secret | The Client Secret from Google Cloud |
| Refresh Token | Leave it empty for now. Get it in the next step. |
| Root directory | Optional. Defaults to imgbed. |
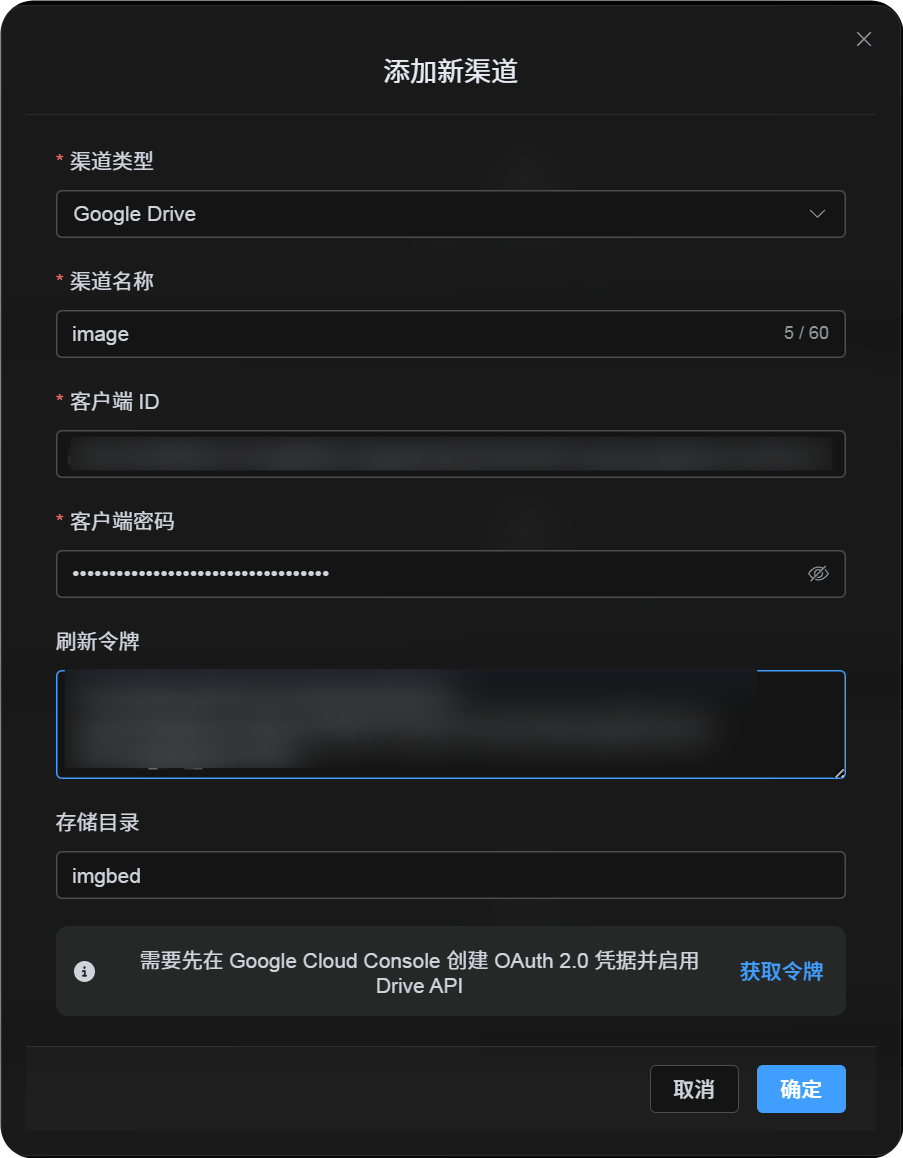
Step 5: Get the Refresh Token
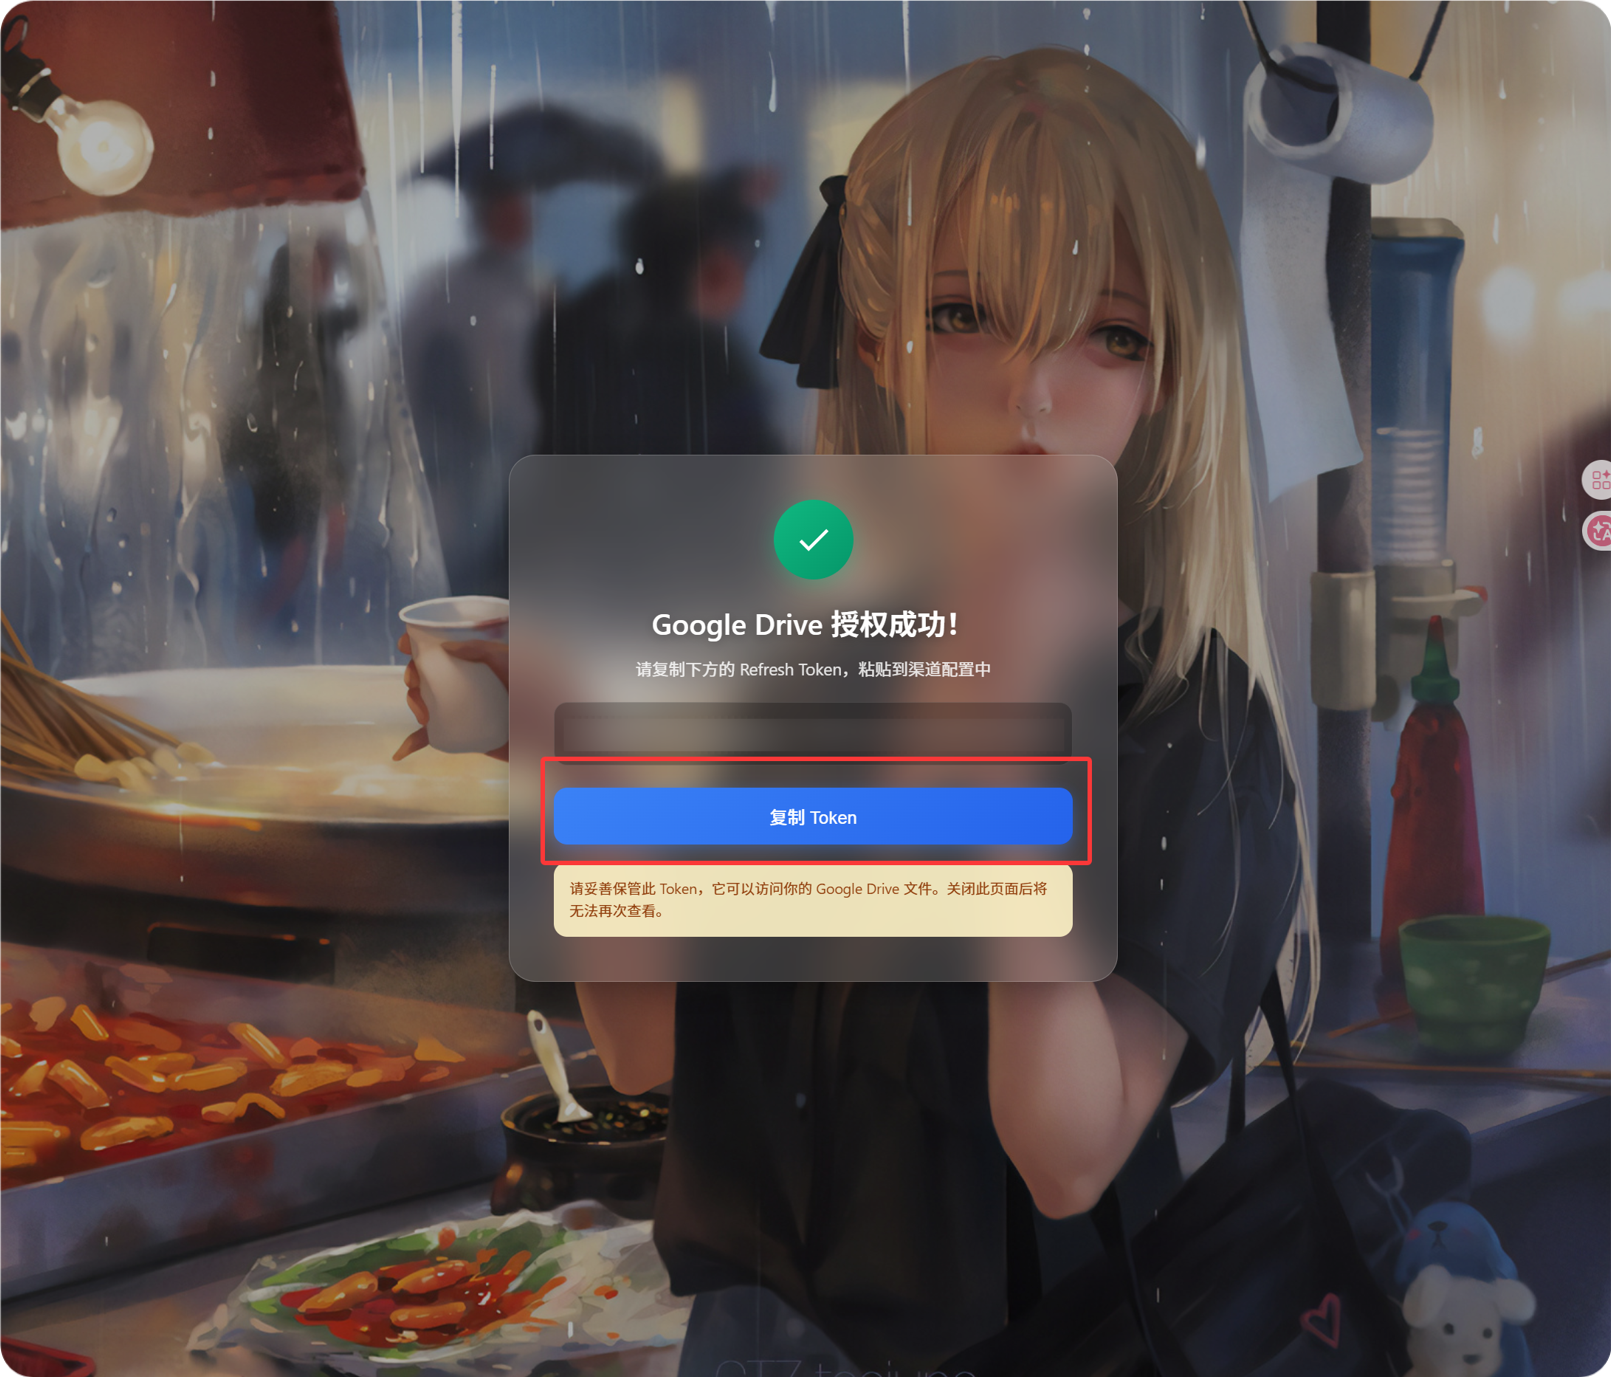
- Click
Get Token. - Choose the Google account you want to connect.
- Complete the authorization prompts.
- The callback page will show a
Refresh Token. - Copy it.
- Return to ImgBed and paste it into the
Refresh Tokenfield.
If you later switch Google accounts, change the OAuth client, or the old authorization expires, you do not need to delete the channel. Open the edit page and click Reauthorize.
Step 6: Save the Channel
After all fields are filled in, save the channel.
Quick Flow
text
Open Google Cloud
-> Create or select a project
-> Enable Google Drive API
-> Configure Google Auth Platform
-> If Audience is External, add your Google account to Test users
-> Create a Web application OAuth client
-> Use https://your-domain.com/api/oauth/google/callback as the redirect URI
-> Fill Client ID and Client Secret into ImgBed
-> Click Get Token
-> Sign in with Google and authorize
-> Copy the Refresh Token from the callback page
-> Paste it back into ImgBed and save
-> Upload a test image
References
- Google OAuth Web Server Applications: https://developers.google.com/identity/protocols/oauth2/web-server
- Google Workspace OAuth Consent Configuration: https://developers.google.com/workspace/guides/configure-oauth-consent
- Google Drive API Auth Scopes: https://developers.google.com/workspace/drive/api/guides/api-specific-auth