Add a Hugging Face Channel
What You Need Before You Start
You only need three things:
| Requirement | Purpose |
|---|---|
| Hugging Face account | Used to generate an access token and own the repository. |
| Hugging Face User Access Token | Used by ImgBed to access the Hugging Face API, create repositories, and upload files. |
| Repository name | You can enter only the repository name, for example image. |
Setup Steps
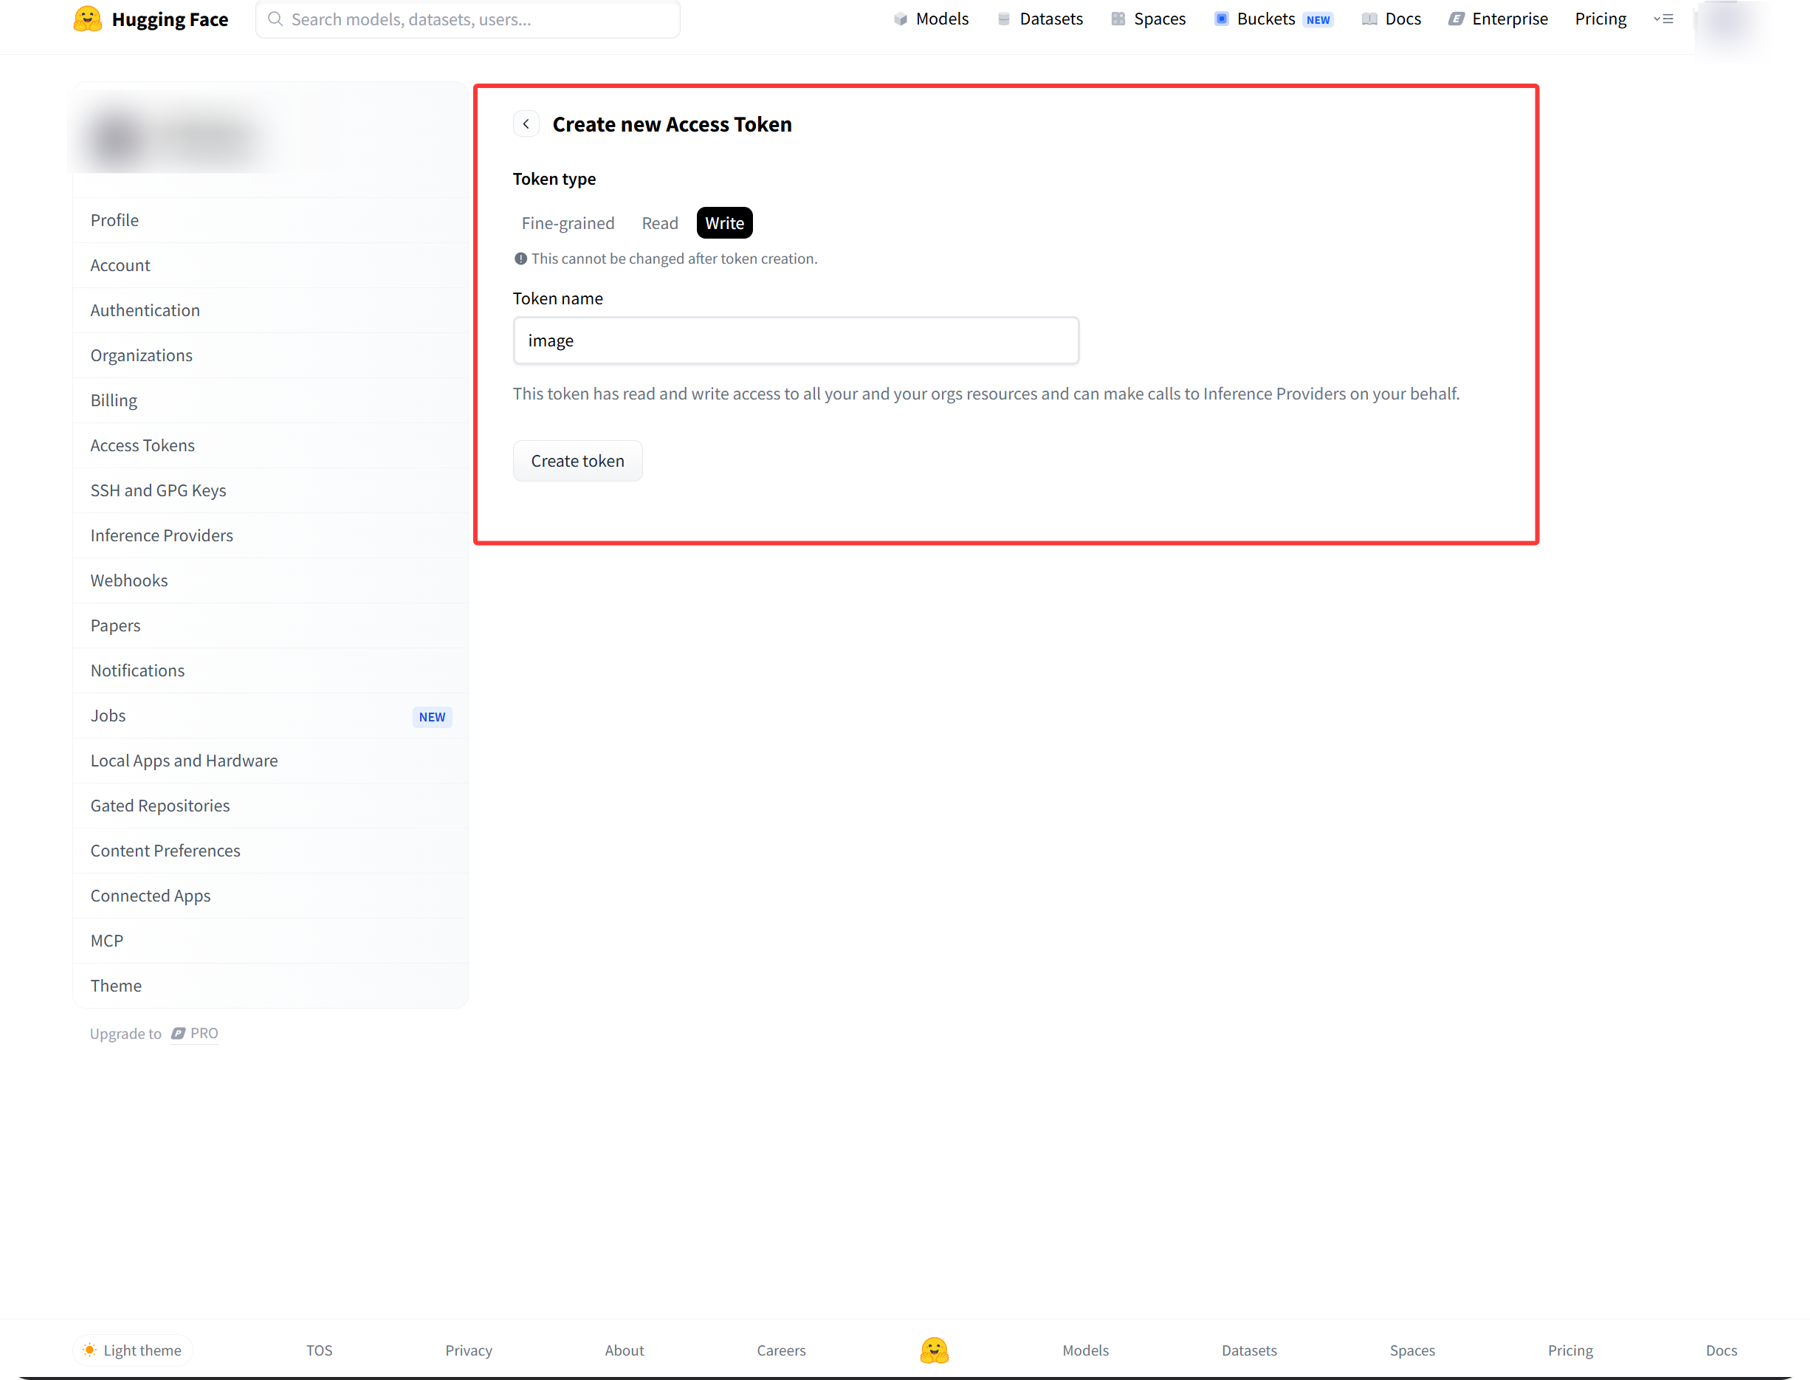
Step 1: Sign in to Hugging Face and Create an Access Token
- Sign in to Hugging Face.
- Click your avatar in the upper-right corner and open
Settings. - Open
Access Tokensfrom the left sidebar. - Create a new token.
- Give the token a recognizable name.
- Select
writepermission. - Copy and save the token immediately after it is created.
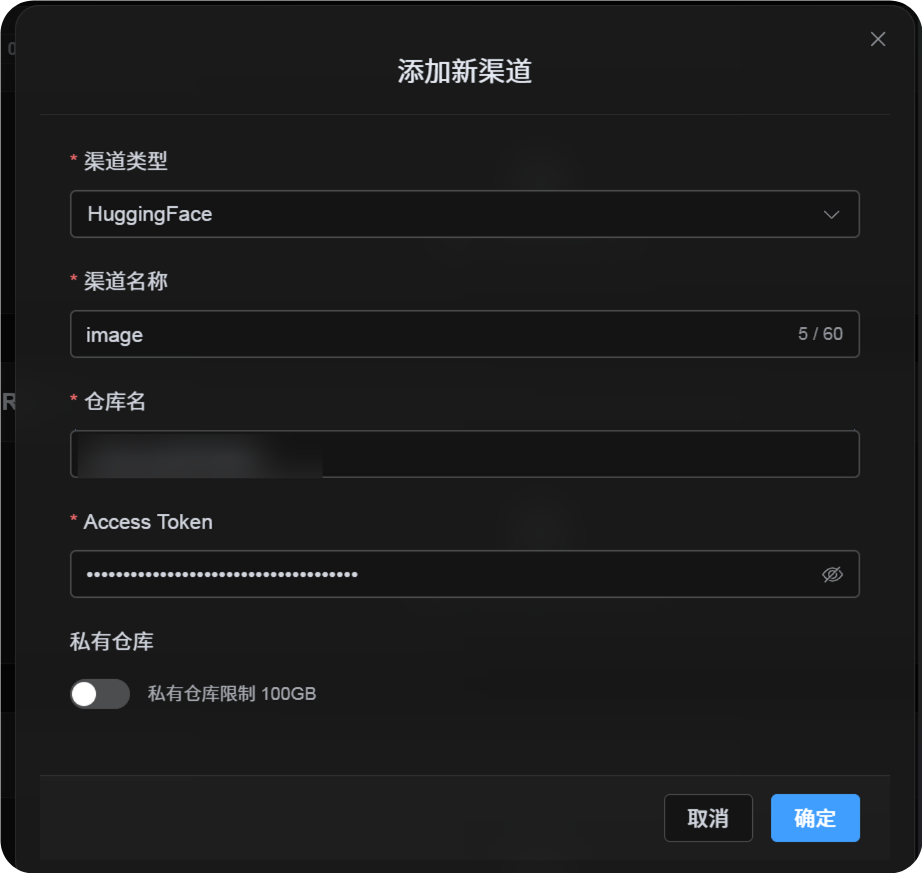
Step 2: Fill in the Hugging Face Channel in ImgBed
After selecting Hugging Face in Upload Settings, fill in the fields as follows:
| UI Field | What to Enter |
|---|---|
| Channel name | A name you choose, such as hf-primary. |
| Repository name | Either a short repo name such as image, or a full path such as username/image. |
| Access Token | The Hugging Face User Access Token you just created. |
| Private repository | Turn on or off based on your needs. |
| Remark | Optional, for example Primary upload channel. |
Step 3: Save the Channel
After filling in the fields, click Save.
The system will then handle these details:
| System Behavior | Description |
|---|---|
| Short repository name | ImgBed identifies the current Hugging Face account and expands the value into a full repository path. |
| Full repository path | ImgBed uses the username/repository path exactly as entered. |
| Repository check | If you use the current personal account path, ImgBed tries to create the repository when it does not exist. If you enter a full path manually, ImgBed uses that path directly. |
| Repository type | This channel uses a dataset repository. |
| Public/private state | The repository visibility is synchronized according to the current switch. |
Quick Checklist
text
Sign in to Hugging Face
-> Create an Access Token
-> Select write permission
-> Return to ImgBed and enter the token and repository name
-> Save
-> If only a repo name is entered, ImgBed adds the current username automatically
-> If username/repo is entered, ImgBed uses it as-is
-> ImgBed checks or creates the dataset repository
-> Upload a test image