Add a Telegram Channel
What You Need Before You Start
| Requirement | Purpose |
|---|---|
| Telegram account | Used to create the bot and the storage channel. |
@BotFather | Used to create a Telegram bot. |
| A Telegram channel | The final storage destination for files. |
@userinfobot | Used to look up the channel Chat ID. |
Where to Add It
- Open System Settings.
- Go to Upload Settings.
- Click Add Channel in the upper-right corner.
- Select
Telegram.
Field Reference
| Field | What It Does | Required |
|---|---|---|
| Channel name | A friendly name for this channel, such as "Telegram Primary". | Required |
| Active | Enables or disables this channel. | Recommended |
| Bot Token | The token of your Telegram bot. | Required |
| Session ID (Chat ID) | The ID of the Telegram channel. | Required |
| Relay Proxy URL (optional) | Use this only if Telegram access is unstable. Enter the full proxy URL, including https://. | Optional |
| Remark | Notes for future maintenance. | Optional |
Setup Steps
1. Create a Telegram Bot
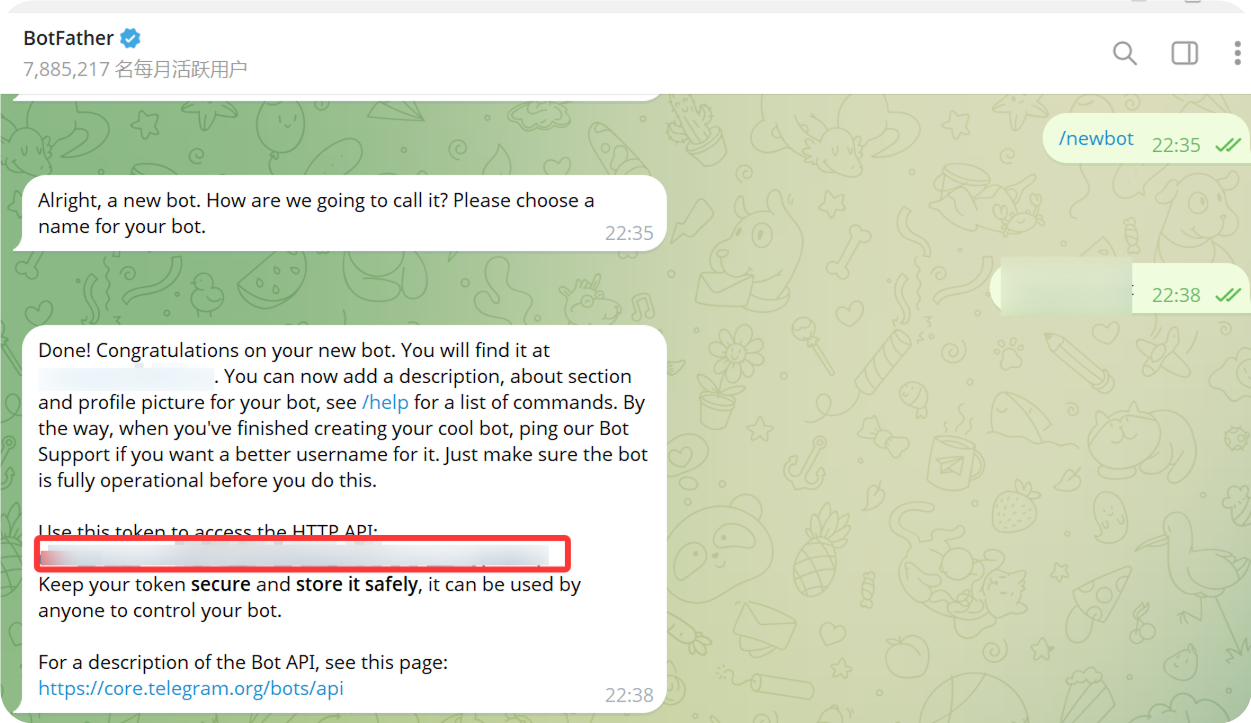
- Open Telegram and search for
@BotFather. - Open the chat and click
Start. - Send
/newbot. - Follow the prompts to enter a bot display name.
- Follow the prompts to enter a bot username. The username usually needs to end with
bot. - After the bot is created,
@BotFatherwill return a bot token.
This token is the Bot Token you need to enter in ImgBed.
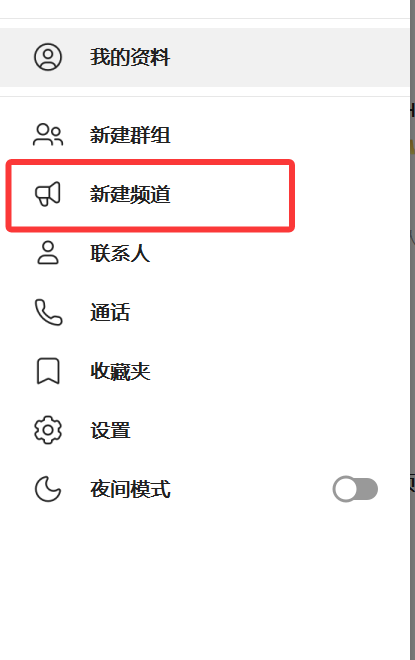
2. Create a Channel
- In Telegram, click New Channel.
- Enter a channel name.
- Finish creating the channel.
Both public and private channels can be used.
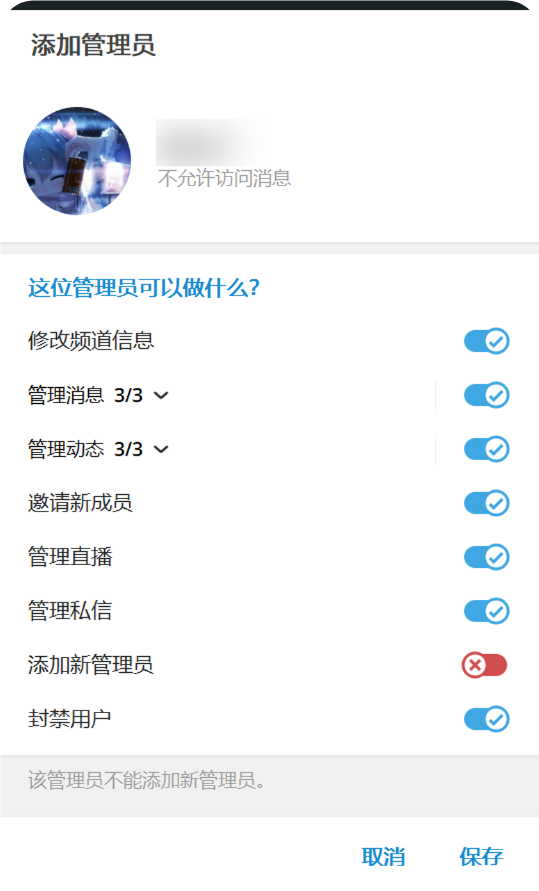
3. Add the Bot to the Channel
- Open the channel you just created.
- Open the channel settings.
- Add a member or administrator.
- Search for the bot username you created.
- Add the bot to the channel.
For the most reliable uploads, grant the bot administrator permissions.
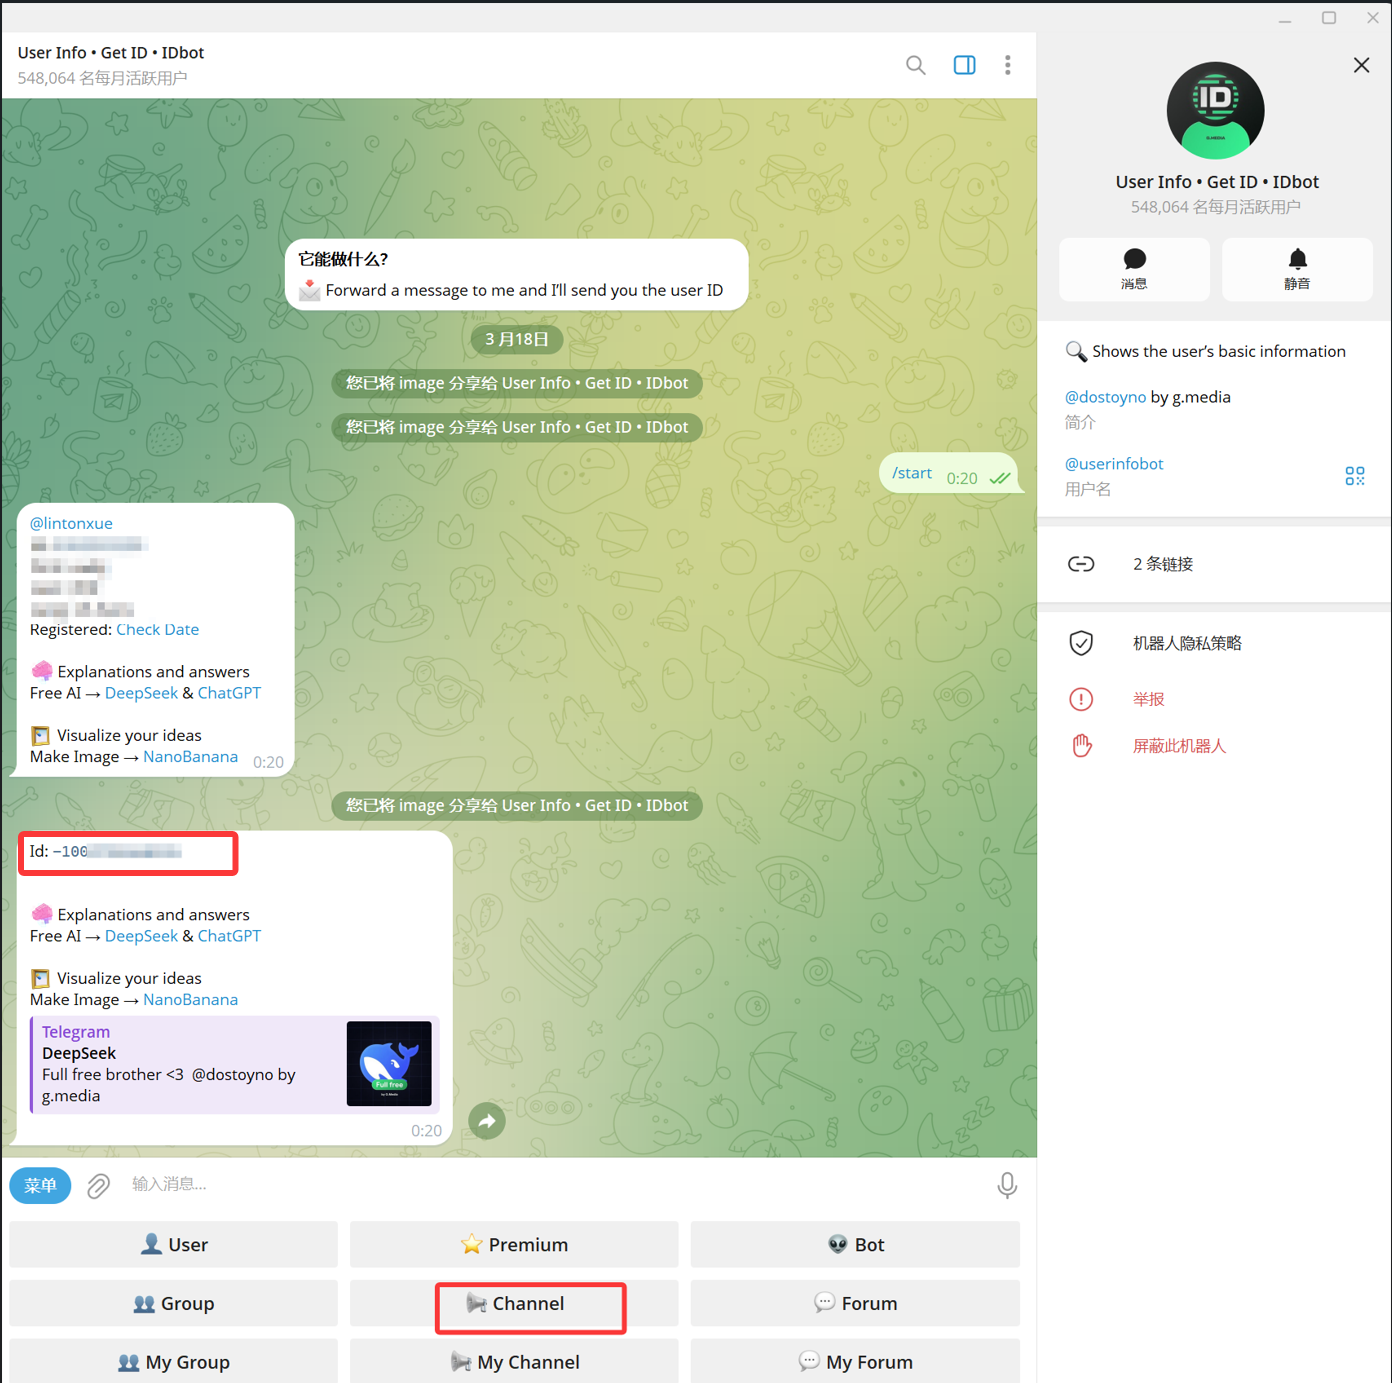
4. Get the Channel ID with User Info - Get ID - IDbot
- Search for
@userinfobotin Telegram. Its display name is usuallyUser Info - Get ID - IDbot. - Open the chat and click
Start. - Choose
Channelfrom the options provided by the bot. - In the message picker, select the target channel and send it to
@userinfobot. - When
@userinfobotreturns the result, copy the number shown asId: -100....
The number starting with -100 is the Session ID (Chat ID) required by ImgBed.
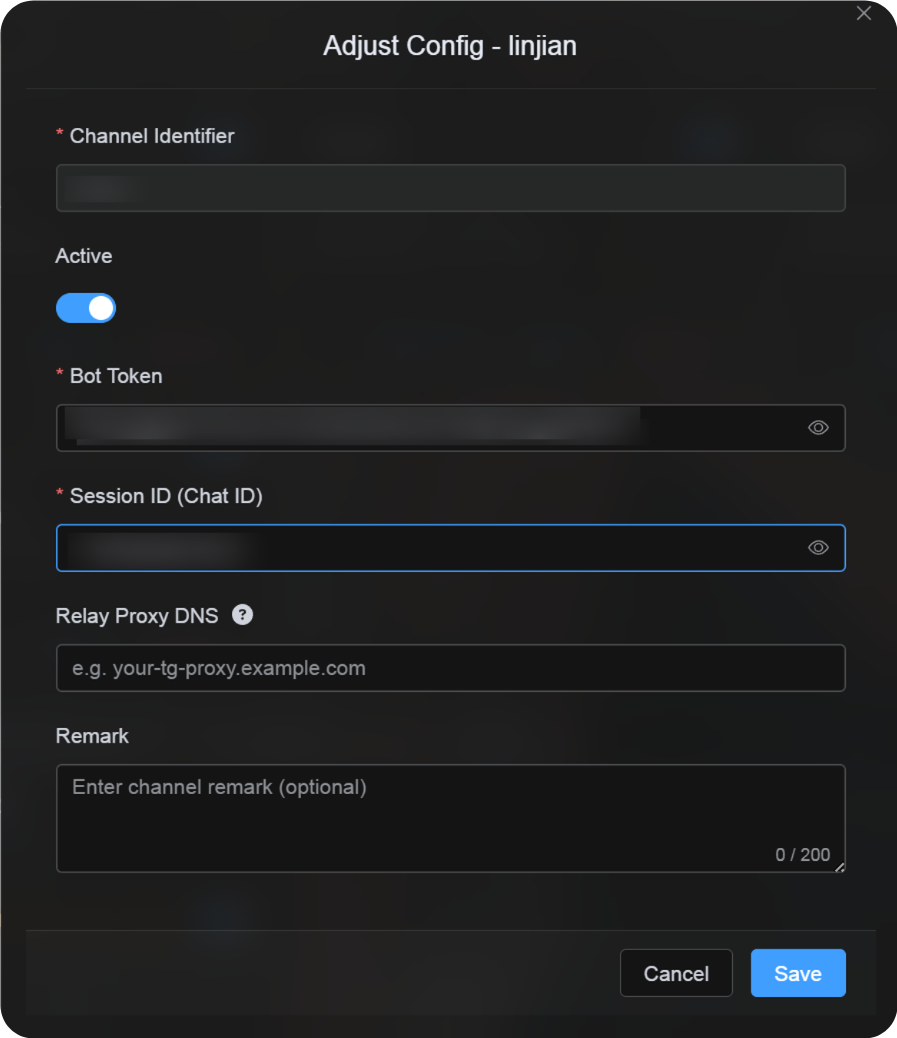
5. Fill in the Telegram Channel in ImgBed
Return to the channel configuration dialog and fill in the fields as follows:
| UI Field | Value |
|---|---|
| Channel Identifier | A custom channel name, for example TelegramPrimary. |
| Active | Recommended. |
| Bot Token | The bot token from @BotFather. |
| Session ID (Chat ID) | The -100... number returned by @userinfobot. |
| Relay Proxy URL (optional) | Only if needed, for example https://your-tg-proxy.example.com. |
| Remark | Optional notes. |
Click Save when you are done.
How to Verify It
| Check | How to Verify |
|---|---|
| Channel card appears | After saving, the Upload Settings page should show a Telegram channel card. |
| Channel can be enabled | The Active switch should stay on. |
| Configuration is saved | The detail view should show that the Bot Token and Chat ID were saved. |
| Upload works | Upload a test image and confirm that it appears in the target Telegram channel. |
Quick Checklist
text
Create a bot with @BotFather
-> Save the Bot Token
-> Create a Telegram channel
-> Add the bot to the channel and grant administrator permissions
-> Search for @userinfobot and choose Channel
-> Forward any message from the channel to @userinfobot
-> Copy the returned Id: -100...
-> Enter the Bot Token and Chat ID in ImgBed
-> Save and upload a test image
References
- Telegram bots: https://core.telegram.org/bots
- Telegram Bot API: https://core.telegram.org/bots/api