Add a Cloudflare R2 Channel
Best Fit
Use Cloudflare R2 when:
- Your ImgBed site is already deployed on Cloudflare and you want to store files in an R2 bucket under the same Cloudflare account.
- You do not want to configure a separate S3 endpoint, access key, and secret key.
- You want reads and writes to go through the Worker or Pages R2 binding with minimal setup.
In short:
The R2 channel is not created manually inside the ImgBed admin panel. You first bind an R2 bucket to the Cloudflare project, and the binding variable name must be img_r2.
What You Need Before You Start
- A Cloudflare account.
- An existing R2 bucket.
- Permission to manage the Cloudflare project where ImgBed is deployed.
Configure It in Cloudflare
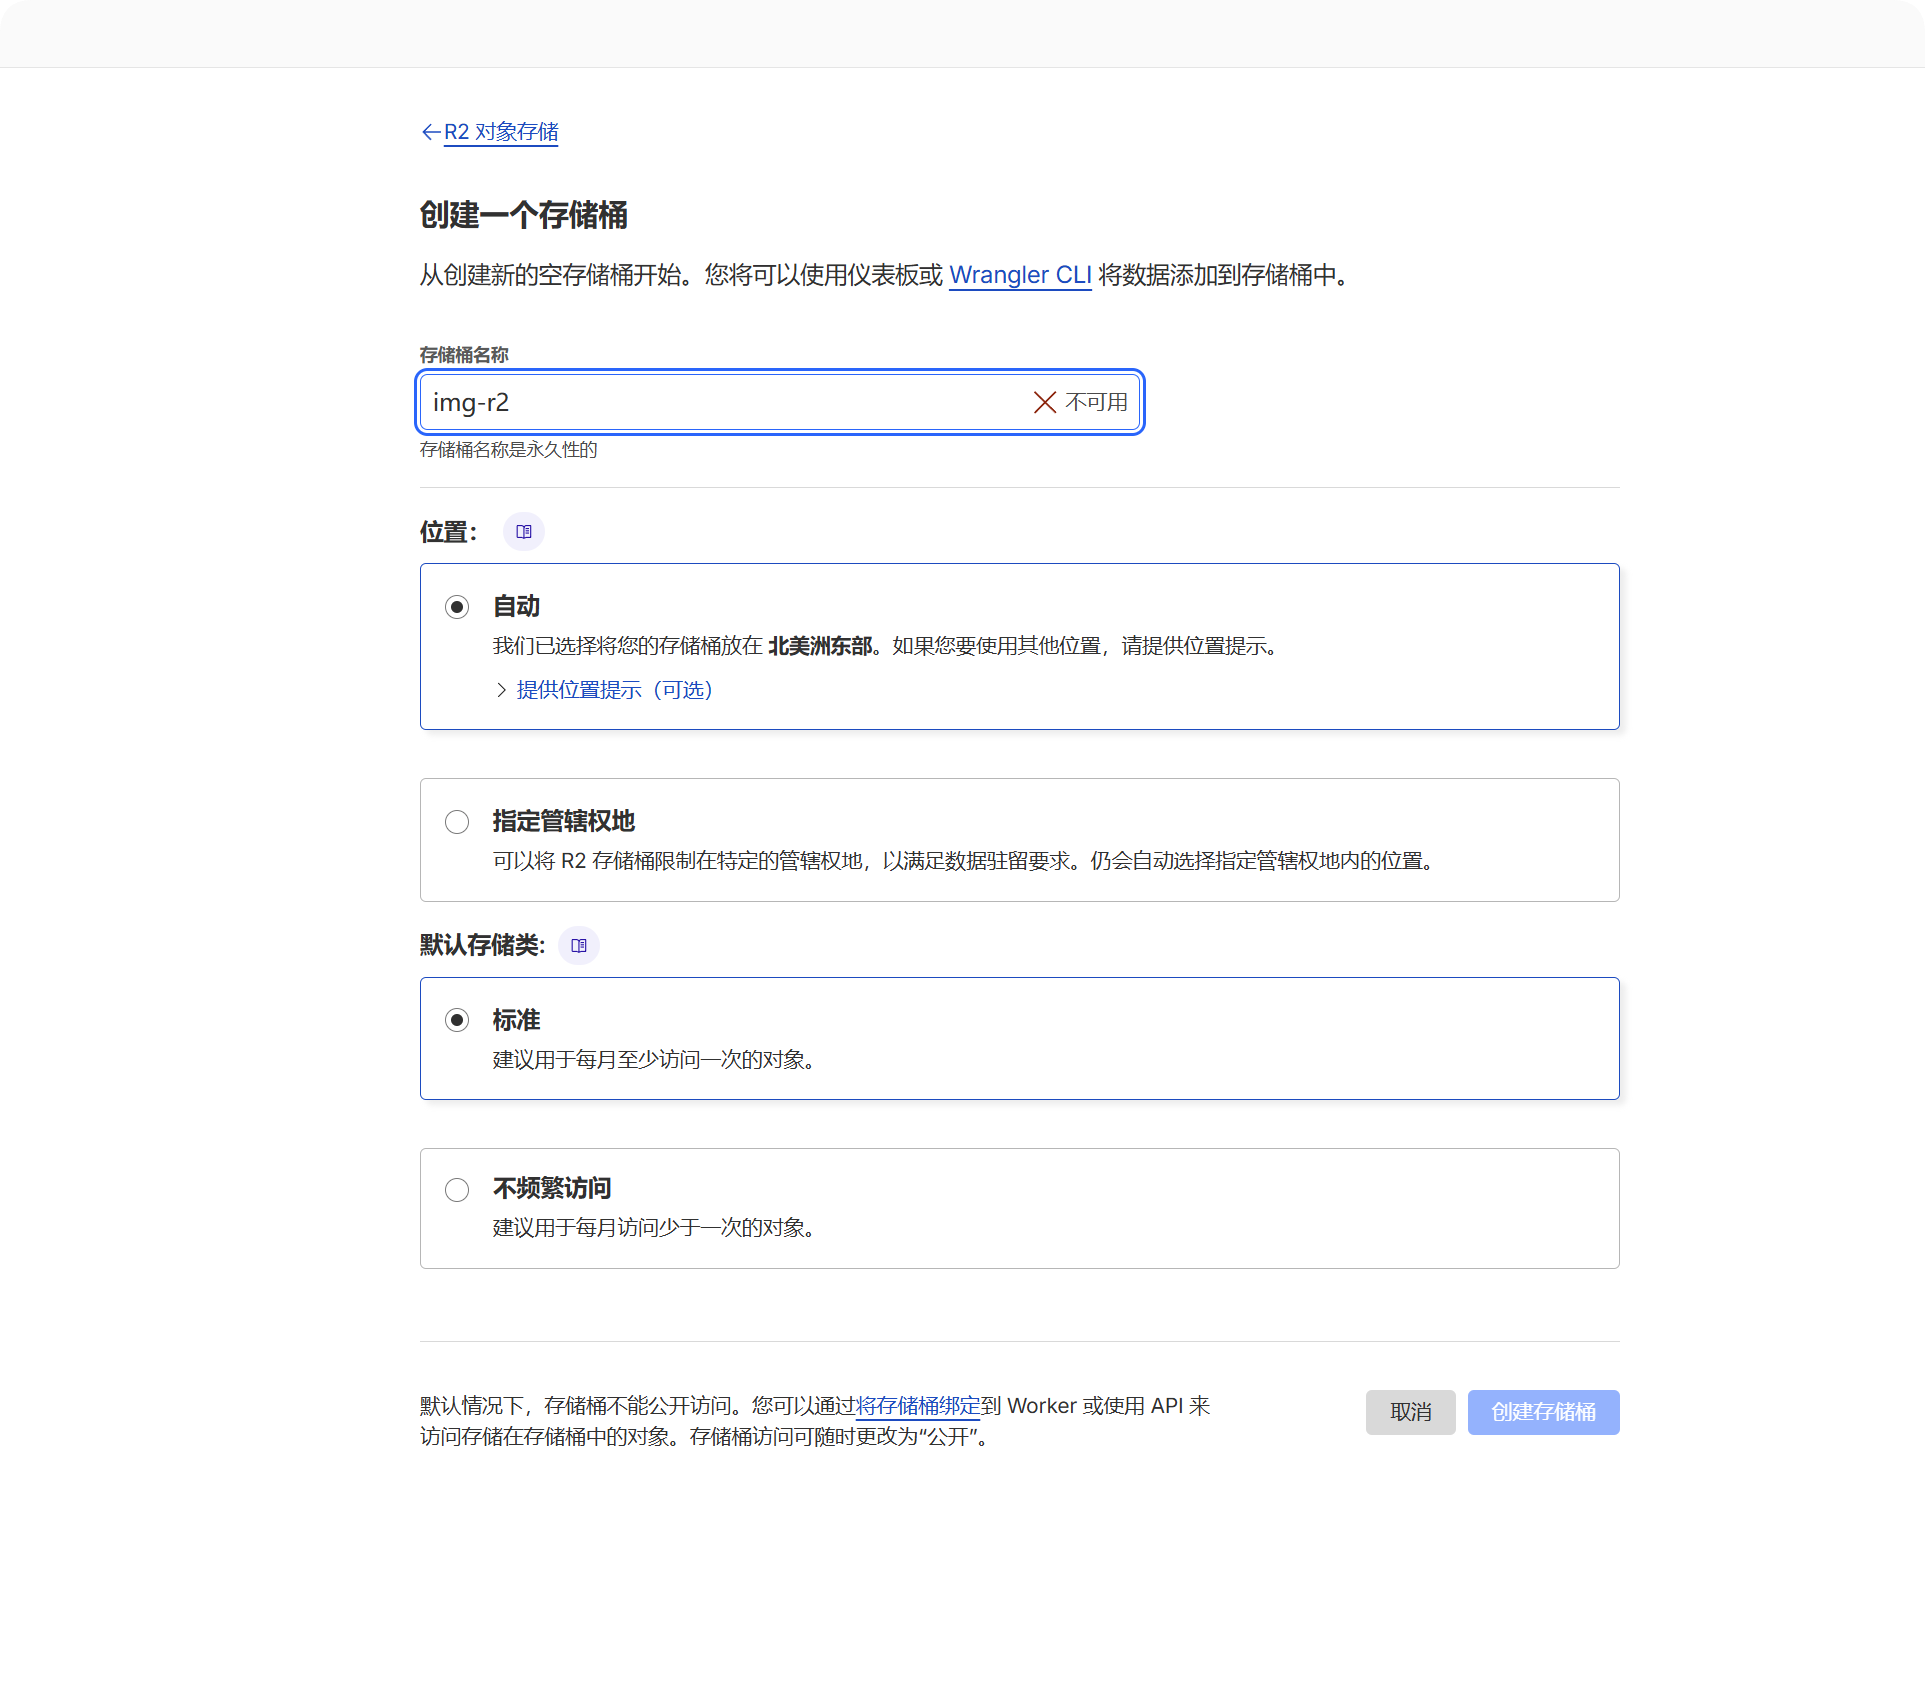
1. Create an R2 Bucket
- Log in to the Cloudflare Dashboard.
- Open
R2 Object Storage. - Click Create bucket.
- Choose a bucket name, for example
imgbed.
This bucket is where uploaded files will be stored.
2. Bind the Bucket to the ImgBed Project
Choose the binding location based on your deployment type:
| Deployment Type | Binding Location |
|---|---|
| Pages | Current Pages project -> Settings -> Functions -> R2 bucket bindings |
| Worker | Current Worker -> Settings -> Bindings -> R2 bucket bindings |
When adding the binding, the important fields are:
| Field | Value |
|---|---|
| Variable name | img_r2 |
| R2 bucket | Select the bucket you created. |
The variable name must be exactly img_r2. Uploading, reading, and deleting R2 files all depend on this binding name.
3. Redeploy the Project
After saving the binding, redeploy ImgBed so the Worker or Pages runtime can access img_r2.
What You Will See in ImgBed
After the R2 binding is available, open:
- System Settings.
- Upload Settings.
- The
Cloudflare R2channel.
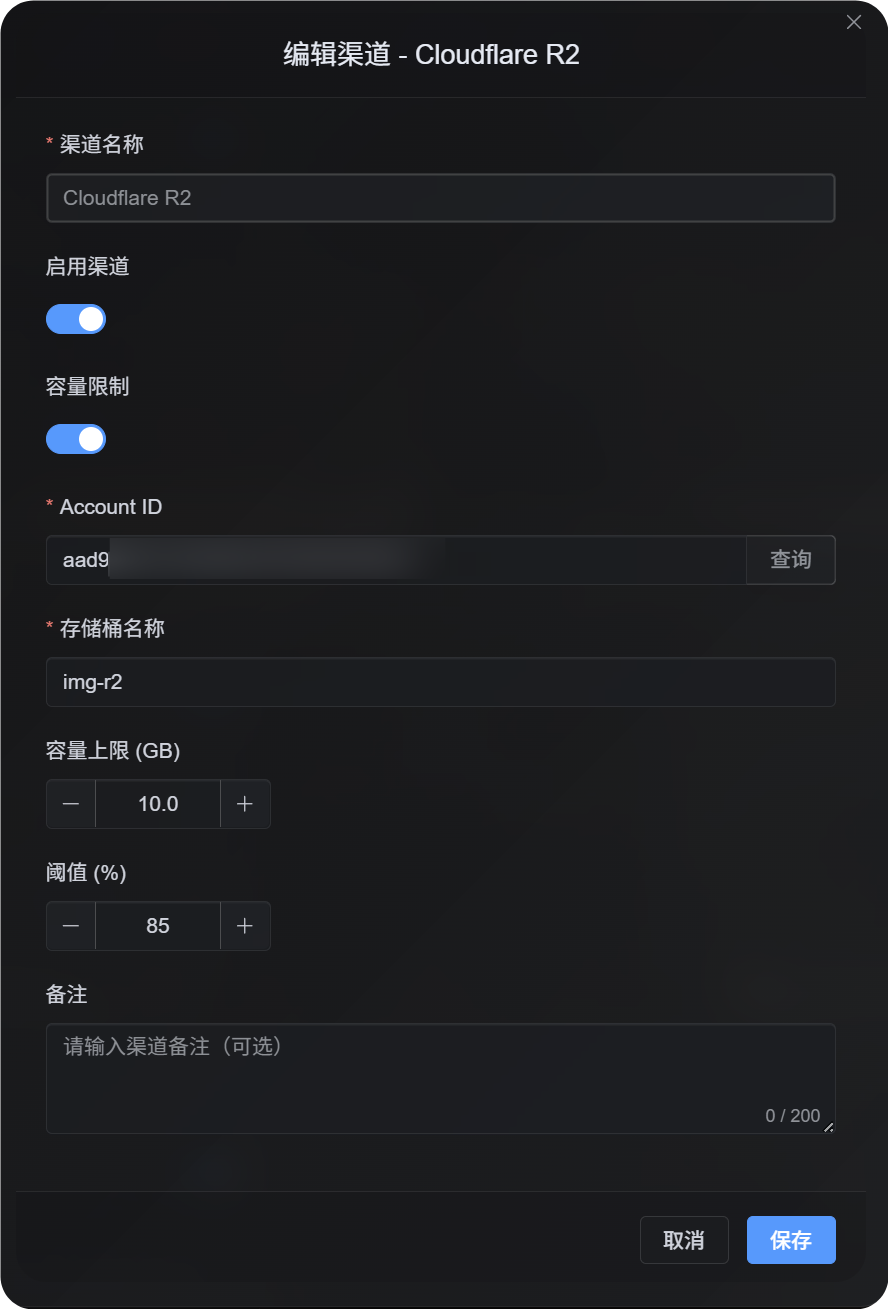
The system automatically creates one fixed channel:
| Field | Fixed Value |
|---|---|
| Channel name | Cloudflare R2 |
| Channel type | cfr2 |
| Storage mode | binding |
| Configuration source | Environment binding |
This is a fixed binding channel. You do not need to click Add Channel to create it, and it cannot be deleted like a regular channel.
Editable Fields in the Admin Panel
| Field | What It Does | Required |
|---|---|---|
| Enable channel | Controls whether R2 participates in upload selection. | Yes |
| Account ID | Used only when quota limits are enabled and official R2 usage needs to be queried. | Recommended when quota limits are enabled |
| Bucket name | Used only when quota limits are enabled and official R2 usage needs to be queried. | Recommended when quota limits are enabled |
| Quota limit | Controls whether this R2 channel participates in upload selection based on capacity. | No |
| Threshold | Stops writing to this channel after usage reaches the specified percentage. | Required when quota limits are enabled |
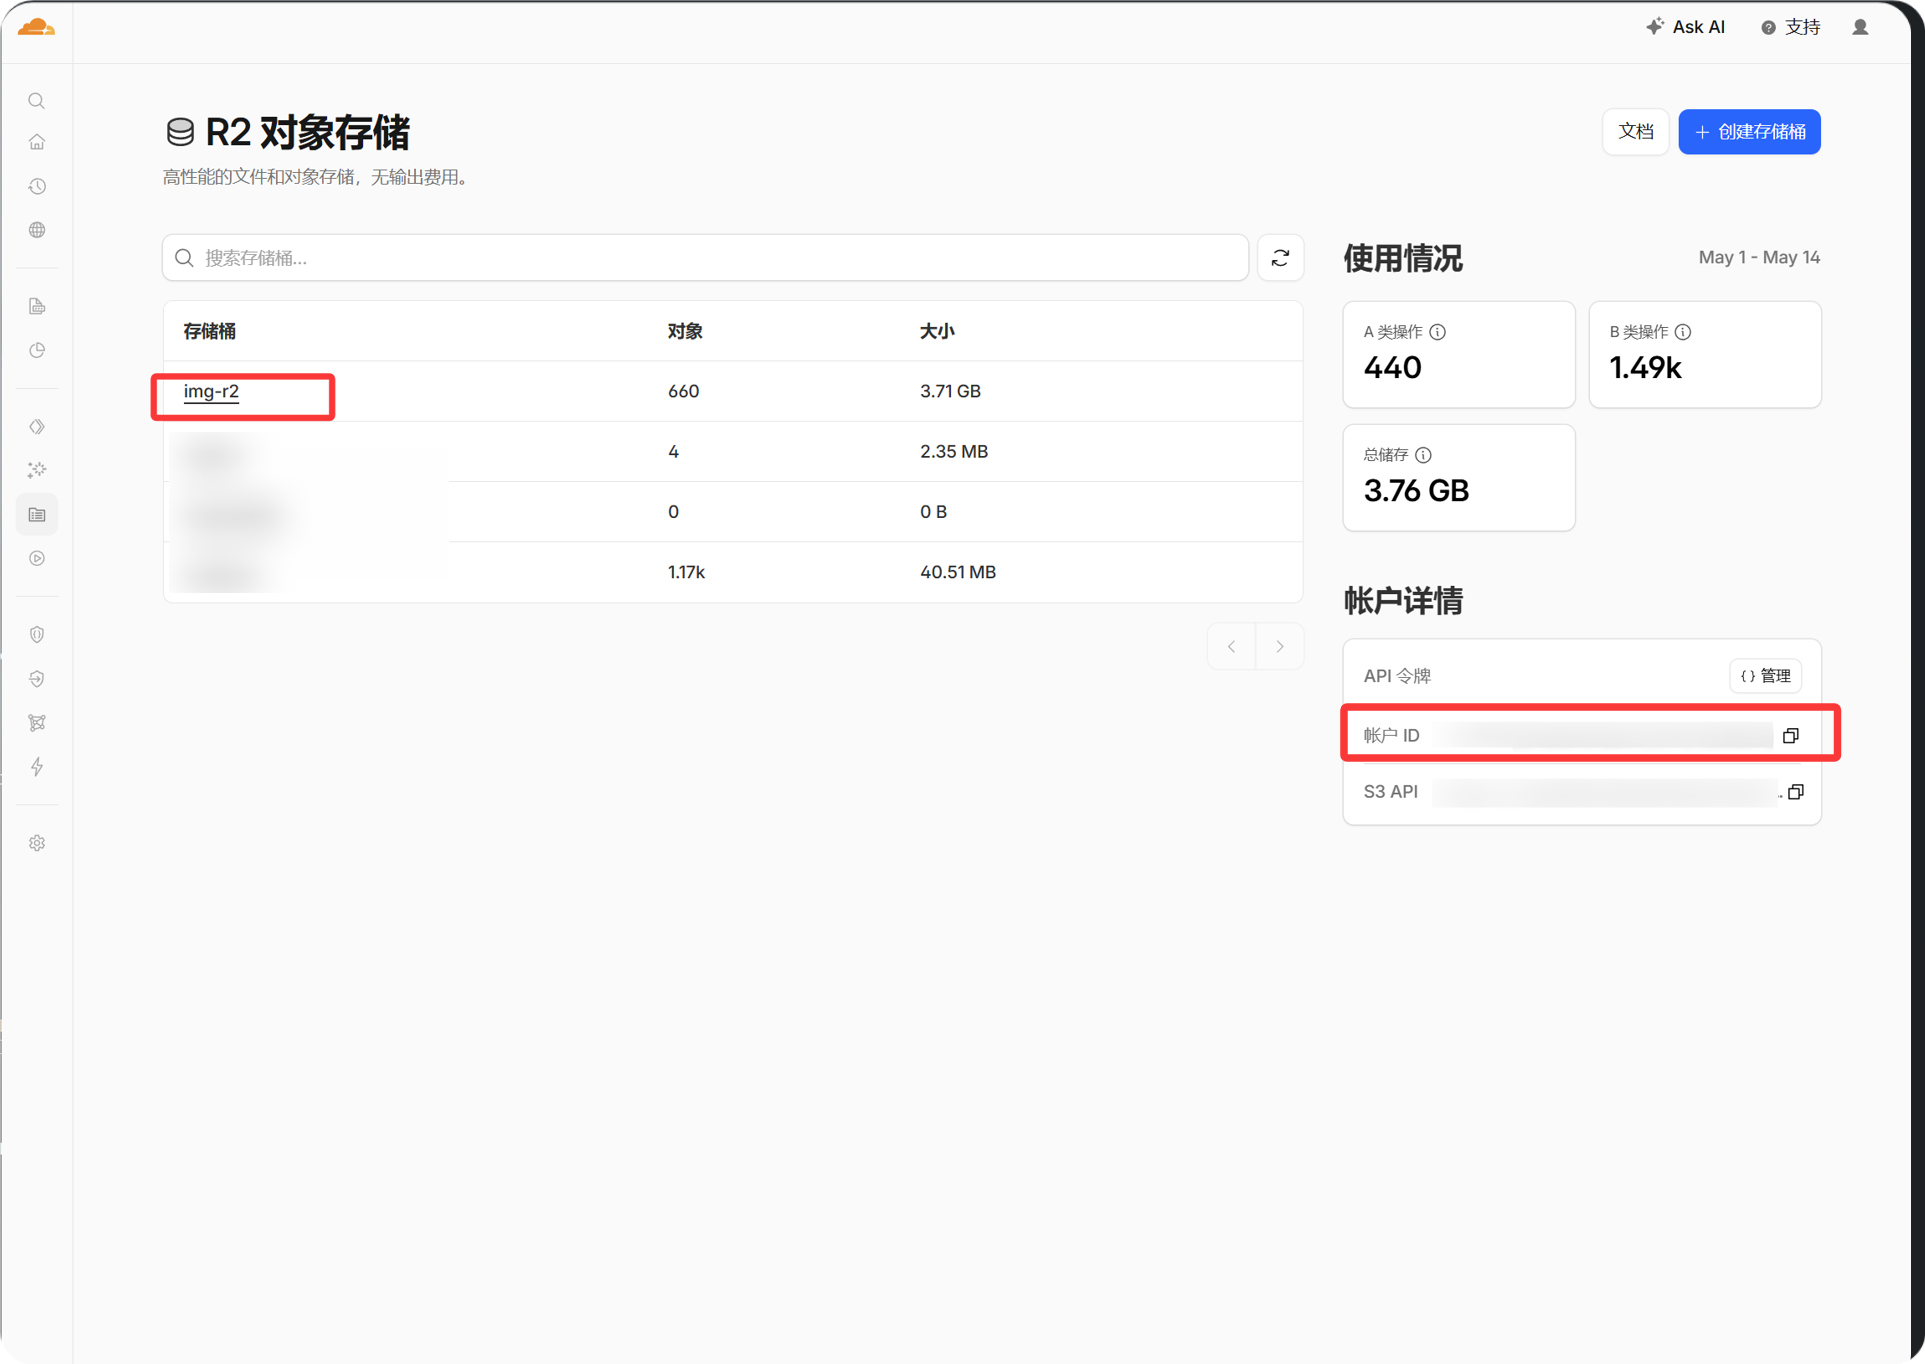
You can copy the Account ID from the account information panel in the Cloudflare dashboard. Fill it in only if you want ImgBed to query and enforce R2 quota usage.
Setup Steps
- Create an R2 bucket in Cloudflare.
- Open the Cloudflare settings for the ImgBed project.
- Add an R2 bucket binding.
- Set
Variable nametoimg_r2. - Select the R2 bucket you created.
- Save the binding and redeploy ImgBed.
- Return to ImgBed -> System Settings -> Upload Settings.
- Confirm that the
Cloudflare R2channel appears and is enabled.
If you want R2 to participate in upload selection based on capacity, enable the quota limit, then enter the Account ID, bucket name, quota limit, and threshold before saving.
How to Verify It
- The fixed
Cloudflare R2channel appears in Upload Settings. - The channel card shows that it is enabled.
- A small test file uploads successfully, and the returned link opens normally.
- If opening a file returns
R2 database binding is not configured, the runtime did not receive theimg_r2binding. Check the binding name in Cloudflare and redeploy the project.