Upload Settings
Upload Settings connects ImgHost to your own storage channels. After a channel is configured, uploaded images and files are saved to the service you choose. ImgHost then manages file records, access links, previews, public gallery features, random image API access, WebDAV access, and related workflows.
Different users may prefer different channels. If you want a simple setup, Telegram, Discord, or GitHub Releases can be good starting points. If you care more about capacity, speed, and long-term stability, consider Cloudflare R2, S3, OneDrive, Google Drive, Dropbox, Yandex, pCloud, or your own WebDAV service.
Before You Start
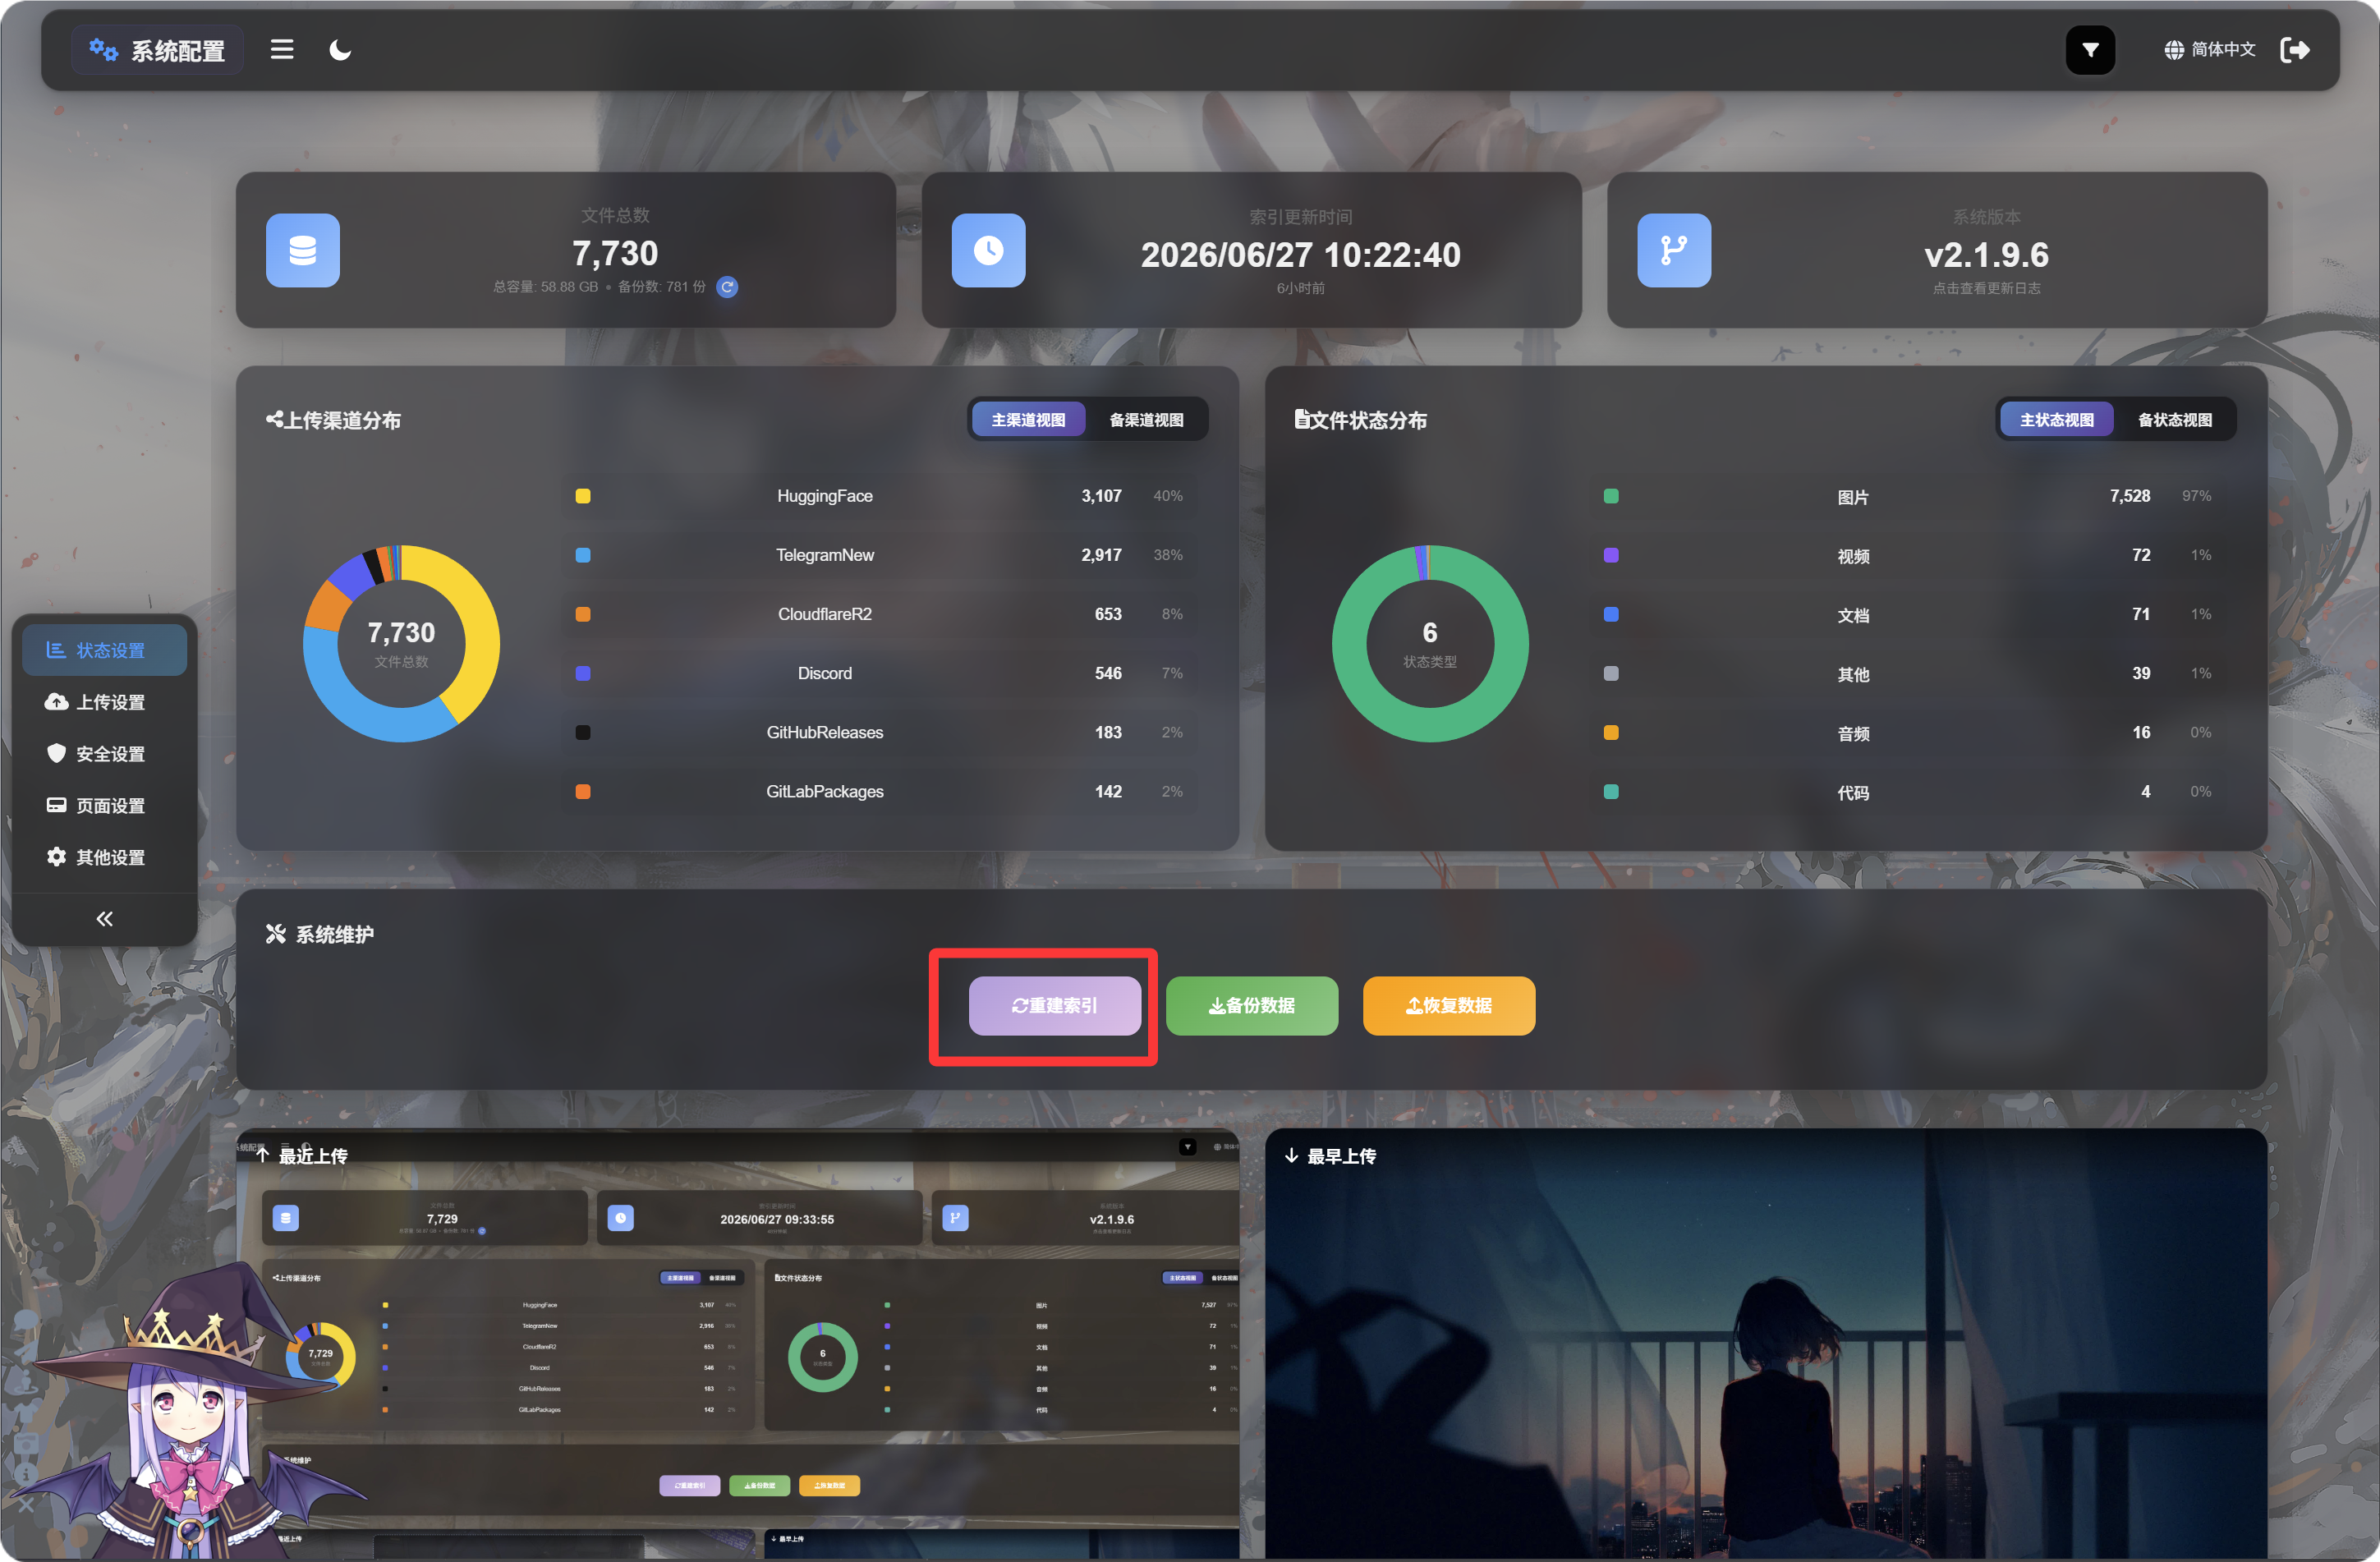
Before using ImgHost for the first time, you must open the initialization page and click "Rebuild Index" to complete the required D1 tables and avoid errors in later features.
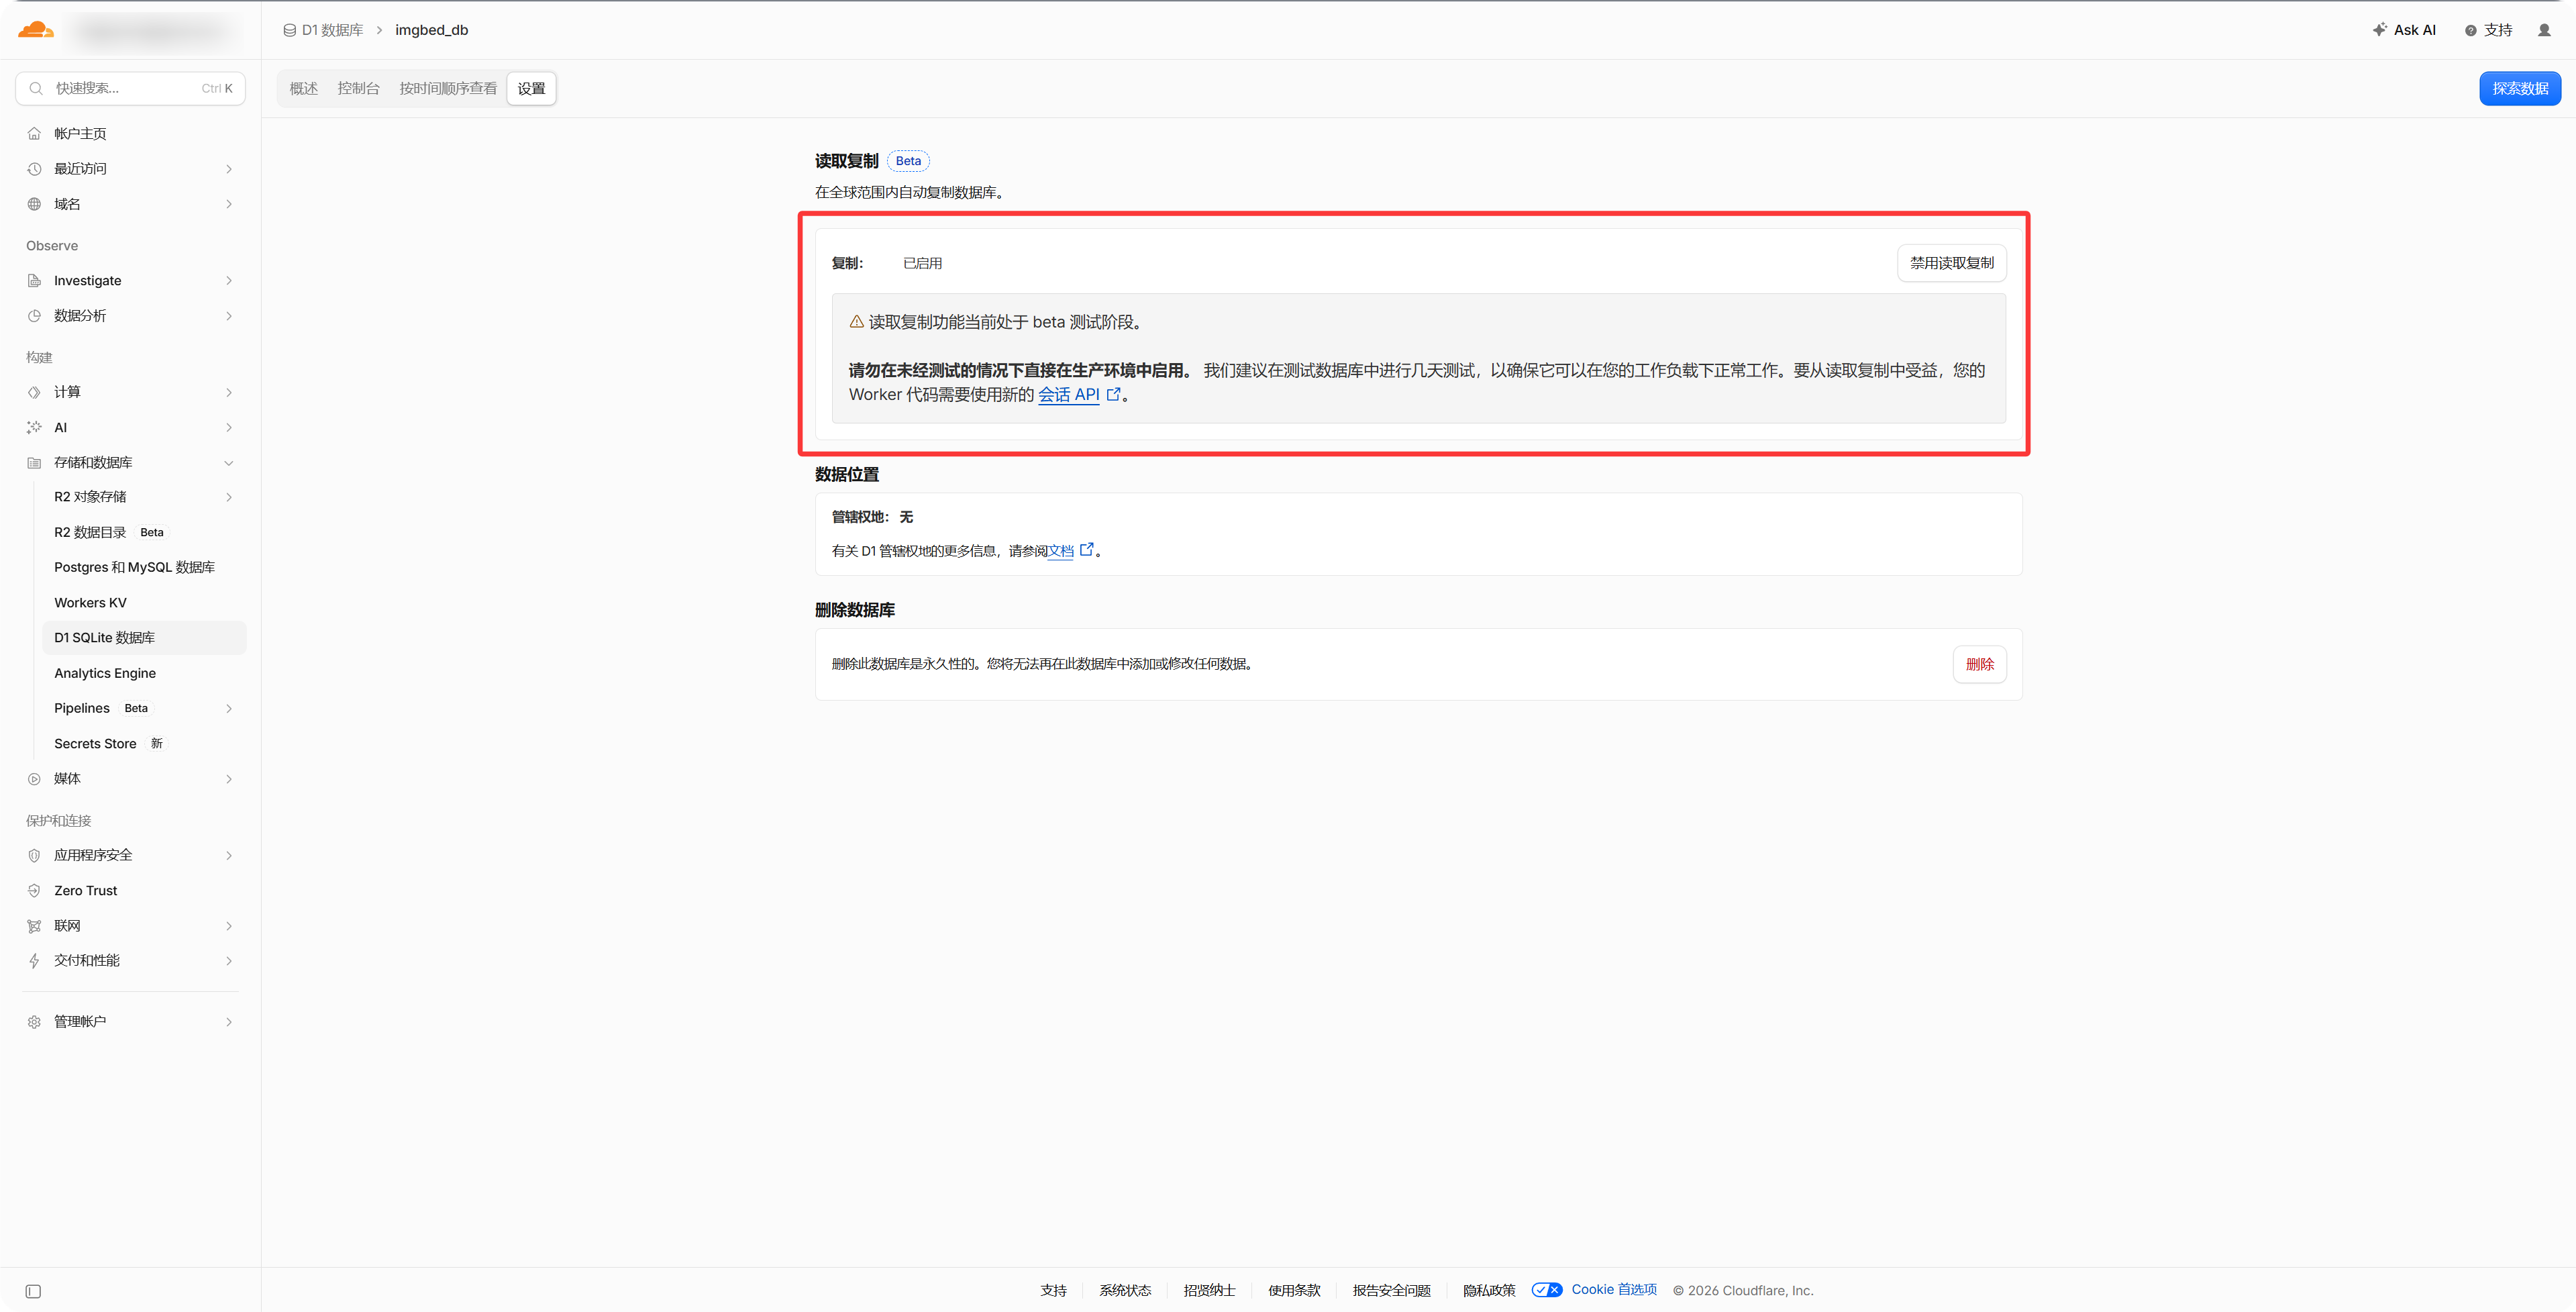
Optional: Enable D1 Read Replication
In the D1 database settings in the Cloudflare dashboard, enable Read Replication to speed up File Management, the Public Gallery, and the Random Image API. ImgHost works normally without it.
- Prepare the storage account or API credentials you want to use.
- Make sure your ImgHost domain is reachable, because OAuth-based channels need callback URLs.
- After adding a channel, upload a test image first to confirm that files can be saved and opened correctly.
Channel Directory
- Telegram
- Cloudflare R2
- S3
- WebDAV
- Discord
- Hugging Face
- GitHub Releases
- GitLab Packages
- OneDrive
- Google Drive
- Dropbox
- Yandex
- pCloud
What This Chapter Covers
- What each upload channel needs before setup.
- How to create apps, copy keys, or authorize tokens on third-party platforms.
- How to fill the channel configuration back into ImgHost and confirm uploads work.